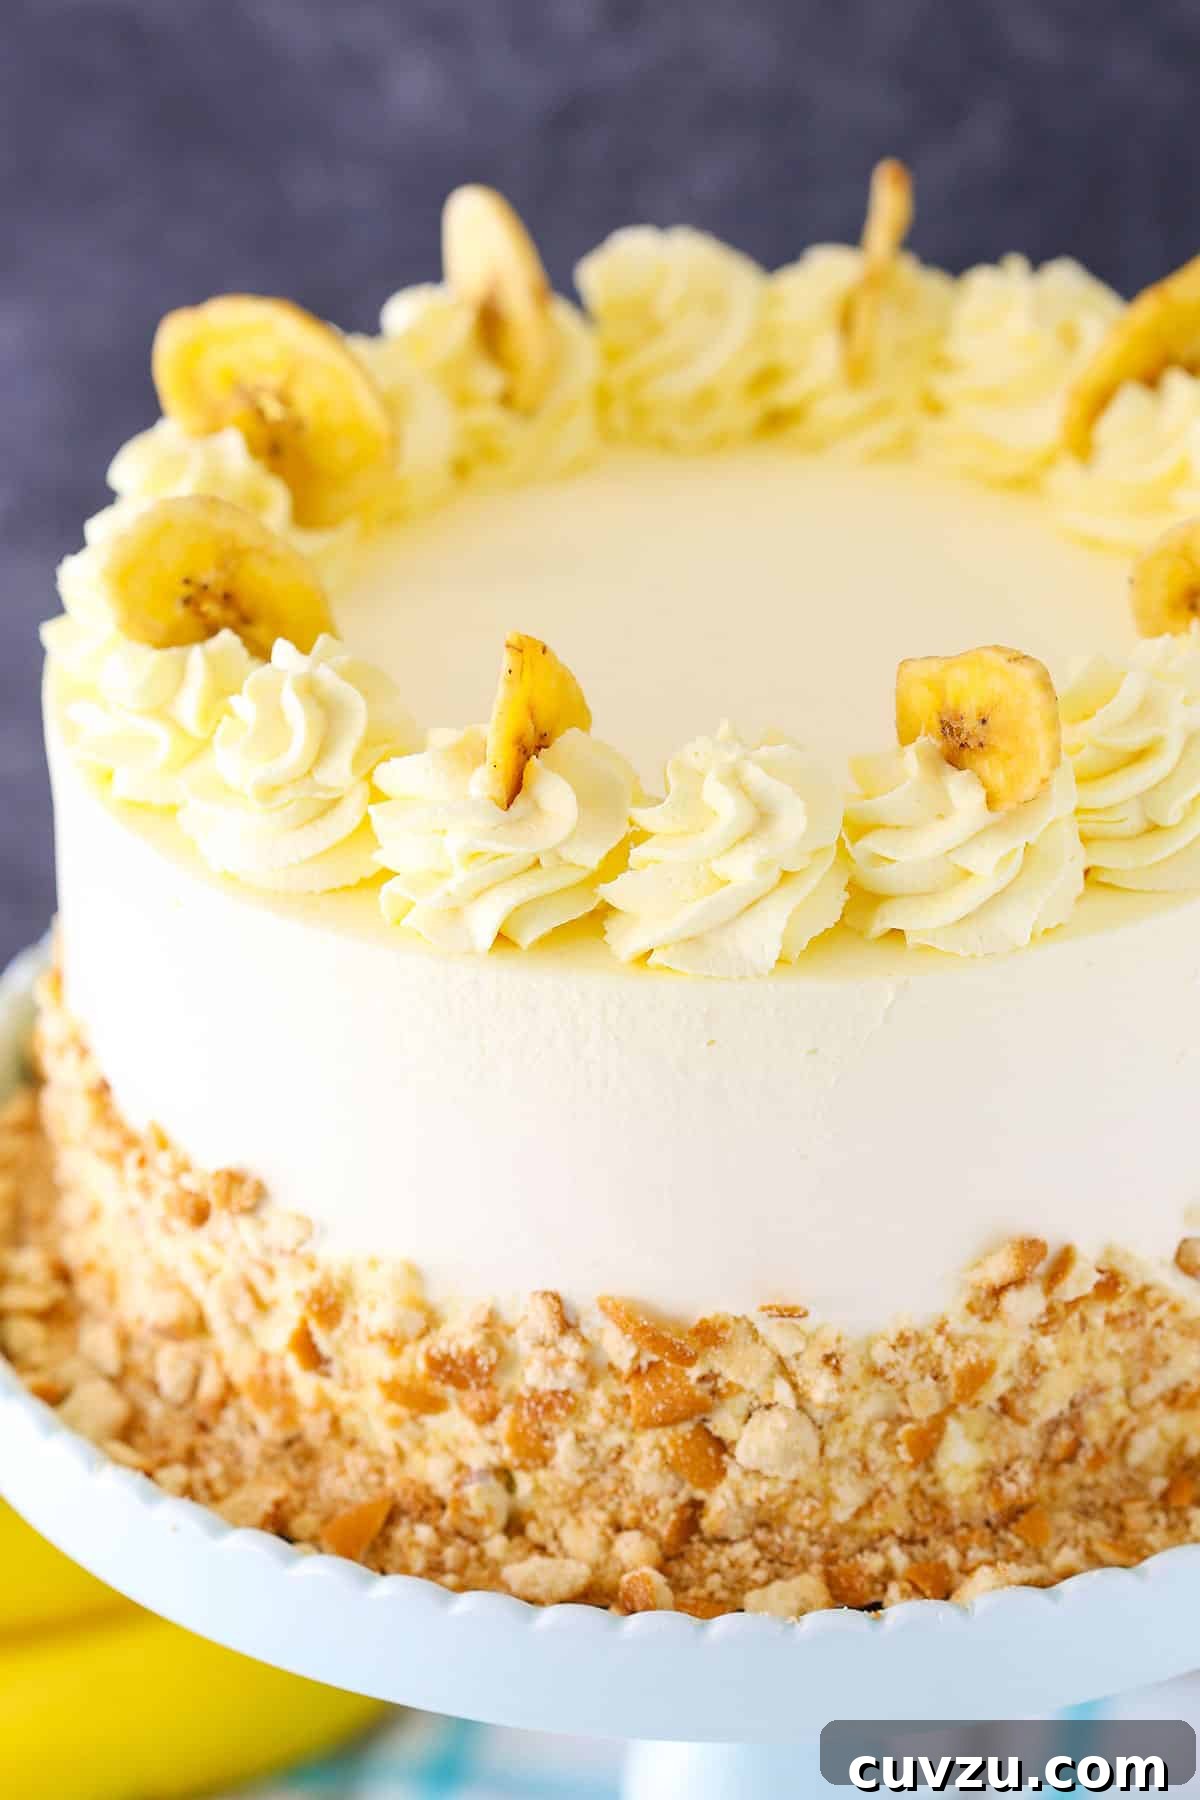
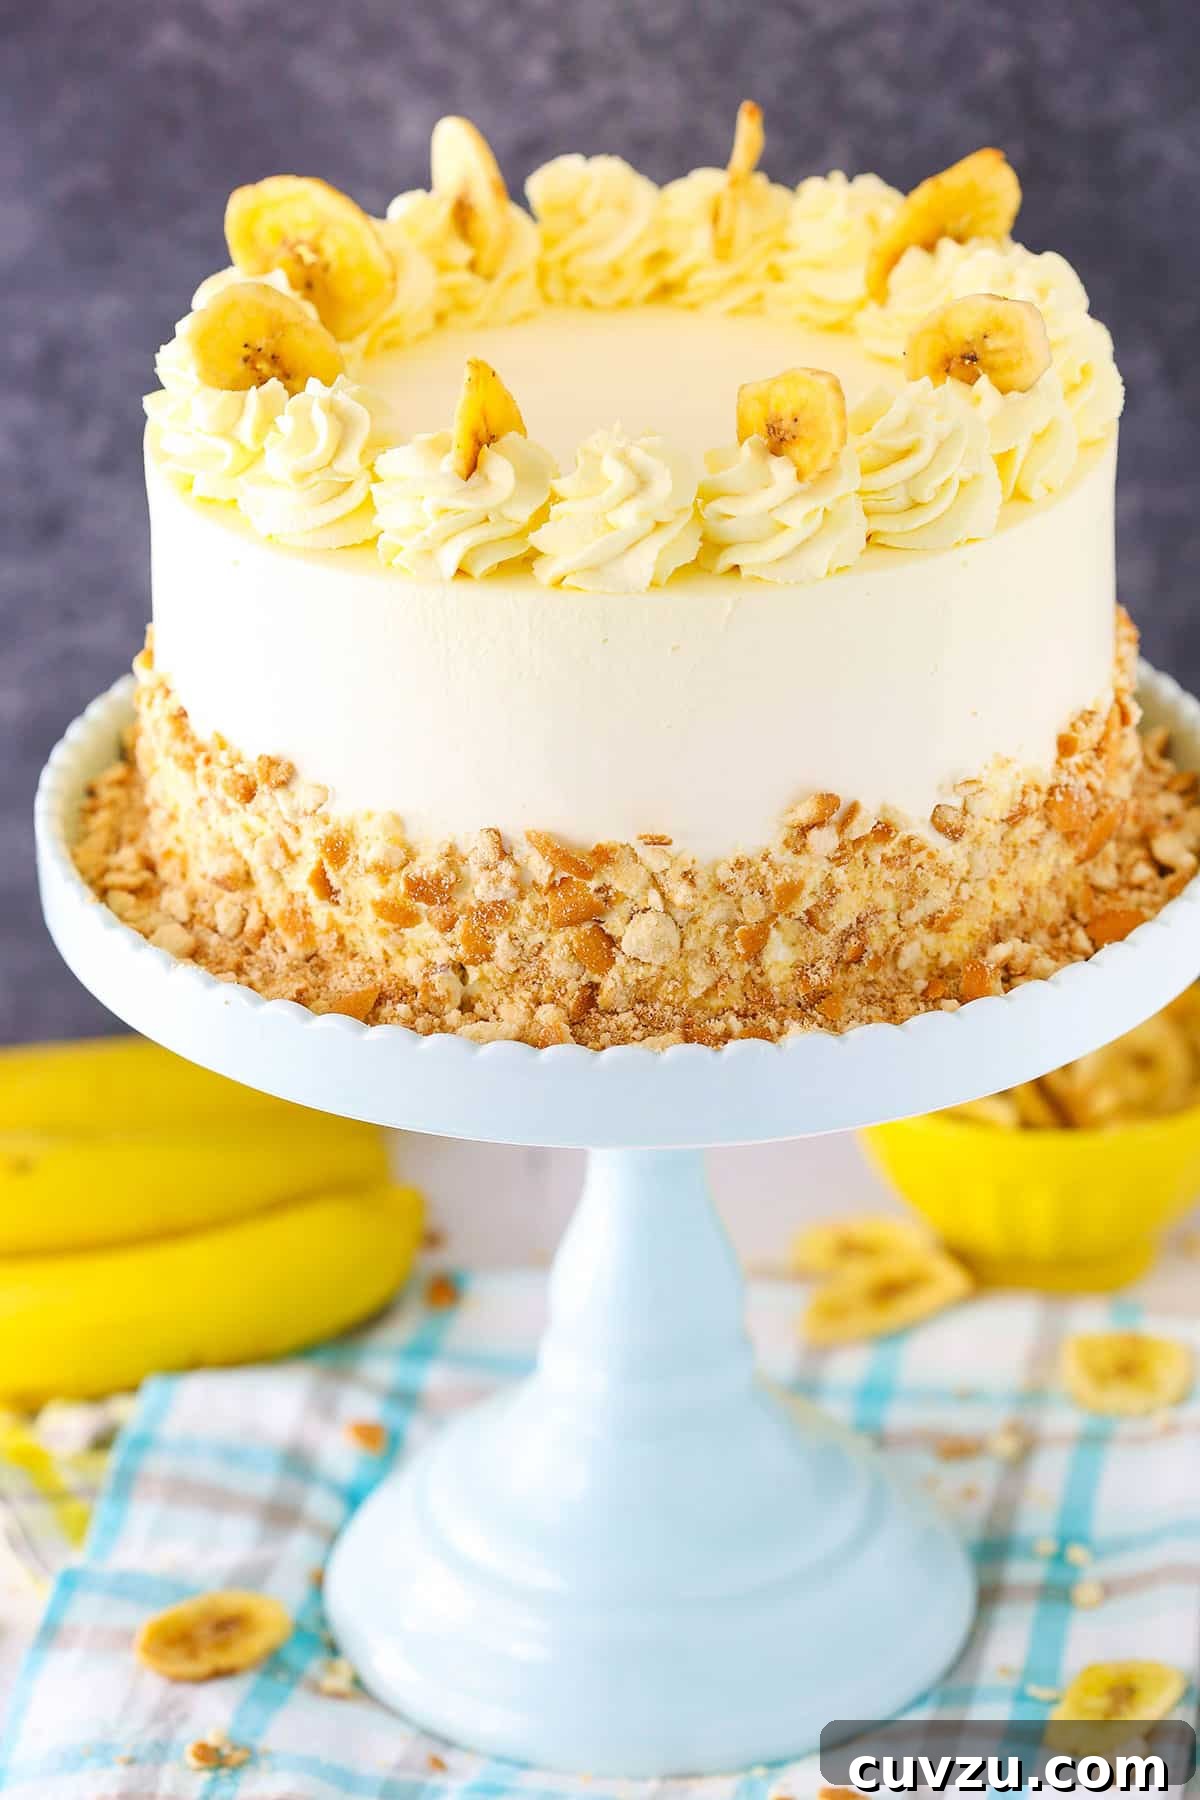
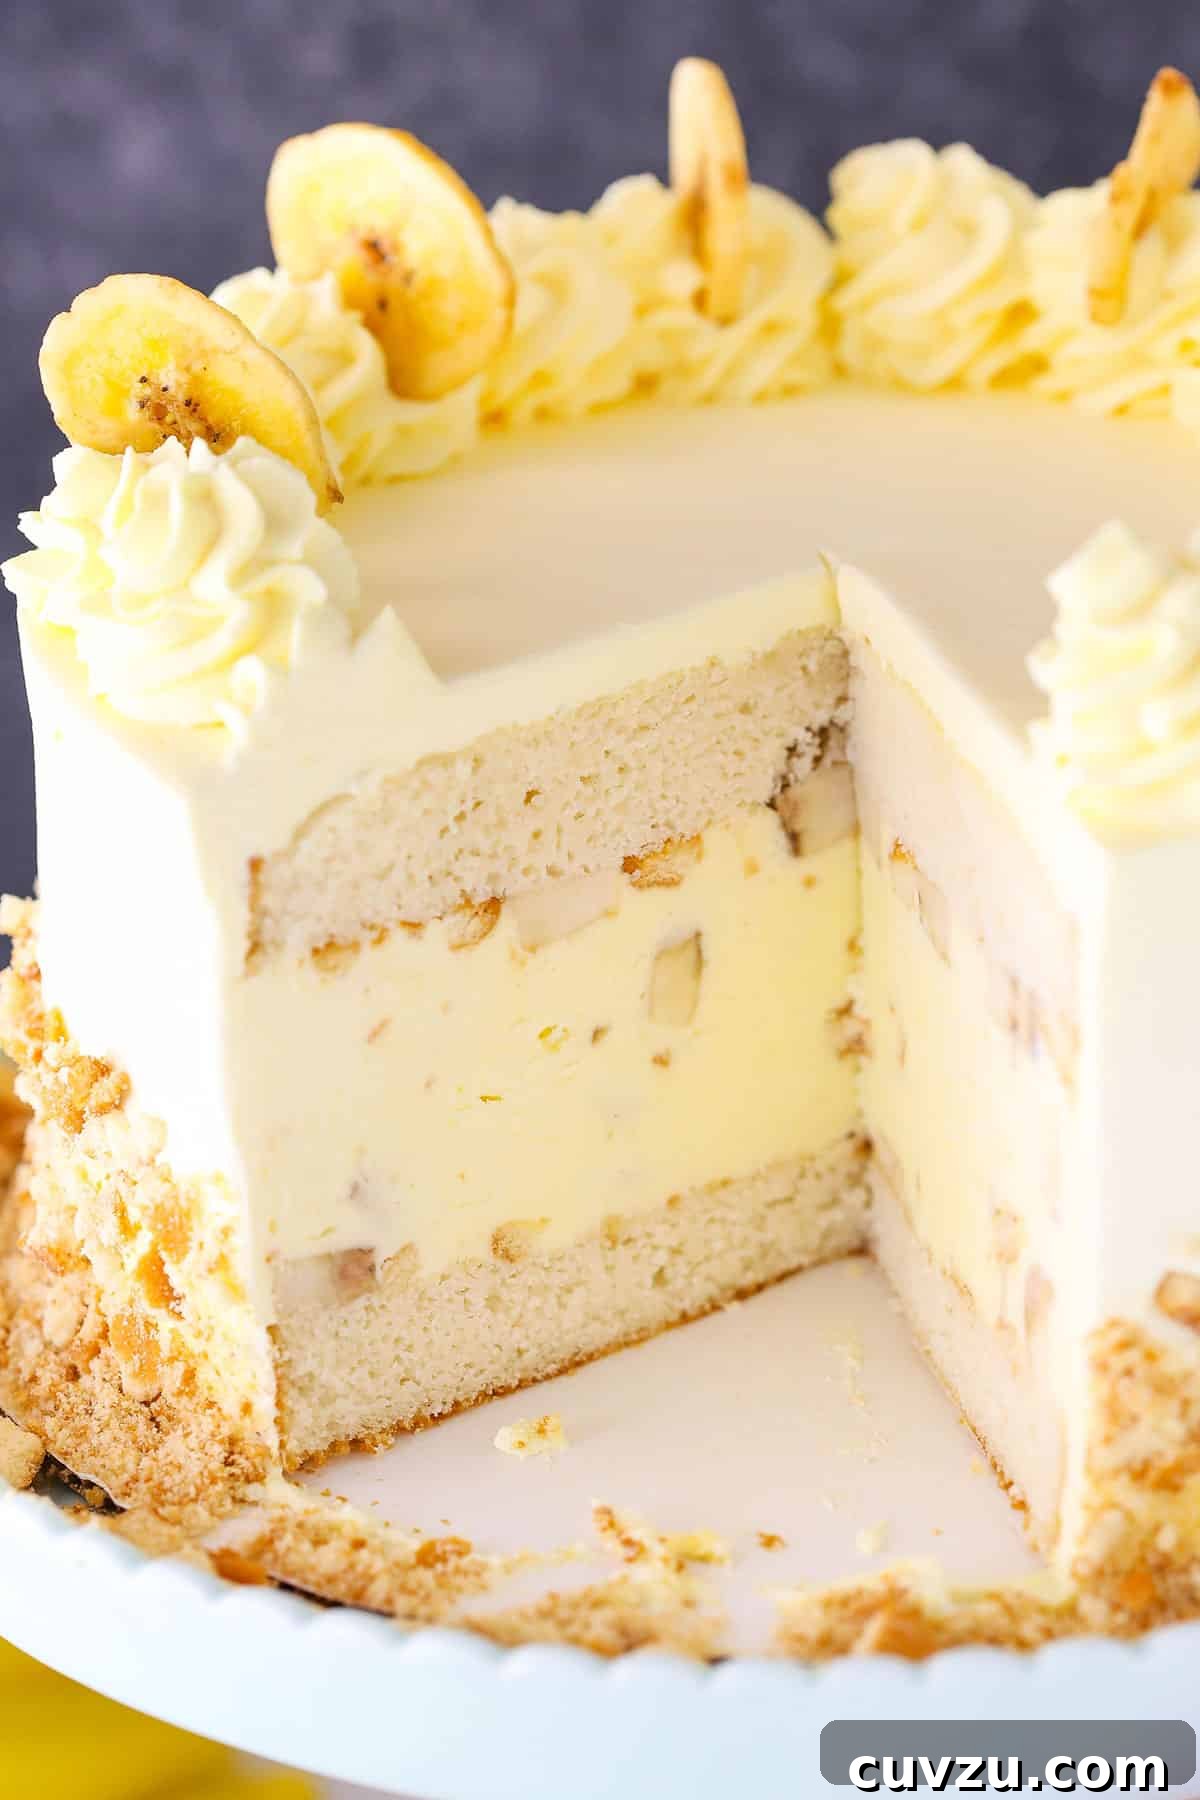
Prepare to have your dessert dreams come true with this sensational Banana Pudding Ice Cream Cake! Imagine layers of tender, moist vanilla cake embracing a rich, velvety banana pudding ice cream, generously studded with fresh banana chunks and crisp vanilla wafers. This isn’t just a cake; it’s a celebration of classic banana pudding transformed into an extraordinary frozen delight that will captivate any banana enthusiast.
If you adore the comforting flavors of banana pudding and the refreshing chill of ice cream cake, this recipe is tailor-made for you. It’s a dessert that perfectly balances texture and taste, offering a delightful experience with every single forkful. Get ready to impress your family and friends with a dessert that looks as incredible as it tastes, requiring surprisingly little effort for such a stunning outcome.
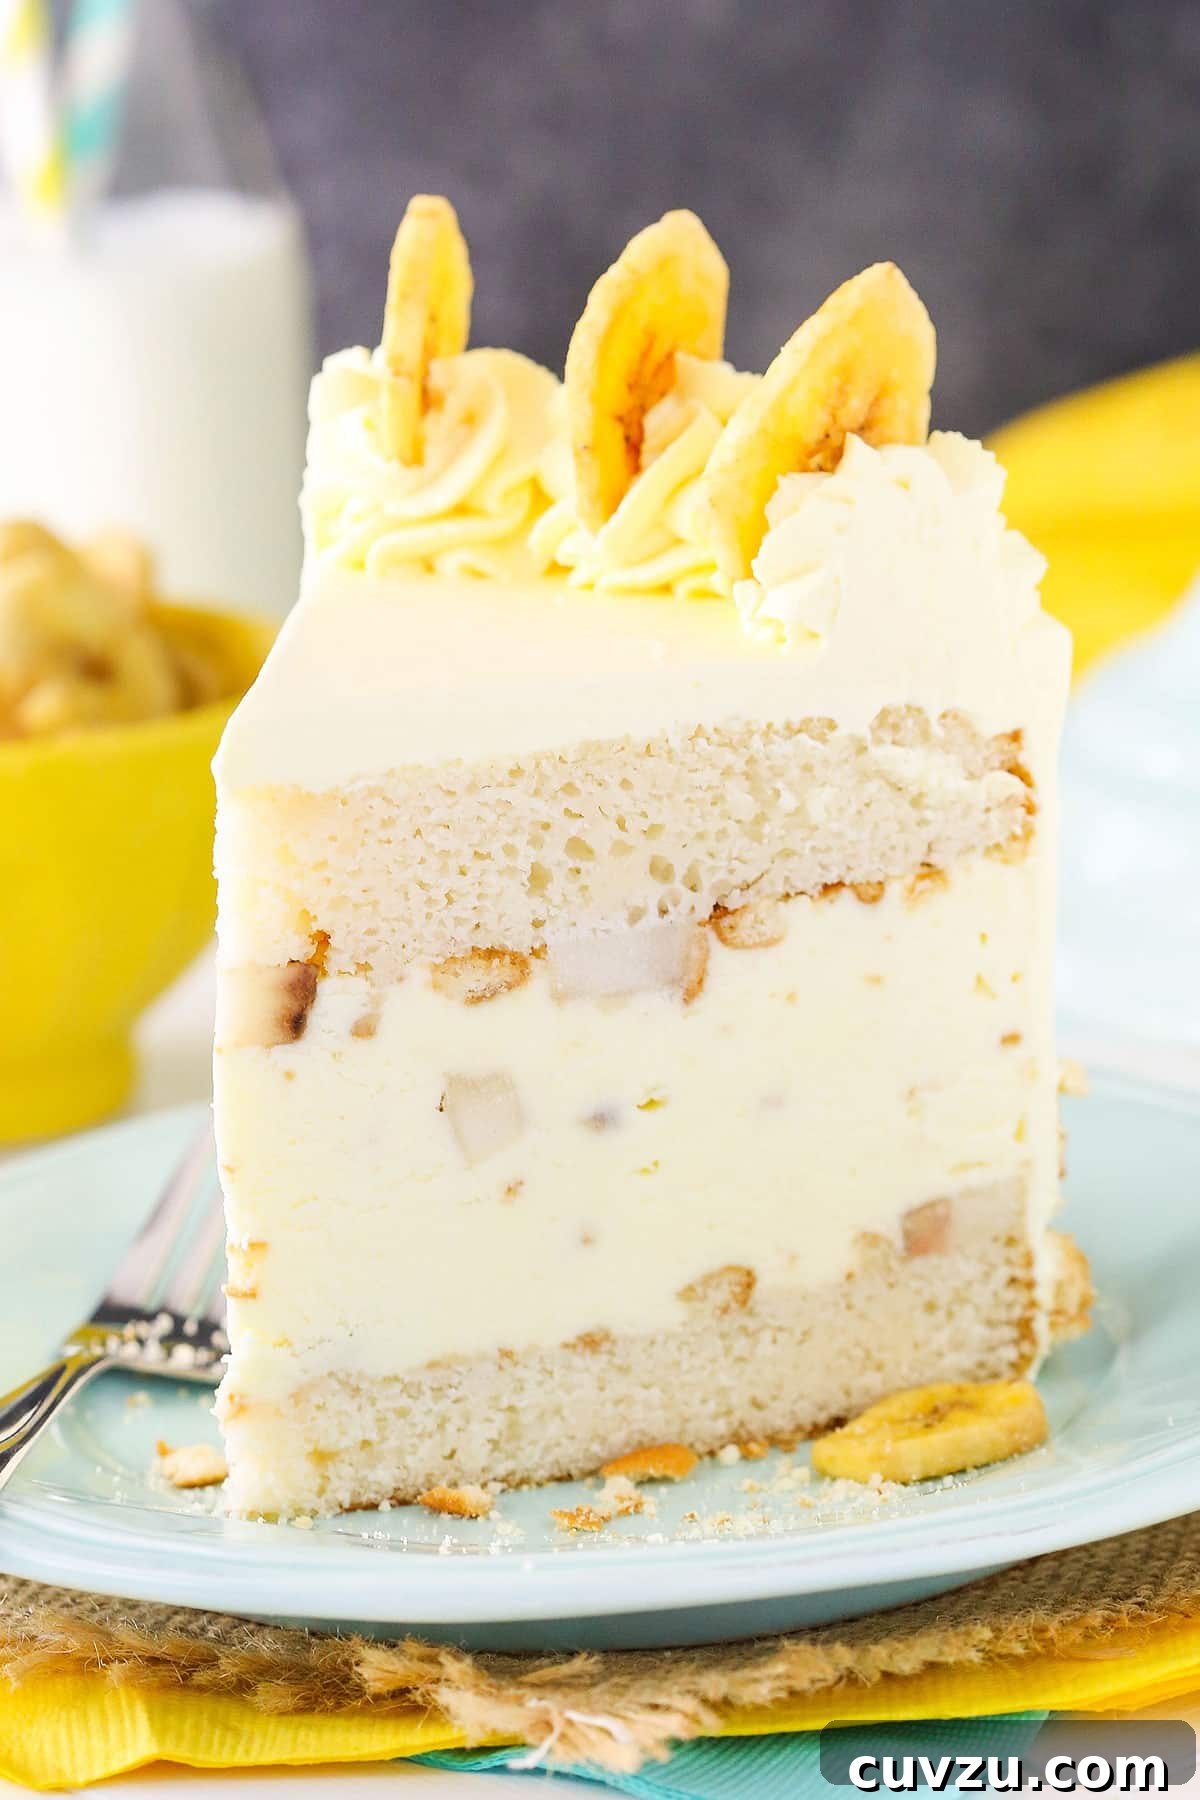
The Ultimate Banana Pudding Ice Cream Cake: A Delectable No-Churn Delight
Life is full of moments – some that challenge us, and others that fill us with an undeniable sense of purpose. Just as we navigate the complexities of personal growth and connection, there’s also immense joy in simple pleasures, like sharing a truly exceptional dessert. This Banana Pudding Ice Cream Cake embodies that joy, bringing together comforting flavors in a spectacular presentation that’s perfect for any gathering or a quiet moment of indulgence. It’s the kind of treat that makes you feel exactly where you’re meant to be, fork in hand, savoring every sweet bite.
Why This Banana Pudding Ice Cream Cake Will Become Your New Favorite
This isn’t just another ice cream cake; it’s a meticulously crafted dessert designed to deliver maximum flavor and textural contrast. Here’s why this recipe stands out and why you’ll want to make this homemade banana pudding ice cream cake again and again:
- Unforgettable Flavor Combination: We take the beloved taste of classic banana pudding and elevate it into a frozen masterpiece. The rich banana creaminess is perfectly complemented by the subtle sweetness of vanilla, creating a nostalgic yet novel experience.
- Moist Vanilla Cake Layers: Forget dry cake! Our vanilla cake layers are incredibly soft, moist, and tender, providing the ideal foundation for the decadent no-churn ice cream. They bake up beautifully and are easy to work with, maintaining their delightful texture even when frozen.
- Easy No-Churn Ice Cream: No ice cream maker? No problem! The banana pudding ice cream is a simple no-churn recipe that comes together quickly, delivering a smooth, scoopable texture without specialized equipment. It’s rich, creamy, and packed with authentic banana flavor.
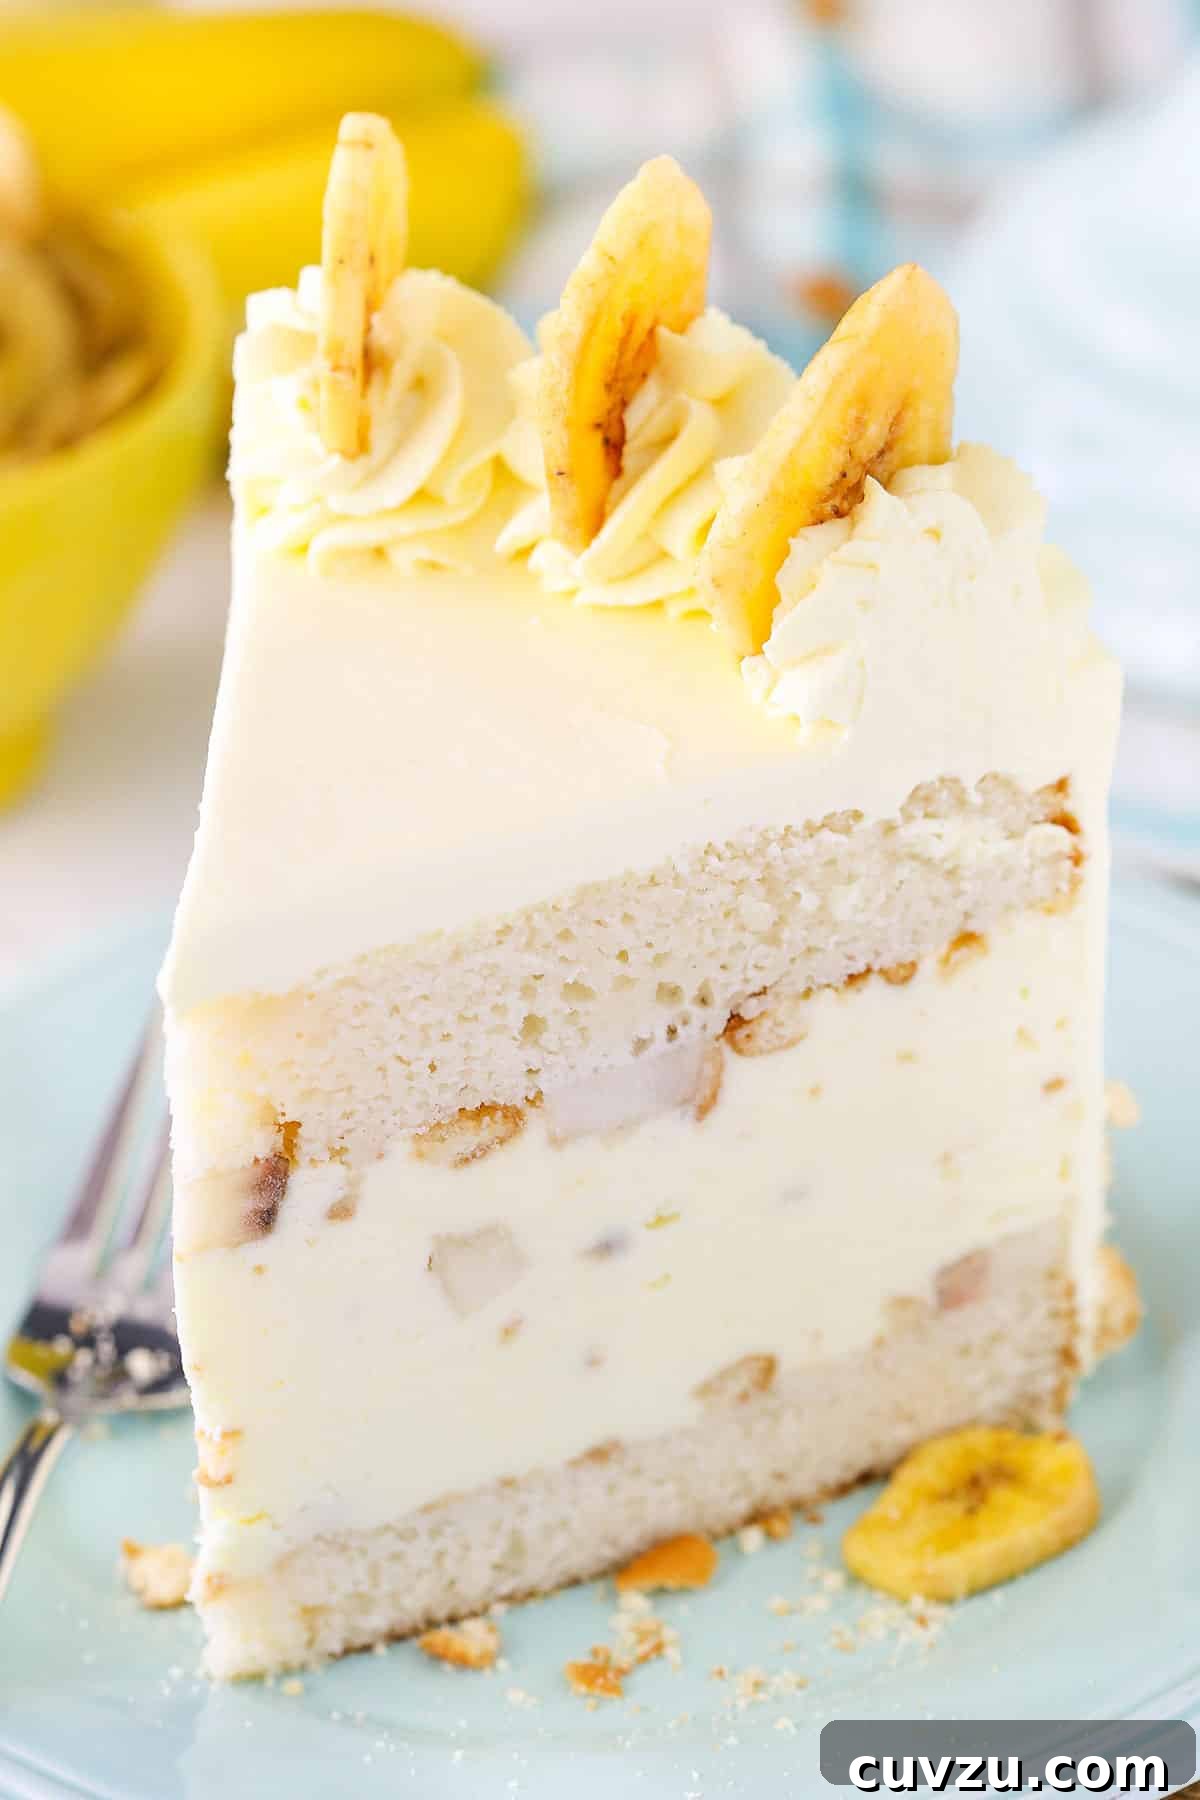
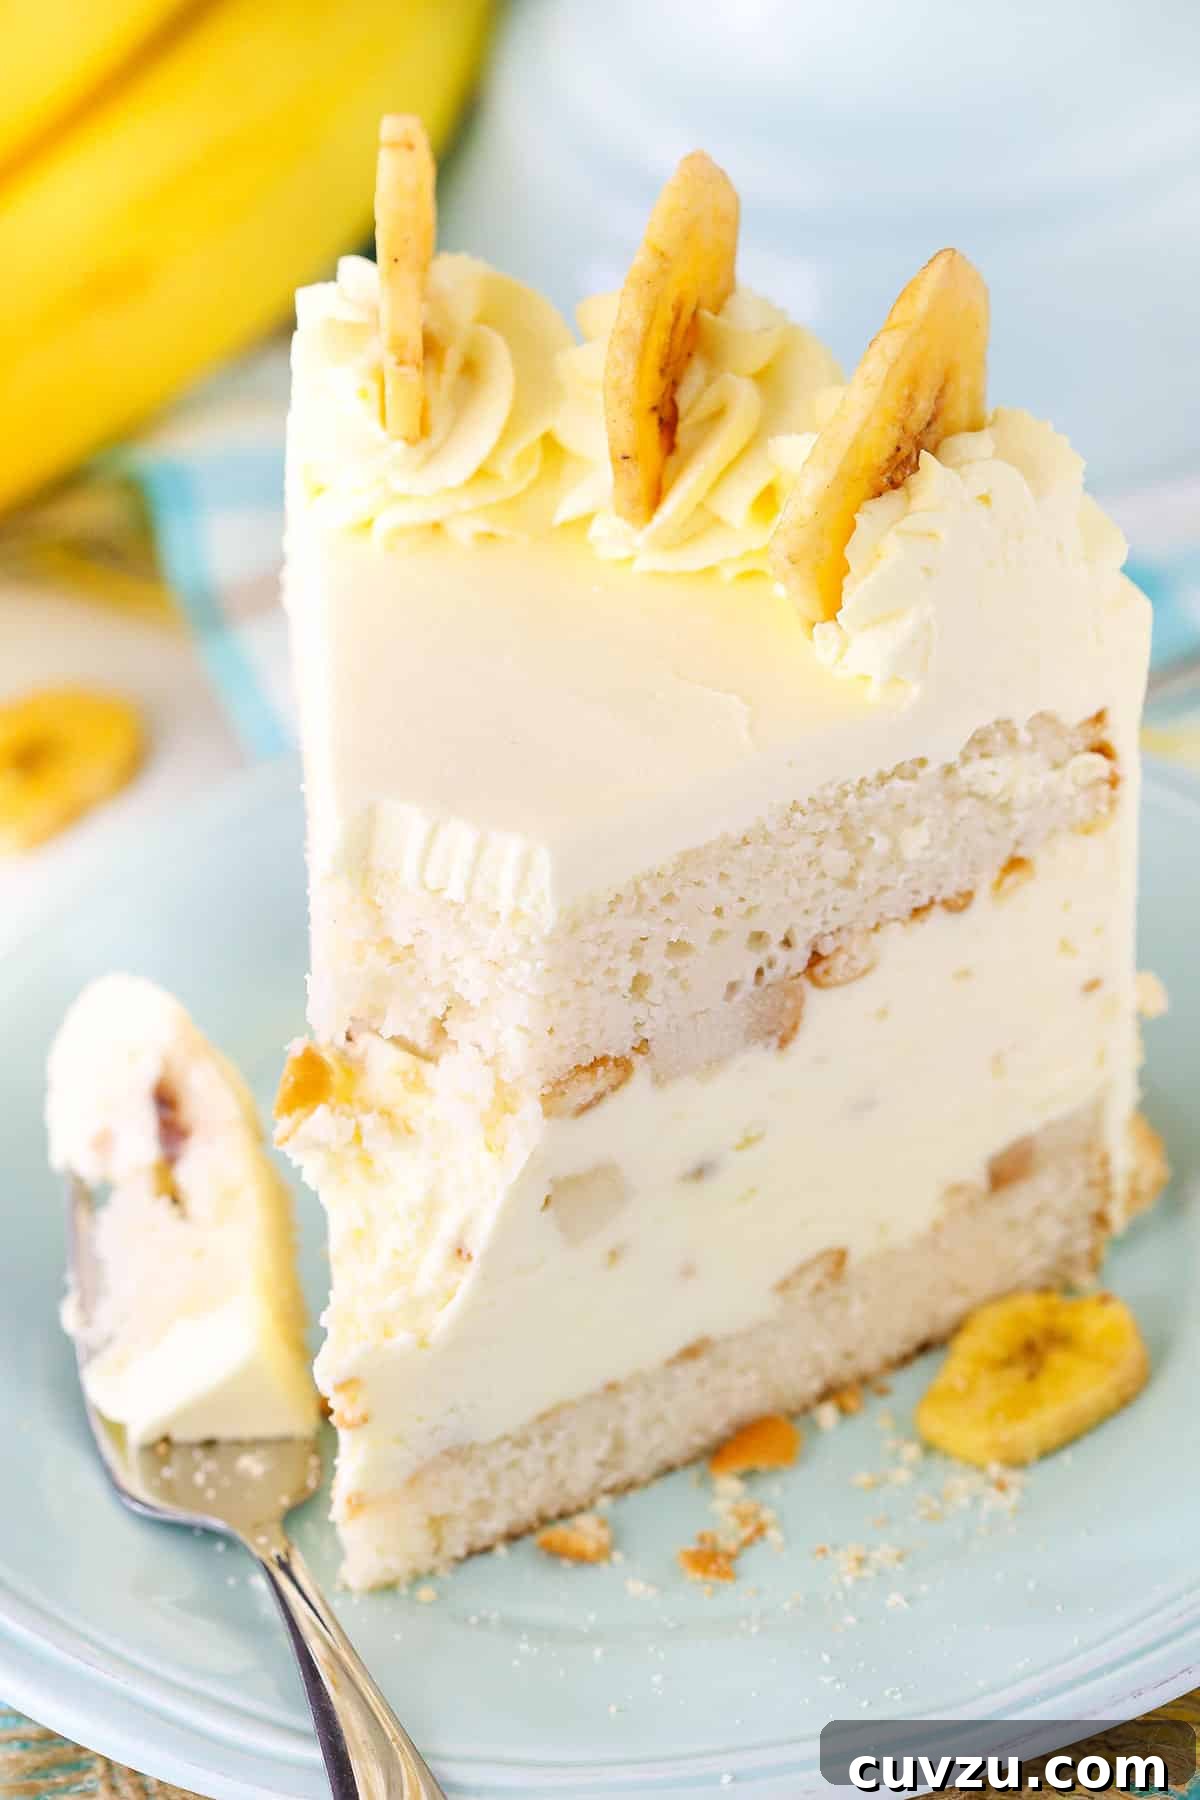
- Irresistible Textural Contrast: Each slice offers a symphony of textures: the tender cake, the creamy ice cream, the soft, naturally sweet chunks of fresh banana, and the delightful crunch of vanilla wafers. This interplay makes every bite exciting.
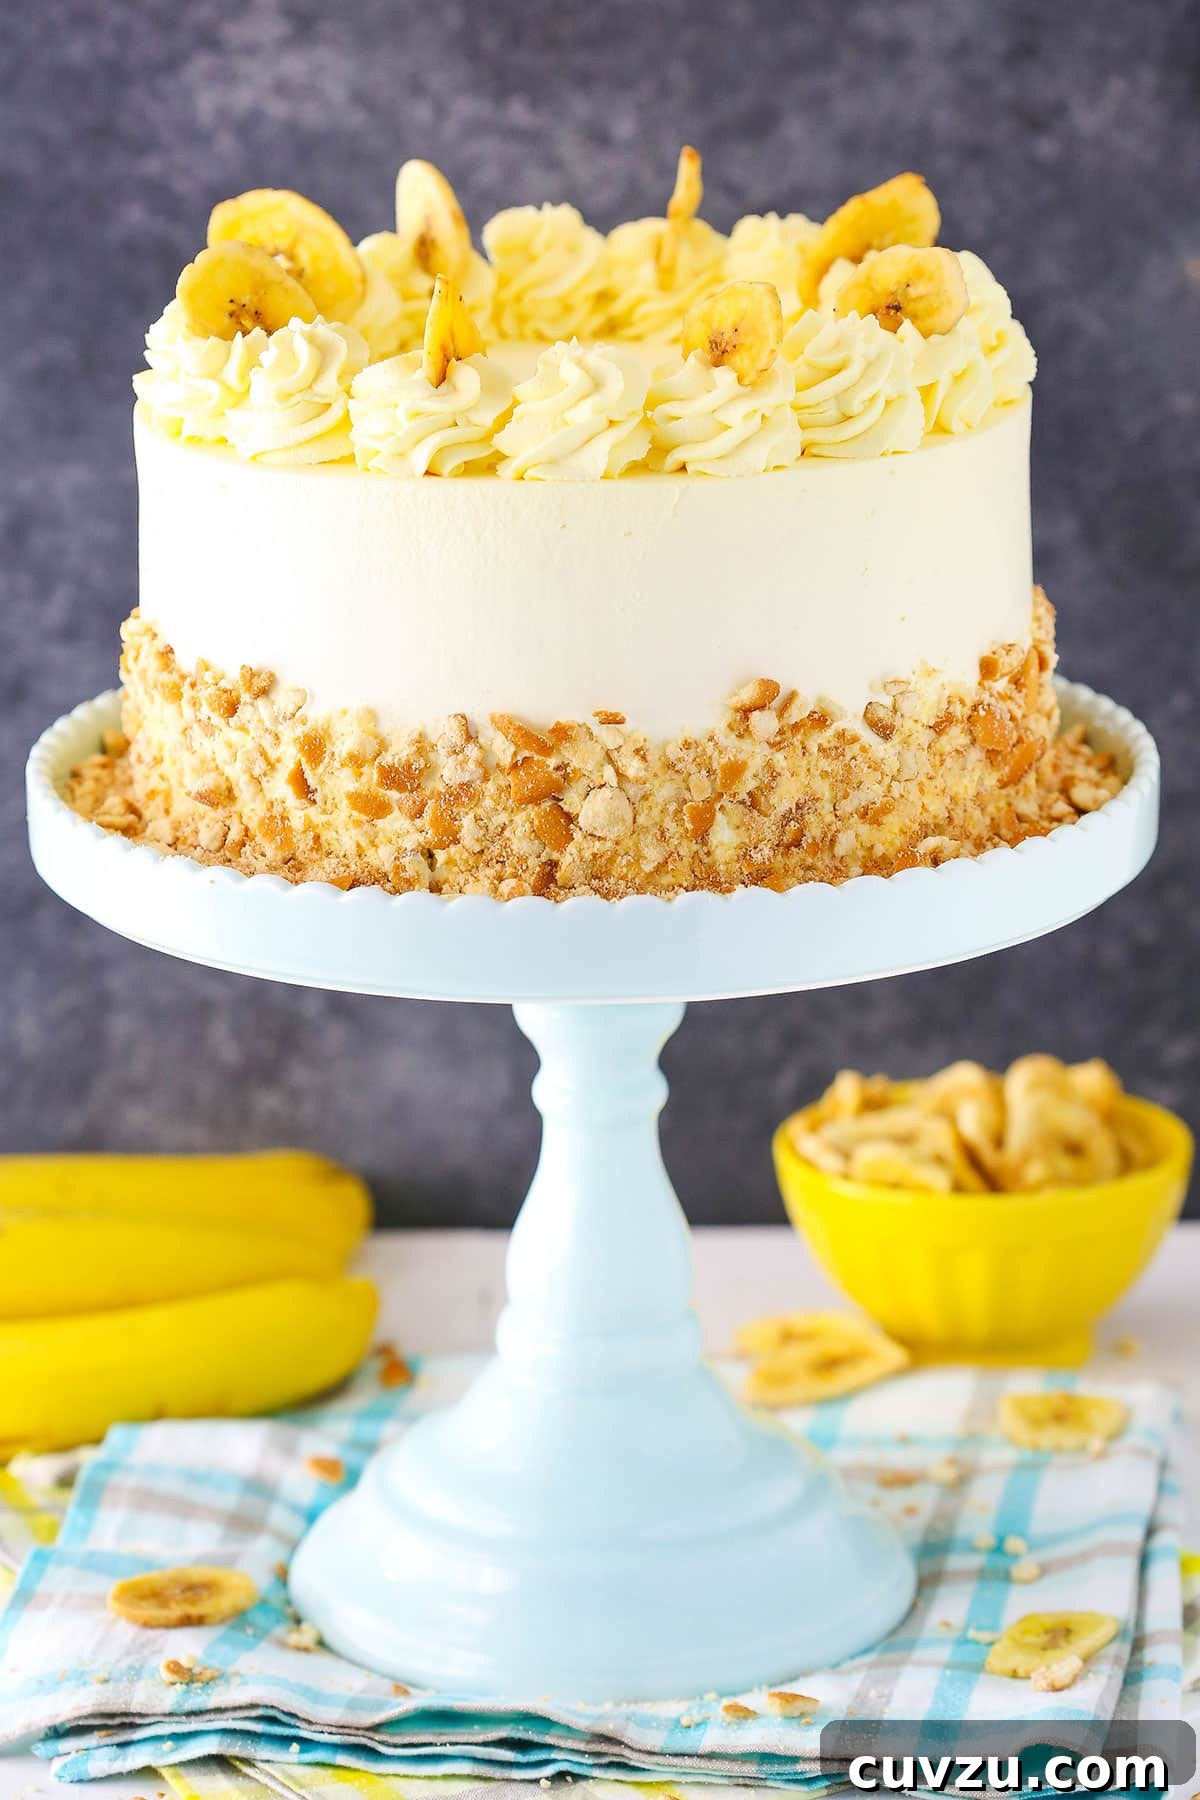
- Show-Stopping Presentation: Crowned with fluffy vanilla whipped cream, optional banana chips, and a generous coating of crushed vanilla wafers, this cake is visually stunning and guaranteed to be the star of any dessert table. It’s a true showstopper!
- Perfect for Any Occasion: Whether it’s a birthday, holiday gathering, summer BBQ, or just a simple weekend treat, this ice cream cake is versatile enough for all celebrations. It’s also an excellent make-ahead dessert, freeing up your time on event day.
Key Components of Our Banana Pudding Ice Cream Cake
Let’s dive into what makes each element of this frozen dessert so special and how they contribute to its ultimate deliciousness:
The Moist Vanilla Cake Layers
Our foundation is a superior vanilla cake. This isn’t just any cake; it’s specifically formulated to be light, airy, and exceptionally moist, ensuring it doesn’t become hard or dry when frozen. The delicate vanilla flavor is intentionally subtle, designed to harmonize with the robust banana pudding ice cream without competing for attention. We use egg whites to achieve a beautiful, bright crumb and a delicate texture that perfectly complements the creamy filling. These layers provide a gentle sweetness and a satisfying chew that makes this a truly balanced dessert.
The Velvety No-Churn Banana Pudding Ice Cream
This is truly the heart of the cake! The no-churn banana pudding ice cream is a revelation, capturing the comforting, nostalgic essence of traditional banana pudding. We achieve this by blending instant banana cream pudding mix with softened cream cheese, a touch of milk, and billows of freshly whipped heavy cream. The pudding mix is critical for that distinctive, authentic banana pudding taste. The inclusion of cream cheese adds an incredible richness and stability, ensuring the ice cream remains wonderfully creamy and scoopable, even after extended freezing. To further enhance the experience, we generously fold in soft, sweet chunks of fresh banana and crunchy crushed vanilla wafers, creating delightful pockets of flavor and texture throughout.
Fresh Bananas and Crunchy Vanilla Wafers
These two ingredients are the defining elements of any classic banana pudding, and they play a starring role here. Freshly chopped, perfectly ripe bananas provide bursts of natural sweetness and a soft, yielding texture that contrasts beautifully with the frozen creaminess. Their natural enzymes also contribute to the authentic pudding flavor. Vanilla wafers, carefully crushed, are integrated throughout the ice cream layers and used as a garnish. They add a crucial element of crunch and a delicate buttery vanilla flavor that ties all the components together, softening just enough in the freezer to offer a pleasant, melt-in-your-mouth experience without losing their structural integrity.
Light Whipped Cream Frosting and Elegant Garnish
To complete this masterpiece, we encase the entire cake in a cloud of fluffy, stable vanilla whipped cream frosting. This adds another layer of creamy indulgence and a clean, elegant finish. A hint of yellow food coloring is optional but can give the frosting a soft, inviting hue, visually linking it to the banana theme. The final touches of crushed vanilla wafer crumbs pressed delicately around the sides and a scattering of optional banana chips on top not only add visual appeal but also echo the flavors and textures found within the cake, creating a cohesive and beautifully presented dessert that’s sure to impress.
Essential Tips for Crafting Your Perfect Banana Pudding Ice Cream Cake
Achieving a bakery-worthy Banana Pudding Ice Cream Cake is easier than you think with these expert tips:
- Room Temperature Ingredients are Key: For the cake layers, ensure your unsalted butter, sour cream, and egg whites are all at true room temperature. This allows them to cream together properly, creating a smooth, emulsified batter that bakes into a light and tender cake. Cold ingredients can result in a lumpy batter and a denser cake.
- Avoid Overmixing the Cake Batter: When combining the wet and dry ingredients for the cake, mix just until the flour streaks disappear. Overmixing develops the gluten in the flour, which can lead to a tough and chewy cake, a texture you want to avoid in a moist ice cream cake.
- Choose Quality Pudding Mix: For the ice cream, opt for a good quality instant banana cream pudding mix. This ensures a robust and authentic banana flavor that will stand out even when frozen. A generic brand might not deliver the same depth of taste.
- Ensure Softened Cream Cheese: It’s crucial that your cream cheese is well softened before mixing it into the ice cream base. Cold, firm cream cheese will lead to lumps in your ice cream, impacting its smooth, velvety texture. Plan ahead and let it sit out for at least an hour.
- Select Perfectly Ripe Bananas: For the best flavor and texture in your filling, choose bananas that are ripe (bright yellow with a few brown speckles) but still firm. Overly soft or mushy bananas can become watery when frozen, while unripe bananas lack sweetness and flavor.
- Allocate Sufficient Freezing Time: Patience is a virtue here! The cake needs ample time to firm up completely – at least 6-8 hours, but preferably overnight. Rushing this step will result in a messy, unstable cake that’s difficult to slice cleanly.
- Thawing Before Serving is Essential: Straight from the freezer, this ice cream cake will be very firm. For optimal enjoyment and easy slicing, allow your cake to sit at room temperature for approximately 45 minutes to an hour before cutting into it. This brings the ice cream to its perfect creamy consistency and makes the cake layers tender again.
- Utilize a Springform Pan: An 8-inch springform pan is highly recommended for assembling and effortlessly removing the frozen cake. The removable sides make de-molding a breeze and preserve the cake’s pristine layers.
- Parchment Paper is Your Ally: For baking, line the bottom of your cake pan with parchment paper and grease the sides to prevent sticking. For assembly, create a parchment paper collar around the inside of the springform pan. This helps contain the ice cream layers, especially if your cake is a bit taller than the pan, and makes for cleaner edges.
Step-by-Step Guide: Crafting Your Ultimate Banana Pudding Ice Cream Cake
Follow these detailed instructions to create a truly unforgettable dessert that will impress everyone.
Banana Pudding Ice Cream Cake
5 Stars
4 Stars
3 Stars
2 Stars
1 Star
No reviews
-
Author:
Lindsay -
Prep Time:
30 minutes -
Cook Time:
30 minutes -
Total Time:
7 hours -
Yield:
14–16 servings -
Category:
Dessert -
Method:
Oven -
Cuisine:
American
Description
This Banana Pudding Ice Cream Cake is made with moist vanilla cake, smooth banana pudding ice cream, and chunks of banana and vanilla wafer! A delightful twist on a classic, perfect for any occasion.
Ingredients
CAKE LAYERS
- 6 tablespoons (84g) unsalted butter, room temperature
- 3/4 cups (155g) granulated sugar
- 6 tablespoons (86g) sour cream
- 1 teaspoon vanilla extract
- 3 large egg whites, room temperature
- 1 1/4 cups (163g) all purpose flour
- 2 teaspoons baking powder
- 1/4 teaspoon salt
- 6 tablespoons (90ml) milk
- 2 tablespoons (30ml) water
ICE CREAM
- 3/4 cup milk
- 3.4 ounce package dry banana cream instant pudding mix
- 8 ounce cream cheese, softened
- 1/2 cup (104g) granulated sugar
- 1 1/2 cup heavy whipping cream
- 3/4 cup powdered sugar
- 2 large bananas, chopped
- 18 vanilla wafers, crushed
WHIPPED CREAM FROSTING
- 2 1/4 cups (540ml) heavy whipping cream, cold
- 1 cup (115g) powdered sugar
- 1 1/2 teaspoon vanilla extract
- 10–12 drops yellow food coloring (optional, for color)
- 1 cup vanilla wafers, crushed, for garnish
- 9–10 banana chips, optional, for garnish
Instructions
Pro Tip for Assembly: An 8×3-inch springform pan is ideal for this cake, as it allows for easy removal once frozen. If you don’t have one, line a regular 8-inch cake pan generously with plastic wrap, ensuring it extends over the edges. This will create “handles” to lift the cake out once it’s set. Always ensure your cake layers are made in the same size pan you intend to build the ice cream cake in, guaranteeing a perfect fit. Alternatively, you can use cake collars for a professional finish.
TO MAKE THE CAKE LAYERS:
- Prepare an 8-inch springform or standard cake pan by placing a parchment paper circle at the bottom and lightly greasing the sides. Preheat your oven to 350°F (176°C).
- In a large mixing bowl, using an electric mixer, cream together the room temperature butter and granulated sugar until the mixture is light in color and fluffy. This should take approximately 3-4 minutes. Do not shorten this creaming time, as it’s crucial for the cake’s texture.
- Add the sour cream and vanilla extract to the butter mixture, mixing until they are just well combined.
- In two separate additions, incorporate the egg whites into the batter, mixing until well combined after each. Remember to scrape down the sides of the bowl as needed to ensure all ingredients are fully integrated.
- In a separate, medium-sized bowl, whisk together the all-purpose flour, baking powder, and salt. In a small measuring cup, combine the milk and water.
- Add half of the dry ingredients to the wet batter and mix on low speed until just combined. Next, pour in the milk and water mixture and mix until fully incorporated. Finally, add the remaining dry ingredients and mix until the batter is smooth and no streaks of flour remain. Avoid overmixing.
- Evenly pour the prepared batter into your 8-inch cake pan. Bake for about 29-31 minutes, or until a toothpick inserted into the center comes out with only a few moist crumbs attached.
- Once baked, remove the cake from the oven and allow it to cool in the pan for 3-5 minutes. Then, carefully invert it onto a wire cooling rack to cool completely.
TO MAKE THE NO-CHURN ICE CREAM:
- Once the cake layers are completely cool, begin preparing the banana pudding ice cream. In a bowl, combine the milk and the dry banana cream instant pudding mix. Whisk vigorously until the mixture is smooth and slightly thickened.
- In a separate large mixer bowl, combine the softened cream cheese and granulated sugar. Beat with an electric mixer until the mixture is smooth and lump-free.
- Gently stir the prepared pudding mixture into the cream cheese mixture until thoroughly combined and smooth. Set this bowl aside.
- In another clean, large mixer bowl (or after washing the first one), add the cold heavy whipping cream and powdered sugar. Whip on high speed until stiff peaks form. Be careful not to over-whip, as it can turn grainy.
- Carefully fold about one-third of the whipped cream into the cream cheese-pudding mixture until just combined. Then, gently fold in the remaining whipped cream until the mixture is light and airy.
- Finally, gently fold in half of the freshly chopped bananas and one-third of the crushed vanilla wafers. Distribute them evenly throughout the ice cream mixture.
ASSEMBLY OF THE ICE CREAM CAKE:
- Prepare your 8-inch springform pan for assembly. Line the sides with parchment paper, ensuring it extends a few inches above the rim of the pan to accommodate the height of the cake. If desired, place a cardboard cake circle at the bottom for easier transfer later. (If using the plastic wrap method mentioned in the pro tip, ensure the wrap covers the bottom and sides thoroughly). Remember to use the same 8-inch pan you used for the cake layers to ensure a perfect fit.
- Using a serrated knife, carefully level the top (dome) off of your cooled cake layer. Then, slice the cake horizontally into two even layers. Place the first cake layer firmly into the bottom of the prepared pan.
- Evenly sprinkle half of the remaining chopped bananas and another one-third of the crushed vanilla wafers over the first cake layer.
- Carefully spoon the prepared banana pudding ice cream mixture over the banana and wafer layer, spreading it out evenly to the edges of the pan.
- Sprinkle the remaining chopped bananas and crushed vanilla wafers over the ice cream layer. Gently pat them down into the ice cream so they are flush with the surface.
- Carefully place the second cake layer on top of the ice cream mixture, gently pressing down to ensure it’s level and making good contact.
- Freeze the assembled cake until it is completely firm. This will take approximately 6-8 hours, but for best results, freezing overnight is recommended.
- Once the cake is thoroughly frozen, carefully remove it from the springform pan and peel off the parchment paper from the sides.
FROSTING AND FINISHING:
- To make the whipped cream frosting, in a large mixer bowl, combine the very cold heavy whipping cream, powdered sugar, vanilla extract, and optional yellow food coloring. Whip on high speed until stiff peaks form.
- Using an offset spatula, frost the entire outside of the frozen cake evenly with the prepared whipped cream. If you like, pipe a decorative border around the top edge of the cake.
- To finish, gently press the remaining crushed vanilla wafer crumbs onto the sides of the cake. If desired, arrange banana chips on top for an elegant garnish.
- Return the finished cake to the freezer until you are ready to serve.
- Before serving, allow the cake to thaw at room temperature for about 45 minutes to an hour. This will ensure the ice cream is perfectly creamy and the cake is easy to slice and enjoy.
Nutrition
- Serving Size: 1 Slice
- Calories: 563
- Sugar: 38.4 g
- Sodium: 251.2 mg
- Fat: 33.8 g
- Carbohydrates: 60.4 g
- Protein: 7.4 g
- Cholesterol: 87.2 mg
Print
Make-Ahead and Storage Instructions
This Banana Pudding Ice Cream Cake is an ideal make-ahead dessert, perfect for entertaining. You can assemble the entire cake up to 3-5 days in advance. Once fully frozen and frosted, cover it tightly with several layers of plastic wrap and then a layer of aluminum foil to prevent freezer burn. Store it in the coldest part of your freezer, away from strong-smelling foods that could affect its flavor.
Leftovers should also be stored tightly wrapped in the freezer. It will maintain its best quality for up to a week. For longer storage, up to 2-3 weeks, ensure it’s in an airtight container or very well-wrapped to protect against odors and ice crystals. Remember to let individual slices thaw for 15-20 minutes before enjoying!
Frequently Asked Questions About Banana Pudding Ice Cream Cake
- Can I use a different cake flavor? Absolutely! While vanilla cake is classic and complements the banana pudding beautifully, you could experiment with a yellow cake mix, a butter cake, or even a subtle spice cake for a different twist. Just ensure the layers are baked and cooled as directed.
- What if I don’t have a springform pan? No problem at all! As mentioned in the pro tip, line a standard 8-inch cake pan generously with plastic wrap, leaving plenty of overhang on all sides. Once frozen, you can use these plastic wrap “handles” to easily lift the cake out of the pan. Cake collars are also an excellent alternative for a neat finish.
- Can I make this dairy-free or gluten-free? Adapting this recipe can be challenging due to multiple dairy components (butter, sour cream, cream cheese, heavy cream) and gluten in the flour and wafers. However, you could explore gluten-free vanilla cake mixes, dairy-free cream cheese alternatives, coconut cream for whipping, and gluten-free vanilla wafers. Results may vary slightly in texture and flavor, so some experimentation might be needed.
- How ripe should the bananas be for the filling? Choose bananas that are ripe (bright yellow with a few brown spots) but still firm. These will offer the best sweetness and texture. Avoid overly soft, very brown bananas, as they might become too mushy or watery when frozen and thawed. Unripe bananas, on the other hand, will lack the necessary flavor.
- Can I add other mix-ins to the ice cream? Definitely! This recipe is versatile. Chocolate chips, a drizzle of caramel, a sprinkle of toasted pecans, or even some shredded coconut could all be delicious additions to the ice cream layer. Feel free to customize it to your taste!
- Why do I need to thaw the cake before serving? Thawing allows the ice cream to soften to a creamy, scoopable consistency and the cake layers to become tender and palatable again. Attempting to slice a rock-solid frozen cake will be difficult, potentially damaging your knife and the cake, and the textures won’t be as enjoyable.
- How long does this ice cream cake last in the freezer? When properly wrapped, this cake will stay fresh and delicious in the freezer for up to 2-3 weeks. Beyond that, while it may still be safe to eat, the quality and freshness might start to diminish.
Explore More Irresistible Banana Dessert Recipes
If you’re a true banana lover, your culinary adventure doesn’t have to stop with this incredible ice cream cake! Dive into these other fantastic banana-infused treats that celebrate the versatile and beloved fruit:
- Easy Banana Bread
- Bananas Foster Cheesecake
- Banana Cream Cheesecake
- Banana Cream Pie Cupcakes
- Banana Cream Pie
- Banana Pudding Icebox Cake
This Banana Pudding Ice Cream Cake is more than just a dessert; it’s an experience. The harmonious blend of moist cake, creamy banana ice cream, and crunchy wafers creates a symphony of flavors and textures that will leave everyone asking for more. Don’t hesitate to try this recipe and share the joy of this spectacular frozen treat!
This post may contain affiliate links, which means I may receive a small commission if you make a purchase through these links, at no extra cost to you.