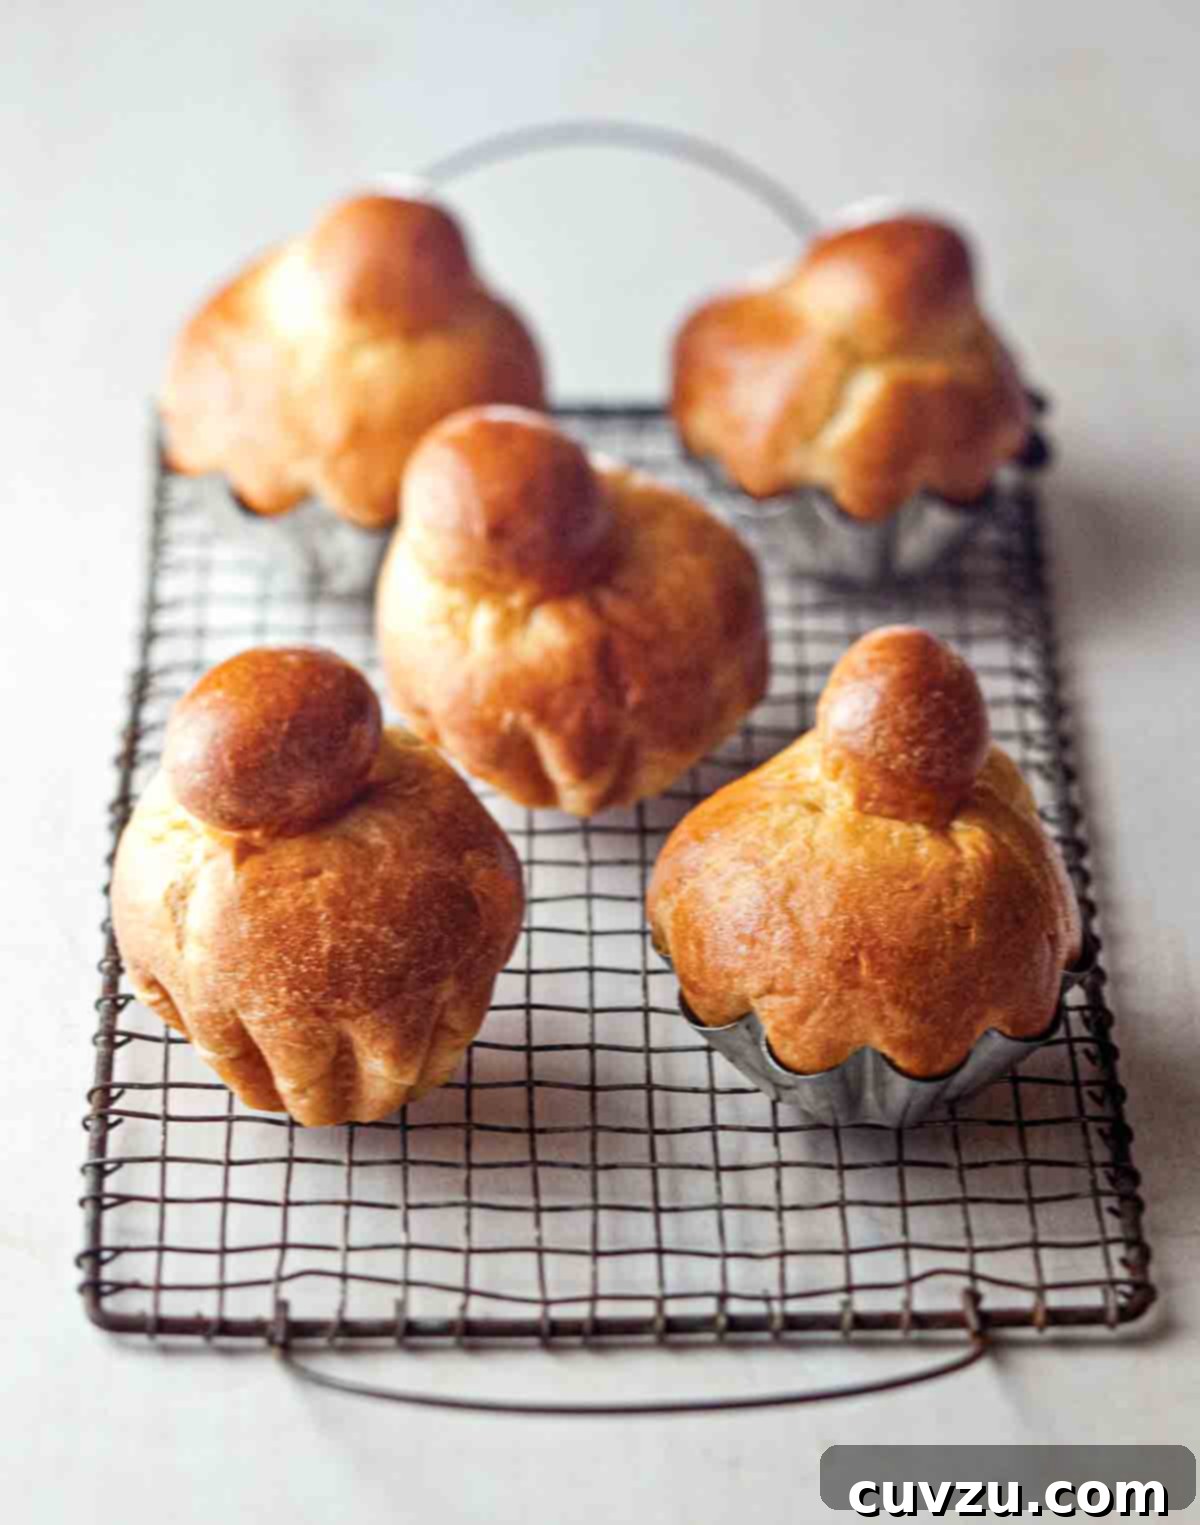
Mastering Classic French Brioche: A Journey to Fluffy, Buttery Perfection
Embark on a culinary adventure to create the quintessential French brioche, a bread renowned for its rich flavor, subtle sweetness, and incredibly tender, airy texture. Thanks to generous amounts of butter and egg yolks, combined with just the right touch of flour, this recipe delivers a truly exceptional loaf or individual rolls, perfect for elevating any breakfast, brunch, or special occasion.
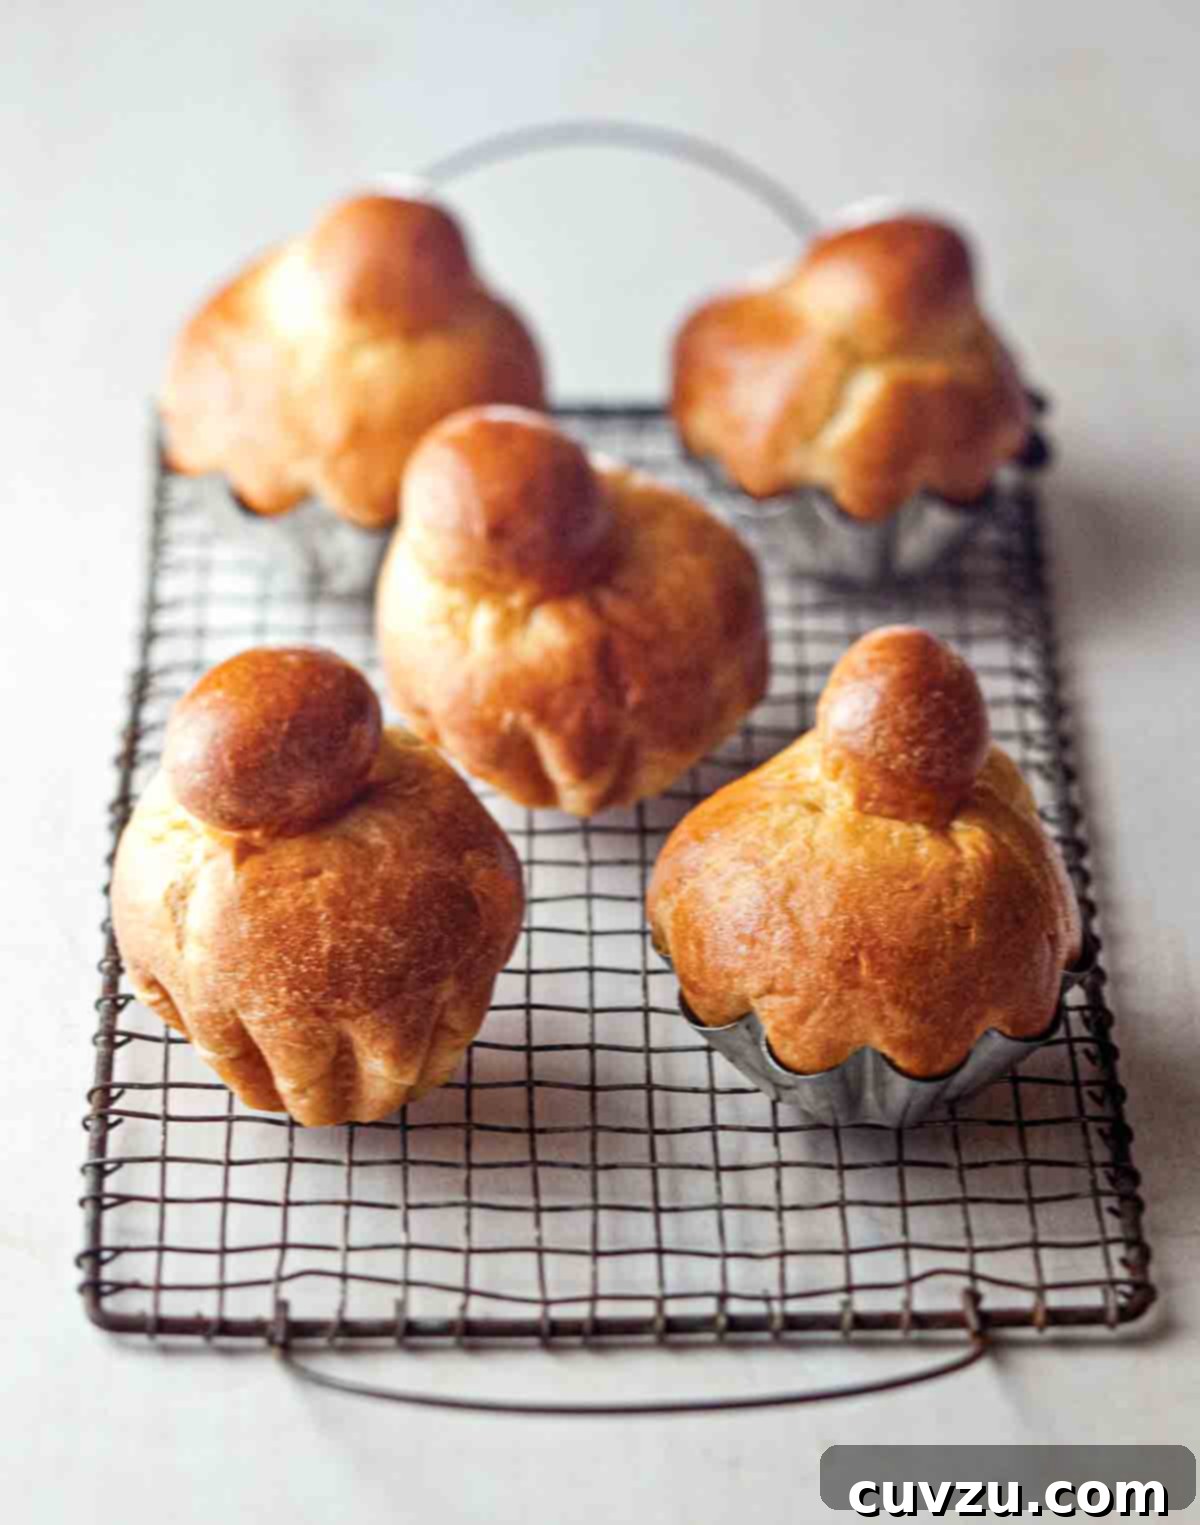
The Allure of Homemade Brioche: Beyond the Boulangerie
While the thought of strolling into a local Parisian boulangerie and emerging with a bag of warm, fragrant brioche rolls is undeniably charming, the satisfaction of creating these miniature masterpieces in your own kitchen is unparalleled. This recipe, inspired by the legendary Sarabeth Levine of NYC’s acclaimed brunch destination, Sarabeth’s, proves that baking exquisite brioche at home is not only achievable but also immensely rewarding. Forget merely buying them; the process of transforming simple ingredients into something so ethereal is a culinary triumph in itself.
These diminutive brioche, characterized by their light, buttery, and rich-yet-not-heavy nature, surprisingly require less hands-on time than you might imagine. A small investment in specialized brioche tins is beneficial for achieving their classic shape, though it’s a purchase easily justified. Consider these charming little reflective metal tins as versatile additions to your kitchen—they even make adorable tea light holders when not in use for baking! As Sarabeth Levine herself might attest, some culinary delights are simply worth the effort.

Sarabeth’s Classic Brioche Recipe
This traditional French brioche is a testament to the art of baking, offering a sublime experience with its deep, buttery flavor, delicate sweetness, and a remarkably tender, airy texture. Crafted with care and featuring an abundance of butter and egg yolks, it’s meticulously balanced with just the right amount of flour. An absolute must-try for breakfast, brunch, or any time you crave a touch of French elegance.
Recipe by David Leite, adapted from Sarabeth Levine.
Print Recipe
Breakfast, Brunch, Dessert
French
12
servings
213
kcal
25
minutes
4
hours
5
minutes
4
hours
30
minutes
Ingredients
- 1 ounce (2 packed tablespoons) compressed yeast, or 3 1/2 teaspoons active dry yeast
- 2 tablespoons superfine sugar, (or simply blitz granulated sugar in a blender until finely ground but not powdery)
- 1/3 cup plus 1 tablespoon whole milk, (cold if using compressed yeast, warm if using active dry yeast)
- 8 large egg yolks
- 2 1/4 cups unbleached all-purpose flour, as needed, divided
- 1/4 teaspoon fine sea salt
- 8 tablespoons (1 stick) unsalted butter, cut into tablespoons and softened, plus more for greasing the bowl and brioche tins
- 1 large egg, well beaten
Step-by-Step Instructions for Perfect Brioche
-
Prepare the Yeast Mixture: If using compressed yeast, finely crumble it into the bowl of a heavy-duty stand mixer. Add the superfine sugar and let it sit for about 3 minutes until the yeast begins to release some moisture. Whisk thoroughly to dissolve the yeast completely. Incorporate the cold milk and egg yolks, whisking until well combined.
For active dry yeast, sprinkle the yeast over 1/3 cup of warm milk (between 105° to 115°F / 40° to 46°C) in a small bowl. Allow it to soften for approximately 5 minutes, then stir until dissolved. Add this mixture to the mixer bowl along with the remaining 1 tablespoon of cold milk, the sugar, and the egg yolks, then whisk everything to combine. -
Start the Dough: Secure the bowl to your stand mixer and attach the paddle attachment. With the machine running on low speed, gradually add 2 cups of the unbleached all-purpose flour and the fine sea salt. Mix until the ingredients come together to form a sticky, batter-like dough that clings to the sides of the bowl. This initial stage might seem loose, but it’s part of the process.
-
Incorporate the Butter: Increase the mixer speed to medium. Begin adding the softened unsalted butter, one tablespoon at a time. Ensure that each addition is fully absorbed into the dough before adding the next piece. This gradual incorporation is crucial for developing brioche’s signature rich texture. Once all butter is incorporated, remove the paddle attachment.
💡 TESTER TIP: The butter’s consistency is key here. It must be very soft, almost spreadable, but not melted. To achieve this, cut your butter into tablespoon-sized pieces and let them sit at room temperature for at least 1 hour before you begin preparing the dough.
-
Knead the Dough: Using a spatula, scrape the sticky dough from the sides and bottom of the bowl into the center. Switch to the dough hook attachment. Knead the dough on medium-high speed until it pulls away from the sides of the bowl and forms a ball around the hook. Reduce the speed to medium and continue kneading, adding tablespoons of the remaining flour incrementally until the dough becomes smooth, tacky to the touch, and still slightly sticks to the bottom of the bowl. This process typically takes about 3 minutes.
-
First Proofing: Generously butter a clean, medium-sized bowl. Turn the kneaded dough out onto a lightly floured work surface. Gently shape the dough into a ball. Place the dough ball into the buttered bowl, smooth side down, then flip it over so the smooth side is up, ensuring it’s lightly coated in butter. Cover the bowl tightly with plastic wrap and allow it to proof in a warm place until it has doubled significantly in size, which usually takes 1 1/2 to 2 hours.
-
Prepare Tins and Divide Dough: While the dough proofs, butter twelve 3 1/2-inch-wide brioche tins. Once the dough has doubled, carefully turn it out onto a lightly floured work surface. It’s crucial not to punch the dough down; its texture should be light and airy, reminiscent of a feather-filled pillow. Using a sharp knife or bench scraper, divide the dough into 12 equal portions. For precision, if you have a kitchen scale, each portion should weigh approximately 2 ounces.
-
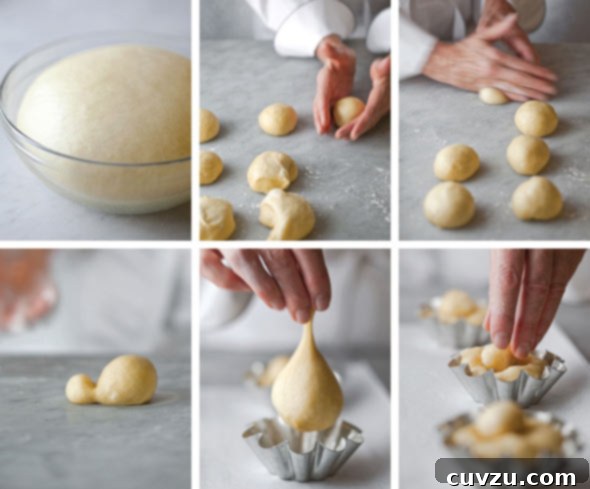
Shape the Brioche-à-Tête: This is the classic “brioche with a head” shape. Work with one portion of dough at a time to prevent the butter from softening too much. Gently shape each portion into a smooth ball by cupping both hands around it on the work surface and rotating it with light pressure. Avoid overhandling to maintain the butter’s integrity.
Next, to create the distinctive “head,” place the dough ball on its side, with the slightly rougher underside facing you. Lightly dust the side of your dominant hand with flour. Position your hand about 1 inch from one end of the smooth dough ball. Using the upper part of your hand, including your pinky finger, gently roll your hand back and forth, pressing into the dough. This action will “cut” into the dough, forming a smaller ball (the “head”) that remains attached to the larger portion by a thin strand of dough. This technique requires a delicate touch to ensure the head doesn’t break off.

-
Place in Tins and Egg Wash: Carefully transfer each shaped brioche to a prepared tin. Hold the larger base portion in one hand and the small “head” in the other, being mindful not to sever the connection. Place the larger portion of dough into the bottom of the tin. Using your thumb and first two fingers (still holding the small head), gently press a hole into the center of the larger dough portion, reaching all the way to the bottom of the tin. Insert the smaller head into this hole. This method helps secure the head, preventing it from detaching during baking. Repeat this process for all remaining dough balls. Arrange the filled tins on a half-sheet pan. Lightly brush the tops of the brioche with a portion of the well-beaten egg, reserving the rest for later.
-
Second Proofing (Proving): Choose a warm, draft-free spot in your kitchen for the final proofing. To create an ideal humid environment, slip the half-sheet pan (with the brioche tins) into a tall, “kitchen-sized” plastic bag. Place two tall glasses filled with very hot water near the center of the pan inside the bag. Wave the opening of the bag to trap air, inflating it like a balloon to create ample “head room,” ensuring the plastic does not touch the sticky dough. Twist the bag closed. Allow the brioche to proof in this warm environment for about 1 hour, or until they appear noticeably puffy and risen.
-
Bake: While the brioche are proofing, position an oven rack in the center and preheat your oven to 350°F (176°C). Once the brioche are puffy, carefully remove the glasses of hot water from the bag, then remove the pan. Lightly brush the tops of the brioche once more with the reserved beaten egg. Bake for approximately 20 minutes, or until the brioche achieve a beautiful golden-brown color on top and are cooked through.
-
Cool and Serve: Let the freshly baked brioche cool in their tins for 5 minutes. After this initial cooling, carefully remove the brioche from their tins. They are best served warm, allowing their buttery aroma to fill the air, or at room temperature. For any fortunate leftovers, brioche freezes exceptionally well for up to 2 weeks. Simply wrap them tightly in plastic wrap and then foil. They are absolutely terrific when gently thawed and toasted, making for an instant treat.

Adapted From
Sarabeth’s Bakery: From My Hands to Yours
Buy On Amazon
Explore More with AI
Substitutions
Scale Recipe
Summarize Key Insights
Nutritional Information (Approximate Per Serving)
- Serving: 1 brioche
- Calories: 213 kcal
- Carbohydrates: 21 g
- Protein: 5 g
- Fat: 12 g
- Saturated Fat: 6 g
- Monounsaturated Fat: 4 g
- Trans Fat: 1 g
- Cholesterol: 160 mg
- Sodium: 65 mg
- Fiber: 1 g
- Sugar: 2 g
Please note: Nutrition information is automatically calculated and should only be used as an approximation.
Tried this recipe?
Mention @leitesculinaria or tag #leitesculinaria!
Tips for Brioche Baking Success
Baking brioche can seem intimidating, but with a few expert tips, you can achieve professional results at home:
- Ingredient Temperature: Ensure your butter is truly softened (room temperature, but not melted) and your egg yolks are also at room temperature. This helps them emulsify better with the dough, creating a smoother, more homogenous texture.
- Patience is Key: Brioche dough requires two distinct proofing periods. Do not rush these stages. A slow, steady rise builds flavor and results in the desired light, airy texture.
- Stand Mixer Advantage: While it’s possible to knead brioche by hand, a heavy-duty stand mixer significantly simplifies the process, especially when incorporating the butter and developing the gluten structure.
- Don’t Over-Flour: Resist the urge to add too much flour during kneading or shaping. A slightly tacky dough is normal for brioche and indicates proper hydration for its rich texture. Keep your work surface lightly floured.
- Creating a Warm Proofing Environment: If your kitchen is cool, the plastic bag and hot water trick is invaluable for providing the consistent warmth and humidity brioche needs to rise properly.
- Visual Cues for Doneness: Trust your eyes! The brioche should be deeply golden brown, indicating a beautifully caramelized crust and thoroughly baked interior.
Serving Suggestions: Sweet or Savory Delights
Brioche is incredibly versatile and can be enjoyed in countless ways, adapting beautifully to both sweet and savory accompaniments:
- Classic Breakfast: Serve warm with butter, jam, or marmalade. A simple sprinkle of superfine sugar is also delightful.
- Elegant Brunch: Perfect alongside fresh berries, whipped cream, or a dollop of crème fraîche. It also makes for an extraordinary French toast or bread pudding.
- Savory Pairing: Brioche’s subtle sweetness beautifully complements savory dishes. Use it as a base for mini sandwiches with smoked salmon and cream cheese, or as a luxurious bun for gourmet sliders or mini burgers. It’s also excellent dipped into a rich soup or stew.
- Coffee and Tea Time: Enjoy a brioche roll with your afternoon coffee or tea for a truly indulgent snack.
Recipe Testers’ Reviews
Our dedicated team of recipe testers put this Sarabeth’s brioche recipe to the test, offering their invaluable insights and experiences.
Melissa Moran
These brioche rolls were absolutely phenomenal! I’m completely hooked. As someone relatively new to yeasted breads, I followed the directions precisely, and I must admit, they turned out perfectly, even exceeding my expectations.
I used active dry yeast without any issues, but I’m quite intrigued by compressed yeast, which I hadn’t encountered before, and plan to try it next time for comparison. Also, because I tend to be less confident with eyeball measurements, I used my kitchen scale to weigh each portion of dough, ensuring consistency. However, given the success, I might feel confident enough to skip this step in future attempts.
My only question during the process was regarding the temperature of the eggs. I chose to leave them on the counter while the butter was softening, assuming room temperature would be best, but I’d love clarification on whether they should have been cold or room temperature.
Linda Pacchiano
These little brioche-a-tête were incredibly flavorful and remarkably light. The finished product had a wonderful texture and delicate crumb that truly impressed.
I found that they baked slightly faster than indicated in the recipe, being perfectly golden and done in about 15 minutes instead of the suggested 20. I used active dry yeast, which performed flawlessly. My primary suggestion for future bakers would be to consider an alternative or more simplified method for shaping the dough. I found the instructions for forming the “head” a bit awkward to follow precisely.
Specifically, I’d suggest that after forming the small marble of dough, one could simply break it off, make an indentation in the larger round, and then insert the small piece. This might be a more intuitive approach for some. Next time, I plan to adapt this recipe into a brioche loaf, as that’s what my family typically prefers and it might streamline the shaping process even further.