Delicious Peppermint Bark Cookies: Your Ultimate Holiday Baking Guide
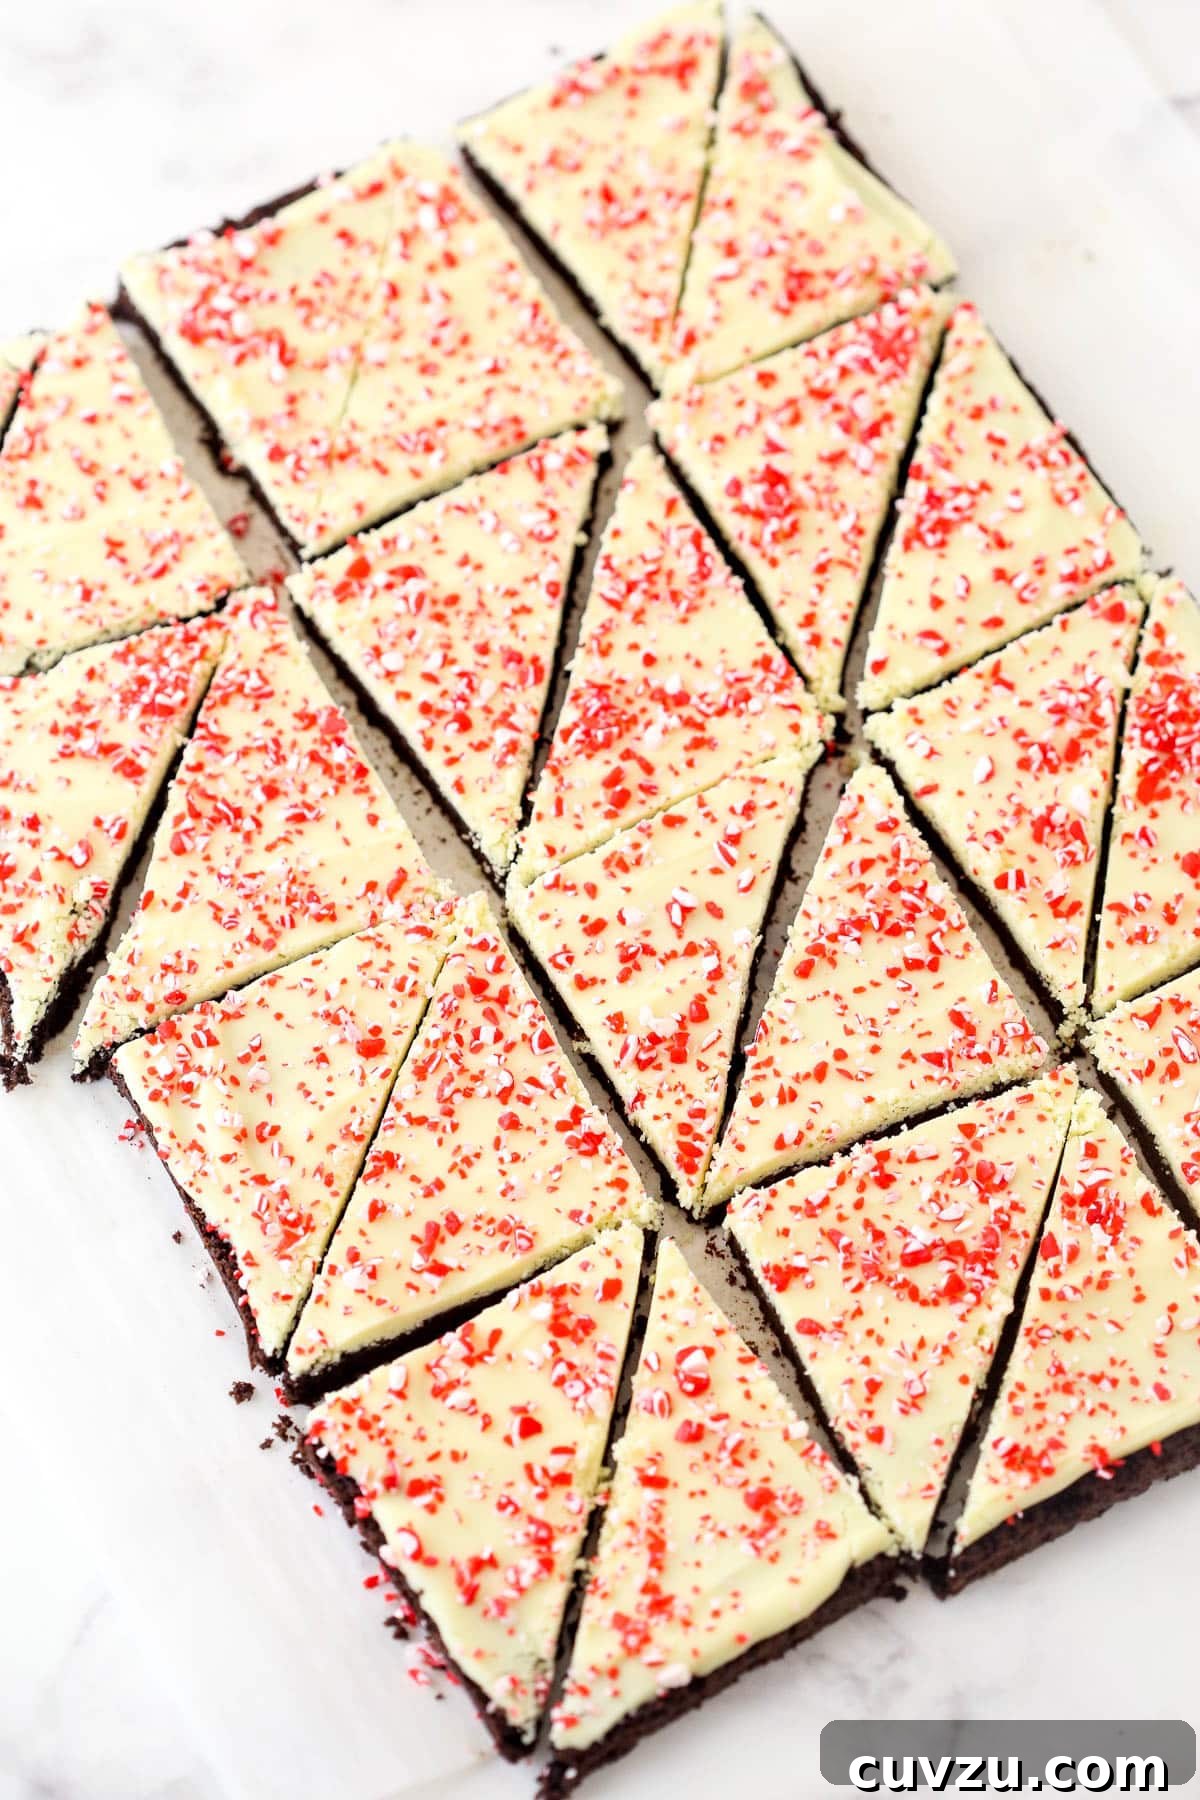
Step into the festive season with a batch of these absolutely irresistible Peppermint Bark Cookies! Combining the rich, decadent flavor of chocolate with the refreshing cool kick of peppermint, these cookies are a joyful twist on the classic holiday bark. Imagine a soft, slightly cakey chocolate cookie base, generously topped with a smooth, creamy white chocolate peppermint layer, and finished with a scattering of vibrant crushed candy canes. This recipe transforms a beloved treat into a delightful, bite-sized cookie, destined to become the star of your Christmas cookie platters and a new favorite tradition.
Why These Peppermint Bark Cookies Will Be Your New Holiday Obsession
These aren’t just any Christmas cookies; they’re a carefully crafted symphony of textures and flavors designed to bring cheer to every bite. Here’s why you’ll fall head over heels for this recipe:
- Unmatched Soft & Smooth Texture: The foundation is a wonderfully soft and slightly cakey chocolate cookie that melts in your mouth. This contrasts beautifully with the silky-smooth white chocolate topping, creating a perfectly balanced and incredibly satisfying chew.
- The Perfect Harmony of Sweet & Minty: Achieving the ideal peppermint flavor is key. Our recipe masterfully blends vanilla extract with peppermint in the white chocolate topping, ensuring a bright, festive mint taste without any hint of artificiality or, as many fear, tasting like toothpaste! The vanilla mellows the peppermint, making it sweet and inviting, just like a candy cane.
- Visually Stunning Holiday Showstoppers: Dressed in their white chocolate and crushed candy cane finery, these cookies are a feast for the eyes. Their vibrant colors and elegant presentation make them a standout addition to any holiday gathering, cookie exchange, or festive dessert table. They truly embody the spirit of Christmas!
- Simple Yet Sophisticated: While they look impressive, these cookies are surprisingly straightforward to make. With clear, easy-to-follow steps, even novice bakers can achieve professional-looking and tasting results, making your holiday baking stress-free and enjoyable.
Essential Ingredients for Crafting Your Peppermint Bark Cookies
Crafting these layered holiday delights requires a few key ingredients, but don’t be intimidated by the slightly longer list. Each component plays a vital role in building the incredible flavor and texture of these cookies. You’ll find the exact measurements in the recipe card below, but let’s break down what you’ll need and why:
For the Irresistible Chocolate Cookie Base
- All-Purpose Flour: The structural backbone of our cookie. For the most accurate results, I highly recommend using a food scale. If you don’t have one, use the spoon and level method to avoid a dense cookie.
- Cocoa Powder: This is where the rich chocolate flavor comes from. I prefer using a good quality dark Dutch cocoa powder for a deeper, more intense chocolate profile that perfectly complements the bright peppermint.
- Baking Soda: Our leavening agent, which helps the cookies rise and achieve that lovely, soft, cakey texture.
- Salt: A crucial ingredient that balances the sweetness and enhances all the other flavors, particularly the chocolate.
- Unsalted Butter: Ensure it’s at room temperature for optimal creaming with the sugars. This creates air pockets, leading to a lighter, fluffier cookie. Set it out on the counter for about an hour before you plan to bake.
- Dark Brown Sugar: Adds moisture, depth of flavor, and a wonderful chewiness to the cookies, thanks to its molasses content.
- Granulated Sugar: Contributes to the overall sweetness and helps create a tender crumb.
- Large Egg: Acts as a binder, adds richness, and helps with the structure and moisture of the cookie dough. Make sure it’s a large egg for consistency.
- Vanilla Extract: A universal flavor enhancer that rounds out the chocolate notes beautifully.
For the Dreamy White Chocolate Peppermint Topping
- White Chocolate Baking Bars: Quality matters here! I strongly recommend using reputable brands like Baker’s or Ghirardelli for the best melting consistency and flavor. Chocolate chips often contain stabilizers that prevent smooth melting.
- Shortening (Vegetable): This is your secret weapon for a perfectly smooth, easy-to-spread white chocolate topping. It helps the chocolate melt consistently and prevents it from becoming too stiff or seizing.
- Peppermint Extract: The star of the show for that signature minty zing. You can usually find this in the baking aisle of any grocery store. A little goes a long way, so measure carefully!
- Vanilla Extract: Yes, it’s back! Adding vanilla extract to the white chocolate is crucial. As mentioned, it softens the intensity of the peppermint, ensuring a delightful, balanced minty flavor that tastes like candy canes, not toothpaste. Don’t skip it!
- Candy Canes (Crushed): Not just for garnish, these provide a fantastic crunchy texture and a burst of concentrated peppermint flavor. Crush them yourself for fresh pieces, or if you prefer a shortcut, pre-crushed peppermint candies in jars work perfectly too!
Step-by-Step Guide to Crafting Peppermint Bark Cookies
These two-layer Christmas cookies are sure to impress both with their festive appearance and their incredible flavor. They’re guaranteed to be a highlight at any holiday gathering. Follow these detailed steps to create your own batch of holiday magic:
Preparing Your Delicious Chocolate Cookie Base
- Prepare for Baking: Begin by preheating your oven to 350°F (175°C). Line a 9×13 inch baking pan with parchment paper, ensuring the paper extends over the long sides of the pan. This ingenious trick will allow you to easily lift the cooled cookie base out later.
- Combine Dry Ingredients: In a medium-sized bowl, whisk together the all-purpose flour, cocoa powder, baking soda, and salt. Whisking ensures these dry ingredients are thoroughly combined and evenly distributed, preventing pockets of unmixed leavening or salt. Set this aside.
- Cream Butter and Sugars: In the bowl of a stand mixer fitted with the paddle attachment (or using a hand mixer), add the room-temperature unsalted butter, dark brown sugar, and granulated sugar. Beat on medium-high speed for 2-3 minutes until the mixture becomes visibly lighter in color and fluffy. This process incorporates air, essential for a tender cookie.
- Add Wet Ingredients: Scrape down the sides of the bowl. Add the large egg and vanilla extract to the creamed butter mixture. Beat again on medium speed until they are fully incorporated, ensuring no streaks of egg remain.
- Integrate Dry into Wet: Gradually add the dry ingredient mixture to the wet ingredients. Mix by hand with a spatula until just combined. It’s crucial to avoid over-mixing here. Over-mixing can develop the gluten in the flour too much, resulting in tough, dense cookies instead of light and airy ones.
- Press into Pan: The cookie dough will be quite soft. Spoon small portions of the cookie dough evenly around the prepared 9×13 inch pan. Then, use your fingers or an offset spatula to gently but firmly press the dough into an even layer across the entire bottom of the pan. Ensure it’s spread edge to edge for a uniform base.
- Bake the Base: Place the pan in the preheated oven and bake for 10-15 minutes. The cookie base is done when the top no longer looks glossy and appears set, with a slight golden-brown hue around the edges. Avoid over-baking to maintain its soft texture.
- Cool Completely: Carefully remove the pan from the oven. Allow the cookie base to cool completely in the pan before attempting to remove it. This patience is key – moving it while warm increases the risk of it breaking. For a faster cool-down, you can place it in the refrigerator. Once fully cooled, use the parchment paper overhang to lift the cookie base onto a cutting board or a large flat plate. If any edges are slightly raised, use a sharp knife to carefully trim them for a perfectly flat surface. Those trimmed bits? A delicious cook’s treat!
Creating the Festive White Chocolate Peppermint Topping
- Melt the White Chocolate: In a medium-sized microwave-safe bowl, combine the chopped white chocolate baking bars and shortening. Heat in 30-second increments, stirring well after each interval, until the mixture is completely melted and smooth. Be extremely careful not to overheat or scorch the white chocolate, as it can seize easily. Low and slow is the key!
- Finish the Topping: Once the white chocolate is perfectly smooth, stir in the peppermint extract and vanilla extract. Mix until well combined. You’ll notice the mixture will thicken slightly, but it should remain smooth and spreadable, not clumpy or seized.
- Add Topping to Cookie Base: Immediately and evenly spread the white chocolate peppermint mixture over the cooled chocolate cookie base, ensuring it reaches all the way to the edges.
- Decorate with Candy Canes: While the white chocolate is still wet, liberally sprinkle the crushed candy canes over the entire surface. Press them gently to ensure they adhere to the chocolate.
- Set, Cut, and Serve: Allow the white chocolate topping to set and firm up completely. You can place the cookie in the refrigerator for 20-30 minutes to speed this process. Once firm, use a sharp, warm knife (run under hot water and wipe dry) to cut the large cookie into bars. For a festive touch, I recommend cutting the cookie into 12 squares (by cutting lengthwise into 3 strips, then crosswise into 4 strips) and then cutting each square diagonally to create 24 charming triangular cookies.
Expert Tips for Perfectly Pepperminty Bark Cookies
Achieving bakery-quality peppermint bark cookies is easier than you think with these professional tips and tricks:
- The Parchment Paper Advantage: Always use a large piece of parchment paper that extends beyond the long sides of your baking pan. This simple step is a game-changer, allowing you to easily lift the entire cooled cookie slab out of the pan without any sticking or breaking.
- Even Dough Distribution: When pressing the cookie dough into the pan, avoid dumping it all in the center. Instead, drop small spoonfuls of dough around the pan, then gently spread it evenly to the edges. This makes achieving a thin, uniform base much easier, ensuring consistent baking.
- Patience is a Virtue (Cooling): Do not rush the cooling process for the cookie base. If you attempt to remove or cut the cookie while it’s still warm, it’s highly susceptible to breaking apart. Allow it to cool completely at room temperature, or accelerate the process by chilling it in the refrigerator.
- Mastering White Chocolate Melting: White chocolate is notorious for being finicky. Melt it slowly in short 30-second bursts in the microwave, stirring thoroughly after each interval. Overheating will cause it to seize and become grainy. The shortening helps keep it smooth and fluid.
- Quality White Chocolate: For the best results, use high-quality white chocolate baking bars (not chips!). Baking bars melt more smoothly and provide a superior flavor and texture for your topping.
- Clean Cuts: For neat, professional-looking cuts, use a sharp knife. For the cleanest lines, especially through the chocolate topping, run your knife under hot water and wipe it dry before each cut. The warm blade will slice through the chocolate more easily.
Proper Storage and Freezing Instructions
To keep your delightful peppermint bark cookies fresh and delicious, follow these simple storage guidelines:
- Countertop Storage: Leftover cookies can be stored in an airtight container at room temperature for up to 3-4 days. Ensure the container is truly airtight to prevent them from drying out or absorbing other odors.
- Freezer Storage for Longer Freshness: If you’re planning ahead or have a larger batch, these cookies freeze beautifully. Wrap individual cookies or small stacks tightly in plastic wrap, then an additional layer of aluminum foil. Place the wrapped cookies in a freezer-safe bag or an airtight container. They will maintain their freshness for up to 2-3 months. To enjoy after freezing, simply let the cookies thaw at room temperature for a few hours before serving.
Peppermint Bark Cookie Variations and Customizations
While this classic peppermint bark cookie recipe is perfect as is, feel free to get creative and customize it to your liking! Here are a few ideas to inspire your baking:
- Dark Chocolate Cookie Base: For a deeper, more intense chocolate flavor, consider using an extra dark cocoa powder in your cookie base or even adding a handful of mini dark chocolate chips to the dough before baking.
- Milk Chocolate Swirl: After spreading the white chocolate topping, drizzle melted milk chocolate over it and use a toothpick or skewer to create elegant swirls before adding the candy canes.
- Alternative Toppings: Instead of (or in addition to) crushed candy canes, try sprinkling on some festive sprinkles, mini chocolate chips, or even a fine dusting of cocoa powder for a sophisticated finish.
- Peppermint Extract Intensity: Adjust the amount of peppermint extract in the white chocolate topping to suit your preference. Start with 1/2 teaspoon and add a tiny bit more if you desire a stronger mint flavor, tasting as you go.
- Nutty Twist: For an interesting texture contrast, you could finely chop some pecans or walnuts and sprinkle them lightly over the chocolate base before adding the white chocolate topping.
Frequently Asked Questions About Peppermint Bark Cookies
Got questions about baking these festive treats? Here are some common queries and their answers to help you along the way:
Can I use store-bought cookie dough for the base?
While this recipe is designed for a homemade chocolate cookie base, you could potentially use a store-bought chocolate cookie dough or even a brownie mix pressed into the pan as a shortcut. However, be aware that the texture and flavor might differ from the intended recipe. Adjust baking times according to package instructions, then proceed with the white chocolate topping.
How do I prevent the white chocolate from seizing?
Seized chocolate becomes thick, lumpy, and unusable. To prevent this, always melt white chocolate slowly and gently. Use a microwave in 30-second increments, stirring well after each, or a double boiler over simmering (not boiling) water. Avoid introducing any water or steam into the chocolate, as even a tiny drop can cause it to seize. The addition of shortening in this recipe is also a key factor in ensuring a smooth, fluid melt.
Can I make these cookies gluten-free?
Yes, you can! Substitute the all-purpose flour with a high-quality 1:1 gluten-free baking flour blend that contains xanthan gum. Follow the rest of the recipe instructions as written. Always check the labels of all your ingredients to ensure they are certified gluten-free.
How far in advance can I make these cookies?
These cookies are wonderful for making ahead! You can bake them up to 3-4 days in advance and store them at room temperature in an airtight container. If you plan to make them further ahead for the holidays, follow the freezing instructions provided above, and they’ll be perfect for your festive celebrations.
More Festive Christmas Cookie Recipes to Explore
The holiday season is all about delicious baking! If you loved these Peppermint Bark Cookies, you might enjoy trying these other festive recipes:
- German Spritz Cookies
- Anise Cookies
- Chocolate Dipped Peppermint Sugar Cookies
- Peppermint Chocolate Thumbprint Cookies
- Soft Cut Out Sugar Cookies
Peppermint Bark Cookies
★
★
★
★
★
5 from 2 reviews
- Author: Lindsay
- ⌚ Prep Time: 35 minutes
- ⌚ Cook Time: 10 minutes
- ⌚ Total Time: 45 minutes
- 🍴 Yield: 24 cookies
- 📁 Category: Cookies
- ⏹ Method: Oven
- 🏴 Cuisine: American
Description
These peppermint bark cookies are festive, fun, and 100% delicious. A light cookie base, perfectly-balanced white chocolate peppermint topping, and crushed candy canes create one of the best Christmas cookies of all time!
Ingredients
For the Cookie Base
- 1 1/4 cups (163g) all purpose flour (measured correctly)
- 1/2 cup (57g) dutch cocoa powder
- 1 teaspoon baking soda
- 1/4 teaspoon salt
- 3/4 cup (168g) unsalted butter, room temperature
- 1/3 cup (75g) dark brown sugar, packed
- 1/2 cup (104g) sugar
- 1 large egg
- 1 teaspoon vanilla extract
For the White Chocolate Peppermint Topping
- 10 ounces white chocolate baking bars, chopped
- 4 tablespoons (48g) shortening
- 1/2 teaspoon peppermint extract
- 1/2 teaspoon vanilla extract
- 1/4 cup crushed candy canes (2–3 candy canes)
Instructions
- Preheat the oven to 350°F. Prepare a 9×13 inch pan with parchment paper that sticks up above the sides of the pan on the long side, so that you can remove the cookie base later.
- In a medium sized bowl, combine the flour, cocoa powder, baking soda and salt in a medium sized bowl and set aside.
- Add the butter and sugars to a large mixer bowl and beat on medium speed until light in color and fluffy, about 2-3 minutes.
- Add the egg and vanilla extract and mix together until well combined.
- Add the dry ingredients and mix together just until combined.
- Press the cookie dough evenly into the bottom of the prepared 9×13 pan. It’ll be very thin, so it helps to drop spoonfuls of the dough around the pan, then spread it evenly.
- Bake the cookie base for 10-15 minutes or until no longer glossy on top.
- Remove the cookie from the oven and allow to cool completely (pop it in the fridge to cool more quickly, if you like), then remove the cookie from the pan and set it on the counter. If you move the cookie when warm, it’s more likely to break, so be sure it’s cooled. Use a sharp knife to trim the slightly raised edges from the sides of the cookie base, so everything is even and flat. Set aside.
- Add the white chocolate and shortening to a medium sized microwave-safe bowl and heat in 30 seconds increments, stirring well between each, until the mixture is melted and smooth.
- Add the peppermint and vanilla extract and stir to combine. The mixture will thicken slightly.
- Spread the white chocolate mixture evenly over the cookie base, spreading all the way to the edge. Sprinkle on the peppermint pieces.
- Allow the white chocolate to cool and firm up (pop it in the fridge again to cool more quickly, if you like), then cut into bars. I made triangles by cutting it into pieces lengthwise and 4 pieces the shorter way to make 12 squares, then I cut each square diagonally to get 24 cookies.
Notes
- To store. Leftover cookies can be stored at room temperature for 3-4 days in an airtight container.
- To freeze. If you need these to last longer, wrap the cookies in plastic or foil and place them in a freezer bag or airtight container. They’ll stay fresh for a couple of months. To serve after freezing, let the cookies come to room temperature and store them on the counter.
Nutrition
- Serving Size: 1 cookie
- Calories: 197
- Sugar: 15.1 g
- Sodium: 91.7 mg
- Fat: 12.2 g
- Carbohydrates: 21.6 g
- Protein: 2 g
- Cholesterol: 25.5 mg