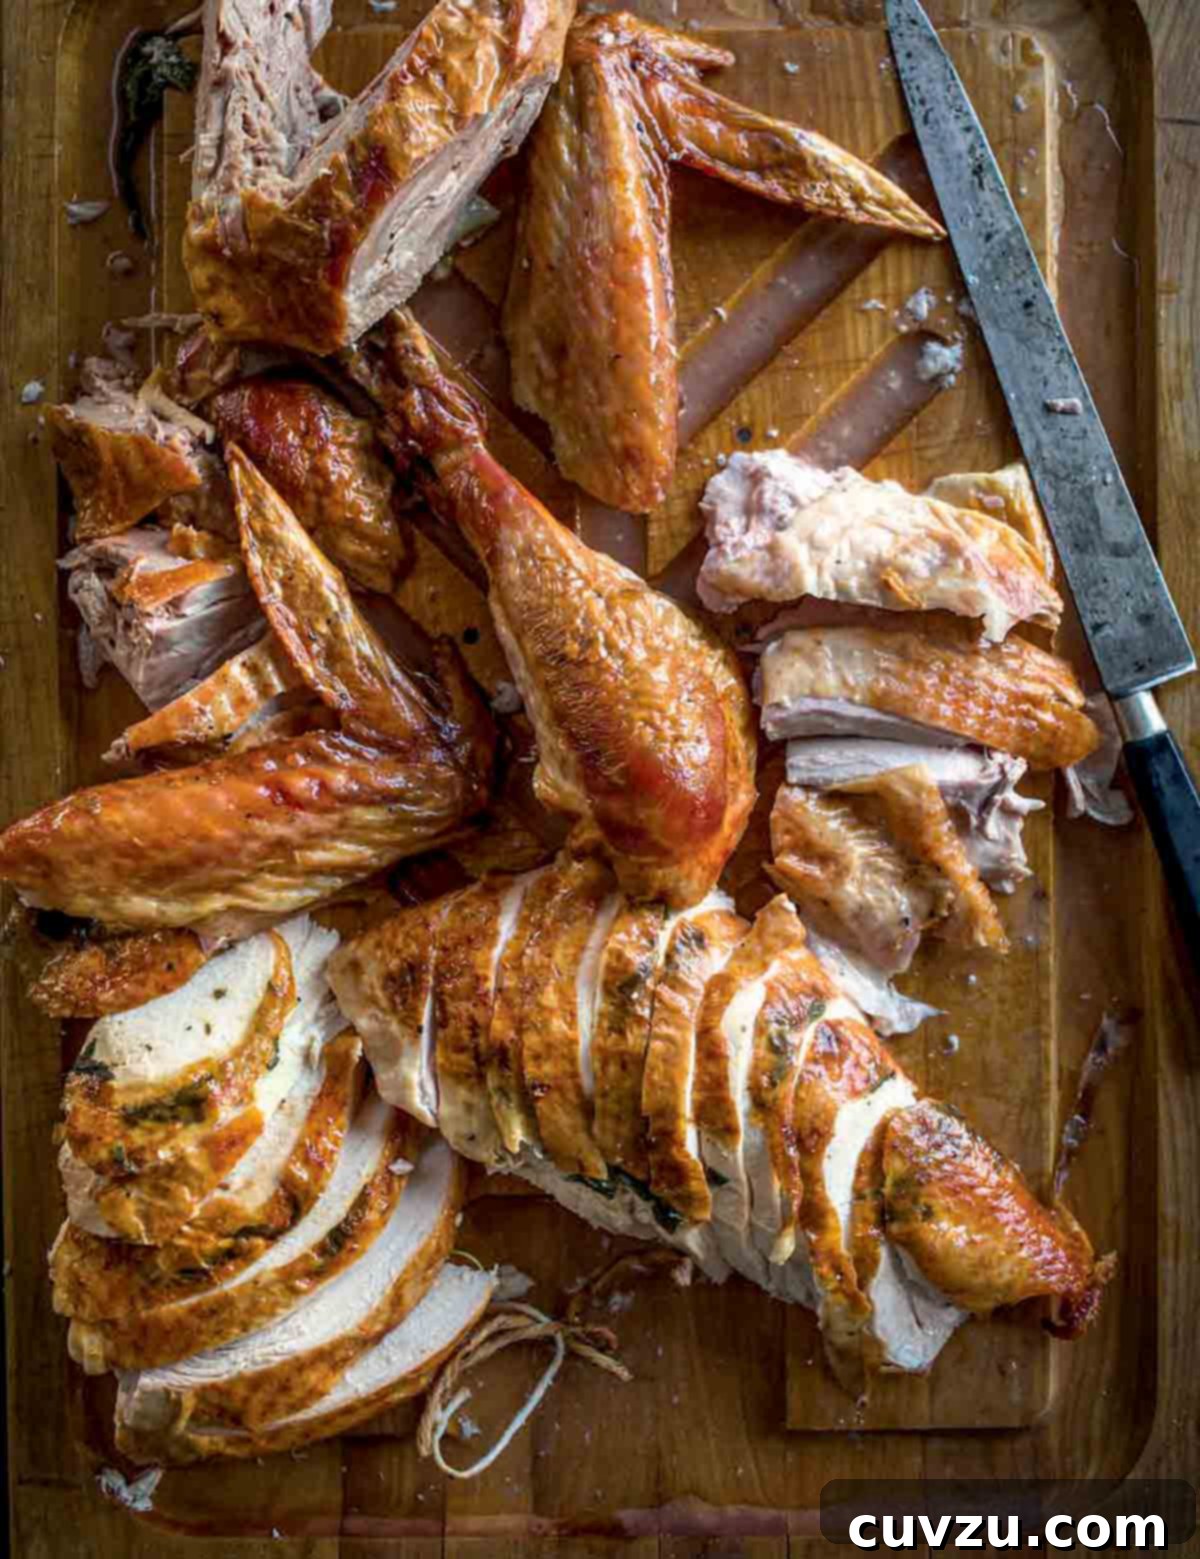
For many, the mere thought of carving the Thanksgiving turkey ignites a familiar sense of dread. It ranks right up there with navigating politically charged family discussions or enduring unsolicited advice about your hairstyle. Yet, unlike those unavoidable holiday traditions, mastering the art of turkey carving is entirely within your control. It’s a skill that, once acquired, transforms a daunting task into a moment of confident culinary artistry.
This comprehensive guide reveals the secrets to carving a turkey with grace and precision, ensuring your Thanksgiving platter becomes a breathtaking centerpiece rather than a regrettable aftermath. We’ll walk you through each step, making the process so straightforward and elegant that you’ll wonder why you ever worried. Because when you’re not stressing over the turkey, you gain invaluable patience for all those other beloved—and sometimes trying—holiday rituals. This, in turn, allows your Thanksgiving dinner, at least the carving part, to be as perfectly “Rockwell-ian” as possible. Prepare to elicit “oohs” and “aahs” from your guests and serve a bird that looks as incredible as it tastes.
—Adapted from insights by David Leite
Why Mastering Turkey Carving Matters
Beyond the immediate gratification of a beautiful platter, learning the proper turkey carving technique offers numerous benefits. Firstly, it ensures even slices of meat, allowing every guest to enjoy tender, succulent portions. Secondly, it maximizes the amount of usable meat, minimizing waste. A well-carved turkey is easier to serve, making the buffet line more efficient and pleasant. Most importantly, it boosts your confidence as a host, allowing you to present your holiday feast with pride and elegance, setting a joyous tone for the entire meal.
Essential Tools for a Flawless Carve
Before you embark on your carving journey, gathering the right tools is crucial. Think of them as extensions of your skill, making the process smoother and safer.
- A Sharp Carving Knife: This is non-negotiable. A long (10-12 inch), thin, and razor-sharp knife is essential for clean, precise cuts. A dull knife will tear the meat, creating a messy presentation and a frustrating experience. Consider a knife specifically designed for carving, which often has a pointed tip to navigate joints.
- A Sturdy Carving Fork: A two-pronged carving fork helps stabilize the turkey on the board, preventing it from sliding as you carve. It also allows you to handle hot meat without burning your hands.
- A Reliable Carving Board: Opt for a large, sturdy carving board, preferably one with a perimeter groove to catch any precious juices. This keeps your countertop clean and ensures no flavor goes to waste. A non-slip base is also a significant advantage.
- Sharpening Steel or Whetstone: Even the best knives lose their edge. A sharpening steel allows you to hone your knife’s edge just before carving, ensuring peak performance. If your knife is truly dull, a whetstone may be necessary.
- Clean Kitchen Towels: These are useful for gripping the turkey, wiping down your knife, and managing any spills.
- Serving Platter: Have a large, warmed serving platter ready to receive the beautifully carved meat. Warming the platter helps keep the turkey slices at an ideal temperature.
Pre-Carving Preparations: Setting the Stage for Success
The carving process doesn’t begin the moment the turkey leaves the oven. A few crucial steps beforehand will ensure a juicier, more manageable bird and a smoother carving experience.
- Rest the Turkey: This is arguably the most important step. Once the turkey reaches its internal target temperature (165°F or 74°C in the deepest part of the thigh without touching bone), remove it from the oven and transfer it to a large cutting board. Tent it loosely with foil and let it rest for at least 20-30 minutes, or even up to an hour for larger birds. Resting allows the juices, which have migrated to the center during cooking, to redistribute throughout the meat. Skipping this step results in dry meat and a flood of juices on your cutting board.
- Transfer to a Carving Board: Carefully transfer the rested bird, breast-side up, from the roasting pan to your prepared carving board. Position the turkey with the legs facing you for easier access to the drumsticks and thighs.
- Remove Stuffing (If Applicable): If you’ve cooked stuffing inside the bird, gently scoop it out with a large spoon or serving utensil and transfer it to a separate serving dish. This not only makes carving easier but also allows the stuffing to be served hot.
With your tools at hand and the turkey perfectly rested, you’re ready to dive into the carving itself. We’ll proceed in a logical, step-by-step order, ensuring stability and efficiency throughout.
1. Remove the Drumsticks
Begin your carving masterpiece by addressing the drumsticks. This initial step helps to create a stable base for the subsequent breast carving and is often the easiest starting point.
Standing with the turkey’s legs positioned towards you, take your sharp carving knife. Make a shallow, exploratory cut through the skin and meat between the breast and the thigh. Gently pull the leg away from the body to expose the joint connecting the thigh to the backbone. You should feel the ball-and-socket joint. Once you locate it, use your knife to firmly cut through this joint, separating the entire leg quarter (drumstick and thigh) from the turkey’s body. A clean cut here, following the natural seam, is key. Avoid hacking; instead, let the knife do the work, guiding it around the bone.
Repeat this process precisely on the other side to remove the second leg quarter. For now, leave the drumstick attached to the thigh. You can either place these leg quarters directly onto your serving platter or set them aside on a separate cutting board. Leaving the remaining thigh portions (for now) on the bird can provide additional stability as you tackle the larger breast sections.
2. Carve the Breast
The turkey breast is often the most anticipated part of the bird, and carving it into elegant, uniform slices is a hallmark of a skilled carver. There are two primary methods for handling the turkey breast, each yielding beautiful results.
- Method A: Slicing Directly from the Bird (Ideal for smaller turkeys or quick serving)
With the turkey still on the carving board, locate the breastbone running down the center of the breast. Just above the thigh and wing, make a deep horizontal cut through the breast meat, cutting all the way down to the breastbone. This creates a foundational “base” cut for your slices. Next, position your knife alongside the breastbone and slice downwards, parallel to the breastbone, guiding the knife along the rib cage. The slices should meet your initial horizontal cut, allowing them to fall away cleanly. Continue making even, thin slices from top to bottom, working your way around the contour of the breast. Repeat on the other side of the breastbone.
- Method B: Removing the Entire Breast Half First (Often preferred for larger turkeys and a more controlled, uniform presentation)
This method offers exceptional control over slice thickness and presentation. To begin, just above the thigh and where the wing attaches, make a deep, horizontal cut through the breast meat, going all the way to the bone. This serves as your base line. Now, carefully slip the tip of your carving knife alongside the breastbone. Keep the blade as close to the breastbone as possible and slice downwards, maintaining a parallel trajectory with the bone. Continue slicing downwards, following the natural curve of the rib cage, until your knife meets the horizontal cut you made earlier. With a gentle pry, you should be able to cleanly remove the entire breast half in one beautiful piece.
- Keep Your Knife Sharpened: We can’t stress this enough. A sharp knife is safer and more effective. Hone it before every use.
- Take Your Time: Rushing leads to messy cuts and frustration. Approach the task with calm and confidence.
- Follow the Bone Structure: The turkey is designed to be carved. Let the bones guide your knife to find the natural seams and joints.
- Use a Carving Fork for Stability: Don’t try to hold the turkey with your bare hands. The fork provides a firm, safe grip.
- Don’t Forget the Pan Juices: As you carve, collect any juices that accumulate on your carving board. These are liquid gold, perfect for enriching your gravy or drizzling over the carved meat.
- Practice Makes Perfect: If you’re nervous about the big day, try carving a roasted chicken beforehand. The principles are the same, just on a smaller scale.
- Warm Your Platter: Serve the carved turkey on a warm platter to help maintain its temperature and flavor.
- Not Resting the Turkey: This is the cardinal sin of turkey carving, leading to dry meat and a juicy mess.
- Using a Dull Knife: It’s frustrating, dangerous, and results in torn, uneven slices.
- Carving Against the Grain (where applicable): For breast meat, always slice across the grain for maximum tenderness.
- Forgetting to Remove Stuffing First: Trying to carve around a cavity full of stuffing makes the job much harder.
- Discarding the Carcass Too Soon: The leftover turkey carcass is a treasure trove of flavor for making a delicious turkey stock or broth.
Once you have removed an entire breast half, transfer it to a separate, stable cutting surface (or rotate your main carving board if it’s large enough). Orient the breast so you can slice it crosswise, against the grain of the meat. Slice the breast meat into thick, uniform medallions, aiming for about 1/4 to 1/2 inch thick, depending on preference. Slicing against the grain ensures the meat is as tender as possible. Repeat this entire process for the other breast half. Arrange these beautiful slices artfully on your serving platter.
3. Remove the Thighs and Wings
With the breast meat expertly carved, it’s time to address the remaining dark meat and the wings. The leg quarters you initially removed can now be further broken down.
Pick up one of the leg quarters. You’ve already made the initial cut around the thigh joint. Now, locate the joint connecting the drumstick to the thigh. Gently bend the leg to expose this joint, then use your knife to cut cleanly through it, separating the drumstick from the thigh. Repeat for the other leg quarter. You now have two separate drumsticks and two separate thighs.
For the thighs, you can serve them whole, or, if desired, cut the thigh meat into thick slices. To slice the thigh, place it skin-side up on the cutting board. Run your knife along the thigh bone to remove the meat, then slice this meat against the grain into desired portions. This makes serving easier and often more appealing to guests.
Next, turn your attention to the wings. Locate the joint where each wing attaches to the breastbone area. It’s a fairly straightforward ball-and-socket joint. Use your carving knife to cut cleanly through this joint, detaching each wing from the turkey’s frame. You can choose to serve the wings whole, or for a more manageable presentation, you can separate the drumette and flat sections at their natural joint. Some prefer to leave the wing tips attached for presentation, while others remove them.
4. Arrange the Turkey on a Serving Platter or Cutting Board
This is where your artistry truly shines. The way you arrange the carved turkey pieces elevates the meal from simply food to a feast for the eyes. Gather all your beautifully carved pieces: the pristine slices of white breast meat, the succulent dark meat from the thighs (sliced or whole), and the drumsticks and wings.
Start by arranging the breast meat slices in an overlapping pattern in the center of your warmed serving platter. This creates a focal point. Then, artfully arrange the dark meat around the white meat, creating a harmonious and abundant display. Place the drumsticks and wings at the ends or in key positions to add visual interest and offer variety to your guests. Think of it as building a landscape of deliciousness.
To truly make your platter pop, consider garnishing it with fresh herbs like parsley, rosemary, or sage. Bright citrus slices (orange or lemon) and vibrant cranberries or pomegranate seeds can add a festive splash of color and a touch of freshness. This final flourish completes your Thanksgiving masterpiece, turning a simple platter into an unforgettable centerpiece.
Expert Tips for a Flawless Carve Every Time
Common Carving Mistakes to Avoid
There you have it! Your work is done. All that remains is to graciously accept the inevitable accolades from family and friends. You’ve not only conquered the turkey but transformed it into a symbol of holiday abundance and your own culinary prowess. Wasn’t that so much less difficult than you anticipated? Enjoy the fruits of your labor and the admiration of your guests. Happy Thanksgiving!