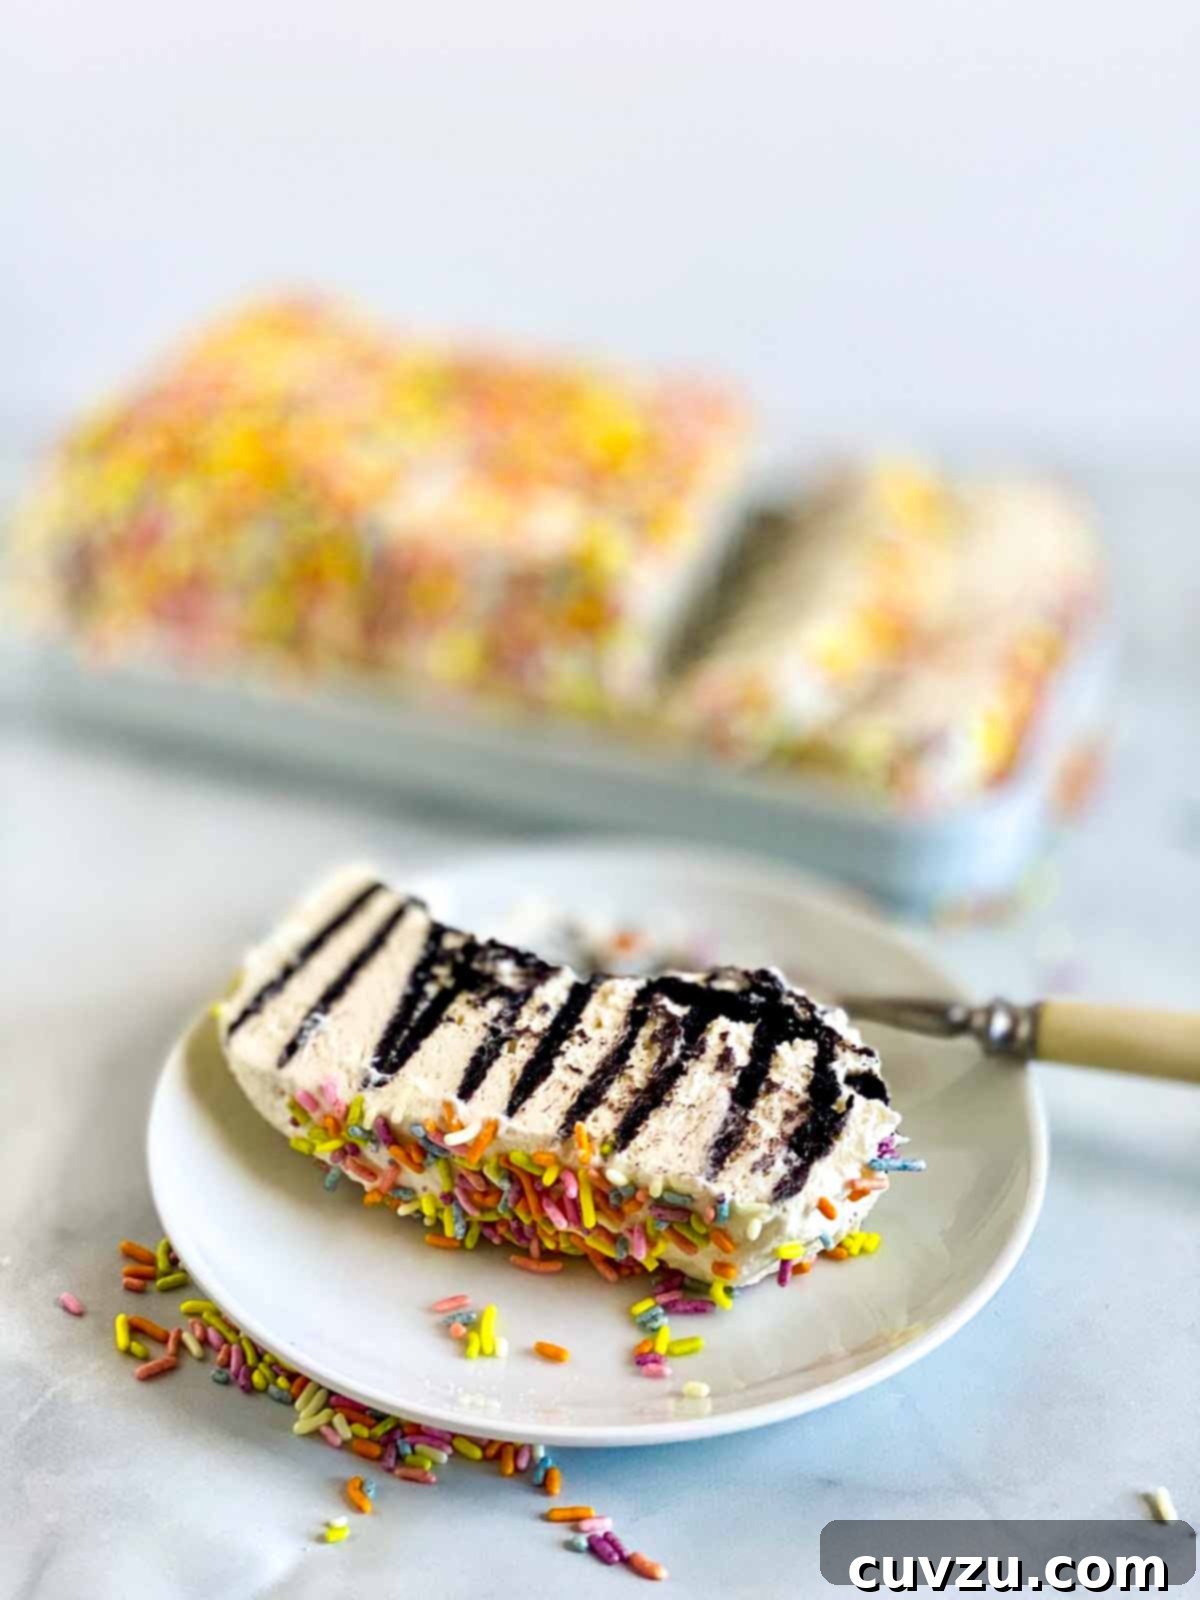
Irresistible No-Bake Icebox Cake with Silky Sweetened Condensed Milk Whipped Cream
Dive into a world of effortless indulgence with this classic no-bake icebox cake, elevated to new heights with a luscious, fluffy sweetened condensed milk whipped cream. A symphony of delicate chocolate wafers and velvety cream, this dessert promises a nostalgic journey with every bite. Perfect for any occasion, from casual summer gatherings to sophisticated dinner parties, its simplicity belies its incredible flavor and elegant presentation. Forget the oven and lengthy prep times; this icebox cake comes together in mere minutes, requiring only a patient chill in the refrigerator to transform humble ingredients into a spectacular treat.
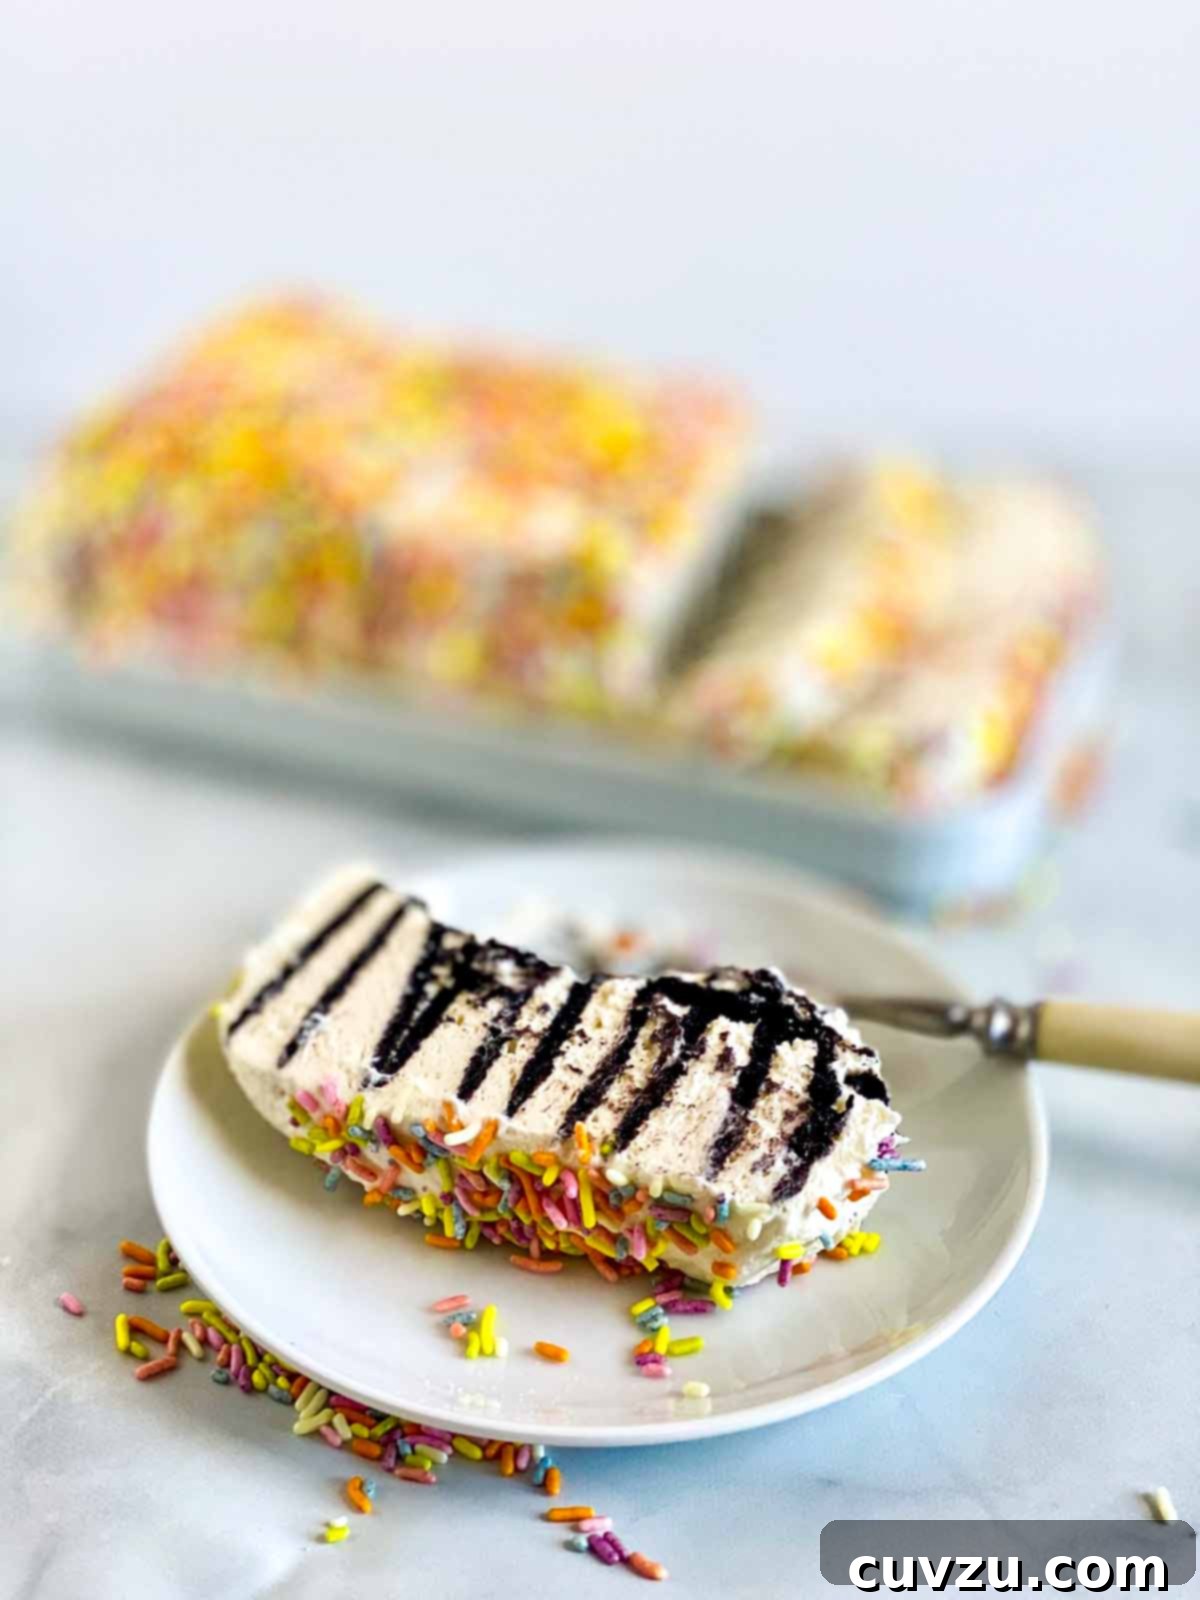
“A deliciously simple icebox cake with a very special sweetened condensed milk whipped cream.” – Jessie Sheehan
The Timeless Allure of Icebox Cakes
Icebox cakes are a testament to culinary ingenuity born out of necessity. Originating in the early 20th century, primarily in America, these “cakes” became popular as refrigerators (then called “iceboxes”) became more common. They offered a simple, no-fuss dessert solution during an era when ovens were often too hot for summer baking or simply less accessible. The basic concept is brilliantly simple: layers of crisp cookies or wafers are softened by rich cream, creating a cake-like texture as it chills. This transformation is pure magic, turning ordinary pantry staples into an extraordinary dessert without a single moment of baking. The beauty of an icebox cake lies in its minimal effort and maximum reward, making it a beloved staple in homes across generations. They are incredibly versatile, adaptable to countless flavor combinations, and always a crowd-pleaser, proving that sometimes, the simplest desserts are the most satisfying.
Why Our Condensed Milk Whipped Cream Makes All the Difference
While traditional icebox cakes often feature a standard whipped cream, our recipe introduces a delightful twist: a whipped cream sweetened with condensed milk. This seemingly small alteration profoundly impacts the dessert’s profile. Sweetened condensed milk not only provides a creamy, rich sweetness that perfectly complements the chocolate wafers but also adds incredible stability to the whipped cream, preventing it from weeping or deflating. The result is a uniquely smooth, intensely flavorful, and wonderfully fluffy cream that holds its shape beautifully and melts in your mouth. This special whipped cream eliminates the need for granulated sugar, ensuring a balanced sweetness that enhances, rather than overwhelms, the chocolatey goodness of the wafers. It’s a game-changer for anyone seeking an easy yet impressive dessert that stands out from the crowd, offering a texture and richness that traditional whipped cream simply can’t match.
Icebox Cake FAQs: Your Questions Answered
Chocolate wafer cookies are thin, crisp, and subtly sweet chocolate-flavored biscuits. The most common and widely recognized brand in the United States is Nabisco’s Famous Chocolate Wafers, often found in the baking aisle. These wafers are specifically designed to soften beautifully when layered with cream, creating that quintessential cake-like texture. However, many other brands produce similar chocolate wafers, which can be found online or in specialty grocery stores. If you find yourself struggling to locate these specific wafers, don’t fret! One of our recipe testers successfully substituted these homemade chocolate cookies, proving that flexibility is key in the kitchen. The goal is a thin, crispy chocolate cookie that will absorb the cream and soften beautifully during chilling, contributing to the overall integrity and flavor of the icebox cake.
The possibilities are endless and deliciously tempting! This decadent sweetened condensed milk whipped cream is too good to waste. Its rich, creamy texture makes it a versatile topping or filling for almost any sweet treat. You can generously dollop it on top of classic Sunday morning pancakes or fluffy waffles for an extra special breakfast or brunch. It’s also fantastic with angel food cake, delicate shortcakes, or paired with fresh berries and other fruits for a lighter dessert. For a quick and easy indulgence, spoon it inside crepes, serve it alongside chilled puddings, or simply enjoy it straight from the bowl with a spoon – we won’t tell! Don’t let a single spoonful go to waste!
Absolutely! This icebox cake freezes beautifully, making it an excellent make-ahead dessert for future enjoyment or for portioning out leftovers. To freeze, first ensure the cake has been thoroughly chilled overnight as per the recipe instructions. This initial chilling helps the cake set completely. In the morning, wrap the entire cake tightly in plastic wrap, then wrap it again in a second layer of plastic wrap or aluminum foil to ensure it’s completely airtight. This double-layer protection helps prevent freezer burn and keeps the cake fresh, preserving its texture and flavor. It can be safely frozen for up to one month. When you’re ready to serve, simply transfer the cake from the freezer to the refrigerator a few hours beforehand to allow it to thaw gently and evenly, then decorate and enjoy its creamy goodness.
Once assembled and thoroughly chilled, your icebox cake will generally last for 3-4 days in the refrigerator when covered properly. The cookies will continue to soften, and the flavors will meld beautifully over this time, often improving on the second day. While it remains delicious and perfectly edible up to day 4, some testers noted that the cream might start to separate slightly near the bottom after the second day, though this does not affect the taste significantly. For the best texture and freshest appearance, it’s ideal to enjoy it within the first two days after its initial chill. Always keep it well-covered to prevent it from absorbing refrigerator odors and to maintain its moisture.
A standard 9-by-5-inch (23-by-13-cm) loaf pan is perfect for this icebox cake recipe. Its rectangular shape makes it exceptionally easy to line with plastic wrap, which is crucial for effortless removal. The dimensions of the loaf pan also lend themselves well to arranging the chocolate wafers vertically, allowing you to create those beautiful, distinct striped layers when the cake is sliced. The depth of the loaf pan ensures sufficient height to accommodate several layers of cookies and the rich cream mixture. If you don’t have a loaf pan, a similar-sized rectangular container or even an 8×8 inch square pan could work, though you might need to adjust the cookie arrangement and potentially cut some wafers to fit neatly.
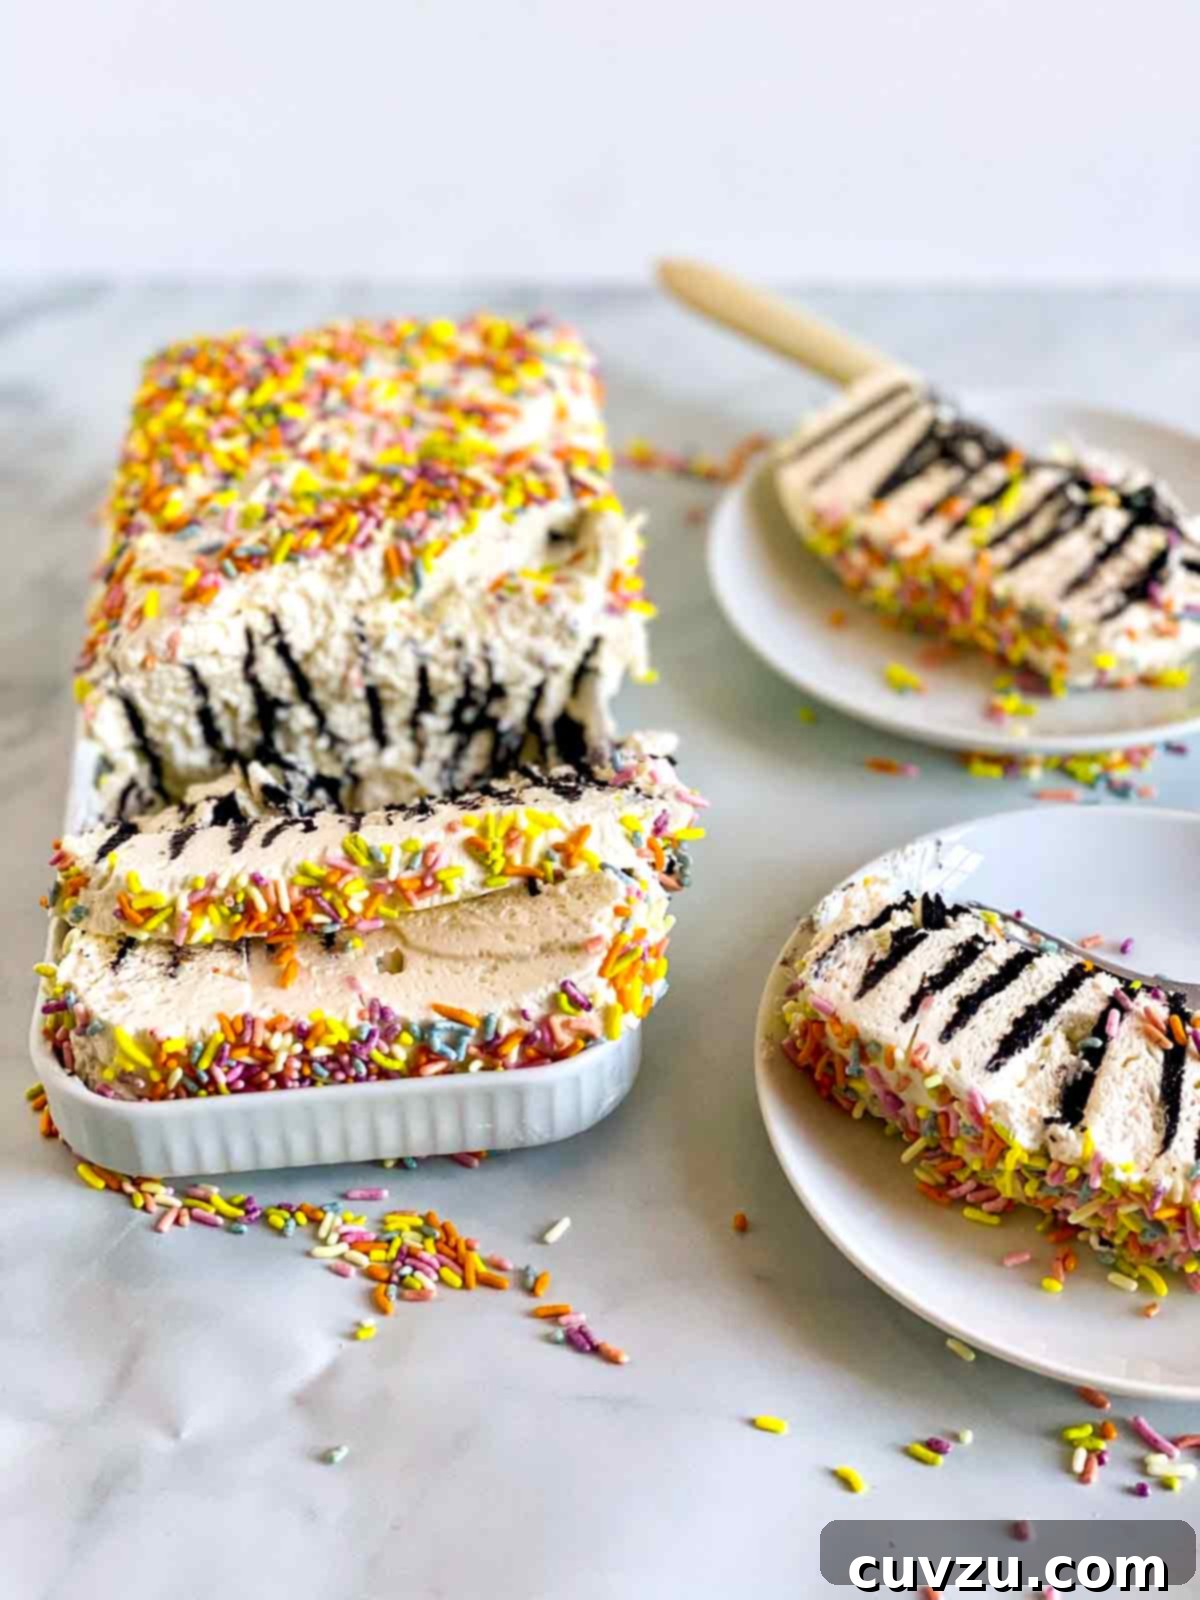
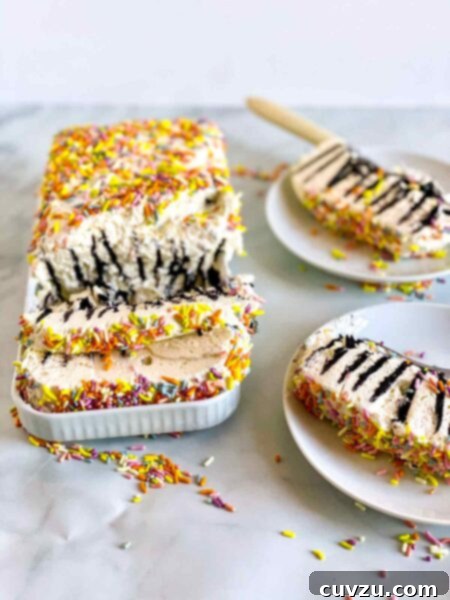
Icebox Cake with Condensed Milk Whipped Cream
This easy icebox cake comes together in just 20 minutes of active prep time and requires only 5 simple ingredients. A truly fuss-free dessert, it’s perfect for warm weather or when you need an impressive treat without the baking.
Recipe by David Leite
Ingredients
- 3 cups heavy cream, chilled
- 3/4 cup full-fat sweetened condensed milk, at room temperature
- 1 teaspoon vanilla extract
- 9 ounces chocolate wafer cookies (such as Nabisco Famous Chocolate Wafers)
- Rainbow sprinkles, for decorating (optional, but highly recommended for a classic look)
Instructions
- Prepare the Pan: Line a 9- by 5-inch (23- by 13-cm) loaf pan with plastic wrap, ensuring the wrap hangs generously over both the short and long sides of the pan. You may need two overlapping pieces of plastic wrap to cover the pan completely and create “handles” for easy cake removal later.
- Whip the Cream Mixture: In the bowl of a stand mixer fitted with the whisk attachment (or using a hand mixer with a large bowl), combine the thoroughly chilled heavy cream, room temperature full-fat sweetened condensed milk, and vanilla extract. Whisk on medium-high speed until medium peaks form, typically taking 4 to 6 minutes. The cream should be thick and hold its shape but still be smooth and luscious, not stiff or curdled.
- Assemble the First Layer: Position the prepared loaf pan in front of you with one of its short sides closest to you. Scoop approximately three-quarters of the whipped cream mixture into the pan. Begin arranging the chocolate wafers vertically into the cream, pressing them gently. Arrange them like dominoes in short, tight rows that stretch from one long side of the pan to the other. Ensure they are snugly packed to minimize gaps and create beautiful, uniform layers when sliced.
- Finish Layering and Chill: Continue layering the wafers until you run out of cookies, making sure they are well-embedded in the cream. Once all cookies are in place, cover the rows generously with the remaining whipped cream. Smooth the top with an offset spatula or the back of a spoon to create an even surface. Refrigerate the assembled cake for a minimum of 6 to 8 hours, or preferably overnight (up to 24 hours), to allow the chocolate wafers to soften fully and the flavors to meld beautifully. Note: You may have a small amount of extra whipped cream, which can be enjoyed separately or used as a topping for other desserts.
- Unmold, Decorate, and Serve: Once thoroughly chilled, invert the loaf pan onto your chosen serving platter. Carefully remove the loaf pan and gently peel away the plastic wrap. Decorate the top of the cake with vibrant rainbow sprinkles (or your preferred topping, such as chocolate shavings or fresh berries). For perfectly clean slices, dip a sharp knife in hot water and wipe it clean between each cut. Serve immediately and enjoy the creamy, cake-like texture!
Adapted From

jessiesheehanbakes.com
Buy On Amazon
Nutrition Facts (per serving)
Serving Size: 1 slice
- Calories: 357 kcal
- Carbohydrates: 28 g
- Protein: 5 g
- Fat: 26 g
- Saturated Fat: 16 g
- Monounsaturated Fat: 7 g
- Cholesterol: 74 mg
- Sodium: 164 mg
- Fiber: 1 g
- Sugar: 20 g
Nutrition information is automatically calculated and should be used as an approximation.
Tried this recipe?
We’d love to see your creations! Mention @leitesculinaria or tag #leitesculinaria on Instagram!
Pro Tips for the Ultimate Icebox Cake Experience
Crafting the perfect icebox cake is all about understanding a few key principles that ensure maximum flavor and ideal texture. Follow these expert tips for a truly unforgettable dessert:
- Chilling is Critical: The most crucial step is allowing ample chill time. The recommended 6-8 hours (or overnight) is absolutely essential for the chocolate wafers to fully absorb moisture from the cream and transform into a soft, homogeneous, cake-like consistency. Rushing this step will result in crunchy, unyielding cookies that are difficult to slice and less pleasant to eat. Patience truly pays off here; consider making it the day before you plan to serve.
- Temperature Matters: Ensure your heavy cream is very cold before whipping. Cold cream whips up faster, achieves a firmer, more stable peak, and maintains its volume longer. Conversely, have your sweetened condensed milk at room temperature. This helps it blend smoothly and evenly into the cold cream without causing the mixture to seize or form lumps, ensuring a silky-smooth final texture.
- Whip to Medium Peaks: Pay attention to the consistency of your whipped cream mixture. You’re looking for medium peaks – where the cream holds its shape when the whisk is lifted, but the tip curls over slightly. Be careful not to over-whip, as this can result in a grainy or butter-like texture and potentially cause the cream to separate during the extended chilling period.
- Strategic Wafer Placement: Arranging the wafers vertically in the loaf pan is key to achieving those striking striped layers when the cake is sliced. This method allows the cream to permeate each cookie evenly. Pack them snugly together, leaving minimal gaps between wafers, and ensure each cookie is well-surrounded by cream. This facilitates even softening and a cohesive structure.
- Clean Slices Every Time: For perfectly neat, photogenic slices, especially if serving to guests, use a long, sharp knife. Dip the knife in hot water before each cut and wipe it clean with a damp cloth or paper towel. The warm blade glides effortlessly through the chilled cake, preventing crumbling, smearing, and ensuring a beautifully defined presentation.
- Embrace Customization: While rainbow sprinkles offer a charming, classic touch, don’t hesitate to experiment with other toppings and flavor additions. Chocolate shavings, fresh seasonal berries, a rich drizzle of homemade caramel or chocolate sauce, toasted coconut flakes, or chopped nuts can elevate both the visual appeal and flavor complexity of your cake, allowing you to tailor it to your personal taste or occasion.
Creative Variations and Delicious Customizations
The inherent simplicity and delicious foundation of this icebox cake make it incredibly versatile. Once you’ve mastered the classic version, the culinary possibilities for customization are endless. Here are some inspiring ideas to make this dessert uniquely yours:
Cookie Swaps:
- Nilla Wafers & Banana Slices: As one tester brilliantly suggested, replace chocolate wafers with Nilla wafers and layer in thin slices of ripe banana. This creates a delightful, comforting banana pudding-inspired icebox cake, perfect for a taste of the South.
- Graham Crackers: For a slightly different texture and a hint of honeyed sweetness, use graham crackers. You could even lean into a “S’mores” theme by adding a touch of marshmallow fluff to the cream and topping with mini toasted marshmallows and a drizzle of chocolate sauce.
- Homemade Cookies: If you have the time and desire for an extra special touch, using homemade chocolate cookies (like those linked in our FAQ section) will provide a deeper, more artisanal chocolate flavor and texture that truly elevates the cake.
- Ginger Snaps: For a warming, spiced twist, especially appealing in the fall or winter months, use crisp ginger snaps. Their spicy kick provides a wonderful contrast to the sweet, creamy filling.
- Biscoff Cookies: For a caramel-like, spiced flavor profile, consider using Biscoff (speculoos) cookies. Their distinct taste would pair beautifully with the sweetened condensed milk cream.
Whipped Cream Enhancements:
- Coffee Infusion: For a subtle mocha flavor that pairs wonderfully with chocolate, add 1 to 2 teaspoons of instant espresso powder (or strong instant coffee) to the heavy cream mixture before whipping.
- Liqueur Boost: A tablespoon of Kahlúa, Baileys Irish Cream, or another coffee or cream liqueur can add an elegant adult twist and depth of flavor to the whipped cream.
- Citrus Zest: For a brighter, fresher profile that cuts through the richness, incorporate 1 teaspoon of finely grated orange or lemon zest into the cream mixture.
- Cream Cheese or Mascarpone: For an even richer, tangier, and more stable cream, consider gently folding in 4 ounces of softened cream cheese or mascarpone after the heavy cream has reached medium peaks. This also adds a luxurious mouthfeel.
- Peanut Butter Swirl: Swirl a few tablespoons of smooth peanut butter into a portion of the whipped cream for a chocolate-peanut butter dream cake.
Topping Transformations:
- Fresh Fruit Medley: Macerated strawberries, raspberries, sliced bananas, or even thinly sliced mango or kiwi are natural, refreshing complements to the rich chocolate and cream.
- Chocolate Overload: Indulge your inner chocoholic with elegant chocolate curls, mini chocolate chips, a dusting of cocoa powder, or a rich homemade chocolate ganache drizzle.
- Nutty Crunch: Toasted chopped pecans, walnuts, slivered almonds, or salted peanuts provide a satisfying textural contrast and depth of flavor.
- Caramel Drizzle: A homemade or high-quality store-bought caramel sauce is always a decadent addition, especially when paired with a pinch of sea salt.
- Toasted Coconut Flakes: For a tropical dimension and added texture, sprinkle generously with toasted unsweetened coconut flakes.
What Our Recipe Testers Had to Say
We tasked a panel of enthusiastic recipe testers with trying this Icebox Cake with Condensed Milk Whipped Cream, and their feedback was overwhelmingly positive, highlighting the cake’s ease, nostalgic charm, and irresistible flavor. Here’s what they had to share:
Nadine Bonda
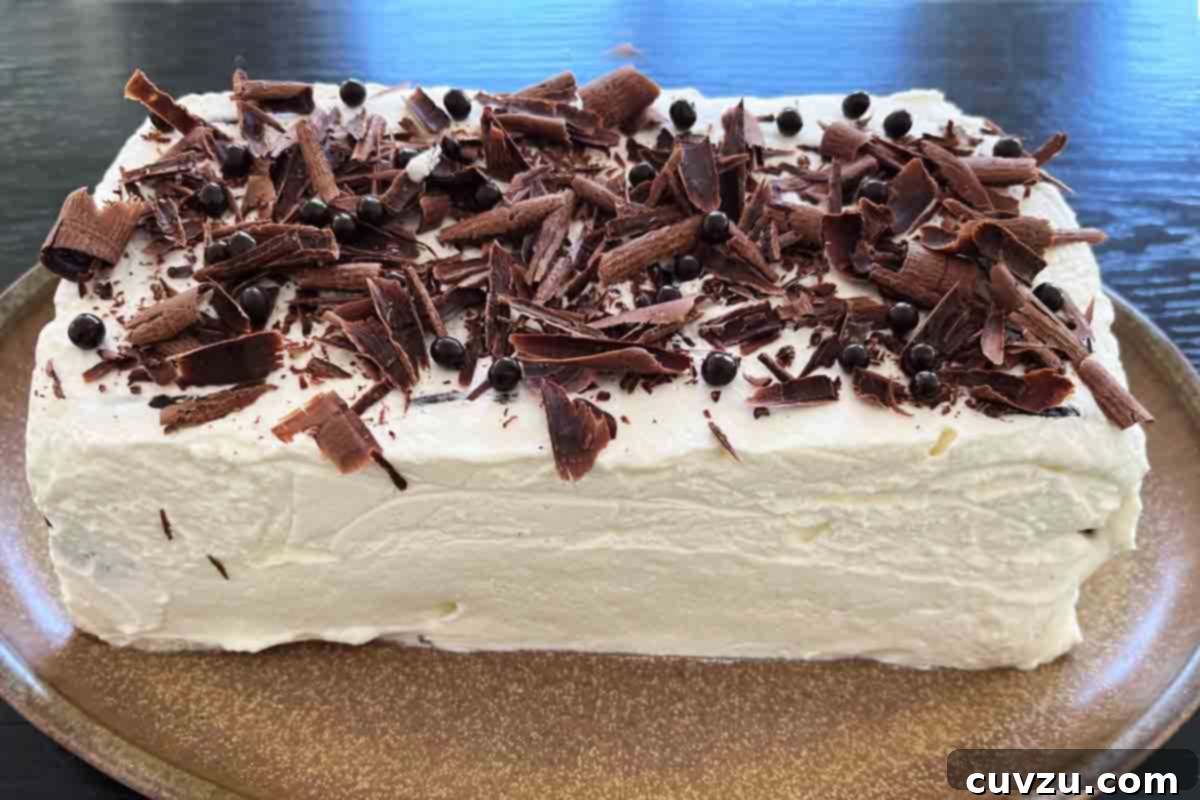
Nadine’s book group absolutely raved about this cake, with members exclaiming, “I feel like I am 8 years old and eating a delicious ice cream sandwich just as it softens,” and “This is my new favorite dessert.” She fondly recalled her mother making similar cakes in her youth and was thrilled to see their resurgence. Nadine found the cake to be wonderfully creamy yet surprisingly light, describing it as beautiful when sliced. Its preparation was incredibly quick and easy, a significant plus, despite the required chilling time. To elevate the presentation for her gathering, Nadine opted for elegant chocolate curls and Valrhona Baking Pearls instead of traditional sprinkles. She confidently declared this icebox cake a definite summer staple in her household.
Jennifer Mallock
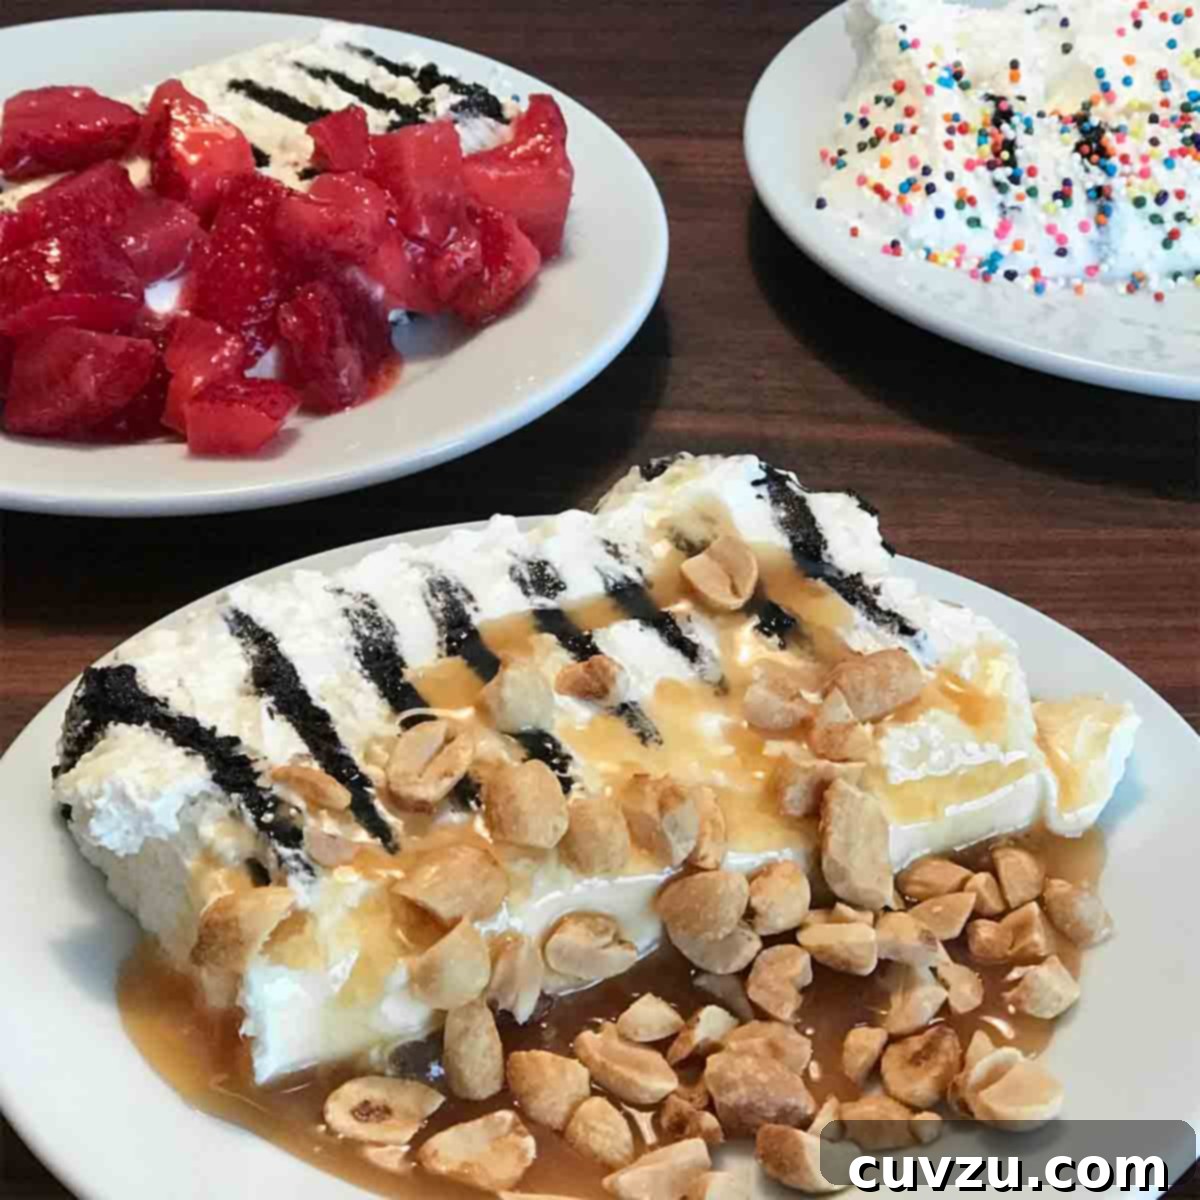
Jennifer enthusiastically emphasized the cake’s effortless nature, reporting that it took a mere 25 minutes from assembly to being placed in the fridge. Her biggest challenge, surprisingly, was simply sourcing plain chocolate wafers. She successfully prepared the cake twice, using both a stand mixer and a hand mixer, achieving equally excellent results each time. Jennifer noted that the icebox cake firms up nicely but does not freeze solid like ice cream, maintaining a delightful, creamy consistency. With about 2 cups of leftover filling from each batch, she enjoyed it on sponge cake with fresh berries. Preferring customized toppings over sprinkles, Jennifer discovered that caramel sauce with salted peanuts and macerated strawberries were absolute favorite additions. She also observed that while the cake held its integrity well for the first day, the cream started to separate slightly near the bottom on day two. Her final verdict was a resounding “Make this. It’s good!” She even sparked an idea for a Nilla wafer and banana variation, highlighting the cake’s adaptability.
Deb Caruso Smith
Deb found this old-fashioned icebox cake to be an absolute “dream to make and a real treat to eat.” She was particularly intrigued by the unique combination of sweetened condensed milk and heavy cream for the filling, initially wondering if it might be overly sweet given no additional sugar was called for. However, her concerns were pleasantly dispelled as she discovered the sweetness was perfectly balanced. The visual appeal of the visible layers of vertical chocolate wafers adorned with rainbow sprinkles evoked a charming, nostalgic appeal, reminding her of classic desserts. Deb praised its impressive simplicity of execution, attractive presentation, and, most importantly, its outstanding flavor and texture. Each bite was described as pillowy, incredibly creamy, and ideally sweetened, with the softened wafers creating a delightful, cake-like consistency that melted in the mouth. It was a universally loved dessert, with some guests even going back for a generous second slice!
Barbara Hinde
While Barbara personally found the cake to be a bit too sweet once it had finished chilling, she enthusiastically reported that her teens and their friends “really, really, REALLY liked it.” She noted that the whipped cream mixture itself, tasted before the chilling process, was lightly sweetened and primarily tasted of fresh cream. However, after the cookies fully absorbed into the cream and softened, they became, in her opinion, “cloyingly sweet,” especially with the added layer of sprinkles. Despite her personal preference for a less sweet dessert, Barbara felt compelled to rate this recipe as a tester’s choice due to its immense popularity and undeniable appeal among the younger demographic, confirming it’s a surefire hit with kids and teenagers.
Greg Crawford
Greg expressed sheer amazement and genuine delight, wondering aloud where this incredible icebox cake had been all his life. He hailed the inclusion of sweetened condensed milk in the whipped cream as “simply genius,” recognizing it as the secret to the dessert’s exceptional flavor and texture. Greg found the recipe incredibly easy to follow, noting that despite the “loooong” wait for the cake to properly chill and set, the results were entirely worth every minute. He even declared it one of the easiest and most satisfying desserts he had ever made, perhaps only second to the absolute simplicity of merely washing fresh fruit. His glowing review firmly establishes this recipe as a must-try for dessert lovers seeking minimal effort with profoundly delicious satisfaction.
Chiyo Ueyama
Chiyo found the icebox cake a “fun to put together” project, humorously comparing it to a summer camp art activity, and ultimately deemed it very tasty. Despite it being her first experience both making and eating an icebox cake, she felt a strong sense of nostalgic simplicity in its composition. She particularly praised how well the wafers absorbed the moisture from the whipped cream without becoming mushy, and confidently affirmed the timeless appeal of the chocolate and vanilla combination. While planning to make it again, Chiyo suggested two thoughtful adjustments for future attempts: first, trying to replace some of the heavy cream (about 1/2 cup) with sour cream or crème fraîche for a pleasant, balancing tartness, a technique she’d enjoyed in other recipes. Second, to add sturdiness to the cake for cleaner slices, she proposed increasing the cookie-to-cream ratio by packing more wafers per row and adding a flat layer of wafers on top to create a “bottom crust,” which she believed would make scooping each slice off the plate much neater.
Adrienne Lee
Adrienne confirmed that this recipe faithfully stays true to the beloved original versions that many cherished in their youth – easy to make and delightfully light on the palate. While she thoughtfully noted that the cake might be “a little bit one note” in its flavor profile, she highlighted that the addition of colorful sprinkles goes a long way in adding much-needed texture and a playful pop of color, significantly enhancing the overall aesthetic and eating experience. Her review reinforces the cake’s enduring classic appeal and simple charm, making it a reliable choice for a straightforward yet satisfying dessert.
Jennifer W.
Jennifer praised this dessert as an exceptionally easy, make-ahead option that’s perfect for summer barbecues or any gathering, noting its minimal prep time and convenient, compact footprint in the fridge. After an unsuccessful search at two different grocery stores for the classic Nabisco Famous Chocolate Wafers, she ingeniously decided to make homemade chocolate cookies instead. She was so glad she did, as she enthusiastically reported that the homemade cookies imparted significantly more chocolate flavor. She even made two different sizes: 2-inch cookies for the icebox cake and 3-inch versions to use for impromptu ice cream sandwiches. Jennifer discovered that the cake needed more than the initial 6 hours of chilling, as the cookies were still quite crispy and too hard to cut through. After sitting overnight, the cookies had softened to perfection. She found the cake easy to remove from the pan and was able to smooth the edges beautifully with a metal spatula for a polished presentation. A generous serving of fresh strawberries was, in her opinion, the perfect complement to this tasty treat.
Conclusion: Your New Go-To No-Bake Dessert
This Icebox Cake with Condensed Milk Whipped Cream isn’t just a recipe; it’s an invitation to simple pleasure, a delightful trip down memory lane, and a testament to how effortlessly delicious desserts can be. With its minimal ingredients, quick assembly, and incredible flavor transformation during the essential chilling period, it truly is a dessert that pleases all palates and simplifies your entertaining. Whether you’re a seasoned baker looking for a fuss-free option or a kitchen novice seeking an impressive yet foolproof treat, this recipe guarantees success and smiles. Indulge in its creamy, cake-like layers, experiment with your favorite toppings and variations, and prepare to make this delightful no-bake wonder a regular in your dessert rotation. Embrace the magic of a dessert that practically makes itself, leaving you more time to enjoy with friends and family!