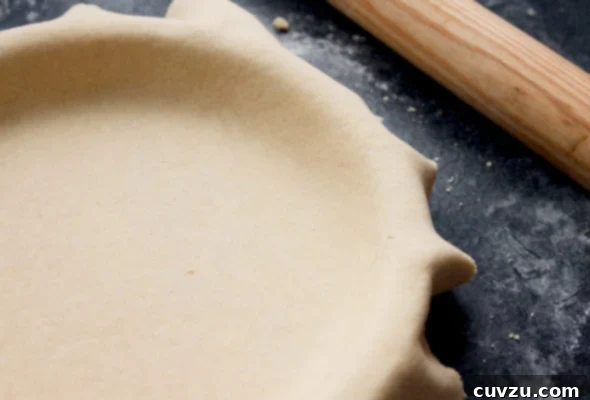
In the illustrious world of French gastronomy, few things hold as much reverence as a perfectly crafted pastry. Among the pantheon of classic doughs, Pâte Brisée stands out as a fundamental, versatile, and utterly essential component for both sweet and savory masterpieces. This particular recipe isn’t just any Pâte Brisée; it’s a cherished family secret passed down from the grandmother of the renowned French chef Jean-Georges Vongerichten himself. If a recipe endures through generations and continues to be the foundation for a Michelin-starred chef’s creations, you know it’s truly exceptional.
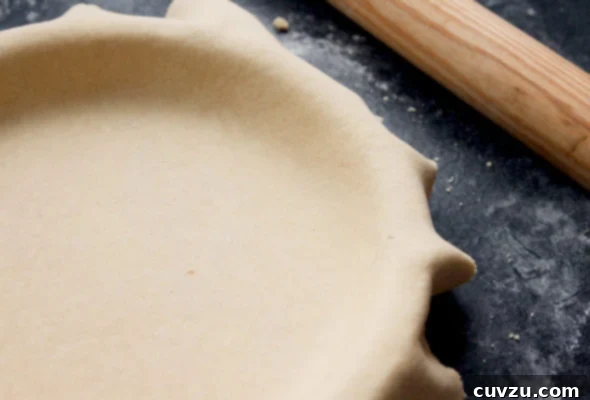
The Ultimate Pâte Brisée: A Timeless French Pastry Recipe from Jean-Georges’ Grandmother
For generations, French home cooks and professional chefs alike have relied on the simple elegance of Pâte Brisée. This “broken pastry” dough forms the ideal base for everything from delicate fruit tarts bursting with seasonal flavors to hearty, comforting quiches. Jean-Georges Vongerichten eloquently shares his foundational experience with this dough: “My grandmother taught me how to make this basic pastry, called pâte brisée, when I was young. The one thing I learned simply by eating her endless variations on delicious tarts for dinner every night is that this dough can be used for just about anything—sweet or savory.” This testament speaks volumes about the recipe’s reliability and incredible adaptability.
What is Pâte Brisée? Understanding the Foundation of French Tarts and Pies
Pâte Brisée, directly translating to “broken pastry,” is a classic French shortcrust pastry renowned for its tender, flaky, and rich texture. Unlike puff pastry, which relies on distinct layers of butter, Pâte Brisée incorporates cold butter and often a bit of shortening directly into the flour, creating a more cohesive yet still crumbly and delicate dough. The “broken” aspect refers to the technique of cutting the cold fat into the flour, resulting in small, uneven pieces of fat that, when baked, melt and release steam, creating pockets of air that give the crust its signature flakiness. Its neutral flavor profile, subtly enhanced by butter, makes it an incredibly versatile canvas for a myriad of fillings.
While often compared to American pie crust, Pâte Brisée tends to be less flaky but more tender and melt-in-your-mouth due to the higher fat content and specific mixing technique. It provides a robust yet delicate foundation that doesn’t overpower the filling but rather complements it, making it the preferred choice for sophisticated French tarts and quiches. Whether you’re aiming for a rustic apple tart, an elegant chocolate ganache tart, or a savory quiche Lorraine, mastering Pâte Brisée is a crucial step in elevating your baking.
Grand-mère Knows Best: The Enduring Legacy of Traditional French Baking
The moral of Jean-Georges’ story is clear: Grand-mère, or grandmother, is always right, especially when it comes to the timeless art of crafting rich, buttery, and impeccably flaky pastry. This isn’t just a charming anecdote; it’s a reflection of the deep-seated culinary traditions in France, where recipes are often perfected over generations and passed down with love and meticulous care. A grandmother’s recipe often embodies simplicity, efficiency, and a profound understanding of ingredients—qualities that many modern recipes, despite their complexities, sometimes miss.
There’s an undeniable magic in a recipe that has stood the test of time, proving its worth through countless family meals and special occasions. Jean-Georges Vongerichten’s continued reliance on his grandmother’s Pâte Brisée recipe is the highest endorsement one can give. It speaks to a fundamental truth in cooking: sometimes, the most basic and time-honored methods yield the most profound and delicious results. Embracing this recipe isn’t just about baking a tart; it’s about connecting with a rich culinary heritage and appreciating the wisdom of those who came before us.
Mastering the Ingredients: Secrets to a Perfect Pâte Brisée
The secret to a truly outstanding Pâte Brisée lies not just in the technique, but in understanding the role of each ingredient and ensuring they are of the highest quality and at the correct temperature. Precision and patience are your best allies here.
- All-Purpose Flour: This forms the structure of your pastry. While specialty pastry flour can be used, standard all-purpose flour works wonderfully. The key is not to overmix, which develops gluten and can lead to a tough crust. A little extra flour for dusting your work surface is also essential.
- Kosher Salt: Salt is more than just a seasoning; it enhances the flavor of the butter and balances the richness of the dough. It also plays a subtle role in strengthening the gluten network, but its primary function here is flavor.
- Unsalted Butter (Preferably Cultured): Butter is the heart of Pâte Brisée, contributing to its rich flavor and flakiness. Using unsalted butter allows you to control the salt content precisely. Cultured butter, common in French baking, has a slightly tangier, more complex flavor and a higher fat content, resulting in an even more luxurious crust. Crucially, the butter MUST be very cold, cut into small pieces. Cold butter melts slowly in the oven, releasing steam and creating those desirable flaky layers. If the butter is too warm, it will incorporate too fully into the flour, leading to a dense, tough dough.
- Vegetable Shortening: While butter provides flavor, vegetable shortening contributes significantly to tenderness and flakiness. Shortening has a higher melting point than butter, which means it stays solid longer during baking, creating more distinct pockets of steam and a flakier texture. Like butter, it must be well chilled and cut into small pieces. The combination of butter and shortening offers the best of both worlds: flavor from butter, and superior tenderness and flakiness from shortening.
- Ice-Cold Water: Water is essential for binding the dough together. Using ice-cold water is non-negotiable. It helps keep the butter and shortening chilled, preventing them from melting prematurely. It also limits gluten development, which is critical for a tender crust. Start with the recommended amount and add more only if absolutely necessary, a teaspoon at a time, until the dough just comes together.
- Large Egg: The egg yolk adds richness and helps bind the dough, while the egg white adds a little moisture and helps create a slightly crisper crust. The egg also contributes to the golden color of the baked pastry. Ensure the egg is also cold to maintain the low temperature of your dough.
By respecting these ingredients and their cold temperatures, you lay the foundation for a Pâte Brisée that is tender, buttery, and exquisitely flaky—a true testament to Grand-mère’s enduring wisdom.
Classic French Pâte Brisée Recipe
This exceptional Pâte Brisée recipe, passed down through generations from Jean-Georges Vongerichten’s grandmother, is a simple yet truly French version of what’s often called “daily pastry.” Its rich, buttery, and flaky texture makes it perfect for a wide array of sweet or savory culinary creations, forming the perfect foundation for any tart or pie.
Recipe by David Leite (adapted from Jean-Georges Vongerichten’s family recipe)
Ingredients
- 1 3/4 cups all-purpose flour, plus more for dusting your work surface
- 1/2 teaspoon kosher salt
- 6 tablespoons (3/4 stick) unsalted butter, preferably cultured, cut into 1/2-inch pieces and well chilled
- 2 tablespoons plus 1 teaspoon vegetable shortening, cut into 1/2-inch pieces and chilled
- About 2 tablespoons ice-cold water
- 1 large egg
Instructions
-
Prepare the Dough: In the bowl of a stand mixer fitted with the paddle attachment, combine the all-purpose flour, kosher salt, the well-chilled pieces of unsalted butter, and the chilled vegetable shortening. Begin mixing on low speed. Continue to mix until the ingredients are thoroughly combined and the mixture resembles coarse crumbs, with some pea-sized pieces of butter and shortening still visible. This texture is vital for creating a flaky crust. With the machine still running on low speed, gradually add the 2 tablespoons of ice-cold water and the large egg. Beat just until the dough starts to come together in large, shaggy clumps. It’s crucial not to overmix at this stage; overworking the dough will develop too much gluten, resulting in a tough, chewy crust rather than a tender, flaky one.
-
Chill the Dough: Carefully remove the dough from the mixer bowl. Divide the shaggy dough into two equal portions. Gently press each portion into a flat, round disk, approximately 1 inch thick. This shape will make it easier to roll out later. Wrap each disk tightly in plastic wrap to prevent any drying out. Refrigerate the dough for at least 1 hour, or until it is firm to the touch. This chilling period is essential for several reasons: it allows the gluten to relax, which prevents the crust from shrinking excessively during baking, and it solidifies the fats, contributing to that desirable flaky texture. You can refrigerate the dough for up to 3 days. If storing longer, allow it to sit at room temperature for about 15 minutes before rolling to make it more pliable. Alternatively, the dough can be frozen for up to 1 month; thaw it overnight in the refrigerator before proceeding.
-
Roll Out the Dough: On a lightly floured work surface, using a lightly floured rolling pin, take one piece of the chilled dough and roll it out into a 10-inch round. Aim for an even thickness, about 1/8 to 1/4 inch. Work efficiently to keep the dough as cold as possible. Carefully transfer the rolled dough to an 8-inch round fluted tart pan with a removable bottom. Gently press the dough against the bottom and up the sides of the pan, ensuring it fits snugly into all the flutes without stretching it. Stretching the dough can cause it to shrink during baking. Trim any excess dough from the edges using a sharp knife or by pressing the rolling pin over the top of the pan. Reserve the second disk of dough for another tart or pie, or store it as directed.
-
Prepare for Blind Baking: To prevent the crust from bubbling up and shrinking during the initial bake, line the dough-lined tart shell with aluminum foil or parchment paper. Press the foil or paper gently against the dough, covering the bottom and sides completely. Fill the lined crust with dried beans, uncooked rice, or ceramic pie weights. These weights provide the necessary pressure. Place the weighted crust in the freezer overnight, or until it is very hard. This deep freeze helps further prevent shrinkage and promotes a more even bake, resulting in a perfectly crisp crust.
-
Preheat Oven: When you’re ready to blind bake the tart shell, preheat your oven to 375°F (190°C). Ensure your oven is fully preheated for consistent baking results.
-
Blind Bake the Crust: Place the frozen, weighted crust directly into the preheated oven. Bake for approximately 20 minutes, or until the edges of the crust appear set and are just starting to turn a light golden color. Carefully remove the tart pan from the oven. Gently lift out the foil along with the dried beans or pie weights. Using a fork, gently poke holes evenly across the bottom of the crust. This step is crucial as it allows any trapped steam to escape, preventing the bottom from puffing up. Return the crust to the oven and continue baking for another 8-15 minutes, or until the bottom is set and the entire crust is a delicate blonde color. The exact time will depend on your oven and your desired level of crispness. Let the blind-baked tart shell cool completely in the pan on a wire rack before filling. This ensures it maintains its crisp structure and prevents a soggy bottom once filled.
Adapted From
Home Cooking with Jean-Georges
Buy On Amazon
Nutrition Information (Approximate Per Serving)
Calories: 110 kcal
Carbohydrates: 10 g
Protein: 2 g
Fat: 7 g
Saturated Fat: 3 g
Monounsaturated Fat: 2 g
Trans Fat: 1 g
Cholesterol: 24 mg
Sodium: 78 mg
Fiber: 1 g
Sugar: 1 g
Nutrition information is automatically calculated and should be used only as an approximation. For precise dietary needs, please consult a qualified professional or use an accurate nutrition calculator.
The Versatility of Pâte Brisée: Sweet and Savory Delights
As Jean-Georges Vongerichten’s grandmother knew so well, the beauty of Pâte Brisée lies in its incredible versatility. Its balanced, buttery flavor makes it the perfect foundation for an endless array of culinary creations, easily adapting to both sweet and savory fillings without missing a beat.
Sweet Applications:
- Classic Fruit Tarts: Imagine a vibrant strawberry tart, a rustic apple galette, or a juicy peach tart, all cradled in this flaky, tender crust. The richness of the Pâte Brisée beautifully offsets the sweetness and acidity of fresh fruits. A simple crème pâtissière (pastry cream) or almond frangipane can further elevate these desserts.
- Chocolate and Custard Tarts: For something richer, Pâte Brisée is ideal for holding decadent chocolate ganache or creamy custards like a vanilla bean tart. Its sturdy yet delicate structure prevents it from becoming soggy, even with moist fillings.
- Nut Tarts: From pecan pie to a sophisticated hazelnut tart, the buttery crust provides a wonderful textural contrast to the crunch of nuts and sticky, sweet fillings.
Savory Applications:
- Quiches: This is arguably where Pâte Brisée shines brightest in the savory realm. A quiche Lorraine, with its smoky bacon and custardy filling, is an iconic dish that depends on a perfect Pâte Brisée base. Beyond the classic, consider mushroom and Gruyère quiche, spinach and feta, or roasted vegetable quiches.
- Savory Tarts and Pies: Think outside the quiche box. Pâte Brisée can form the base for savory hand pies, individual mini tarts filled with caramelized onions and goat cheese, or a grand chicken pot pie. Its ability to hold up to moisture and dense fillings makes it an excellent choice for a substantial main course or appetizer.
- Tartlets: For elegant appetizers, Pâte Brisée can be rolled thin and pressed into mini tartlet pans, then filled with anything from smoked salmon and cream cheese to sun-dried tomato and basil pesto.
The neutral yet flavorful nature of this dough means you can infuse it with additional herbs or spices if desired, tailoring it precisely to your filling. A pinch of black pepper for a savory crust or a hint of citrus zest for a sweet one can add an extra layer of complexity.
Pâte Brisée Troubleshooting: Common Problems and Solutions
Even with a grandmother’s perfected recipe, baking can sometimes present challenges. Here are some common issues you might encounter with Pâte Brisée and how to troubleshoot them:
- Tough Crust:
- Cause: Overmixing the dough, which develops too much gluten.
- Solution: Mix only until the dough just comes together in shaggy clumps. Stop as soon as the flour is hydrated. Handle the dough as little as possible.
- Crumbly Dough That Won’t Come Together:
- Cause: Not enough liquid, or ingredients weren’t cold enough.
- Solution: Add a tiny amount (1/2 teaspoon at a time) of ice-cold water, kneading just enough to bring it together. Ensure butter and shortening are very cold.
- Shrinking Crust During Baking:
- Cause: Insufficient chilling time, overworking the dough (which tightens gluten), or stretching the dough too much when fitting it into the pan.
- Solution: Always chill the dough for at least an hour, or even overnight. Roll out gently and avoid stretching. Use pie weights and freeze the crust before blind baking, as detailed in the instructions.
- Soggy Bottom:
- Cause: Insufficient blind baking, or a very wet filling.
- Solution: Blind bake the crust thoroughly until the bottom is pale blonde and set, not just the edges. For very wet fillings, consider brushing the blind-baked crust with a thin layer of egg white before the final bake to create a seal, or dust lightly with breadcrumbs before filling.
- Browning Too Quickly:
- Cause: Oven too hot, or crust is too thin.
- Solution: Monitor your oven temperature with an oven thermometer. If the crust is browning too fast, loosely tent it with aluminum foil.
Patience and attention to detail, especially regarding temperature, are key to preventing most Pâte Brisée problems. Don’t be discouraged by initial imperfections; practice truly makes perfect when it comes to pastry.
Storage and Make-Ahead Tips for Pâte Brisée
Pâte Brisée is an excellent candidate for making ahead, which can save a significant amount of time when preparing tarts or pies for entertaining or busy days.
- Refrigerating Unbaked Dough: Once you’ve formed the dough into disks and wrapped them tightly in plastic, they can be stored in the refrigerator for up to 3 days. When ready to use, allow the dough to sit at room temperature for about 15-20 minutes to soften slightly, making it easier to roll without cracking.
- Freezing Unbaked Dough: For longer storage, tightly wrapped dough disks can be frozen for up to 1 month. To thaw, transfer the frozen dough to the refrigerator overnight. Again, let it sit at room temperature for a short period before rolling.
- Freezing Blind-Baked Crusts: You can also blind bake your Pâte Brisée crusts entirely and freeze them. Once cooled completely after blind baking, wrap the crust tightly in plastic wrap and then in aluminum foil. Freeze for up to 2-3 weeks. When ready to use, you can often fill and bake directly from frozen, adding a few minutes to the baking time, or allow it to thaw partially before filling.
- Storing Baked Tarts/Pies: Once filled and baked, the storage method will depend on your specific tart or pie filling. Generally, fruit tarts can be kept at room temperature for a day or two, while custard or cream-based tarts should be refrigerated. Always cover them loosely to prevent moisture buildup.
Having Pâte Brisée prepared in advance means you’re always just a few steps away from a fresh, homemade tart or quiche, making gourmet baking accessible even on short notice.
This Pâte Brisée recipe isn’t just a collection of ingredients and steps; it’s a culinary legacy, a testament to the simple perfection of traditional French baking. By following Jean-Georges Vongerichten’s grandmother’s method, you’re not just creating a pie crust; you’re crafting the foundation for unforgettable meals, echoing centuries of French culinary excellence. Embrace the process, savor the aroma, and delight in the tender, flaky results. Happy baking!
Tried this classic recipe?
Share your culinary creations! Mention @leitesculinaria or tag #leitesculinaria on Instagram! We love seeing your delicious results!