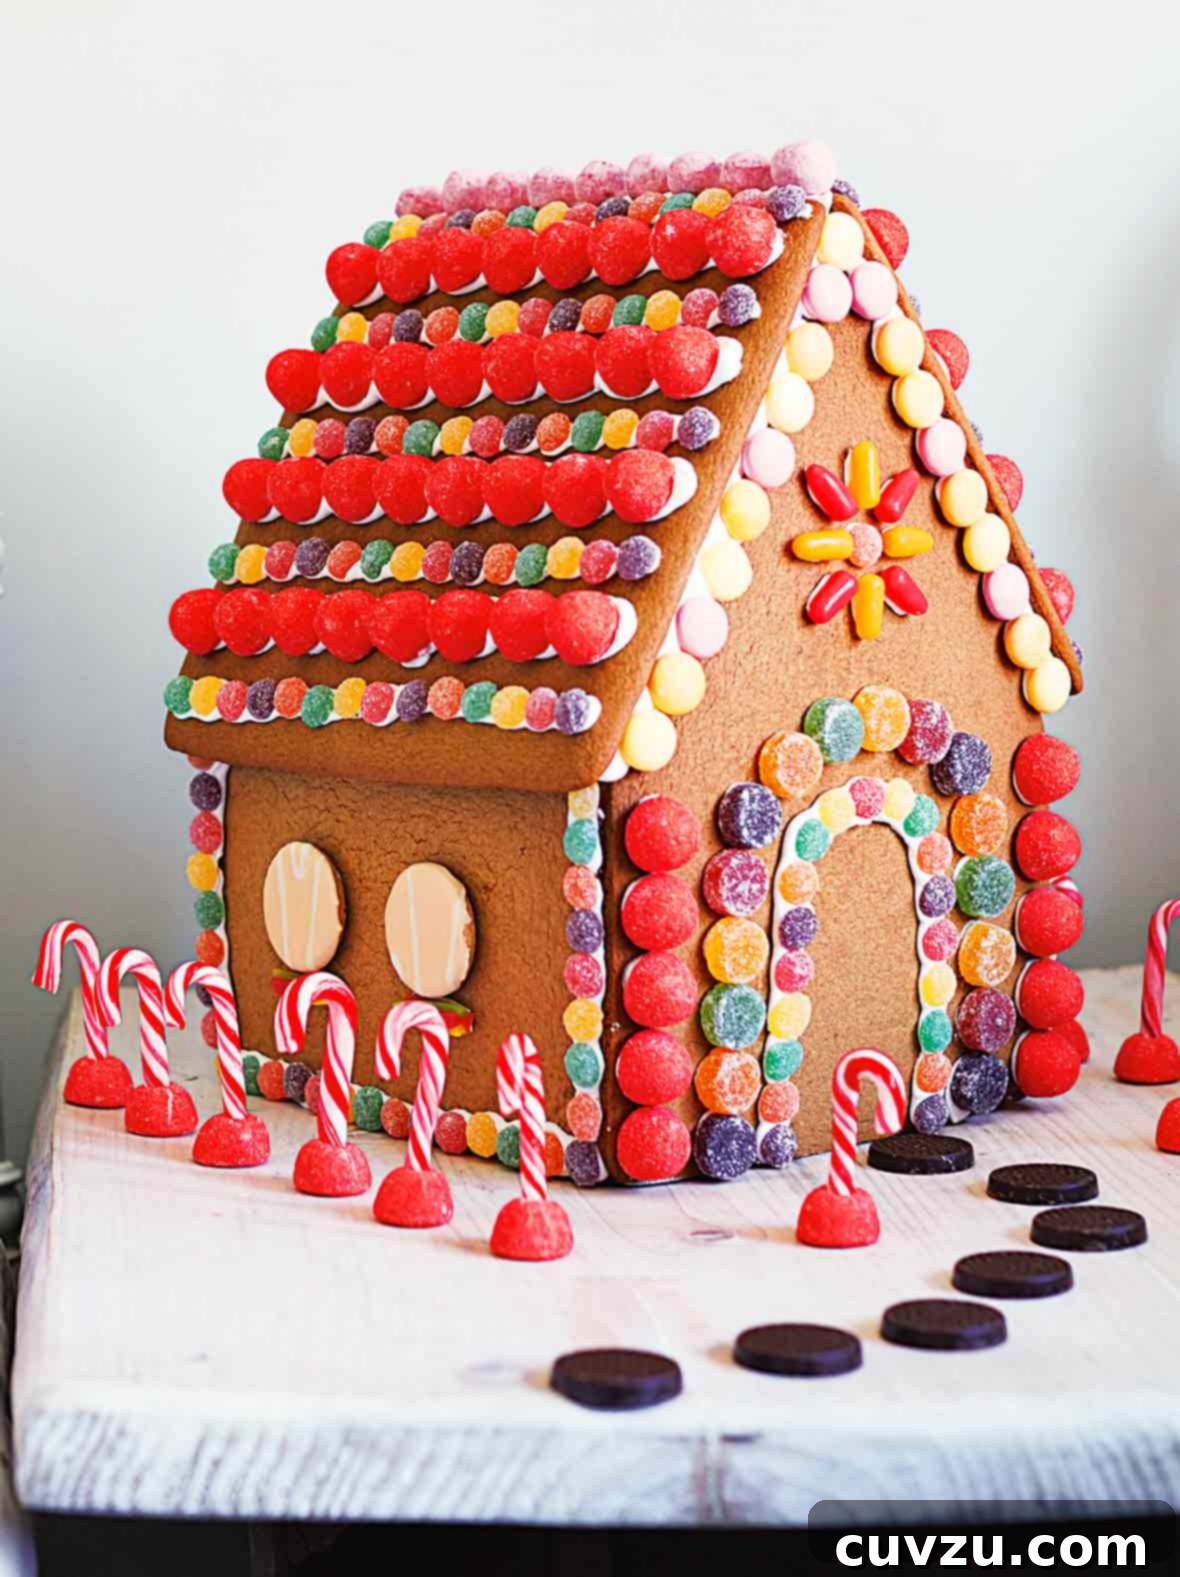
Discover the magic of crafting your very own gingerbread house this holiday season. Far from the intimidating task it might seem, learning how to make a gingerbread house from scratch is a surprisingly straightforward and incredibly rewarding experience. This comprehensive guide will walk you through every step, from baking the perfect gingerbread and preparing a robust caramel glue to assembling your festive structure and decorating it with whimsical flair. Get ready to create a masterpiece that will delight both young and old, making your Christmas truly unforgettable.
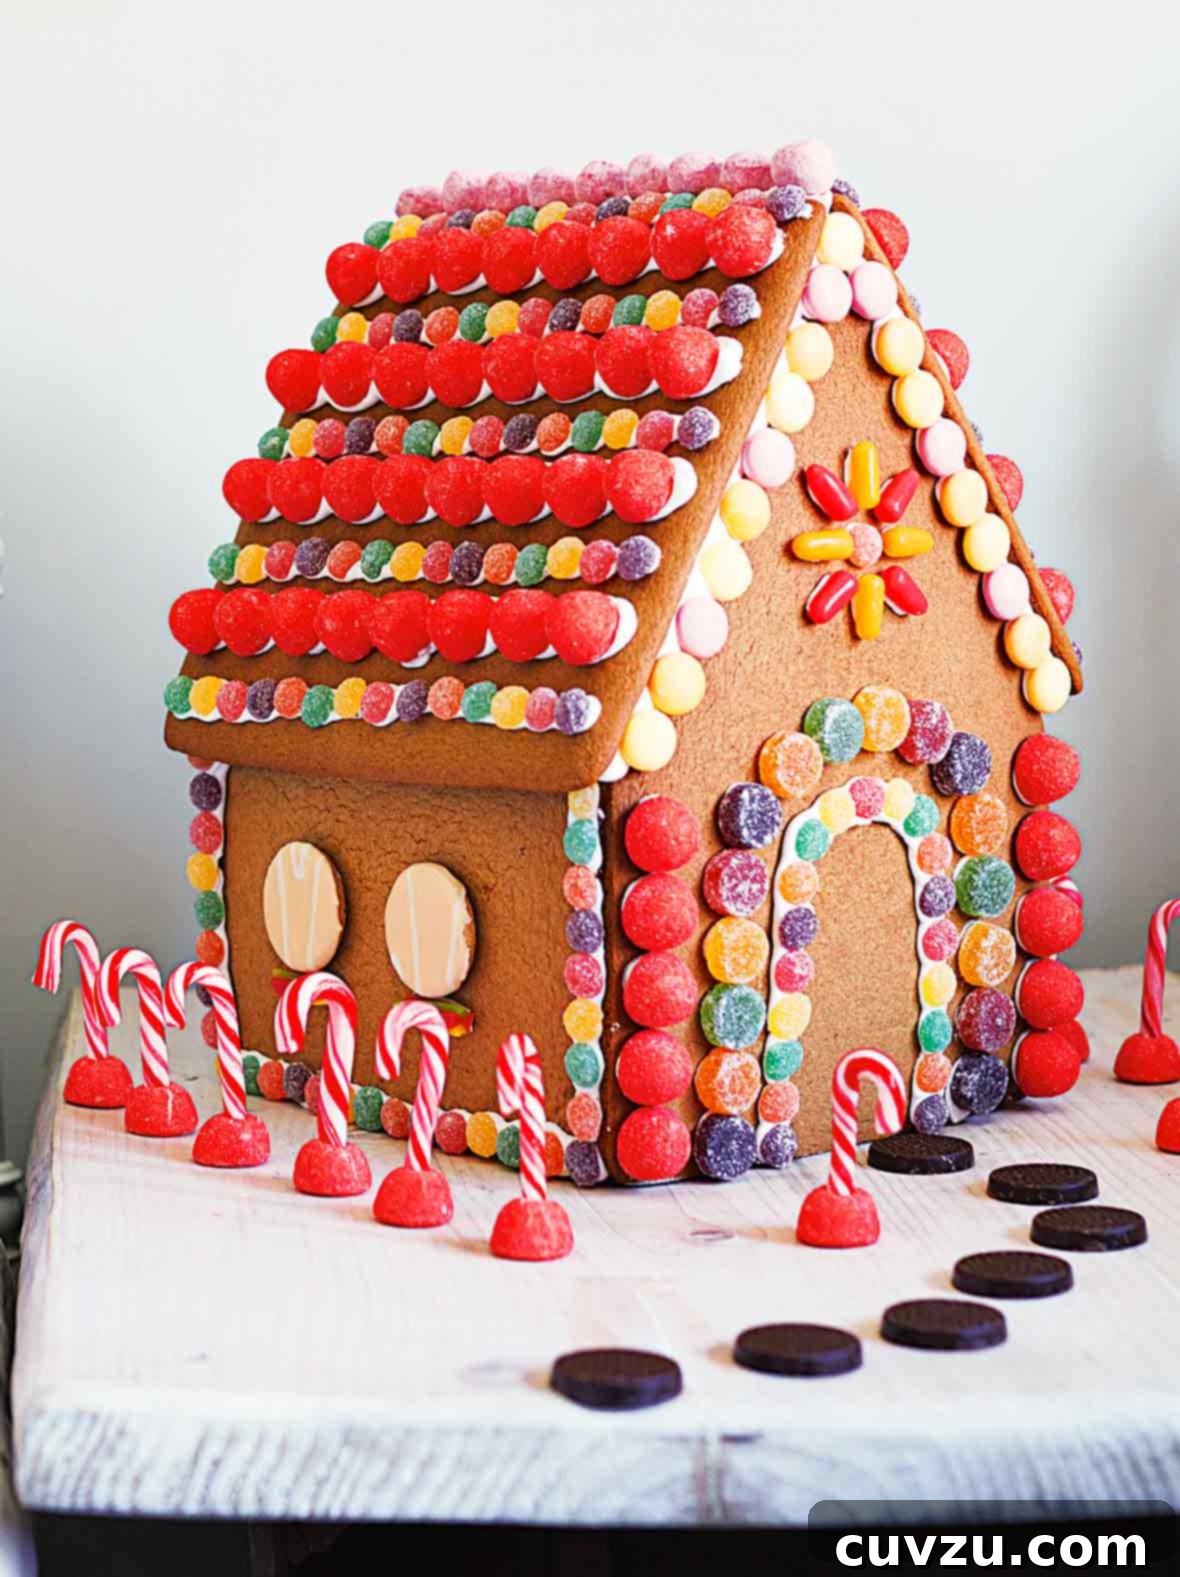
Creating a homemade gingerbread house is more than just a culinary project; it’s a cherished Christmas tradition that brings warmth, spice, and creativity into your home. Forget those flimsy, store-bought kits – with a little patience and a generous amount of festive spirit, you can construct a gingerbread creation worthy of a fairytale. This guide, inspired by the expertise of Angie Zoobkoff and adapted from Leite’s Culinaria, provides everything you need: a reliable recipe, a printable template, and imaginative decorating ideas to bring your edible dream house to life.
How To Make A Gingerbread House
5 / 2 votes
Crafting a gingerbread house is a quintessential Christmas activity, and it’s far simpler than you might think. This guide provides a full recipe, a handy template, and inspiring decorating tips to help you build your perfect festive home.
David Leite
Equipment
- Instant-read candy thermometer
- Sturdy paper or card stock for printing the templates
- Large baking sheets
- Parchment paper
- Sharp knife or pizza cutter
- Rolling pin with guide rings (optional, for even thickness)
- Wire racks for cooling
- Large, low-sided saucepan (preferably a frying pan for easy dipping)
- Piping bags with various nozzles (or resealable plastic bags)
- Spatula or offset spatula
- Cans or jars for support during assembly
- Pastry brush (for applying caramel to roof)
Ingredients
For the Gingerbread House
- 2 recipes Light Gingerbread or Dark Gingerbread Cookie Dough
For the Caramel Glue
- 1 cup granulated sugar
- 1/4 cup cold water
For the Decorations
- 1 batch Royal Icing (potentially 2 batches if heavily decorating)
- Mini candy canes and a wide assortment of colorful sweets and chocolates (e.g., gumdrops, M&M’s, sprinkles, licorice, peppermint candies, pretzels, wafers)
- Confectioners’ sugar (for snow effect)
Instructions
1. Prepare the Stencil and Bake the Gingerbread Pieces
- Print and Prepare the Template: Begin by printing the gingerbread house template on sturdy paper or card stock. If you desire a larger house, feel free to enlarge the template accordingly before printing. Precision here is key for a well-fitting house.
- Preheat Oven: Preheat your oven to 325°F (163°C). Position an oven rack in the center for even baking.
- Roll Out the Dough: On a large sheet of parchment paper, roll out your prepared gingerbread dough to an even thickness of 1/4 inch (6 mm). This consistent thickness is crucial for sturdy walls and roof panels that bake evenly. If you have rolling pin guide rings, now is the time to use them for perfect uniformity.
- Cut House Pieces: Carefully place your printed template pieces onto the rolled-out dough. Using a sharp knife or a pizza cutter, meticulously cut out all the house components (front, back, side walls, and roof panels). While the dough is still on the parchment paper, gently transfer it to a rimmed baking sheet.
- Add Details and Save Scraps: If you wish to add character to your house, use smaller cutters or a knife to create a door and windows. Don’t discard any gingerbread dough scraps! Gather them, re-roll them on a separate piece of parchment, and cut out festive shapes like gingerbread trees, men, or stars to accompany your house. These scraps are also your insurance policy: if a piece of your house breaks during assembly, you’ll have extra dough to quickly bake a replacement. Wrap any remaining dough tightly in plastic wrap and refrigerate for another baking day.
- Chill the Dough: Place the baking sheet with the cut gingerbread dough pieces into the freezer for 10 minutes. This quick chill helps the dough retain its shape and prevents spreading during baking, ensuring sharp, defined edges for easier assembly.
- Bake to Perfection: Bake the gingerbread pieces in the preheated oven. Smaller pieces will typically bake in 10 to 20 minutes, while larger pieces, such as the walls and roof, will require 20 to 25 minutes. Keep a close eye on them; they are ready when the edges turn a beautiful golden brown and the pieces feel firm.
- Cool Completely: Allow the baked gingerbread pieces to cool on the baking sheet for 5 minutes before carefully transferring them to wire racks. Let them cool completely. This step is vital as warm gingerbread is fragile, and proper cooling ensures maximum stability for construction.
2. Create the Caramel Glue
- Prepare for Caramel: Just moments before you plan to begin assembling your gingerbread house, prepare the caramel glue. In a large, low-sided saucepan (a frying pan is ideal as its wider surface makes dipping pieces easier), combine the granulated sugar and cold water.
- Cook the Caramel: Place the pan over medium-high heat. Attach an instant-read candy thermometer to the side of the pan. Heat the sugar and water mixture without stirring. Stirring can cause sugar crystals to form, resulting in a grainy caramel. Continue heating until the mixture registers precisely 320°F (160°C) on the thermometer, which usually takes about 8 minutes. If you don’t have a thermometer, you’ll know the syrup is ready when the sugar has completely dissolved and transformed into a beautiful, light golden-amber color.
- Achieve Right Consistency: Once the desired temperature or color is reached, carefully tilt the pan to gently swirl the syrup, ensuring even coloring. Immediately remove the pan from the heat. Allow the caramel to cool for just a few moments until it slightly thickens to the consistency of warm honey. This thickening makes it easier to work with.
- Safety First: Be aware that caramel is extremely hot and can cause severe burns. **Children should not handle the hot caramel glue.** Assembly should strictly be done by an adult. If the caramel starts to harden in the pan during assembly, return it to very low heat for a brief period, swirling gently until it returns to a dippable, liquid state. Work quickly once the caramel is ready.
3. Assemble and Decorate Your Gingerbread House
- Construct the Walls: Dip one long edge of a front wall piece into the caramel glue, ensuring the entire edge is coated. Promptly attach it at a 90-degree angle to a side wall. Hold the pieces firmly together for a few moments. The caramel glue hardens almost instantly, creating a strong bond. Repeat this process with the remaining walls and the back panel, forming the complete base structure of your gingerbread house.
- Support and Set: Continue to hold the walls in place for a few minutes until the caramel glue has fully set. For added stability during this crucial drying phase, use cans, jars, or heavy bottles to prop up and support the freshly joined walls. Allow the assembled wall structure to sit undisturbed for at least 30 minutes to ensure a rock-solid foundation.
- Attach the Roof Panels: Carefully remove the supports from the house. You will likely need to reheat your caramel glue to bring it back to a liquid, dippable consistency. Using a pastry brush, coat the top edges of the house walls and the edges of the roof panels where they will meet. Due to the steep angle, you’ll need to hold the roof panels firmly in place for several minutes until they begin to set. Patience here will prevent the roof from sliding off. Once attached, allow the entire structure to set, undisturbed, for another 30 minutes.
- Prepare Royal Icing for Decorating: While the house sets, prepare your royal icing. If the icing is too stiff, add a tiny amount of water (a few drops at a time) until it reaches a soft peak consistency. If it’s too runny, gradually beat in more confectioners’ sugar. Spoon the royal icing into a piping bag fitted with a fine nozzle. Alternatively, use a large, sturdy resealable plastic bag and snip off a tiny tip from one of the bottom corners with scissors. Only fill the bag halfway; this allows room to twist the bag and apply gentle, steady pressure, ensuring a smooth, consistent flow of icing.
- Decorate Your Dream House: Now for the fun part! Let your creativity soar. Pipe intricate outlines for windows and doors, create elaborate scalloped patterns on the roof to mimic shingles, or draw delicate snowflake designs. For a rustic, snow-covered aesthetic, use a larger piping tip or snip a slightly larger hole in your plastic bag to create thicker “drifts” and “drips” of icing. If you notice any missed spots, let the current icing set before going back to fill them in with a smaller tip for precision.
- Attach Candies and Sweets: To affix various candies, mini candy canes, and chocolates to your gingerbread house, simply apply a small dot of royal icing to the back of each sweet and gently press it onto the gingerbread structure. The icing will act as a strong adhesive once it dries. Transform your house into a vibrant, edible wonderland!
- Finishing Touches: Once decorated, you can sprinkle a light dusting of confectioners’ sugar over the entire house for a fresh, snowy look. Display your beautiful gingerbread house in a prominent spot and admire your culinary artistry. It’s almost too beautiful to eat!

Adapted From
Gingerbread Wonderland
Buy On Amazon
Nutrition Information
Calories: 129 kcal
Carbohydrates: 21 g
Protein: 1 g
Fat: 5 g
Saturated Fat: 2 g
Monounsaturated Fat: 2 g
Cholesterol: 1 mg
Sodium: 56 mg
Fiber: 0.3 g
Sugar: 17 g
Nutrition information is automatically calculated and should be used as an approximation only.
Expert Tips for Gingerbread House Success
Creating a stunning gingerbread house requires a bit of foresight and adherence to some fundamental baking and construction principles. Here are some invaluable tips from experienced bakers and recipe testers to ensure your gingerbread house stands tall and looks spectacular.
- Precision in Dough Thickness: Monica M. highlights the importance of consistent dough thickness. Using rolling pin guide rings or rolling the dough between two cutting boards of 1/4 inch thickness ensures all your pieces bake evenly and fit together perfectly. Uneven pieces lead to structural instability.
- Don’t Skip the Chill: As Paula D. notes, freezing the cut gingerbread dough pieces for 10 minutes before baking is a “secret to keeping the pieces from spreading.” This step is critical for maintaining sharp edges and accurate dimensions, which are essential for a stable house.
- Bake Until Golden and Firm: While baking times are provided, ovens vary. Pay attention to visual cues: pieces should be golden brown at the edges and feel firm to the touch. Over-baking can make them brittle, while under-baking makes them too soft to support weight.
- Caramel Glue is Your Best Friend (and Foe): The caramel glue is incredibly effective, creating an almost instant bond. However, it is also extremely hot and must be handled with utmost care by adults only. Prepare it just before assembly. If it hardens, gently reheat it over very low heat. Monica M. mentions it might not get as thin on reheating, so try to work efficiently during the initial assembly phase.
- Strategic Assembly and Support: Don’t rush the assembly. Hold pieces firmly in place as the caramel sets. Using cans, jars, or other sturdy objects as temporary props for the walls and roof panels is a brilliant strategy, allowing the caramel to fully harden without shifting. Paula D. advises holding the roof pieces for a few minutes due to their angle.
- Royal Icing Consistency is Key: Royal icing is your decorative cement. Its consistency needs to be just right for both structural piping and aesthetic detailing. As Paula D. discovered, you might need to adjust the recipe by adding more confectioners’ sugar for a stiffer consistency (medium peaks) for architectural details and “snowdrifts,” or a few drops of water for a thinner consistency for fine detailing.
- Practice Your Piping: If you’re new to piping, consider practicing on a piece of parchment paper before going straight to your gingerbread house. This helps you get a feel for the pressure needed and the flow of the icing.
- Never Waste Dough Scraps: This advice from Paula D. cannot be stressed enough. Saved scraps can be rolled out to replace a broken piece or used to make charming gingerbread people or trees to populate your gingerbread scene.
- Work in Stages: Monica M. wisely suggests splitting the project over two days – one for baking and one for decorating. This prevents exhaustion and allows for ample cooling and setting time, resulting in a more enjoyable and less stressful experience, especially if you’re new to gingerbread house making.
- Embrace Imperfection: Remember, homemade gingerbread houses have character! Don’t strive for absolute perfection, especially on your first attempt. The joy is in the process, the festive aroma, and the unique creation you bring to life. Any “missed spots” or irregularities can often be covered with more icing, candy, or a generous dusting of confectioners’ sugar.
Creative Decorating Ideas for Your Gingerbread House
Once the structure of your gingerbread house is secure, the real fun begins: decorating! Royal icing and an array of candies are your tools to transform a simple gingerbread frame into a whimsical, edible wonderland. Here are some inspiring ideas to spark your creativity:
- Classic Winter Wonderland: Use white royal icing to create icicle patterns along the roofline, window frames, and door. Dust the entire house and surrounding base with confectioners’ sugar for a fresh snowfall effect. Mini candy canes can become festive lampposts or part of a tiny fence.
- Candy Extravaganza: Go wild with a variety of colorful candies! Attach gumdrops along the roof ridges, M&M’s as roof tiles, Necco wafers as siding, and licorice whips for fencing or window shutters. Use small hard candies to create stained-glass windows by melting them into cutout spaces on your gingerbread before assembly (be careful with this technique as it can be tricky).
- Chocolate Lover’s Dream: Decorate primarily with chocolate. Use chocolate icing for the roof and walls, then adorn with chocolate chips, chocolate-covered pretzels, mini chocolate bars, and chocolate candies. You can even melt chocolate and drizzle it for a rich, textured look.
- Forest or Garden Scene: Use gingerbread cutout trees (from your dough scraps!) or pre-made sugar trees around the house. Create a path with crushed peppermints or cookie crumbs. Green candies or green-tinted royal icing can form bushes and wreaths.
- Peppermint Palace: Focus on peppermint candies! Crushed peppermints for snow, whole peppermints for roof tiles, and mini candy canes for accents. Red and white royal icing will complement this theme perfectly.
- Themed House: Think beyond traditional Christmas. Perhaps a spooky haunted gingerbread house for Halloween, or a spring cottage with floral accents. The possibilities are endless with different icing colors and candy choices.
- Personalized Touches: Add small figurines, toys, or even tiny edible photos (printed on edible paper) to make your gingerbread house unique to your family or a specific person. You can also pipe names or messages onto the base.
- Textured Roofing: Instead of flat icing, create texture on your roof. Use overlapping wafer cookies, chocolate squares, or even cereal pieces (like shredded wheat for thatch) to give your roof a realistic and interesting dimension.
Remember, there’s no right or wrong way to decorate. Let your imagination guide you, and enjoy the process of bringing your unique gingerbread house to life!
Troubleshooting Common Gingerbread House Problems
Even seasoned bakers encounter challenges when crafting a gingerbread house. Don’t let minor setbacks deter your festive spirit! Here are solutions to common problems you might face:
- Gingerbread Pieces Spread or Lose Shape: This usually happens if the dough wasn’t chilled enough or was rolled too thin. Always freeze your cut pieces for at least 10 minutes before baking. Ensure consistent 1/4-inch thickness. If a piece still warps, you can try to carefully trim the edges with a sharp knife immediately after it comes out of the oven while still warm and pliable.
- Gingerbread Pieces Break: Gingerbread can be fragile. This is where saving those dough scraps (as Paula D. advises) comes in handy! You can quickly re-roll and bake a replacement. If a small corner breaks, royal icing or extra caramel glue can often mend it invisibly. For larger breaks, consider embracing the “rustic” look or using candies to strategically cover the damage.
- Caramel Glue Hardens Too Quickly: Caramel hardens fast! Work rapidly during assembly. If it becomes too stiff, place the saucepan back over very low heat, swirling gently, until it liquefies again. Have a heatproof surface ready to place the hot pan.
- Caramel Glue Is Too Thin/Doesn’t Hold: This might indicate it wasn’t cooked to the correct temperature (320°F / 160°C). If it’s too thin, it won’t set quickly. You’ll need to reheat it to the proper temperature. Ensure your candy thermometer is accurate.
- Royal Icing Is Too Runny: If your icing runs or doesn’t hold its shape, it’s too thin. Gradually beat in more confectioners’ sugar, one tablespoon at a time, until it reaches the desired stiff or soft peak consistency for piping.
- Royal Icing Is Too Stiff: If the icing is too thick to pipe smoothly, add a few drops of water at a time, mixing well after each addition, until it’s pliable. Be careful not to add too much at once.
- Roof Slides Off: This is a common frustration! Ensure your caramel glue is freshly reheated and at the right consistency. Apply it generously to both the top edges of the walls and the bottom edges of the roof panels. Crucially, hold the roof panels very firmly in place for several minutes until the caramel glue has had a chance to set completely. Using temporary supports (like cans or jars placed inside the house) can also provide vital stability during this setting period.
- Decorations Won’t Stick: Make sure the royal icing you’re using to attach candies is thick enough to act as an adhesive. Apply a decent dot to the back of each candy and press it firmly. Allow ample time for the icing to dry before moving or disturbing the house.
With these tips, you’re well-equipped to tackle any gingerbread house challenge and emerge with a delightful creation. Happy building!
Displaying and Storing Your Gingerbread House
Once your gingerbread house is a masterpiece of festive delight, you’ll want to display it proudly and, if possible, keep it fresh for as long as possible. Here’s how to do it:
- Choose a Sturdy Base: Before you even start assembling, decide on the base for your gingerbread house. A sturdy piece of cardboard covered with foil, a wooden cutting board, or a decorative platter works perfectly. This allows you to easily move and display your house.
- Ideal Display Location: Place your gingerbread house in a cool, dry area away from direct sunlight, heat sources (like radiators or fireplaces), and high humidity. Heat can soften the gingerbread and melt the caramel glue and royal icing. Humidity can make the gingerbread soggy and the icing weep.
- Protect from Pests: To keep dust and curious pets (and sometimes children!) away, you can place your gingerbread house under a large cake dome or inside a clear plastic bag or cellophane wrap, especially if you plan to keep it for more than a few days.
- How Long Will It Last?: A well-constructed and properly stored gingerbread house can last for several weeks, or even months, purely for decorative purposes. The gingerbread itself will become very hard and stale over time, so it’s best enjoyed within the first week or two if you intend to eat it. After that, it becomes more of a charming holiday decoration.
- For Extended Storage (Decorative Only): If you want to keep your gingerbread house as a decoration for longer, ensure it’s completely dry and hard. Store it in an airtight container or wrap it tightly in plastic wrap once the holidays are over. Keep it in a cool, dark place. While technically edible, its texture will be rock-hard and less appealing after a long display period.
With these considerations, your gingerbread house can be a beautiful and fragrant centerpiece throughout the entire holiday season.
From the spicy aroma filling your kitchen to the joyful moments of decorating, creating a gingerbread house from scratch is a quintessential holiday experience. It’s a project that combines the satisfaction of baking with the fun of construction and artistic expression, culminating in an edible work of art that captures the spirit of Christmas. Whether it’s a simple cottage or an elaborate mansion, your homemade gingerbread house will undoubtedly become a cherished part of your family’s traditions. So gather your ingredients, print your template, and embark on this sweet adventure. Happy baking and happy holidays!