

Mastering Sourdough: Your Comprehensive Guide to Creating and Caring for a Starter
Embarking on the journey of sourdough baking begins with a simple yet profound step: creating your very own sourdough starter. This living, breathing culture, often referred to as your “pet,” is the heart and soul of every rustic loaf, delivering unparalleled flavor and texture. While the concept of cultivating wild yeast can initially seem daunting, it’s a remarkably straightforward process that fosters a unique, ongoing relationship with your food.
This comprehensive guide is designed to demystify the art of sourdough starter creation and maintenance. From selecting the right ingredients to understanding the nuanced signs of a healthy, active culture, we will walk you through every stage. You’ll learn how to transform basic flour and water into a bubbly, potent leavening agent, how to keep it thriving with consistent care, and even how to share your thriving culture with fellow baking enthusiasts. Prepare to unlock the secrets of natural fermentation and elevate your home baking to an artisan level.
The Essence of Sourdough Starter: A Living Culture
At its core, a sourdough starter is a symbiotic culture of wild yeast and lactic acid bacteria that naturally occur in flour and the air around us. These microorganisms feed on the starches and sugars in flour, producing carbon dioxide (which makes bread rise) and a complex array of organic acids (which give sourdough its distinctive tangy flavor). Unlike commercial yeast, a sourdough starter provides a more nuanced flavor profile and a unique texture to your bread. Many methods suggest using ingredients like fruit juices, grapes, honey, or even potatoes to jumpstart fermentation. However, in my extensive experience, all you truly need are two fundamental ingredients: flour and water. These simple components, when combined and nurtured, naturally initiate the fermentation process, awakening the wild yeasts and beneficial bacteria necessary for making exquisite, naturally leavened bread.
Setting the Stage: Ingredients and Environment
The Right Flour for a Strong Start
The choice of flour is critical, especially when you’re first establishing your starter. To kickstart the fermentation process effectively, it’s vital to begin with whole-grain flour. Whole wheat, rye, and spelt flour are exceptional choices because their bran and germ contain a higher concentration of wild yeasts and nutrients compared to refined flours. This abundance of microbial life accelerates the initial fermentation, giving your starter a robust foundation. Once your starter is well-established, you can typically transition to all-purpose or bread flour for subsequent feedings, though many bakers prefer to continue using a blend for enhanced flavor and activity.
Water Quality Matters
While often overlooked, the quality of your water can significantly impact your starter. Chlorine and chloramines, commonly found in tap water, can inhibit or even kill the delicate microorganisms in your starter. For optimal results, use filtered or unchlorinated water. If you only have tap water, you can leave it uncovered on your counter for 24 hours to allow the chlorine to dissipate. Room temperature water is ideal for feeding, as extremely cold or hot water can shock the culture.
Temperature and Location for Optimal Growth
Temperature plays a pivotal role in the activity of your sourdough starter. Wild yeasts and bacteria thrive in warm environments, typically between 70°F and 80°F (21°C and 27°C). A consistent warm spot will encourage faster, more vigorous fermentation. Avoid direct sunlight, which can overheat the starter, and overly cold spots, which will slow down its activity significantly. A cozy cabinet, a warm spot near a refrigerator (avoiding the actual refrigerator interior at this stage), or even on top of a microwave after it’s been used are excellent choices. Consistent warmth ensures a healthier, more predictable development cycle for your starter.
Essential Equipment
- Large Glass Jar: A wide-mouth glass jar (like a Weck jar or a large mason jar) with a capacity of at least 1-quart (1-liter) is ideal. Glass allows you to easily observe the starter’s activity.
- Digital Kitchen Scale: For precise measurements, especially with flour and water, a digital scale is invaluable. Volume measurements can be inconsistent, leading to varying starter hydration.
- Spoon or Fork: For mixing.
- Loose Cover: Plastic wrap, a small cloth, or a jar lid placed loosely on top will prevent the starter from drying out while allowing air circulation.
The entire process of creating an active, vibrant sourdough starter usually takes about seven days. However, patience and flexibility are paramount. Yeast development can be wonderfully unpredictable, so your best advice is to observe your starter, not just the calendar. Your starter is truly ready when it consistently doubles in size within 4-8 hours after feeding, exhibiting a lively network of bubbles on the surface and throughout the culture, and possessing a pleasant, yeasty aroma. [Editor’s Note: For more invaluable insights, we recommend listening to our enlightening interview with sourdough expert Andrew Janjigian, head bread guru for Cook’s Illustrated and America’s Test Kitchen, who shares advanced tips and common pitfalls.]
Your 7-Day Sourdough Starter Journey: A Step-by-Step Guide
Follow these daily instructions carefully. Remember, consistency in feeding and environmental conditions is key to success.
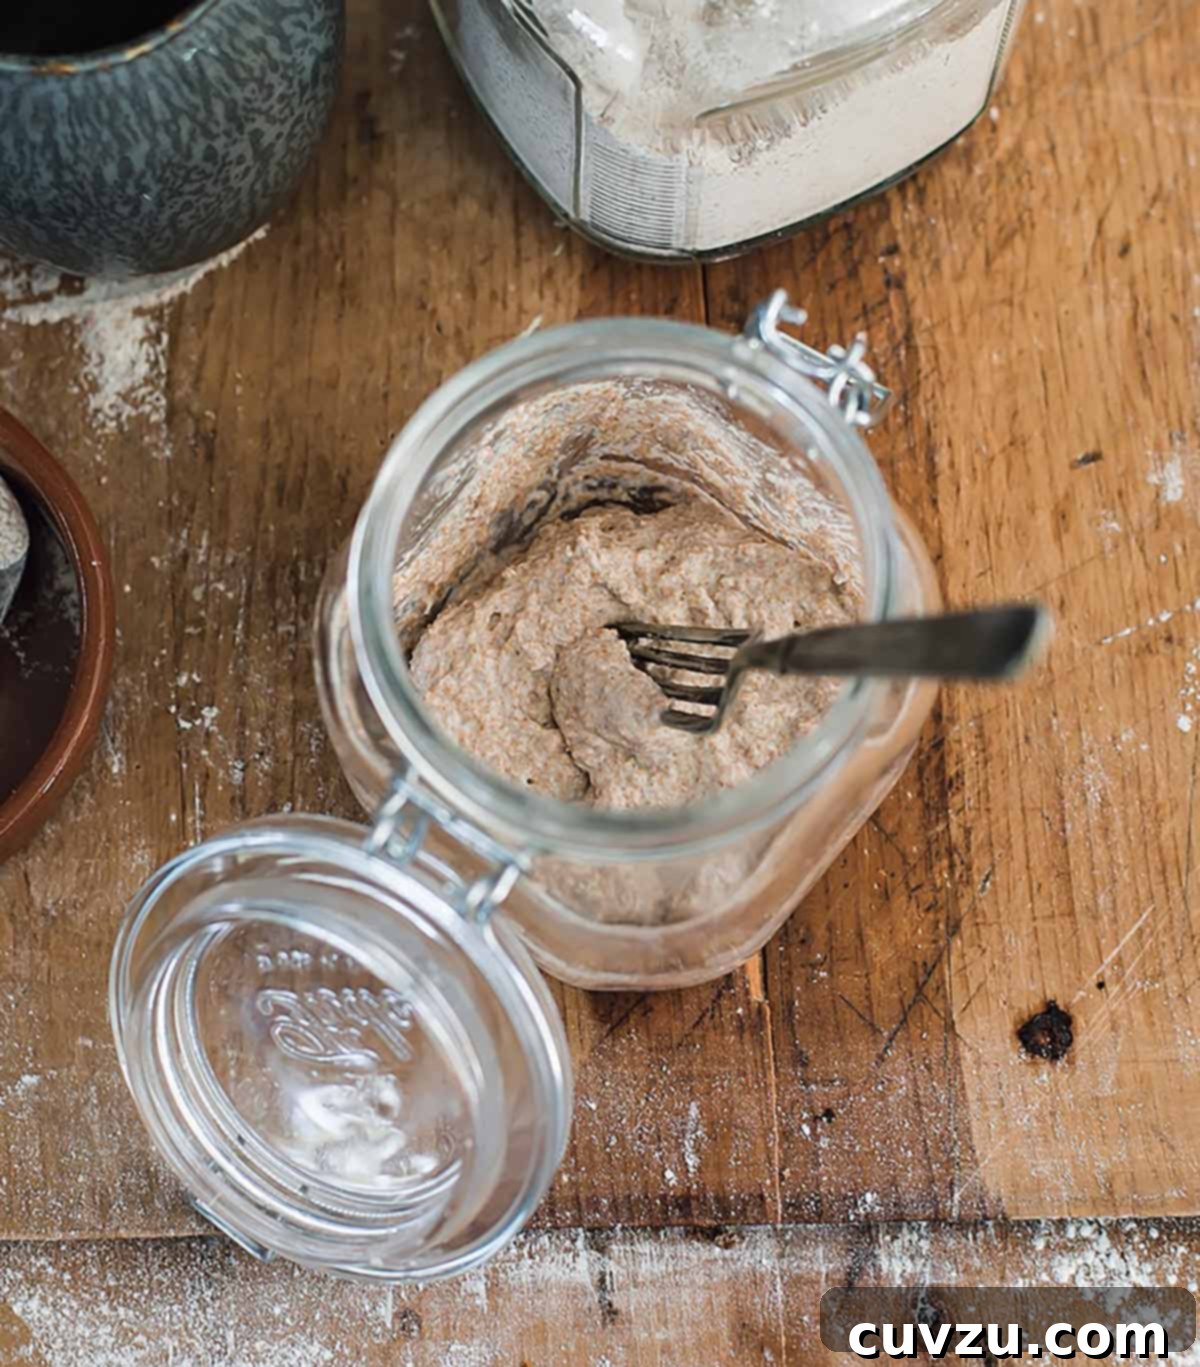
Day 1: The Initial Mix
Begin by adding 60 grams (approximately 1/2 cup) of whole wheat flour and 60 grams (approximately 1/4 cup) of unchlorinated water to a clean, large glass jar. Using a clean fork or spoon, mix these two ingredients thoroughly until all the flour is hydrated and no dry pockets remain. The resulting consistency should be quite thick and pasty, similar to a very stiff dough. If you are measuring by volume, you might need to add a tiny bit more water, teaspoon by teaspoon, to achieve this thick, yet pliable, texture. Cover the jar loosely with plastic wrap, a beeswax wrap, or a breathable cloth secured with a rubber band. This allows air to circulate while preventing the mixture from drying out. Place your jar in a warm spot, ideally between 70-80°F (21-27°C), and let it rest undisturbed for 24 hours. This initial resting period allows the natural yeasts and bacteria in the whole grain flour to begin their work. (Refer to the photo above for Day #1’s appearance.)
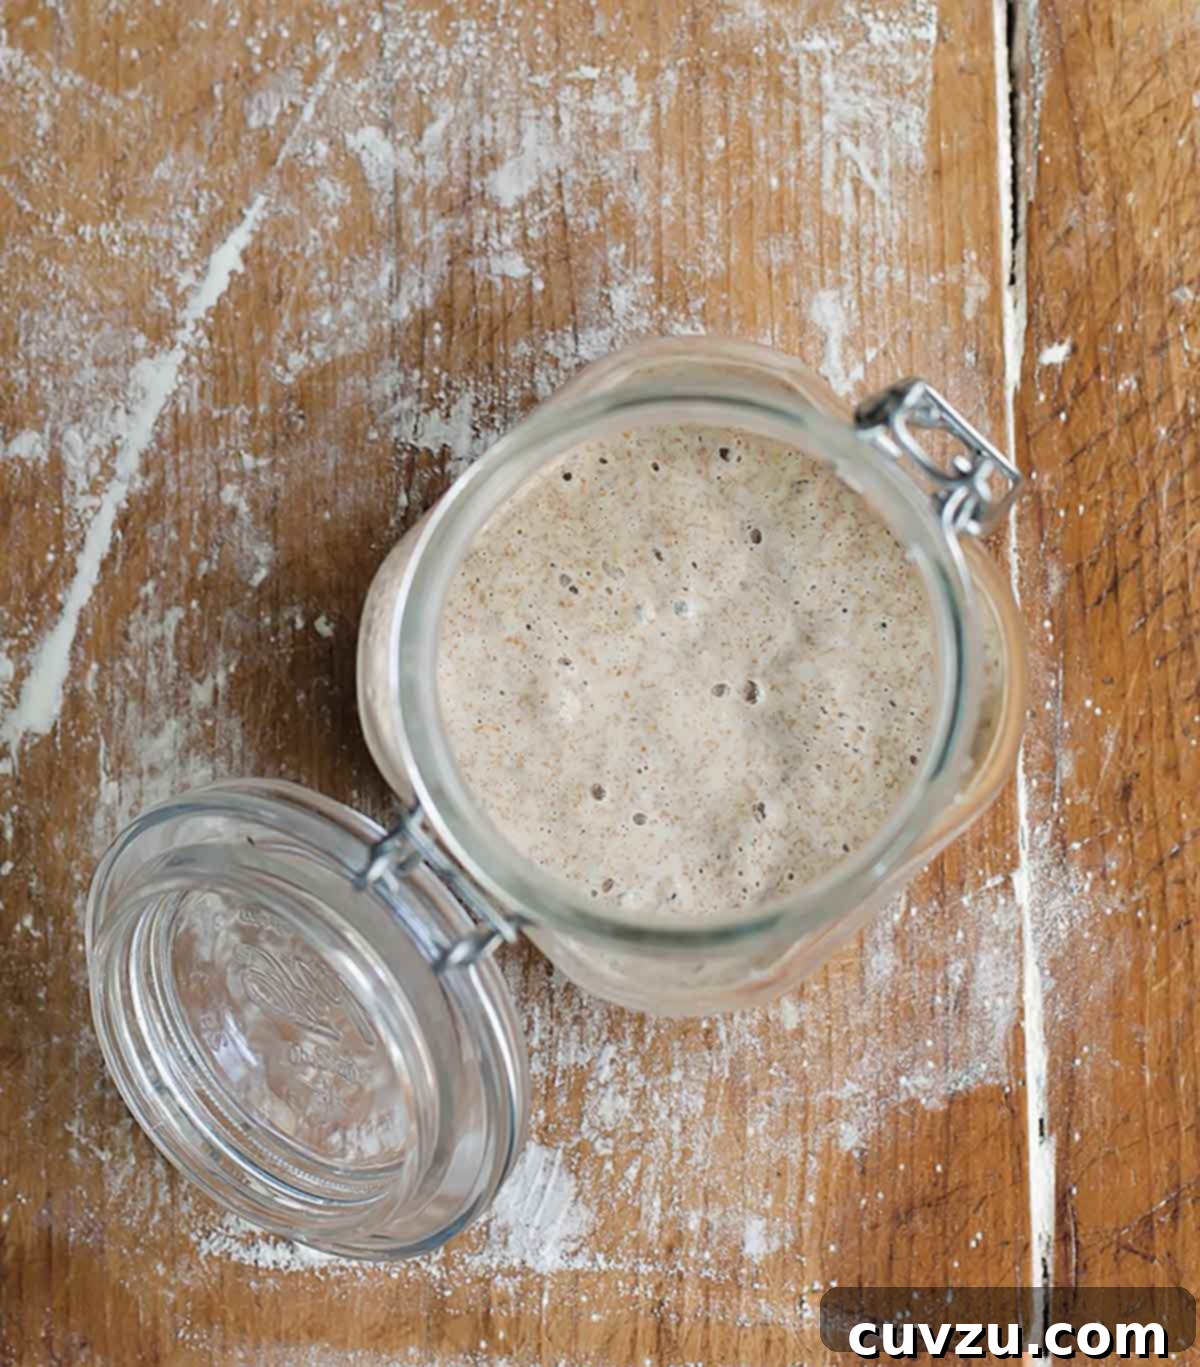
Day 2: Observing the First Signs of Life
After 24 hours, carefully inspect your starter. You might notice the emergence of tiny bubbles on the surface, or perhaps small black dots, which are initial indicators of fermentation activity. These are exciting signs that the wild yeasts and bacteria are waking up and beginning to produce gases. Don’t be discouraged if you don’t observe much activity; sometimes the first signs appear and dissipate overnight. Patience is a baker’s virtue! Regardless of visible activity, simply cover your starter loosely again and allow it to rest in its warm spot for another 24 hours. Continue to maintain a consistent warm environment. (See the photo above for a typical Day #2 starter.)
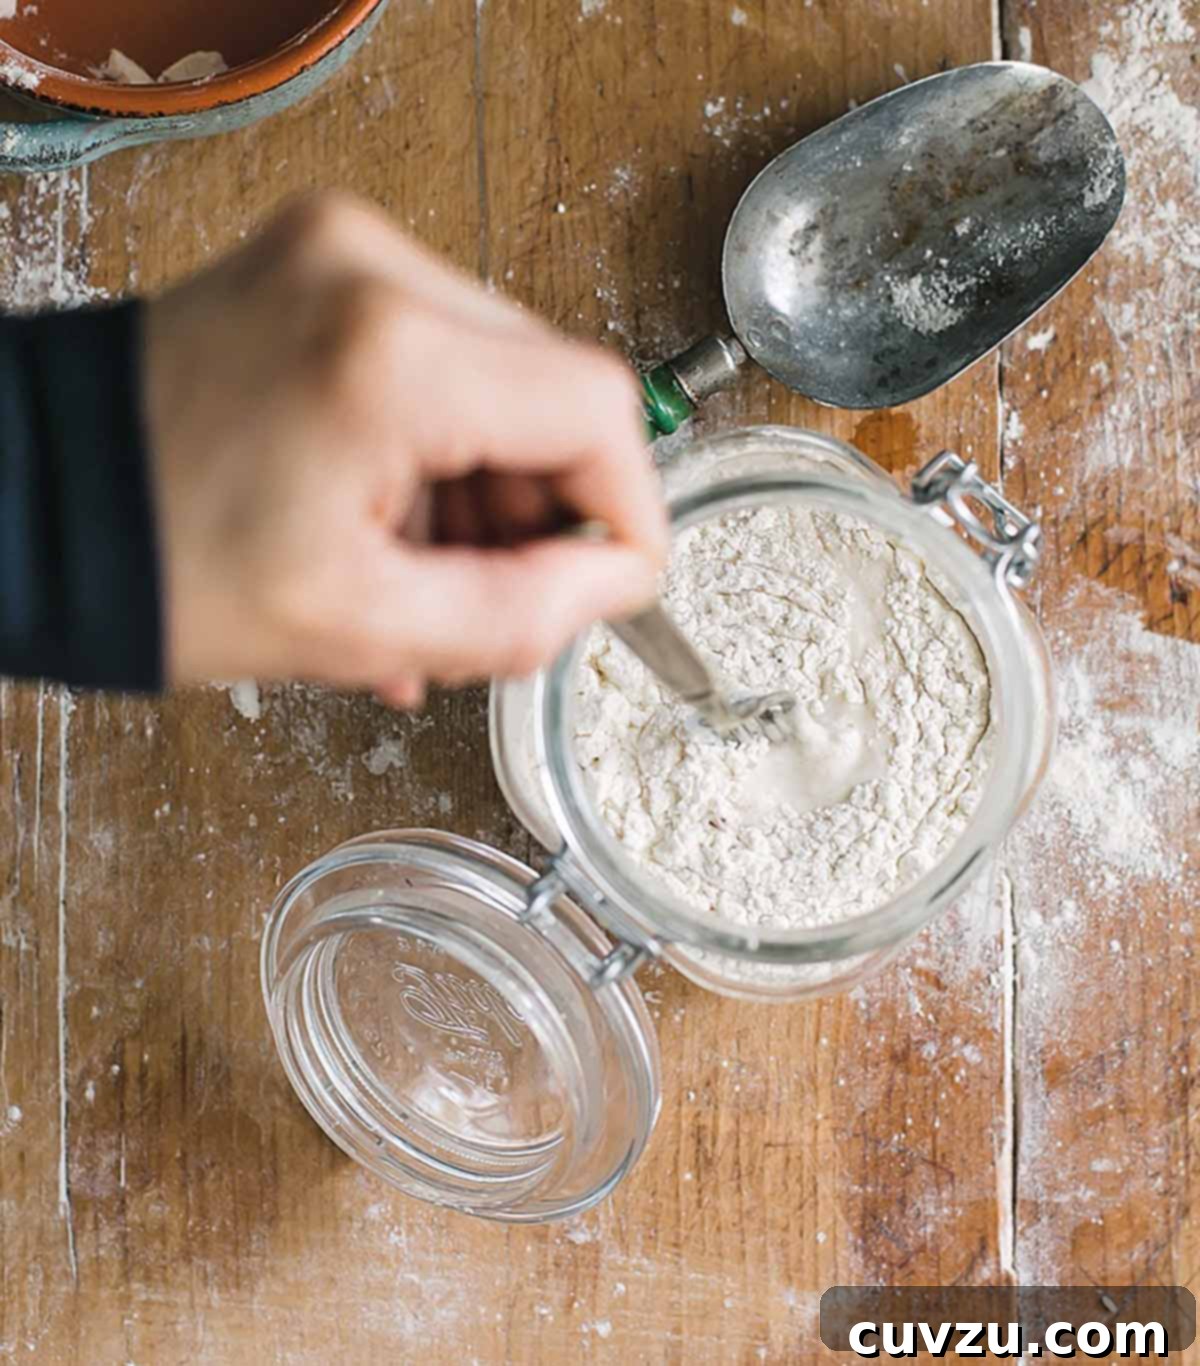
Day 3: The First Feeding and Transition
Today marks the beginning of the feeding process, a crucial step for nurturing your starter. Whether or not you saw bubbles yesterday, it’s time to act. To begin, remove and discard approximately half of the starter from your jar. This step, known as “discarding,” is vital for managing the volume of your starter and concentrating the active microorganisms, preventing the culture from becoming too acidic or running out of food. You’ll notice the texture might be quite stretchy. Now, add 60 grams (1/2 cup) of all-purpose flour and 60 grams (1/4 cup) of unchlorinated water to the remaining starter. Mix thoroughly with a fork until the mixture is smooth and well combined. At this point, the texture should resemble a thick pancake batter or plain yogurt. If it seems too stiff, add water in very small increments (a teaspoon at a time) until the desired consistency is achieved. Cover loosely and return it to its warm resting spot for another 24 hours. (See the photo above for a visual of Day #3’s feeding.)
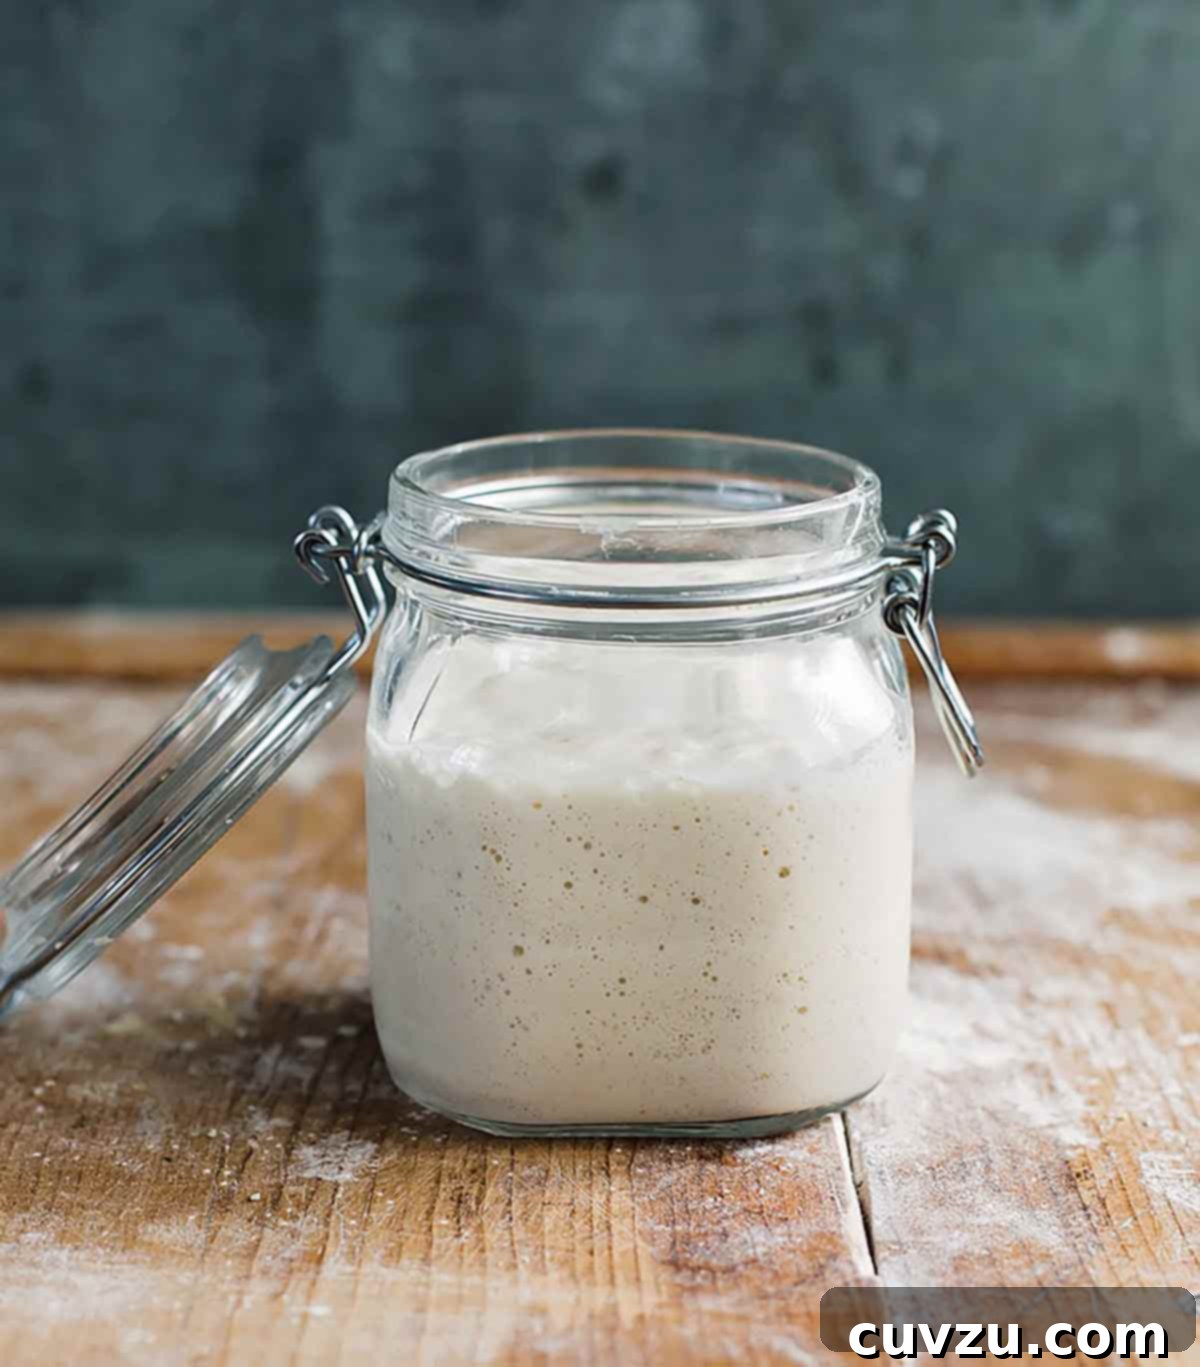
Days 4, 5, and 6: Consistent Nourishment
For the next three days, you will repeat the feeding process precisely as outlined on Day 3. Each day, discard about half of your starter and feed it with 60 grams of all-purpose flour and 60 grams of water. As you continue this routine, you will observe significant changes. The wild yeast population will begin to flourish, leading to a much more active starter. You’ll see it rise noticeably after feeding, often doubling or even tripling in volume, with numerous bubbles forming on the surface and throughout the culture. After reaching its peak, the starter will gradually fall back down, indicating that the yeast has consumed most of its food and is ready for its next meal. This rise and fall cycle is a clear sign of a healthy, developing starter. A useful tip for monitoring growth is to place a rubber band or a piece of masking tape around the jar at the starter’s level immediately after feeding. This allows you to easily track how much your starter rises before it falls. Continue to keep the starter in a warm, consistent environment. (The photo above illustrates the robust growth seen during Days #4, 5, and 6.)
Day 7: The Active and Ready Starter
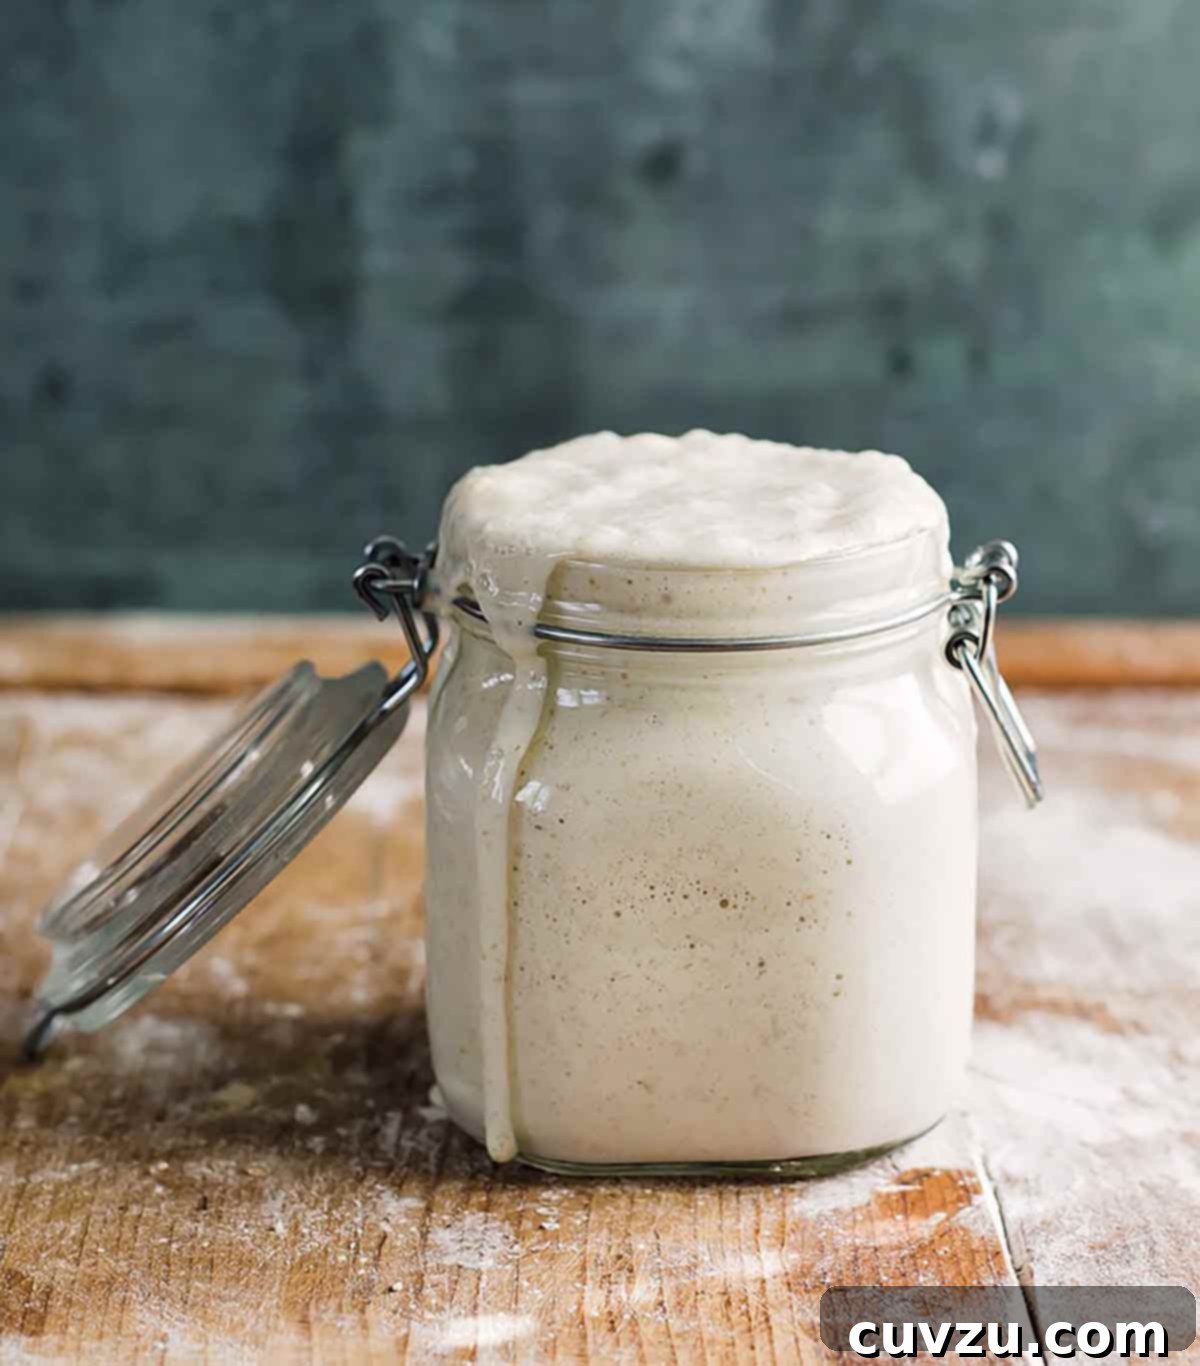
By Day 7, your sourdough starter should be bursting with life! You should see an abundance of bubbles, both large and small, creating a lively, effervescent texture. The starter’s consistency will be spongy and puffy, reminiscent of roasted marshmallows, and it should have a noticeable, pleasant aroma – typically fruity, yeasty, and slightly tangy, but never overtly sour or off-putting. It should consistently double in size within 4-8 hours after feeding. If all these conditions are met, congratulations! Your starter is now active, potent, and ready to be used in your baking endeavors. If, however, your starter isn’t showing these signs of vigorous activity, which is quite common, don’t despair. Simply continue the daily feeding process for another one to two weeks, or even longer, until it consistently demonstrates these characteristics. Patience truly pays off in sourdough baking.
The final, satisfying step is to transfer your vibrant new starter into a clean, appropriately sized jar for its ongoing home. In keeping with a cherished tradition among bakers, you might even consider bestowing a name upon your new culinary companion! [Editor’s Note: And immediately following this accomplishment, we highly recommend trying your hand at baking a batch of our easy sourdough bread recipe – the perfect reward for your diligent efforts!]
Sourdough Starter Care and Troubleshooting
Understanding Hooch: The Dark Liquid
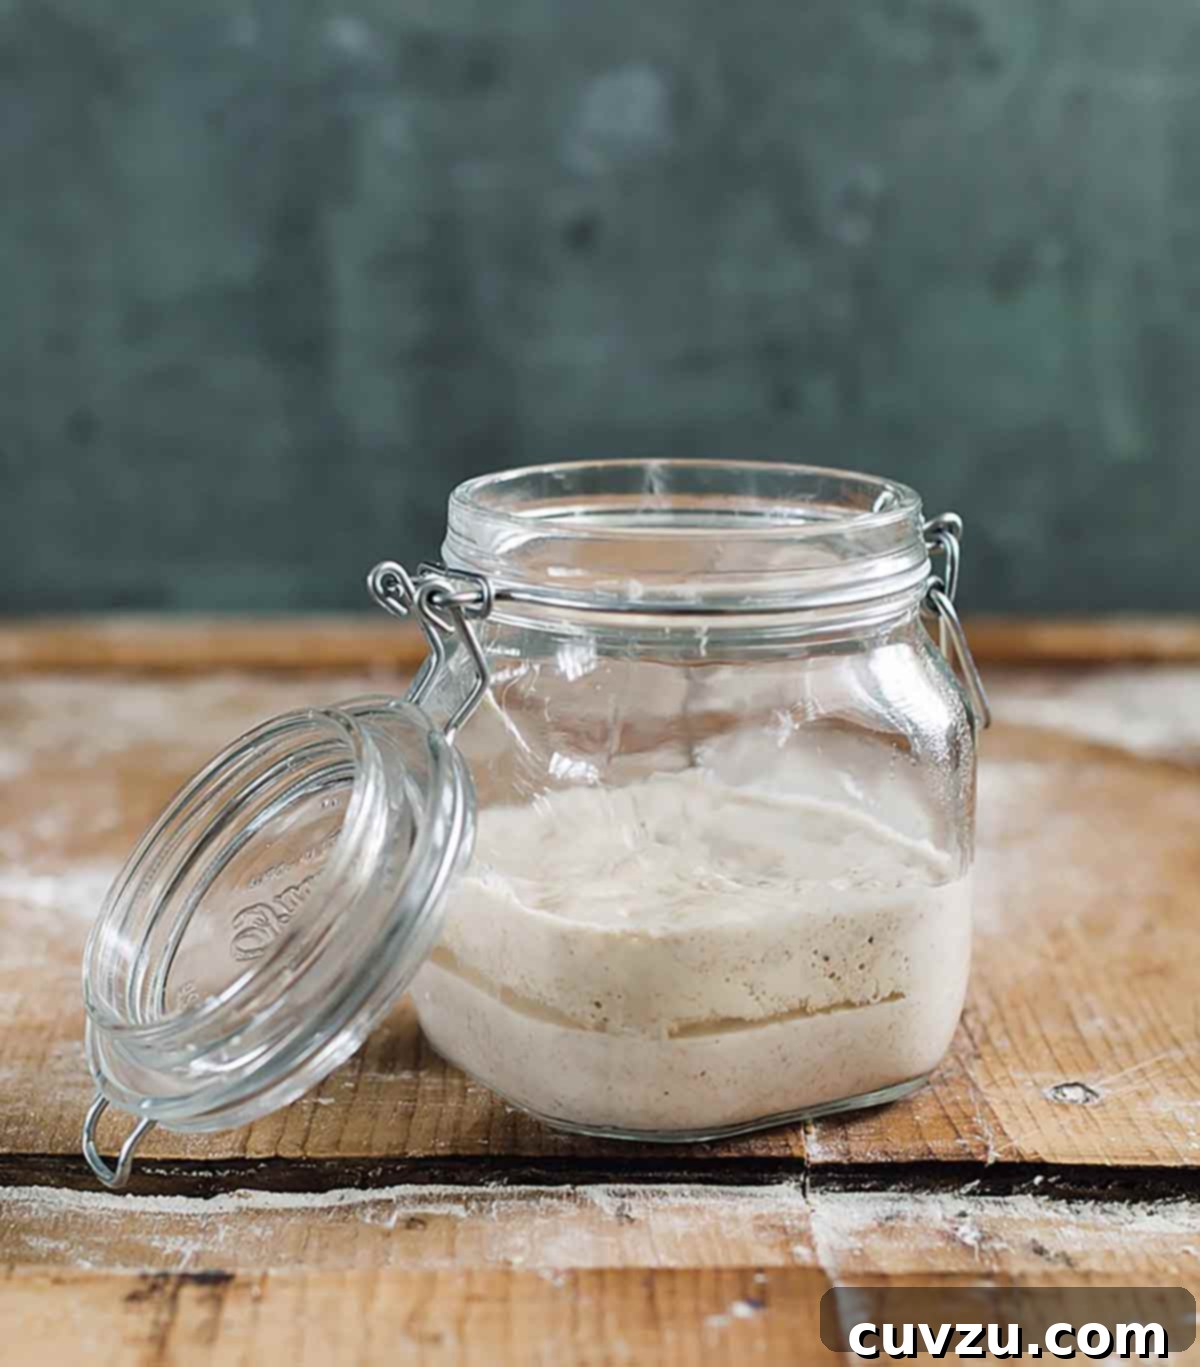
During the initial creation phase, and even after your sourdough starter is established, you might observe a layer of dark, residual liquid forming on the surface or throughout the culture. This liquid, often ranging in color from clear to dark brown or black, has a very distinctive, pungent smell, sometimes likened to rubbing alcohol, nail polish remover, or even gym socks. This phenomenon is known as “hooch,” and it’s a clear indication that your starter is hungry and needs to be fed. Hooch essentially means the yeast has consumed all available food and is breaking down. While some bakers choose to stir hooch back into their starter, believing it adds a more sour flavor to the resulting bread, it often signifies depleted energy. In my opinion, it’s generally best to carefully pour off the hooch, if possible, along with any discolored starter present, before feeding. This helps maintain a healthier, more vigorous culture. (The image above shows a distinct layer of hooch in a starter, signifying its need for a feed.)
Long-Term Storage Options
- Countertop Storage (Active Use): If you plan to bake frequently (daily or every few days), keep your starter on the countertop. Feed it once or twice daily, depending on room temperature and activity.
- Refrigerator Storage (Infrequent Use): For less frequent baking (once a week or less), store your starter in the refrigerator. The cold temperature significantly slows down yeast activity, reducing the need for frequent feedings. Before refrigerating, feed your starter as usual and let it become active for a couple of hours at room temperature, then place it in the fridge with a loose lid. When you’re ready to bake, remove it from the fridge, discard most of it, and feed it a couple of times at room temperature over 12-24 hours until it’s vigorous and bubbly again.
When to Discard Your Starter
Discarding is a fundamental part of maintaining a sourdough starter, especially for those kept on the counter. It prevents your starter from growing into an unmanageable volume and ensures there’s enough food for the active microorganisms. The discarded portion is not waste; it can be used in a variety of delicious recipes, such as pancakes, crackers, muffins, or even pizza dough, making your sourdough journey even more rewarding.
How to Dry Sourdough Starter for Longevity and Sharing
Perhaps you’ve found yourself with an abundance of starter, or you foresee a period where you won’t be baking and prefer not to commit to daily feedings. Or maybe you wish to share the gift of sourdough with a friend or family member. In such cases, you can efficiently dry your sourdough starter and store it indefinitely. This ingenious method ensures nothing goes to waste and provides a convenient way to revive your starter whenever you’re ready to bake again, or to easily transport it as a thoughtful present.
Join the Conversation with Us!
Do you have a burning cooking question, a puzzling query, or a culinary quagmire that you’d love us to address? We thrive on connecting with our readers and helping you navigate your kitchen adventures. Click the prominent ‘Chat with Us’ button to the right to leave us a recorded message. Simply enter your name and email address, press record, and share your thoughts, questions, or baking triumphs. We guarantee a response, and who knows? Your insightful question might even be featured on these very pages or, if it’s particularly engaging, on our popular podcast, “Talking With My Mouth Full.” We look forward to hearing from you!