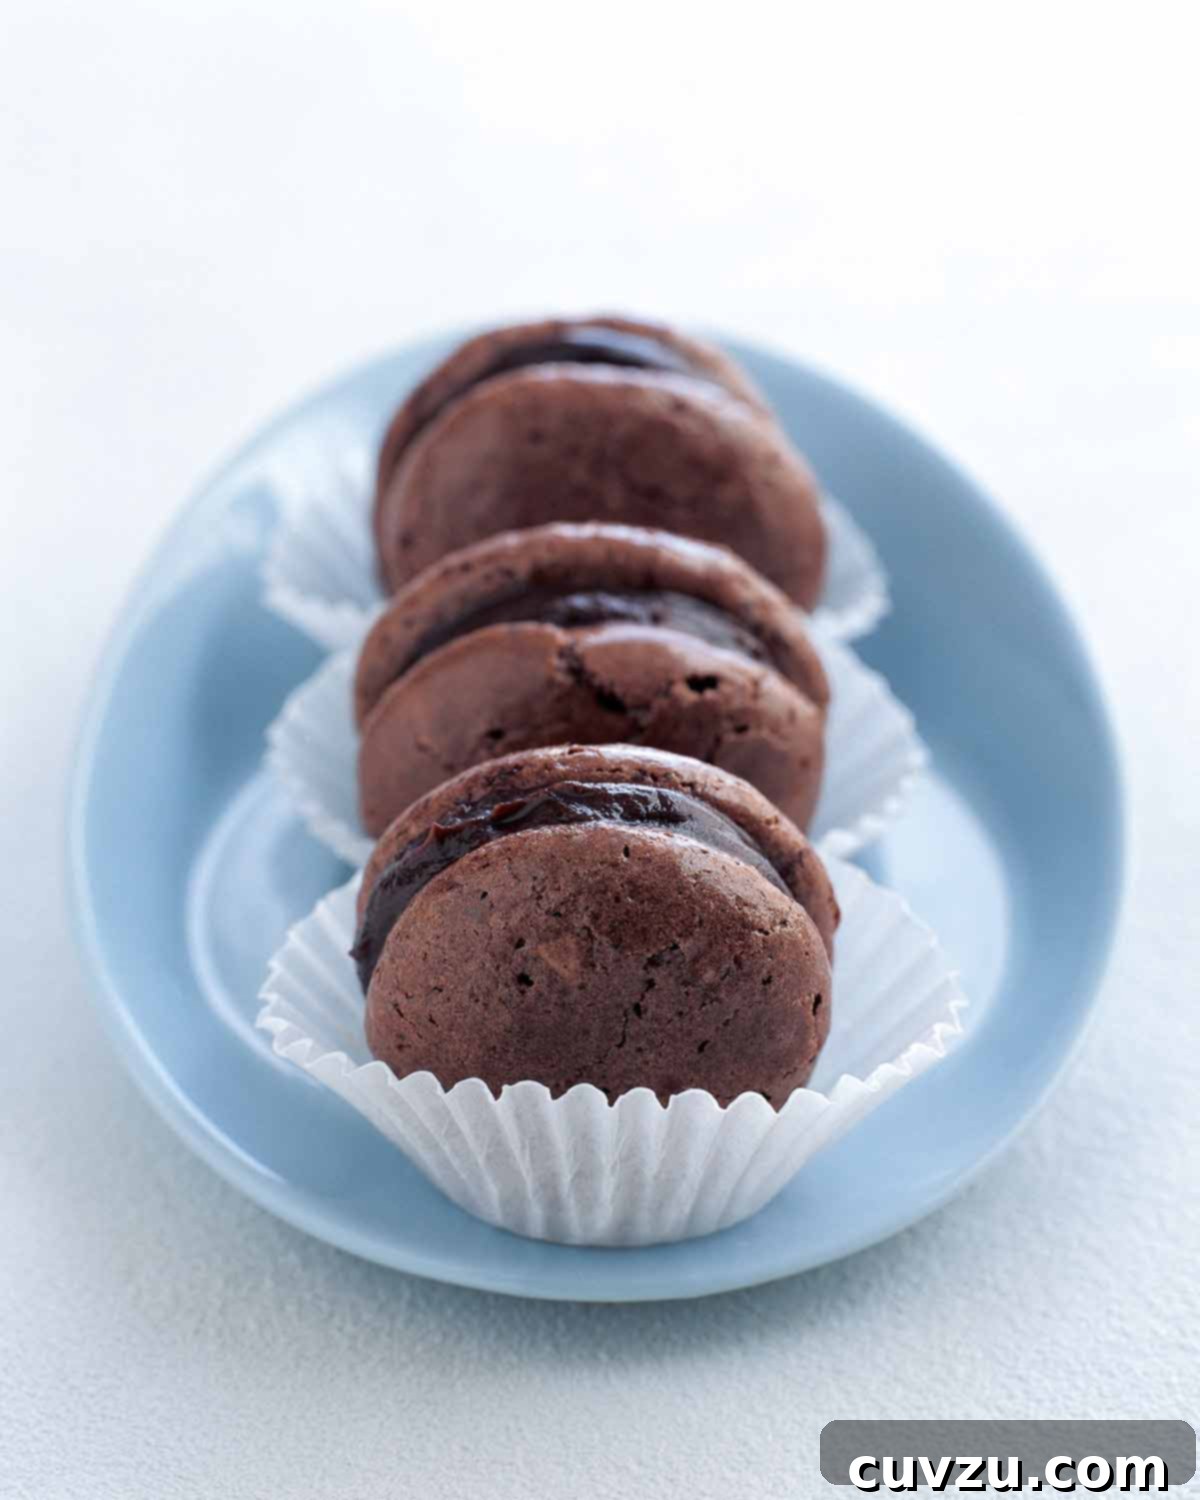
Mastering Decadent Chocolate Macarons: Your Guide to French Patisserie at Home
Chocolate macarons are a true delight, known for their delicate, airy shells and rich, flavorful fillings. Imagine biting into a crisp cookie yielding to a chewy interior, all infused with deep dark chocolate, complemented by an opulent ganache. No need for a trip to a fancy Parisian patisserie—with a little patience and our comprehensive guide, these exquisite treats can be yours in just a few hours. Let’s embark on this sweet journey to create truly unforgettable chocolate macarons right in your own kitchen.
The Allure of the French Macaron
For many, the mention of “macaron” evokes images of charming Parisian cafes, vibrant colors, and delicate, jewel-like pastries. These iconic French confections, often confused with their chewier, coconut-based American counterparts (macaroons), are a world apart. The French macaron is a sophisticated meringue-based cookie sandwich, characterized by its smooth, domed top, ruffled “foot” (the frilly edge at the base), and a tender, slightly chewy interior. They are a testament to the art of baking, requiring precision and a gentle touch, but rewarding bakers with unparalleled elegance and taste.
My personal love affair with macarons began on the cobbled streets of Paris. There’s something truly magical about strolling through the city, perhaps along the Seine or through the Marais, with a delicate macaron in hand, savoring each nuanced bite. Whether sourced from iconic establishments like Dalloyau or Ladurée, or discovered in a charming local boulangerie, the experience is always sublime. The textural contrast—the delicate crispness of the shell giving way to the soft, luscious ganache filling—is simply addictive.
If a Parisian escapade isn’t on your immediate horizon, fret not! This recipe brings the essence of French patisserie directly to you. Prepare to be enchanted by the harmonious blend of rich dark chocolate in both the macaron shells and the decadent ganache. It’s an indulgence that transports you, bite by exquisite bite, reminding you that exquisite desserts are well within your reach.
Why Chocolate Macarons Stand Out
While macarons come in an array of breathtaking flavors and colors, chocolate macarons hold a special place in the hearts of many dessert enthusiasts. The deep, complex notes of dark chocolate elevate the macaron experience, offering a more profound and satisfying indulgence. Unlike fruit-flavored macarons that often rely on bright, tangy fillings, chocolate macarons provide a comforting richness that is both sophisticated and universally appealing. Using high-quality dark chocolate ensures a balanced flavor profile—not overly sweet, but intensely chocolaty, allowing the delicate almond flavor of the shell to shine through without being overpowered.
Moreover, the versatility of chocolate means it pairs wonderfully with countless other flavors. While our recipe focuses on a pure chocolate experience, you can easily imagine how a hint of espresso, a touch of mint, or a swirl of raspberry could further enhance these dark beauties. They are perfect for any occasion, from an elegant dinner party to a quiet afternoon treat, always leaving a lasting impression and a desire for just one more.
Chocolate Macarons Recipe
Classic Dark Chocolate Macarons with Rich Ganache
Create ethereal chocolate macarons with crisp shells and a luscious dark chocolate ganache filling. A truly decadent French dessert that’s achievable at home.
Recipe by David Leite, adapted from Lori Longbotham
Print Recipe
Course: Dessert
Cuisine: French
Yields: 48 servings
Prep Time: 30 minutes
Cook Time: 10 minutes
Total Time: 2 hours (includes cooling & resting)
Calories: Approximately 55 kcal per macaron
Ingredients
For the Macaron Shells:
- 1/2 cup blanched whole almonds
- 1 3/4 cups confectioners’ sugar (powdered sugar)
- 3 tablespoons unsweetened cocoa powder (natural or Dutch-process) (Learn about cocoa powder differences)
- 3 large egg whites, preferably aged for a day or two at room temperature
- Pinch of salt
- 2 teaspoons granulated sugar
For the Dark Chocolate Ganache Filling:
- 1/2 cup heavy cream
- 2 tablespoons unsweetened cocoa powder
- 5 ounces bittersweet or semisweet chocolate, finely chopped (use good quality chocolate for best results)
- 1 stick (4 ounces) unsalted butter, at room temperature, cut into small pieces
Essential Equipment for Macaron Success
Baking macarons requires a few specific tools to ensure the best results. While not all are strictly mandatory, they significantly improve your chances of success and make the process smoother:
- Kitchen Scale: For precise measurements of dry ingredients, which is crucial for macarons. While this recipe uses volume, professionals often recommend weighing ingredients for macaron accuracy.
- Food Processor: Essential for finely grinding almonds and confectioners’ sugar to achieve that smooth macaron shell texture. Consider a robust food processor like Ninja.
- Electric Mixer (Stand or Handheld): For whipping egg whites to stiff peaks consistently and efficiently.
- Large Baking Sheets: At least two, preferably heavy-duty aluminum, to prevent warping and ensure even heat distribution. Nordic Ware baking sheets are highly recommended.
- Parchment Paper or Silicone Baking Mats: Crucial for preventing sticking and promoting the formation of the macaron’s “foot.” Silicone mats, in particular, offer excellent consistency.
- Piping Bag and 1/2-inch Plain Round Tip: For uniformly piping the macaron batter. A proper piping bag provides better control and creates perfectly round shells.
- Fine-Mesh Sieve: For sifting your dry ingredients after grinding to ensure a smooth, lump-free batter.
- Rubber Spatula: Essential for the delicate folding process known as “macaronage.”
Instructions
Making the Macaron Shells:
-
Prepare Your Workspace & Oven:
Position an oven rack in the middle of your oven and preheat to 400°F (200°C). Line two large baking sheets with parchment paper or silicone mats. If using parchment, you might want to draw 1-inch circles on the back to guide your piping for consistent macaron size. This initial high temperature is often for a quick burst; we’ll adjust it for the main bake.
-
Process Dry Ingredients:
In a food processor, combine the blanched whole almonds with 1 cup of the confectioners’ sugar. Pulse repeatedly until the almonds are very finely ground into a flour-like consistency. Be careful not to over-process, as the almonds can release their oils and become pasty. Add the cocoa powder and the remaining 3/4 cup confectioners’ sugar, and pulse again until all ingredients are thoroughly blended and form a fine powder. For the smoothest shells, it’s highly recommended to sift this mixture into a separate bowl to remove any larger almond pieces or cocoa lumps, then discard or re-process the larger bits.
-
Whip the Meringue:
In a large, impeccably clean bowl (preferably a metal or glass bowl to avoid any grease residue), beat the egg whites with the pinch of salt using an electric mixer on medium-high speed. Continue beating until the egg whites begin to thicken and form soft peaks when the beaters are lifted. Gradually add the granulated sugar, continuing to beat on medium-high speed. Increase the speed to high and beat until the whites are glossy, firm, and form stiff, upright peaks. When you lift the beaters, the meringue should hold its shape beautifully without collapsing, indicating it’s ready.
-
Perform Macaronage (Folding the Batter):
Add the sifted dry almond and cocoa powder mixture to the whipped egg whites. Using a rubber spatula, gently fold the dry ingredients into the meringue. This delicate process, known as “macaronage,” is critical. You want to mix just until the batter flows slowly like lava from your spatula, forming a “ribbon” that holds its shape for a few seconds before smoothly disappearing back into the main batter. This is the perfect consistency. Do not overmix, as this will result in flat, spread-out macarons without a foot. Undermixing will yield a stiff batter that’s hard to pipe and may result in peaked shells. It’s a balance achieved through practice!
-
Pipe the Macarons:
Scoop the prepared macaron batter into a pastry bag fitted with a 1/2-inch plain round tip. Hold the pastry bag vertically, about 1/2 inch above your prepared baking sheet. Apply even, consistent pressure to pipe out 1-inch-diameter mounds, spacing them about 2 inches apart to allow for spread. After piping, gently tap the baking sheets firmly against your counter a few times. This helps release any trapped air bubbles, which can cause cracking during baking. Use a toothpick to pop any visible air bubbles on the surface for a smoother, more aesthetic finish.
-
Rest the Macarons (Forming the “Pellicle”):
Allow the piped macarons to rest at room temperature for at least 30 minutes, or up to an hour, depending on your kitchen’s humidity. This crucial step allows a thin skin (or “pellicle”) to form on the surface of each macaron. When lightly touched, the surface should feel dry and not stick to your finger. This pellicle is what helps create the distinctive “foot” during baking and prevents the shells from cracking.
-
Bake the Macarons:
Note on Temperature: The original recipe calls for preheating to 400°F (200°C). While some techniques use a high initial burst, a more common and forgiving method for home bakers is a consistent lower temperature. Reduce your oven temperature to 300-325°F (150-160°C). Bake one sheet at a time for 10 to 12 minutes (this is a more standard duration compared to the original 6-8 minutes, which might be too short for a consistent bake). Bake until the macarons have developed their characteristic ‘feet,’ the tops appear set and dry, and they are firm but still slightly soft to the touch. The feet should be well-defined. If you gently jiggle a macaron, it should not wobble on its base. Rotate the baking sheet halfway through baking for even cooking. Over-baking will make them brittle and hollow; under-baking will make them sticky and difficult to remove.
-
Cool the Macarons:
Once baked, immediately slide the parchment paper with the macarons onto a wire rack. Alternatively, some bakers recommend moving the cookies, still on the parchment paper, to barely dampened kitchen towels to cool for 5 minutes; this can sometimes aid in release. Carefully peel the parchment paper off the cooled macarons and place them on wire racks to cool completely before filling. Macarons must be completely cool before handling and filling, otherwise, they will stick or break.
Making the Dark Chocolate Ganache Filling:
-
In a medium saucepan, bring the heavy cream just to a boil over high heat. Watch carefully to avoid boiling over, then remove the pan from the heat immediately.
-
Whisk in the cocoa powder until thoroughly combined and smooth. This step ensures an even chocolate flavor and helps prevent any lumps in the final ganache.
-
Add the finely chopped bittersweet or semisweet chocolate and the room-temperature butter pieces to the hot cream mixture. Let sit undisturbed for 1-2 minutes to allow the heat of the cream to melt the chocolate and butter effectively, then whisk until the mixture is completely smooth, glossy, and emulsified. You should have a rich, velvety ganache.
-
Let the ganache cool to room temperature, then cover it with plastic wrap (pressing the wrap directly onto the surface to prevent a skin from forming) and refrigerate for at least 30 minutes, or until it is firm enough to pipe or spread without losing its shape. It should be thick but still pliable.
Assembling the Macarons:
-
Carefully match up macaron shells of similar sizes, as baking can lead to slight variations. If desired, scoop the firm ganache filling into a pastry bag fitted with a 1/2-inch plain tip for neat and consistent application.
-
Pipe or spread a generous dollop of ganache onto the flat side of one macaron shell. Top with a second macaron shell, flat side down, gently pressing them together to form a delicate sandwich. Be careful not to press too hard, or the fragile shell might crack.
-
Repeat this process with the remaining macaron shells and filling until all are assembled.
Expert Tips for Perfect Chocolate Macarons
Macarons have a reputation for being finicky, but with attention to detail and a few insider tricks, you can master them. Here are some crucial tips for macaron success that will help you achieve those coveted perfect shells:
- Aged Egg Whites: For best results, separate your egg whites a day or two in advance and let them sit uncovered in a bowl in the refrigerator. This allows some moisture to evaporate, resulting in a more stable meringue that whips up better. Always bring them back to room temperature before whipping.
- Accurate Measurements: Baking is a science, and macarons are particularly sensitive to ingredient ratios. Using a kitchen scale for dry ingredients (almond flour, confectioners’ sugar, cocoa powder) is far more accurate than volume measurements and highly recommended for consistent results.
- Don’t Skip Sifting: After processing the almonds, always sift your almond flour/confectioners’ sugar/cocoa mixture. This prevents grainy shells, ensures a perfectly smooth surface, and removes any larger almond pieces that could impede the texture.
- Proper Macaronage: This is arguably the most critical step. The batter should flow like “lava” or a “ribbon” from your spatula. Practice makes perfect! Undermixing leaves peaked tops and no feet, while overmixing leads to flat, lacy, or spread-out shells without structure. Stop mixing as soon as the batter reaches the right consistency.
- Dry the Shells (Pellicle Formation): The resting time after piping is non-negotiable. A dry skin (pellicle) on the shells is essential for the “foot” to form in the oven and prevents cracking. Test by gently touching a shell – if it doesn’t stick, it’s ready.
- Oven Temperature and Control: Ovens can vary wildly in temperature. It’s highly recommended to use an oven thermometer to ensure accuracy. If your oven has hot spots, rotate your trays halfway through baking. Consistent heat is vital for an even rise and foot formation.
- Patience is Key: Don’t rush any step. Macaron making is a meditative process that rewards patience. Allow macarons to cool completely before removing them from the parchment paper and before filling. Attempting to move them too soon will likely result in breakage.
- Mature the Macarons: While delicious immediately, macarons truly develop their optimal texture after maturing. Once filled, store them in an airtight container in the refrigerator for at least 12-24 hours. This “maturation” allows the filling’s moisture to soften the interior of the shell, creating that signature chewy texture that is so beloved.
But Seriously, What’s So Special About Macarons?
These ethereally airy macarons transcend mere dessert status when slathered with a sinful ganache-meets-buttercream situation. However, the lovely little chocolate macarons are also quite nice—and still quite the indulgence—when nibbled in their simplest form, free of filling and, as a consequence, free of flour or dairy. They’re either sent from heaven above or from Paris abroad. Wait, is there a difference?
The magic of macarons lies in their perfect duality: a crisp exterior giving way to a delightfully chewy interior, crowned by a rich, complementary filling. Each bite is a symphony of textures and flavors, making them an unforgettable treat that feels both luxurious and comforting. Their delicate appearance makes them ideal for gifting or showcasing at special events, always eliciting admiration and delight from those who partake.
A Glimpse into Macaron History
The history of macarons is as rich and layered as the dessert itself. While firmly associated with France today, their origins are often traced back to 16th-century Italy. Catherine de’ Medici, an Italian noblewoman who became Queen of France in 1533, is frequently credited with bringing the recipe for small almond cookies to France from her homeland. These early macarons were simple, single meringue-based almond cookies, quite different from the elaborate sandwich cookie we know today.
It was in the 18th century that convent nuns, known as the “Macaron Sisters,” reportedly started baking and selling these cookies to support themselves, further popularizing them in certain regions of France. However, the modern French macaron, with its characteristic ganache filling and sandwiched appearance, truly took shape in the early 20th century. Parisian pâtisseries like Ladurée are often credited with innovating the “macaron Parisien” as we recognize it today, evolving the simple almond cookie into a sophisticated, filled pastry that captured the imagination of the world.
Beyond Chocolate: Exploring Macaron Variations
Once you’ve mastered the chocolate macaron, a world of flavor possibilities opens up! The beauty of macarons lies in their adaptability, allowing for endless creativity. You can experiment with different flavors for both the shells and the filling to suit any palate or occasion:
- Shell Flavors: Replace a small portion of the almond flour with finely ground pistachios for vibrant green pistachio macarons, or add a teaspoon of instant espresso powder to the dry ingredients for a subtle coffee kick. Food coloring gels (not liquid) can be added to the meringue to create stunning, vibrant, and eye-catching shells.
- Filling Flavors: The ganache itself can be flavored with extracts (peppermint, almond, vanilla, hazelnut), citrus zests (orange, lemon), fruit purées (raspberry, passion fruit), or even a touch of liqueur for an adult twist. Buttercream, fruit curds (lemon, passion fruit), or high-quality fruit jams are also popular and delicious filling choices that offer a different texture.
- Seasonal Macarons: Embrace the seasons! Think pumpkin spice or salted caramel for autumn, cranberry-orange or gingerbread for winter holidays, delicate rosewater or lavender-honey for spring, and bright berry flavors for summer. The options are limited only by your imagination!
Storage Recommendations
Proper storage is essential to maintain the delicate texture and exquisite flavor of your homemade chocolate macarons. Following these guidelines will ensure your hard work stays fresh and delicious:
- Unfilled Shells: Macaron shells can be made one day in advance and stored in layers separated by wax paper in an airtight container at cool room temperature. This is a great way to break up the baking process.
- Filled Macarons: Once filled, it’s best to allow the macarons to “mature” in the refrigerator for at least 12-24 hours. This “maturing” process is crucial, as it allows the moisture from the ganache to soften the chewy interior of the shells, enhancing their signature texture and melding the flavors beautifully. Store filled macarons in an airtight container in the refrigerator for up to 2-3 days for optimal freshness.
- Freezing: Macarons freeze beautifully! To freeze, place filled macarons in a single layer on a baking sheet to flash freeze for about 30 minutes until firm. Then, transfer them to an airtight container or freezer bag, separating layers with parchment paper. They can be frozen for up to 1 month. To serve, thaw them in the refrigerator overnight, then bring them to room temperature for the best flavor and texture experience.
Nutrition information is automatically calculated and should be used as an approximation. Individual results may vary based on ingredients and preparation methods.
Indulge in Homemade French Elegance
Crafting chocolate macarons at home is a rewarding experience that combines the precision of French patisserie with the pure joy of creating something truly special. From the satisfying crisp of the shell to the rich, melting ganache, each macaron is a miniature work of art and a testament to your baking prowess. With the detailed steps and expert tips provided, you are now well-equipped to tackle this delightful challenge. So gather your ingredients, follow these steps with care, and prepare to impress yourself and your loved ones with these sophisticated, utterly delicious treats. Happy baking, and enjoy your exquisite taste of Paris!
Tried this recipe? We’d love to see your creations! Share your photos on Instagram and mention @leitesculinaria or tag #leitesculinaria!