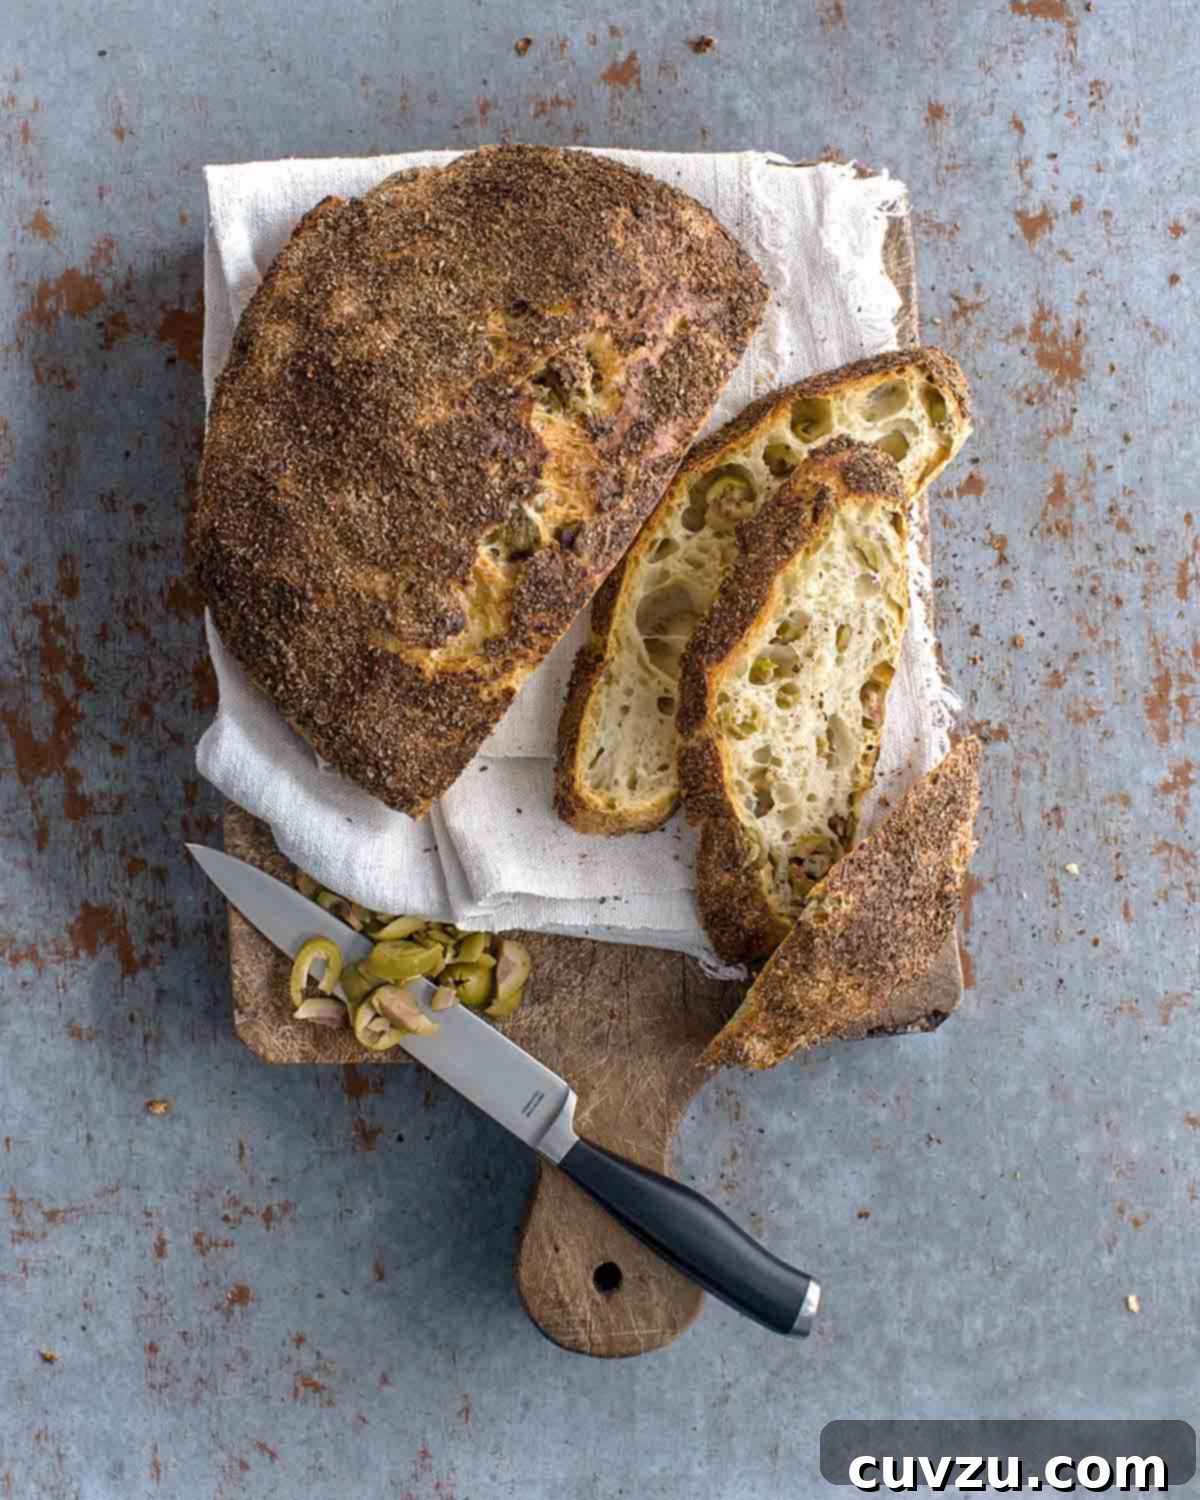
Jim Lahey’s No-Knead Olive Bread: Master Artisan Bread at Home
Unlock the secret to crafting bakery-quality bread in your own kitchen with **Jim Lahey’s No-Knead Olive Bread** from the renowned Sullivan Street Bakery. This revolutionary recipe, requiring just a handful of staple ingredients—flour, water, yeast, and olives—empowers home bakers to create a truly artisan loaf with surprisingly minimal effort. Gone are the days of laborious kneading; this method champions time and patience over intensive labor, yielding a spectacular bread that tastes like it came straight from a professional oven.
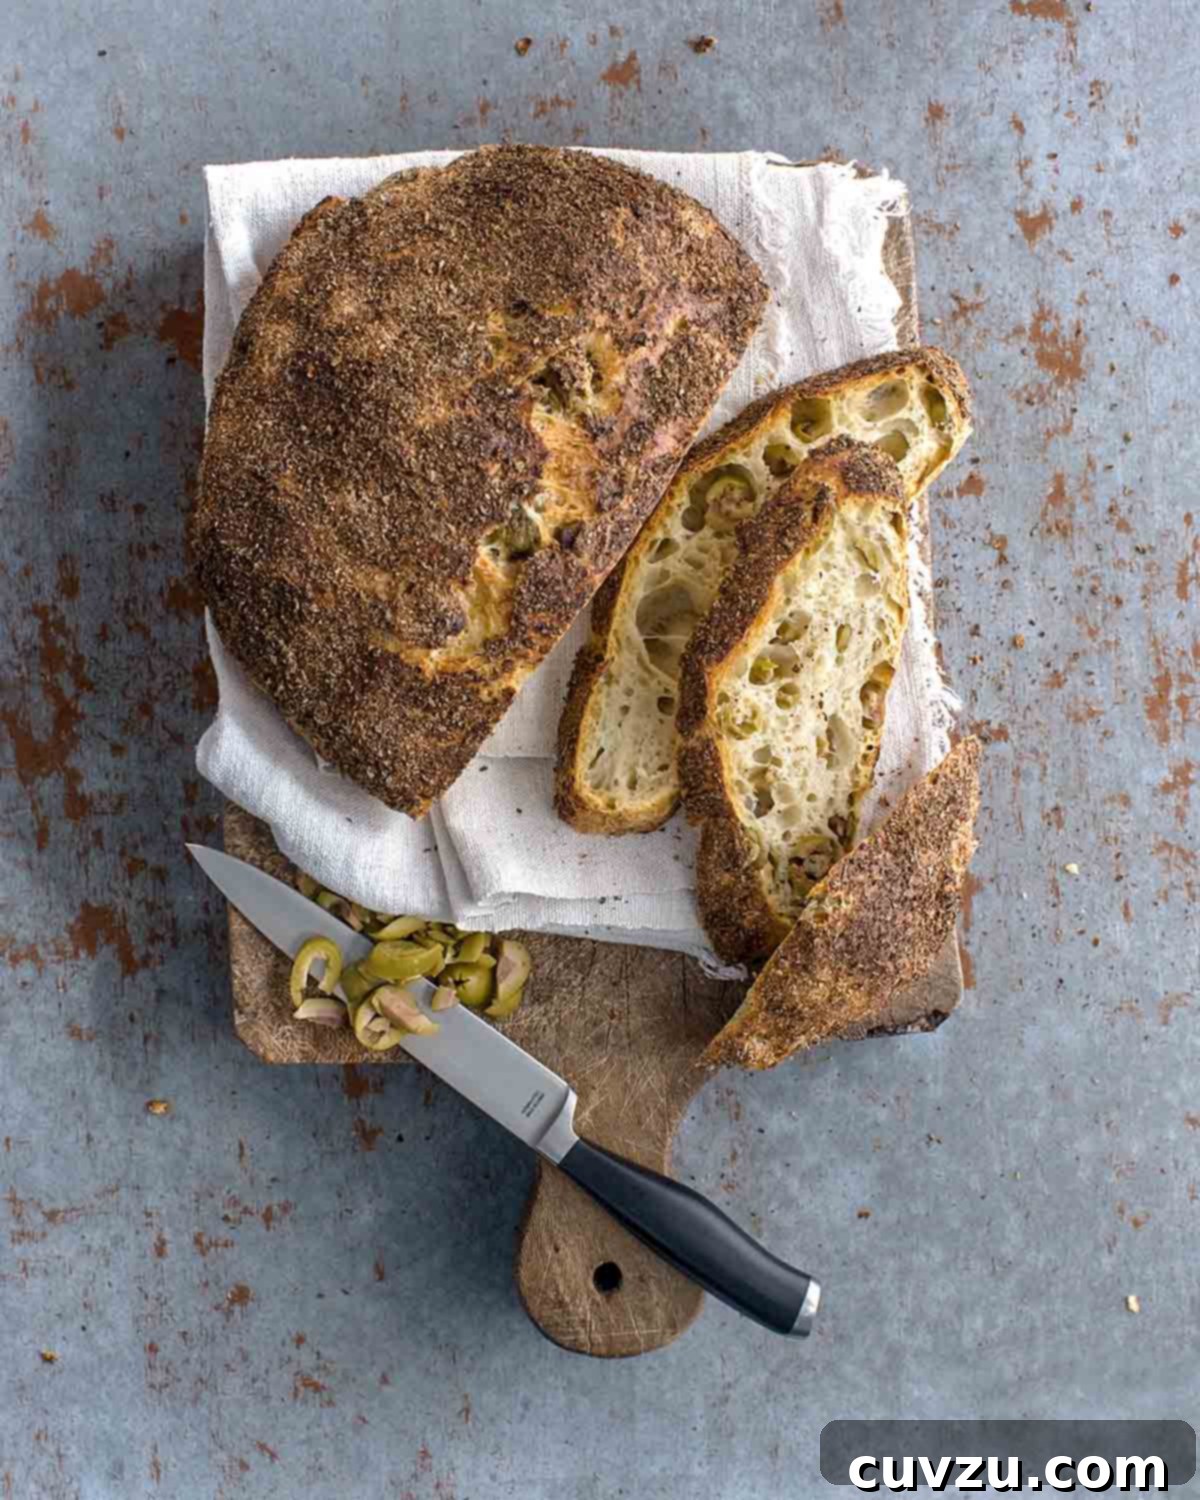
“When I first opened Sullivan Street, with Roman baking in mind, this slightly pungent olive loaf became my signature bread. As a result of the brine the olives release during baking, this recipe calls for no salt. The loaf possesses a golden-brown crust and an open, airy crumb with large pieces of green olive. It’s slightly sour with an intense olive flavor.”
– Jim Lahey with Rick Flaste, author of My Bread
Jim Lahey, the visionary behind Sullivan Street Bakery, transformed home baking with his ingenious no-knead technique. This method, detailed in his acclaimed book “My Bread,” simplifies the bread-making process without compromising on quality or flavor. His olive bread, a testament to Roman baking traditions, quickly became a signature item, beloved for its distinctive taste and irresistible texture. The magic lies in the extended fermentation, which allows the dough to develop complex flavors and an incredible open crumb structure, all while you relax. The brine from the olives naturally seasons the bread, eliminating the need for added salt and contributing to its unique, slightly sour profile and intense olive notes.
Why Choose the No-Knead Method?
The allure of no-knead bread stems from its simplicity and the astounding results it delivers. For aspiring and seasoned bakers alike, this method offers several compelling advantages:
- Effortless Preparation: Say goodbye to strenuous kneading. The dough comes together in minutes with minimal hands-on time, making it perfect for busy schedules.
- Superior Flavor Development: A long, slow fermentation process, often overnight, allows yeast to work its magic, creating deep, nuanced flavors that are impossible to achieve with quick bread recipes.
- Perfect Texture: The high hydration dough and extended rise result in an exceptionally airy interior (crumb) punctuated by large, irregular holes, paired with a wonderfully crisp, chewy crust.
- Accessibility: No special equipment is required beyond a good heavy pot (like a Dutch oven) and a mixing bowl, making artisan bread baking accessible to everyone.
- Consistent Results: Follow the steps, and you’ll consistently achieve professional-looking and tasting loaves.
Jim Lahey’s No-Knead Olive Bread FAQs
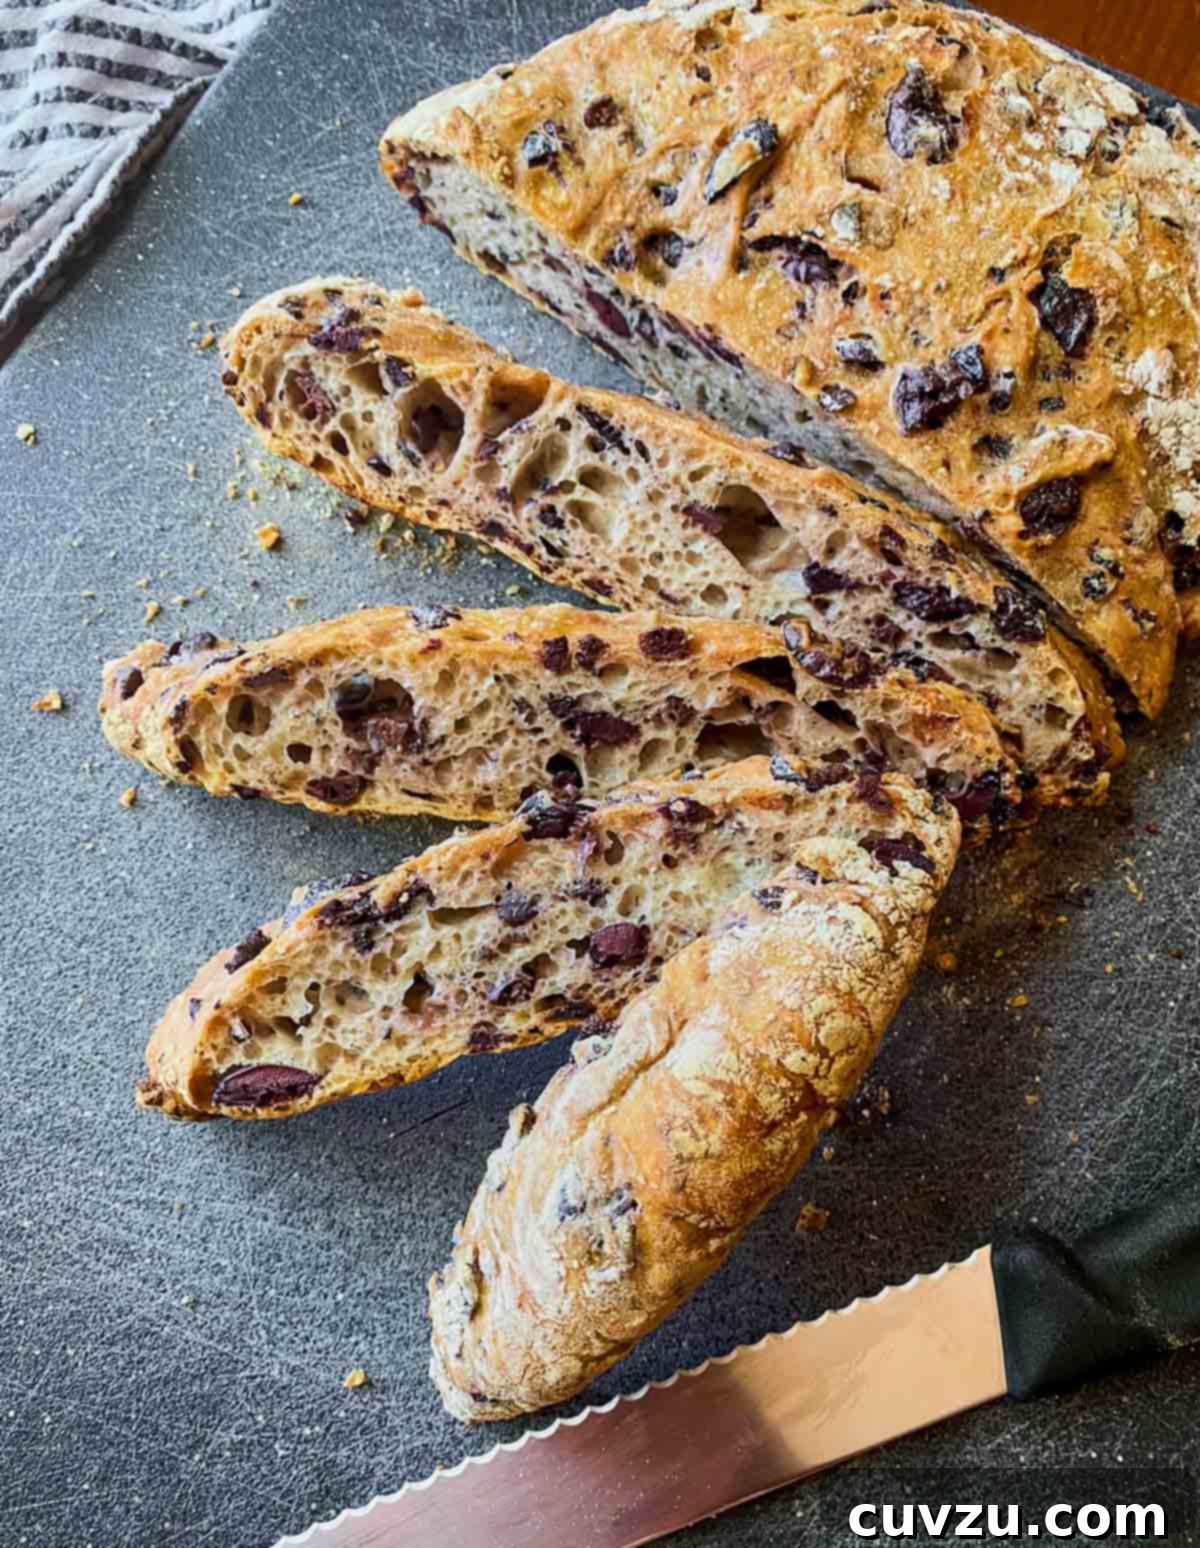
For this exceptional loaf, any pitted olive will yield delicious results. While you might be tempted to pit your own olives, it’s often a tedious process, and the outcomes may not be as neat as commercially pitted varieties. Jim Lahey himself frequently opts for pitted Kalamata olives, specifically those soaked in a pure salt brine with no other additives. Despite their black color, Kalamata olives won’t typically darken your bread, provided you avoid accidentally pouring excess brine into the dough. For a vibrant alternative, consider using green Sicilian colossal olives, sometimes referred to as “giant” olives, also packed in pure salt brine. These are often readily available at Italian food stores and can add a beautiful color contrast and distinct flavor.
A common culprit for a less-than-crisp crust is excess moisture. The no-knead method often involves baking the bread in a covered pot (like a Dutch oven or cloche) to trap steam, which helps the bread achieve its characteristic open crumb. However, this trapped moisture needs to escape for the crust to develop its ultimate crispness. The final uncovered baking period is crucial for this. Ensure you bake the bread for the recommended time without the lid, allowing the crust to thoroughly dry out and brown. Additionally, during the hour-long resting period after baking, it’s vital to place the loaf on a wire rack with ample air circulation. Avoid placing it on a flat surface or letting anything touch its sides, as this can trap steam and lead to a soggy bottom or sides.
While the aroma of a freshly baked loaf is almost irresistible, patience truly is a virtue when it comes to no-knead bread. That “interminable hour” (as some lovingly call it) allows the internal steam to redistribute and be reabsorbed back into the bread as moisture. If you slice into the loaf too soon, the hot steam escapes rapidly, leading to a denser, gummier texture and a loaf that will dry out much faster. Waiting ensures that your bread retains its ideal moisture, structure, and keeps longer. Unless you plan to devour the entire loaf immediately (and no judgment if you do!), try to hold out for that crucial cooling period to experience the bread at its absolute best.
The beauty of this recipe is its minimal equipment requirement. You’ll primarily need a large mixing bowl for the dough, a wooden spoon or a sturdy spatula for mixing, and a clean kitchen towel for proofing. The most important piece of equipment is a 4 1/2- to 5 1/2-quart heavy, oven-safe pot with a lid, such as a Dutch oven or a cloche. This pot creates a steamy environment essential for the bread’s crust and crumb. A bowl scraper can also be very helpful for handling the sticky dough.
To maintain its freshness and flavor, store your no-knead olive bread at room temperature. A common method is to place the cooled loaf in a paper bag or wrap it loosely in a clean kitchen towel. For longer storage (up to 3-4 days), you can store it in an airtight container or a bread box. If you plan to keep it for an extended period, the bread freezes exceptionally well. Slice the cooled loaf, then freeze the slices in an airtight freezer bag. You can then toast individual slices directly from frozen for a quick treat.
Jim Lahey’s No-Knead Olive Bread
★
★
★
☆
David Leite
Saved
- PIN
Ingredients
US
Metric
Metric
- ▢ 3 cups bread flour, plus more for the work surface
- ▢ About 1 1/2 cups roughly chopped pitted olives, (see FAQ above)
- ▢ 3/4 teaspoon instant or other active dry yeast
- ▢ 1 1/2 cups cool (55 to 65°F | 13 to 18°C) water
- ▢ Wheat bran, cornmeal, or additional flour, for dusting
Instructions
-
In a medium bowl, combine the bread flour, roughly chopped olives, and yeast. Stir these dry ingredients together thoroughly to ensure even distribution.
-
Pour in the cool water. Using a sturdy wooden spoon or your hand, mix the ingredients until they form a wet and sticky dough. This process should take approximately 30 seconds. Avoid overmixing; just combine until no dry flour remains.
-
Cover the bowl tightly with plastic wrap or a damp kitchen towel. Let the dough rest at room temperature (ideally between 68-72°F / 20-22°C) for an extended period, usually 12 to 18 hours. During this long fermentation, the dough will develop air bubbles on its surface and more than double in size, indicating it’s ready for the next stage.
-
Once the first rise is complete, generously dust a clean work surface with flour. Use a bowl scraper or a flexible rubber spatula to carefully scrape the dough out of the bowl in one piece. With lightly floured hands (or continuing with your scraper/spatula), gently lift the edges of the dough from all sides and fold them towards the center. Continue to nudge and tuck the edges underneath to form a neat, round loaf shape.
-
Lay a clean kitchen towel on your work surface and generously dust it with wheat bran, cornmeal, or additional flour. Carefully transfer the shaped dough onto the dusted towel, ensuring the seam side is facing down. If the dough feels particularly sticky, lightly dust the top with a little more wheat bran, cornmeal, or flour.
-
Loosely fold the ends of the towel over the dough to cover it completely. Place the covered dough in a warm, draft-free location for its second rise, which will take 1 to 2 hours. The dough is ready to bake when it has nearly doubled in size. To test, gently poke it with a floured finger; if the indentation remains, it’s ready. If it springs back immediately, allow it another 15 minutes to rise.
-
Approximately 30 minutes before the end of the second rise, preheat your oven to 475°F (245°C). Adjust an oven rack to the lower third position. Place a covered 4 1/2- to 5 1/2-quart heavy pot (like a Dutch oven) in the center of the rack to preheat along with the oven. This step is crucial for achieving a crispy crust.
-
Using oven mitts, carefully remove the intensely hot preheated pot from the oven and uncover it. Unfold the towel covering the dough and quickly but gently invert the dough directly into the hot pot, ensuring the seam side is now facing up. Exercise extreme caution as the pot will be exceedingly hot. Replace the lid securely and bake for 30 minutes.
-
After 30 minutes, remove the lid from the pot. Continue baking the olive bread, uncovered, for an additional 15 to 30 minutes, or until the crust develops a deep, rich chestnut color and sounds hollow when tapped. Be careful not to let it burn. Use a heatproof spatula or oven mitts to gently lift the fully baked bread from the pot and transfer it to a wire rack to cool completely before slicing and serving.
Adapted From
My Bread
Buy On Amazon
Explore More with AI
Substitutions
Scale
Summarize
Nutrition
Calories: 168 kcal
Carbohydrates: 28 g
Protein: 5 g
Fat: 4 g
Saturated Fat: 1 g
Monounsaturated Fat: 2 g
Sodium: 318 mg
Fiber: 2 g
Sugar: 1 g
Nutrition information is automatically calculated, so should only be used as an approximation.
Recipe Testers’ Reviews: Real Bakers, Real Results
Don’t just take our word for it! Our community of dedicated recipe testers put Jim Lahey’s No-Knead Olive Bread to the test, offering their insights and tips for achieving perfect results at home. Their experiences highlight the straightforward nature of this recipe and the impressive, delicious outcome.
Larry Noak
This Jim Lahey bread is absolutely STUNNING, from the crunchy, dark crust to the shiny crumb with nice, big holes.
I used green and black olives and I also took the liberty of grinding some fresh rosemary from our garden and kneading it throughout the dough. The dough had more than doubled in about 10 hours, but if you wait a few extra hours, the flavors will be WONDERFUL.
I also recommend patience in leaving the lid on the Dutch oven for the entire 30 minutes. The idea behind Jim Lahey’s method is to create a soft, airy crumb surrounded by a CRUNCHY, dark, almost nutty crust. Take your time and adjust for the depth of color AFTER the first 30 minutes when you remove the lid. My oven browns things quickly, and I checked the loaf after 15 minutes uncovered and it still needed another 5 minutes to reach perfection.
As the loaf cools, listen to it crack and groan and enjoy the wonderful scent of olive and wheat while patiently waiting for the loaf to cool enough to slice. Take your time with this recipe and you will reap RICH rewards.
Sue Epstein
I’m an experienced bread baker and accustomed to teaching breadmaking. This olive bread recipe was so foolproof, simple to make, and delicious that I will definitely make it again and again. It had an excellent crust and crumb structure.
It’s an especially good recipe for a neophyte to breadmaking. The recipe calls for baking it 30 minutes covered and then 15 to 30 minutes uncovered, until it’s a deep chestnut color. When I uncovered it after the initial 30 minutes and tested it with an instant-read thermometer, it had already reached 190°F, which is when bread is fully done. I’d suggest checking it after about 20 minutes and then uncovering it for a final browning. This can prevent overbaking while ensuring that lovely, dark crust.
Emily Olson
This is an easy-to-make olive bread with simple ingredients that doesn’t require a lot of expertise to put together. I liked that I could assemble the dough and let it rise overnight and during the day. It also freezes well and is perfect alongside a bowl of Italian sausage soup.
Serving Suggestions for Your Artisan Olive Bread
Once your Jim Lahey No-Knead Olive Bread has cooled and been sliced, its versatility shines. This flavorful loaf is more than just a side; it can elevate any meal:
- With Soups and Stews: Its robust flavor and sturdy crust make it an ideal companion for hearty soups, stews, and chili, perfect for soaking up every last drop. Think classic minestrone or a rich lentil stew.
- As Part of a Cheese Board: Pair slices of olive bread with a selection of artisanal cheeses, cured meats, and a drizzle of high-quality olive oil for an impressive appetizer or light meal.
- For Sandwiches: Transform your everyday sandwiches into gourmet creations. It’s particularly good with roasted vegetables, fresh mozzarella, or thinly sliced prosciutto.
- Alongside Salads: Serve it with a fresh, vibrant salad to add substance and a delightful Mediterranean twist.
- Simple Snack: Sometimes, the best way to enjoy it is simply toasted with a little butter or a dip in good olive oil.
Conclusion: The Reward of Effortless Artisan Baking
Jim Lahey’s No-Knead Olive Bread is a testament to the fact that exceptional baking doesn’t require complex techniques or extensive experience. With just a few basic ingredients and the magic of time, you can produce a loaf that rivals those from the finest bakeries. Its golden, crunchy crust, open and airy crumb, and intense olive flavor make it a truly special bread—a signature that you can now confidently bring to your own table. Embark on this rewarding baking journey and savor the rich rewards of homemade artisan bread.