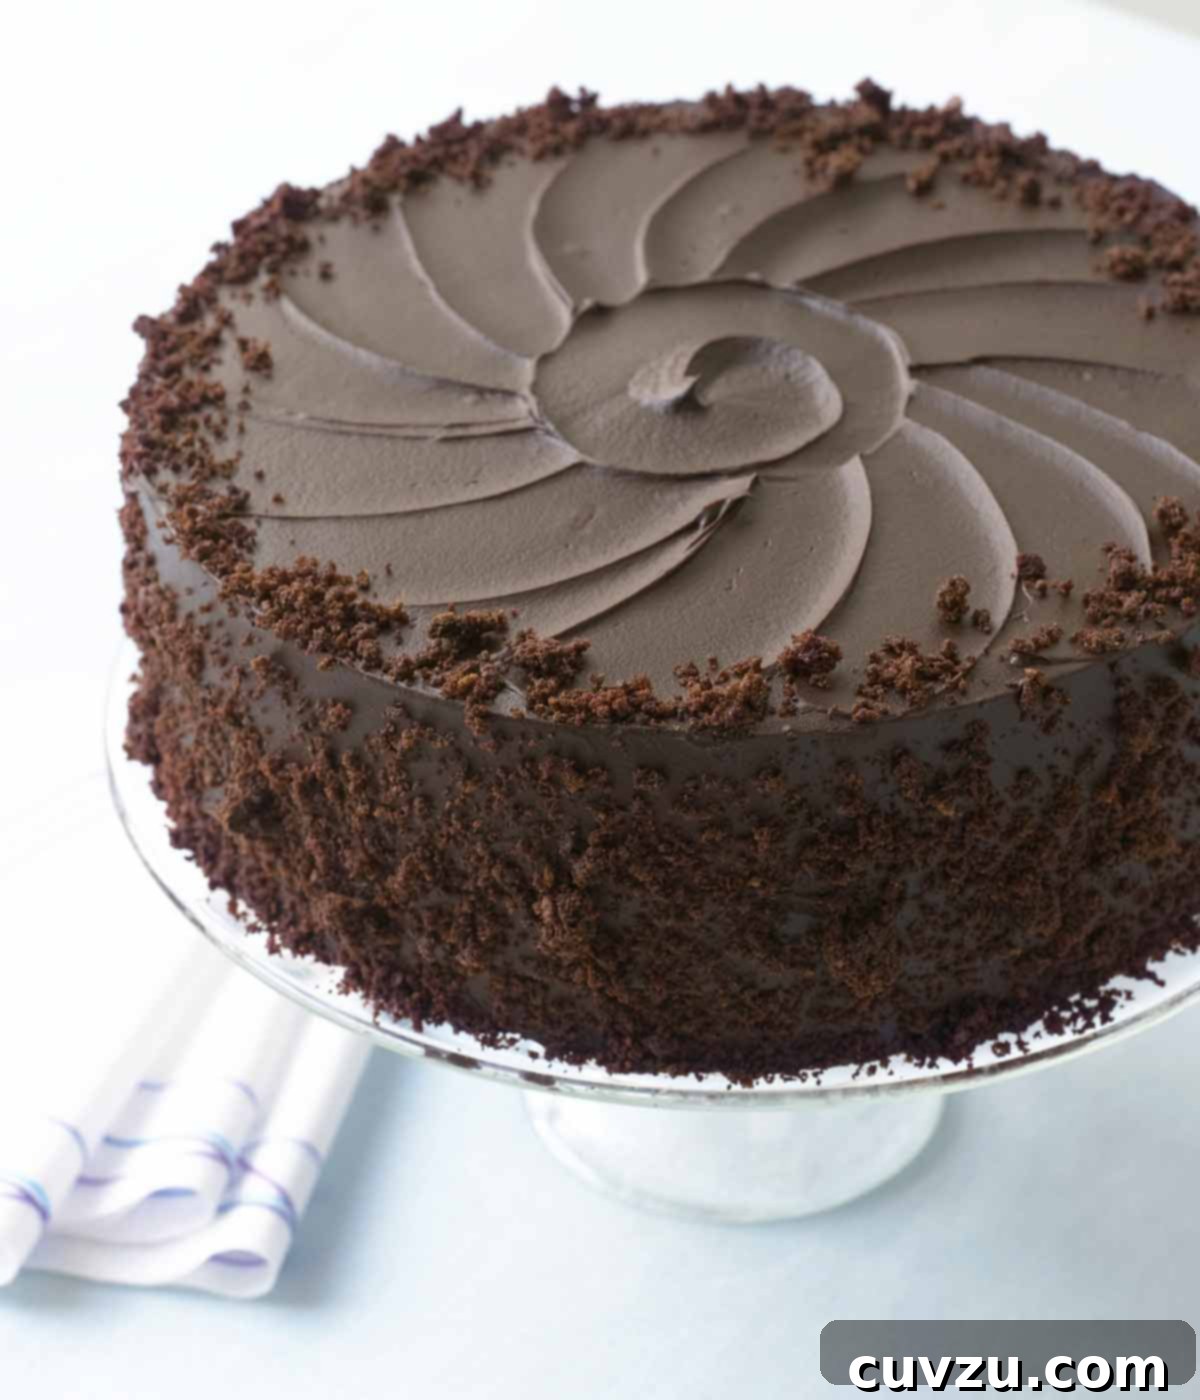
Prepare to be captivated by the legendary **Brooklyn Blackout Cake**, a true chocolate masterpiece that promises an unparalleled experience for every cocoa enthusiast. This recipe, inspired by the cherished original from Ebinger’s Bakery in Brooklyn, is not only surprisingly accessible but also delivers an exquisitely rich and tender dessert. Boasting a decadent pudding-like filling, moist chocolate cake layers, and a lavish, intensely chocolatey frosting enveloped in a cloak of cake crumbs, it’s a guaranteed cure for any chocolate craving.
A Culinary Trip Down Memory Lane: The Enduring Legacy of Ebinger’s Blackout Cake
For many, the mention of Brooklyn evokes images of vibrant neighborhoods, rich history, and iconic culinary delights. Among these, the **Ebinger’s Bakery Blackout Cake** holds a special, nostalgic place in the hearts of New Yorkers and dessert lovers alike. As Elinor Klivans fondly recalls, her childhood summers in Brooklyn were incomplete without a visit to Ebinger’s. This legendary bakery, a mere few blocks from her grandfather’s house, was a treasure trove of homemade-quality treats, from delicate lemon meringue tarts to fluffy Parker House rolls. But for special family dinners, one item reigned supreme: the illustrious chocolate blackout cake.
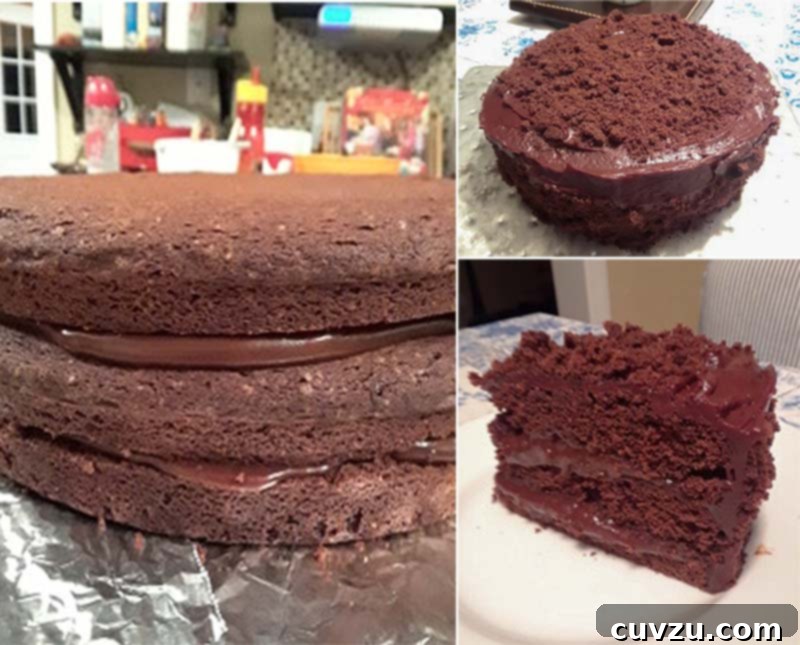
Ebinger’s cake was a marvel: three layers of deep chocolate cake, meticulously layered with a creamy, rich chocolate filling, then lavishly enrobed in a thick fudge frosting and finished with a generous dusting of chocolate cake crumbs. Sadly, Ebinger’s Bakery is no longer with us, but its culinary legend lives on. Over the years, the elusive recipe for this celebrated cake has surfaced in various publications, allowing home bakers to attempt to recreate its magic.
Elinor Klivans took on this challenge, striving to capture the essence of the original while perfecting it for the modern home kitchen. Her “new and improved” **Brooklyn Blackout Cake** mirrors the magnificent depth of flavor and texture of its predecessor. The pudding-like filling, a hallmark of the classic, has been thoughtfully made slightly thicker to ensure it remains perfectly in place between the tender cake layers, adding to the cake’s structural integrity and overall indulgence. Furthermore, this dark chocolate cake boasts the same soft, yielding crumb that melts in your mouth. Unlike some more intricate cake recipes, Klivans’ version simplifies the baking process, making it wonderfully easy to mix without the need for separately beating egg yolks and whites. The best part? You no longer need to wait for a special occasion or company to arrive to savor this exquisite treat. This authentic blackout cake experience is now yours to create, anytime you desire a truly magnificent chocolate indulgence.
The Secret to a Tender Crumb: Mastering Homemade Cake Flour
Achieving the characteristic soft and fluffy texture of a classic blackout cake heavily relies on the right type of flour: cake flour. Cake flour is distinct from all-purpose flour because it is a softer, lower-protein wheat flour that has been more finely milled. This results in less gluten formation when mixed into batter, which in turn bakes up into a much more tender, delicate, and airy crumb compared to cakes made with higher-protein all-purpose flour.
However, if your pantry doesn’t stock cake flour, don’t despair! You can easily create a remarkably close substitute at home using common ingredients. The key lies in reducing the protein content of all-purpose flour and replacing it with a starch that will inhibit gluten development, ensuring that coveted soft texture. For every cup of cake flour required in a recipe, you will need 1 cup of all-purpose flour from which you remove 2 tablespoons. To this remaining all-purpose flour, you will then add 2 tablespoons of cornstarch. The next step is crucial for success: **sift the mixture twice**. Sifting not only ensures that the cornstarch is thoroughly and evenly distributed throughout the flour, but it also aerates the mixture, making it lighter and contributing to the desired delicate crumb. After sifting, measure out 1 cup of this homemade cake flour substitute and use it as directed in your recipe. Remember that sifted flour is less dense, so you might have a little more than a cup after the process, but always measure after sifting for accuracy.
For this particular **Brooklyn Blackout Cake** recipe, which calls for 2 cups of cake flour, the homemade conversion is simple: start with 2 cups of all-purpose flour, remove 4 tablespoons, then add 4 tablespoons of cornstarch. Sift this mixture thoroughly, not once, but twice (or even thrice for extra aeration!) to ensure it’s perfectly combined and light. Finally, measure out 2 cups of your freshly made cake flour substitute and proceed with the recipe, confident that you’re on your way to an incredibly tender chocolate cake.
Brooklyn Blackout Cake: An Iconic Chocolate Dessert
By David Leite, adapted from Elinor Klivans
- PIN
Print Recipe
Ingredients
For the Decadent Chocolate Pudding Filling
- 2 tablespoons unsweetened Dutch-process cocoa powder
- 1 1/2 cups hot water
- 3/4 cup granulated sugar
- 3 ounces semisweet chocolate, chopped into small pieces for even melting
- 3 tablespoons cornstarch, dissolved completely in 2 tablespoons cold water
- 1/4 teaspoon salt
- 1/4 cup (4 tablespoons) unsalted butter, cut into 4 pieces, at room temperature
- 1 teaspoon pure vanilla extract
For the Moist Chocolate Cake Layers
- 2 ounces unsweetened chocolate, chopped
- 1/2 cup unsweetened Dutch-process cocoa powder
- 3/4 cup whole milk
- 2 cups cake flour (or homemade substitute, see instructions above)
- 1 teaspoon baking powder
- 1 teaspoon baking soda
- 1 teaspoon salt
- 1 cup unsalted butter, softened to room temperature
- 2 cups granulated sugar
- 4 large eggs
- 2 teaspoons pure vanilla extract
For the Rich Chocolate Fudge Frosting
- 12 ounces semisweet chocolate, finely chopped
- 3/4 cup unsalted butter, softened to room temperature
- 1/2 cup lukewarm water, precisely 88°F to 90°F (31°C to 32°C)
- 1 tablespoon light corn syrup
- 2 teaspoons pure vanilla extract
For the Garnish (Optional but Recommended)
- Shaved semisweet chocolate for an elegant finish
Instructions
Part 1: Crafting the Silky Chocolate Pudding Filling
-
In a medium-sized heavy-bottomed saucepan, combine the cocoa powder, hot water, granulated sugar, and chopped semisweet chocolate. Place the saucepan over low heat and stir continuously. This constant stirring is crucial to ensure the cocoa powder fully dissolves and the chocolate melts smoothly without scorching. Continue until you have a uniform, glossy chocolate mixture. Once smooth, whisk in the dissolved cornstarch and salt. Increase the heat to medium-high and bring the mixture to a gentle boil, stirring constantly. Pay particular attention to the bottom and sides of the pan to prevent sticking. Allow it to boil gently for 1 minute to activate the cornstarch and thicken the mixture to a rich pudding consistency.
-
Immediately remove the pan from the heat. Add the pieces of unsalted butter and the vanilla extract. Stir until the butter has completely melted and is fully incorporated, creating a luxurious, glossy filling. Pour this warm chocolate filling into a clean bowl. To prevent a skin from forming on the surface, press a piece of plastic wrap directly onto the surface of the pudding, ensuring no air is trapped between the plastic and the filling. Refrigerate the filling for at least 5 hours, or ideally overnight, until it has thoroughly chilled and thickened to the consistency of a soft, spreadable pudding. This firm consistency is essential for layering the cake.
Part 2: Baking the Fluffy Chocolate Cake Layers
-
Adjust an oven rack to the middle position. Preheat your oven to 350°F (180°C). Prepare two 9-inch round cake pans with sides that are 1 3/4 to 2 inches high. Generously butter the bottom and sides of each pan. Line the bottoms with parchment paper circles, then butter the parchment paper as well. This double buttering and parchment paper step is vital for ensuring the cakes release easily without sticking.
-
In a heatproof bowl (or the top section of a double boiler), combine the chopped unsweetened chocolate, Dutch-process cocoa powder, and whole milk. Set this bowl over a saucepan containing barely simmering water (or the bottom section of a double boiler), ensuring the bottom of the bowl does not touch the water. Stir gently and continuously until the chocolate is fully melted, the cocoa powder is dissolved, and the mixture is completely smooth and homogeneous. Remove the bowl from the heat and set it aside to cool to a lukewarm temperature, which will allow it to blend seamlessly with the other ingredients.
-
While the chocolate mixture cools, take a medium bowl and sift together the cake flour (or your homemade substitute), baking powder, baking soda, and salt. Sifting these dry ingredients ensures they are well combined and free of lumps, which contributes to a smoother batter and an even cake texture.
-
In a large mixing bowl, using an electric mixer fitted with the paddle attachment, beat the softened unsalted butter and granulated sugar together on medium speed. Continue beating for about 2 minutes, or until the mixture becomes light in color, fluffy, and smooth. Stop the mixer frequently to scrape down the sides and bottom of the bowl with a spatula, ensuring all ingredients are evenly incorporated. Add two of the large eggs at a time, beating after each addition just until fully incorporated. Then, add the remaining two eggs along with the vanilla extract and beat for another 1 minute until the mixture is cohesive. Reduce the mixer speed to low and slowly add the cooled chocolate mixture, mixing just until it is blended and smooth. Finally, gradually add the sifted flour mixture, mixing on low speed only until the flour is just incorporated and the batter appears smooth. Be careful not to overmix, as this can develop too much gluten and result in a tough cake. Divide the batter evenly between the two prepared cake pans.
-
Bake the cakes for approximately 40 minutes, or until the tops feel firm and spring back slightly when gently touched. A reliable test is to insert a toothpick into the center of each cake; it should come out clean when done. Once baked, remove the pans from the oven and let the cakes cool in their pans on wire racks for 10 minutes. After this initial cooling, carefully run a small, sharp knife around the edges of each pan to loosen the cakes. Invert each cake onto a wire rack, then gently remove the parchment paper from the bottom. Place the parchment paper loosely back on top of the cakes to prevent them from drying out. Allow the cake layers to cool completely to room temperature before handling further, then discard the paper. This complete cooling is crucial before frosting to prevent melting and sliding.
Part 3: Preparing the Luxurious Chocolate Fudge Frosting
-
Place the finely chopped semisweet chocolate and softened unsalted butter in a heatproof bowl (or the top of a double boiler). Set this bowl over a saucepan of barely simmering water (or the bottom of the double boiler), ensuring the bowl does not touch the water. Stir constantly until both the chocolate and butter are completely melted and the mixture is smooth and glossy. Remove from heat and set aside to cool slightly. It is critical for the lukewarm water to be at a specific temperature (88°F to 90°F / 31°C to 32°C). You can check this with your fingertips, ensuring it feels just warm, or use an instant-read thermometer for precision.
-
Once the chocolate mixture has cooled slightly, add the precisely measured lukewarm water all at once. Gently whisk the mixture until the frosting becomes smooth and uniform. You will notice it thickens slightly as the water is incorporated. Stir in the light corn syrup and vanilla extract until well combined. Allow the frosting to sit at room temperature for about 30 minutes, or until it cools further and thickens to a spreadable consistency. If your kitchen is warm, you might need to refrigerate it for 10-15 minutes, stirring occasionally, to achieve the ideal texture.
Part 4: Assembling and Frosting Your Blackout Cake Masterpiece
-
To begin assembling, place one of the cooled cake layers onto your chosen serving plate. Invert it so the top of the cake faces upwards. To keep your serving plate clean during frosting, tuck thin strips of wax paper under the edges of the cake all the way around. Using a long, serrated knife, carefully slice this cake layer horizontally into two even thinner layers, keeping them in place on the plate. Gently slip the removable bottom of a tart pan or springform pan between the layers to help lift the top half, setting it aside temporarily. With a thin metal spatula, evenly spread approximately half of the chilled chocolate pudding filling over the bottom half of the cake layer, leaving a clean 1/2-inch border around the edge to prevent the filling from oozing out. Carefully slide the top half of the cake layer back into place, centering it precisely over the filling-covered bottom layer. Spread the remaining filling evenly over this second layer.
-
Next, take the second baked cake layer and invert it onto a separate plate so its top is facing up. Cut this layer horizontally into two even sections as well. Carefully slide one of these cut halves onto the stacked cake layers already on your serving plate, creating a three-layer cake with two layers of filling. This completes the main structure of your **Brooklyn Blackout Cake**. The remaining half of the second cake layer will be crumbled and used as a signature garnish.
-
Using your thin metal spatula, apply a very thin, even layer of the chocolate fudge frosting over the top and all sides of the assembled cake. This initial layer is known as a “crumb coat” and is designed to trap any loose crumbs, preventing them from mixing into your final frosting layer. Once coated, refrigerate the cake for about 15 minutes to allow this crumb coat to firm up. After chilling, retrieve the cake and spread the remaining frosting generously over the top and sides, creating a smooth, rich outer layer.
-
Now for the iconic finish: take the remaining cake layer and, using your fingers, crumble it into small, fine crumbs. Carefully press these chocolate cake crumbs onto the sides of the frosted cake until it’s fully coated. For an extra touch of decadence, sprinkle some additional crumbs over the top surface of the cake. Gently remove the wax paper strips from beneath the cake. If you desire an even more elegant presentation, scatter a few shaved semisweet chocolate curls over the top. To cut, use a large, sharp knife, warming it slightly between cuts if needed for cleaner slices. The finished **Brooklyn Blackout Cake** can be covered and refrigerated for up to 2 days. For optimal flavor and texture, allow it to sit at room temperature for approximately 45 minutes before serving to ensure the filling and cake are soft and yielding. This timeless recipe was originally published on April 12, 2010.
Baker’s Notes & Expert Tips for Success
- Meticulous Pan Preparation: The importance of thoroughly buttering both the cake pans and the parchment paper cannot be overstated. This ensures that your delicate cake layers release perfectly from the pans, avoiding any heartbreaking sticking or breakage.
- Avoid Overmixing the Batter: To achieve that signature tender crumb and prevent dense or sunken spots in your cake, be careful not to overbeat the cake batter once the dry ingredients are added. Mix only until the flour is just incorporated and the batter resembles a smooth, velvety chocolate mousse. Excess mixing develops gluten, which leads to a tougher cake.
- Cornstarch Dissolution is Key: When preparing the pudding filling, ensure the cornstarch is completely dissolved in the water before adding it to the saucepan. Any undissolved clumps will result in a lumpy filling. Also, ensure the mixture reaches a full boil for at least one minute to properly activate the cornstarch and achieve the desired thickness.
- Frosting Temperature Control: For the smoothest, most spreadable frosting, precise temperature matching between the melted chocolate mixture and the lukewarm water is essential. Using an instant-read thermometer to confirm both are between 88°F to 90°F (31°C to 32°C) will ensure they emulsify beautifully with minimal whisking. If your kitchen is warm, don’t hesitate to briefly chill the frosting to achieve a perfect consistency.
- Slicing Cake Layers: When slicing the cake layers horizontally, take your time and use a long serrated knife for the cleanest cuts. The tip of using the bottom of a tart or springform pan to gently lift and separate layers is invaluable for keeping the delicate cake intact.
- Crumb Coat and Chill: The initial “crumb coat” of frosting is a small but crucial step. It seals in any loose crumbs, creating a smooth, pristine surface for your final layer of frosting. Don’t skip the 15-minute refrigeration after the crumb coat; it helps firm up the cake and filling, making the final frosting application much easier.
- Embrace the Crumbs: The generous layer of chocolate cake crumbs is not just for decoration; it’s a defining characteristic of the blackout cake. Don’t worry about perfection when applying them – they cleverly hide any frosting imperfections and add to the cake’s rustic charm.
- Serving Temperature: While the cake is best stored in the refrigerator, allowing it to sit at room temperature for about 45 minutes before serving truly enhances its texture and flavor, bringing out the richness of the chocolate and softening the cake layers and filling to their ideal consistency.
Adapted From
Chocolate Cakes by Elinor Klivans
Buy On Amazon
Explore More with AI
Nutrition
Nutrition information is automatically calculated, so should only be used as an approximation.
Rave Reviews from Our Expert Recipe Testers
Tammori Petty
Tammori Petty, one of our seasoned recipe testers, declared this **Brooklyn Blackout Cake** as “fabulous, fabulous, fabulous.” If you’re a serious chocolate lover, she assures, this cake is an absolute must-try. What stood out most for Tammori was the perfect balance in its richness: the spongy cake layers and decadent filling were deeply flavorful without being overly sweet. While the recipe suggests serving at room temperature, Tammori discovered a personal preference for enjoying her slice still slightly chilled from the refrigerator, noting it added another layer of delight to the experience. She advises bakers to plan their time accordingly, as this impressive cake does require some dedicated preparation. A minor point of caution from Tammori: be gentle when slicing the cake layers, as the tender crumb can produce a generous amount of delicious chocolate crumbs.
K. Zimmerman
K. Zimmerman reported a delightful frenzy in her kitchen while assembling this cake, with the rich chocolate aroma drawing in curious teenagers. She describes the cake as a “rich, dark chocolate cake with a wonderfully thick chocolate pudding center and an intensely chocolaty frosting and a finish of some more chocolate crumbs. Fabulous!” For the pudding filling, K. Zimmerman found it reached a nice thick consistency after just 3 1/2 hours of chilling, allowing her to proceed with assembly ahead of schedule. She also noted that her warm kitchen necessitated refrigerating the frosting for about 15 minutes to achieve the proper thickness for spreading, a useful tip for those in warmer climates. She had no issues with the cake layers slicing cleanly and found the filling spread nicely, even adding an extra spoonful to the middle of the first layer to ensure evenness. K. Zimmerman diligently left a 1/2-inch plain edge around the filling, as recommended. She mentions having some leftover filling, which she was confident would “disappear quickly.” The frosting, though a bit thin initially, firmed up perfectly after a 15-minute chill in the fridge, and she kept the rest of the frosting bowl in the fridge, stirring it back to a spreadable consistency as needed. The crumb topping, she happily observed, “hid all my mistakes and made for a fun finish,” providing ample opportunities for pre-cutting tasting.
Amy Wilschut
Amy Wilschut humorously dismisses the idea of a “too much chocolate” cake, stating that this **blackout cake** is unequivocally not one of them. She savored a slice at 10:30 PM, noting it would be gone before she finished her review – “no crumbs spared.” Despite the 5-hour journey from start to finish, Amy emphasizes that diligently following the recipe delivers the precise, exquisite result the author intended. She offers several insightful tips for fellow bakers:
• When adding cornstarch to the filling, scrape every last bit from the measuring cup to ensure accurate thickening. Bring the mixture to a full boil for the entire minute, allowing the cornstarch sufficient time to meld with the chocolate.
• Be generous with buttering the pans and parchment paper – do not skimp!
• Using **cake flour** as specified is paramount for achieving the desired light texture and perfect crumb.
• Adhere to the electric mixer timings: 2 minutes for butter and sugar, and an additional minute after all eggs and vanilla are added. When incorporating the flour, fold it in gently to avoid overmixing, which can introduce too much air and cause the cake to sink. The batter should resemble chocolate mousse. Due to its thick consistency, smooth out the batter in the pans to eliminate any potential air pockets.
• The most crucial step for the frosting is using a thermometer to ensure the chocolate mixture and water are at the exact same temperature (around 90°F or 31-32°C). This allows them to gel together smoothly with minimal whisking. Amy found it took about 20 minutes for her chocolate mixture to cool to the ideal temperature.
Finally, Amy, eager to enjoy her cake before midnight on the day of a solar eclipse, cut into it after only 15 minutes of resting, and it sliced perfectly and tasted delicious.
Trisha T.
Trisha T.’s experience with this cake simply made her happy, though she admits to actively trying not to think about it currently residing in her fridge, fearing she might devour the entire confection herself. She found the filling came together perfectly and easily, but noted it took nearly 20 minutes for all the dry ingredients to fully dissolve over low heat, a patience-testing but necessary step.
Trisha followed the directions meticulously and did observe a slight indent on each baked cake layer. However, she skillfully managed this by carefully slicing the layers to be as even as possible. She used one of the indented layers as the middle section, adding a bit more filling in that area to level it out. This clever trick made the center of each slice her favorite bite, thanks to the extra decadent filling. The other indented section was perfectly repurposed for crumbling, ensuring her final cake remained even and beautifully presented, despite the initial dips in the baked layers.
Despite testing the water and chocolate temperatures with an instant-read thermometer before combining, Trisha initially found the frosting a bit thin. A quick 15-minute chill in the fridge, however, transformed it into a perfect, spreadable consistency. When assembling, Trisha particularly appreciated the tip of using the bottom of a tart pan to assist in handling the delicate cake layers, a technique she plans to use for all future cake endeavors. She also advises future bakers to be prepared for a generous amount of cake crumbs during assembly – or, as she suggests, to simply “eat them as you go…”