The Ultimate Patriotic Delight: A Stunning 4th of July Layer Cake
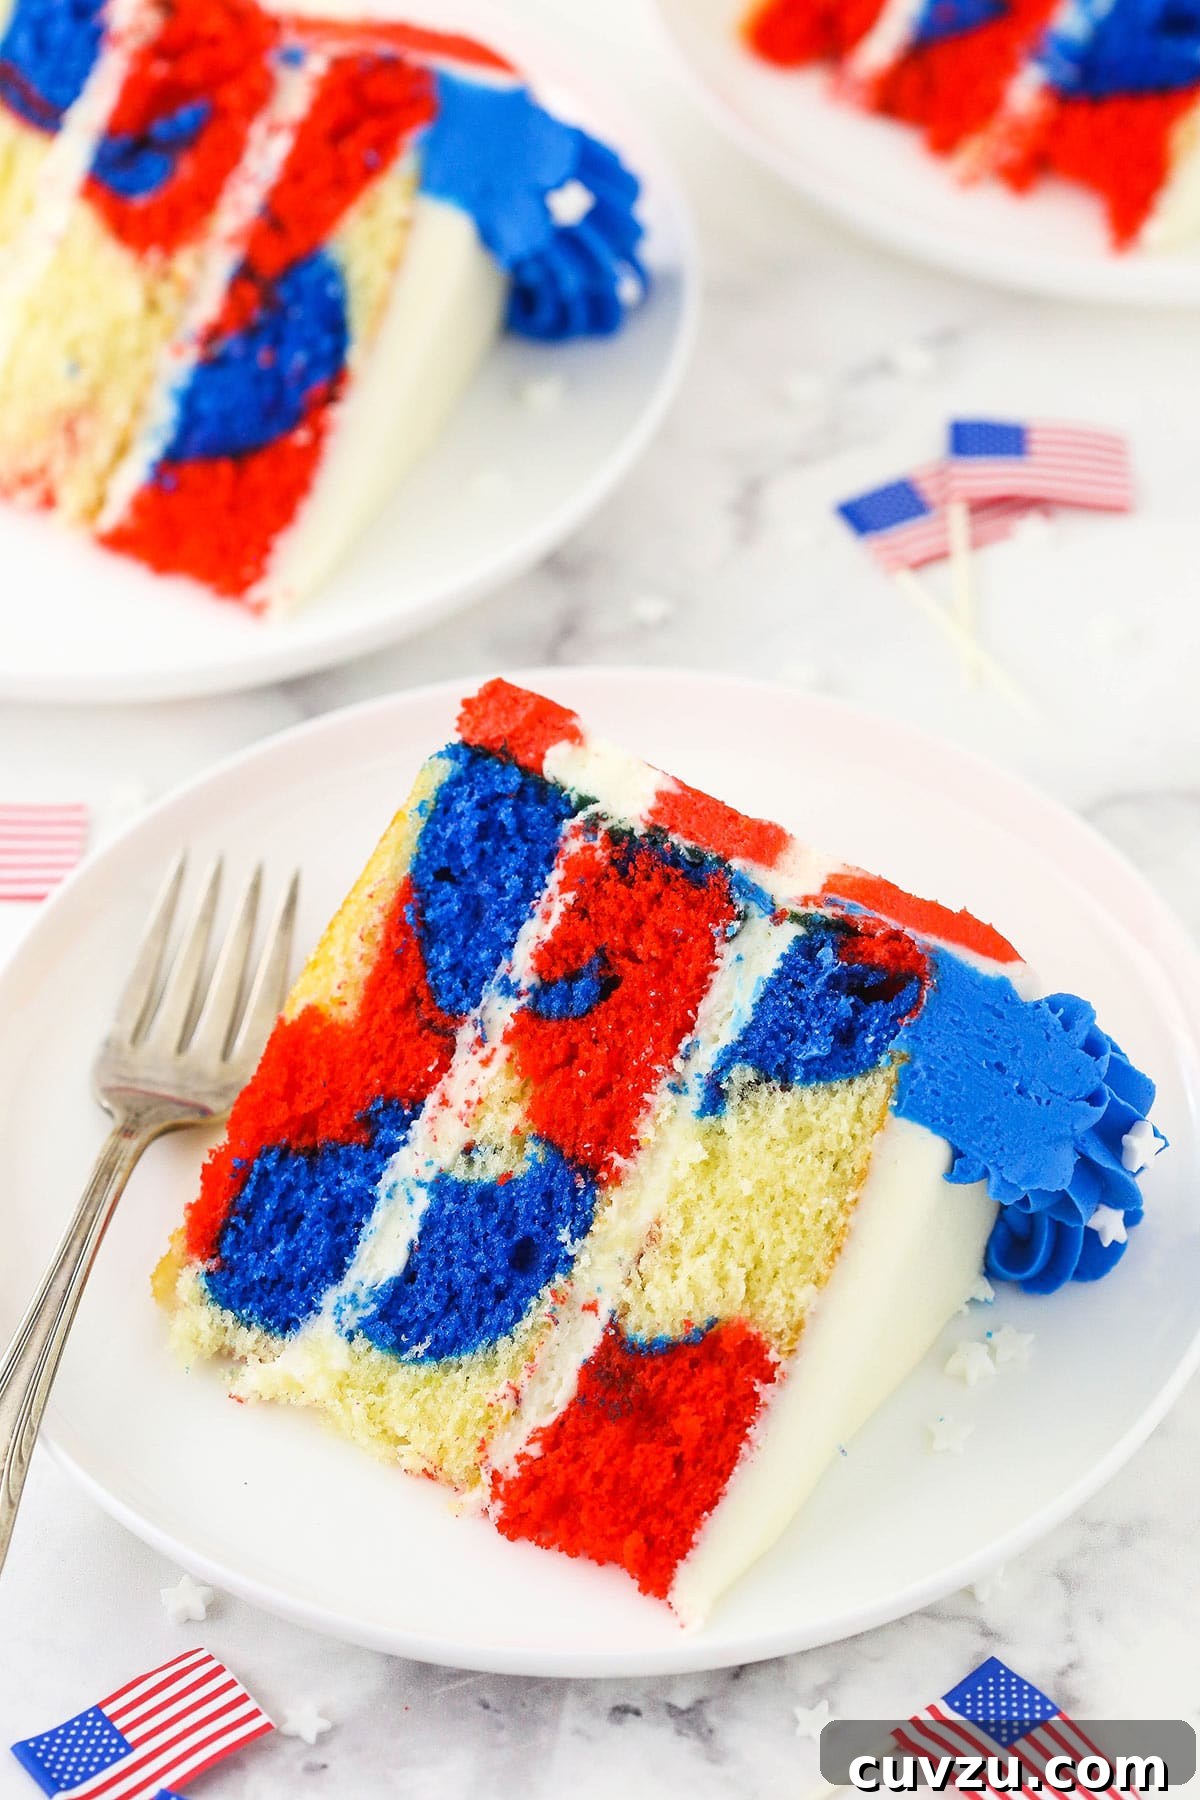
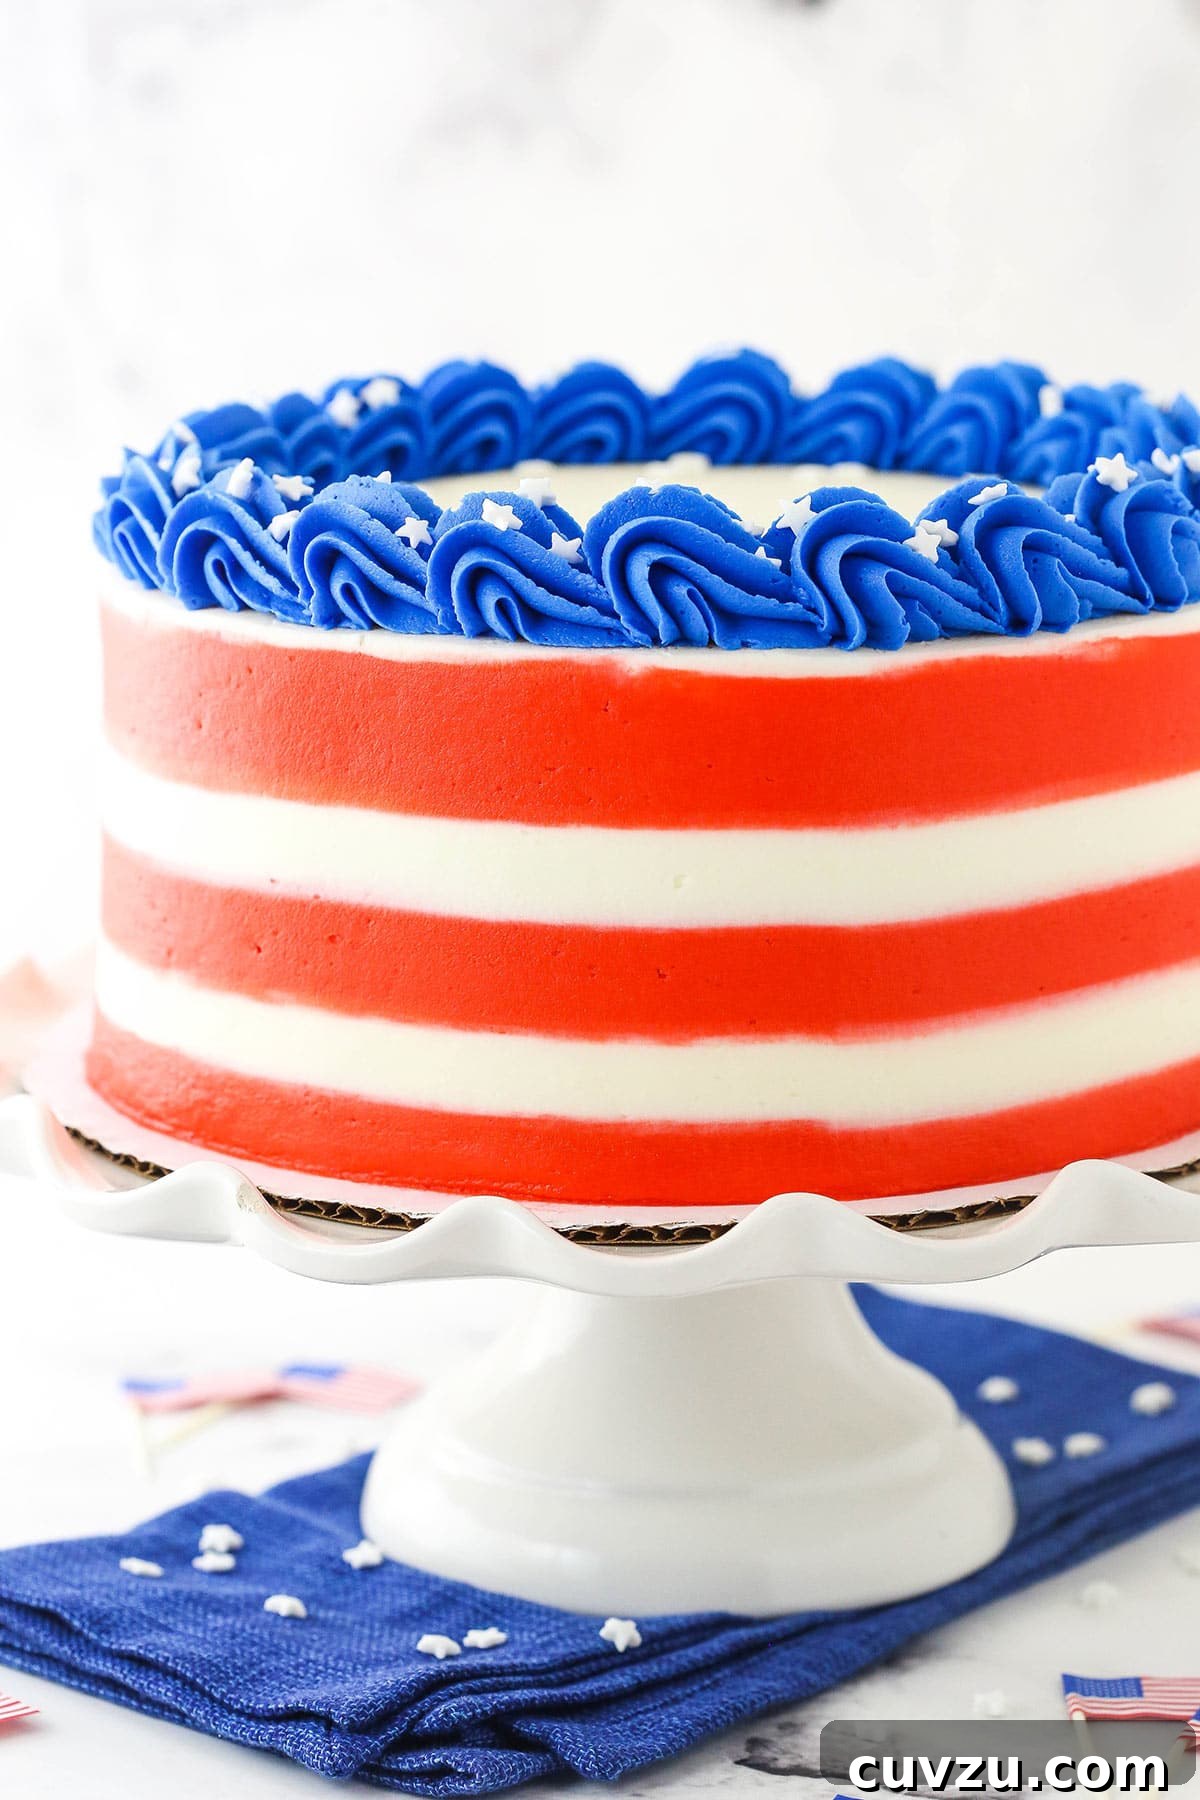
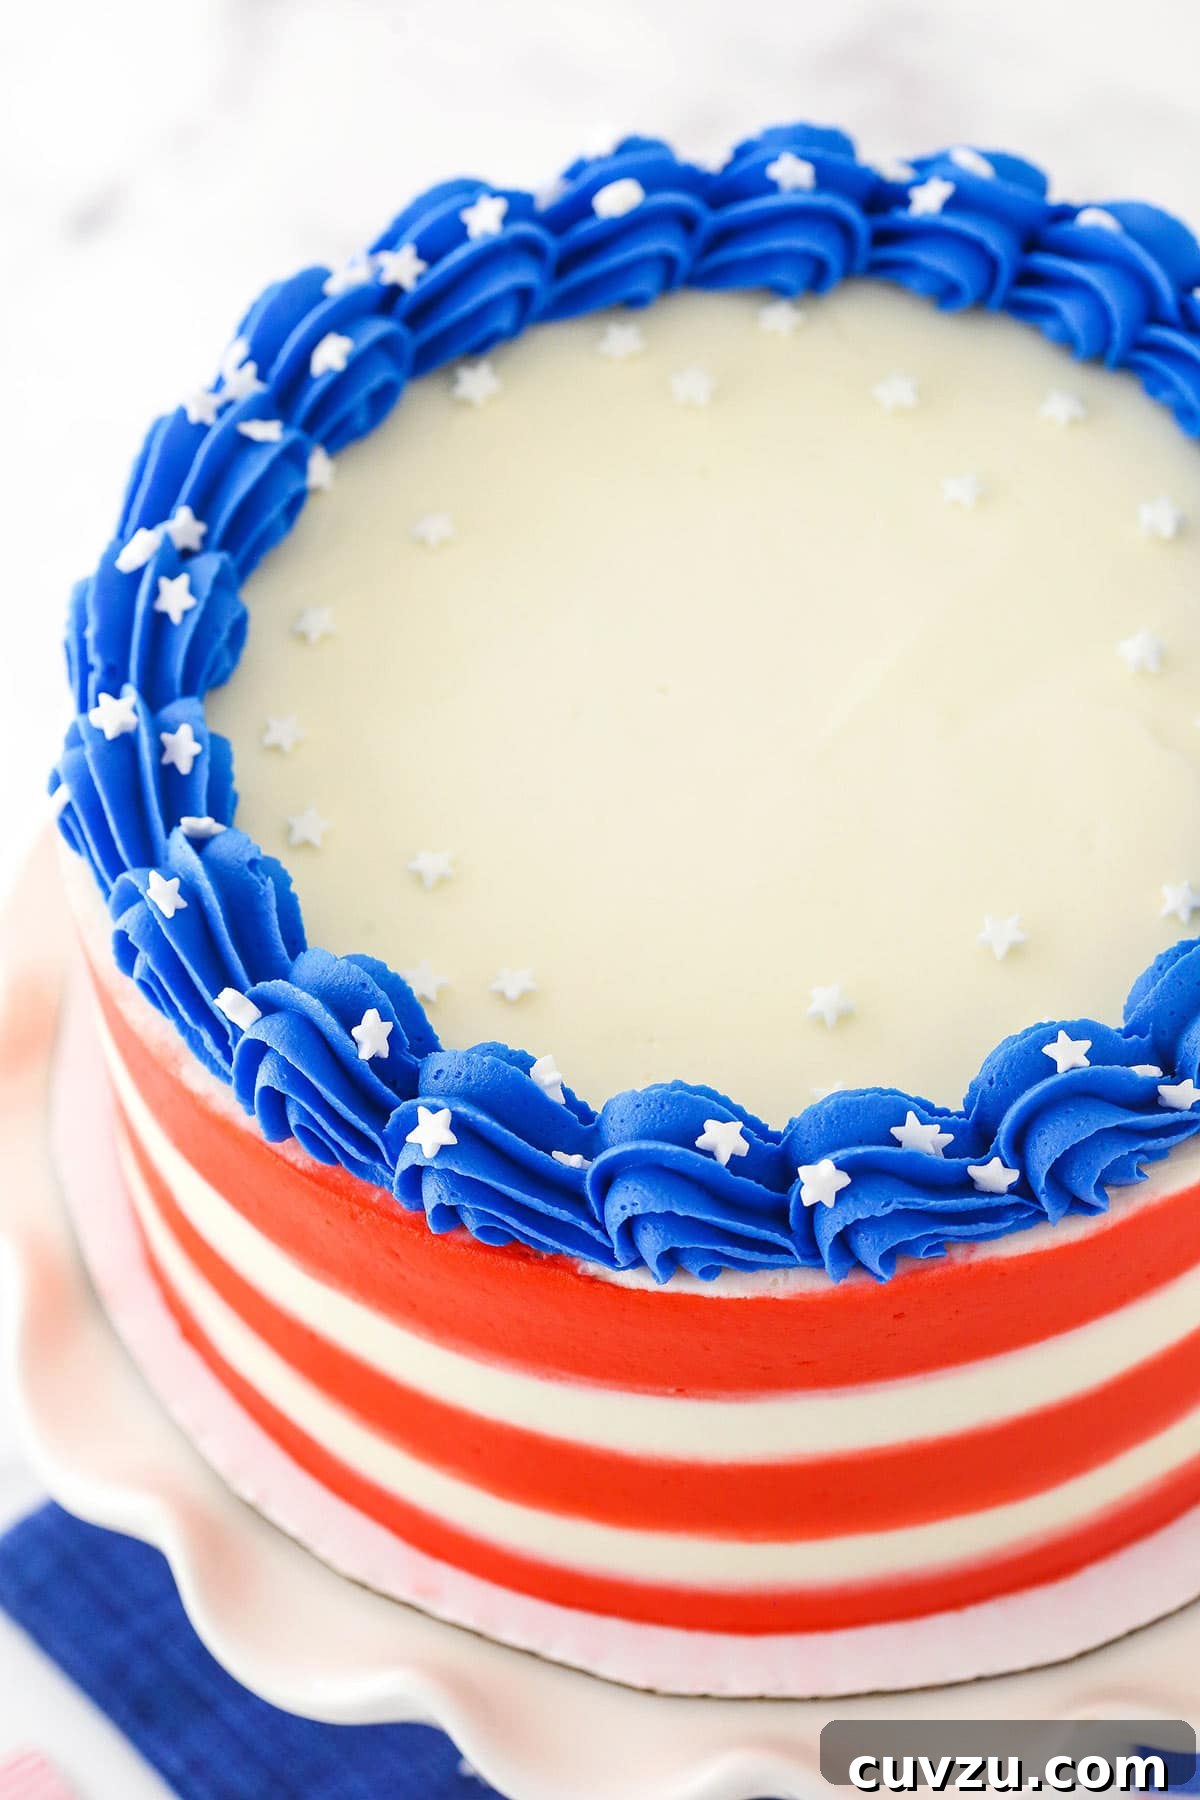
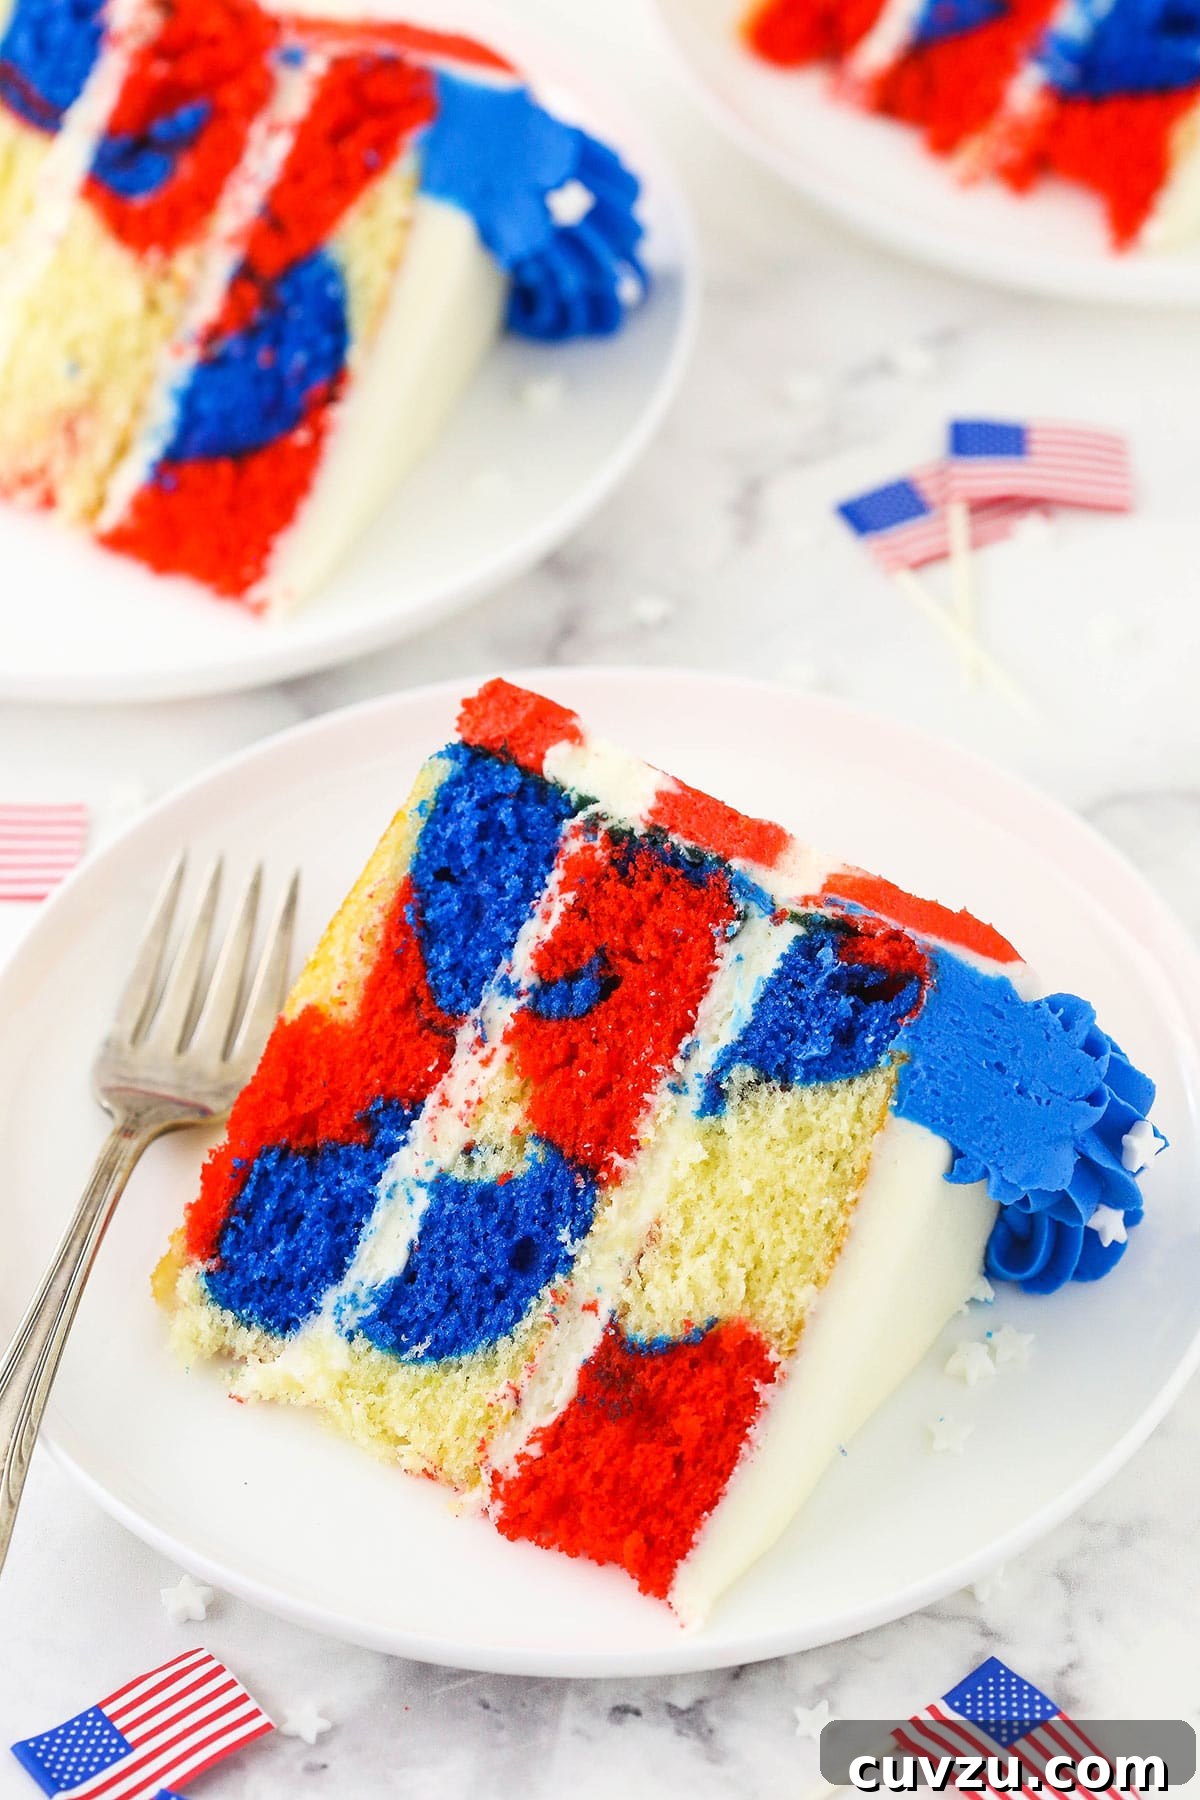
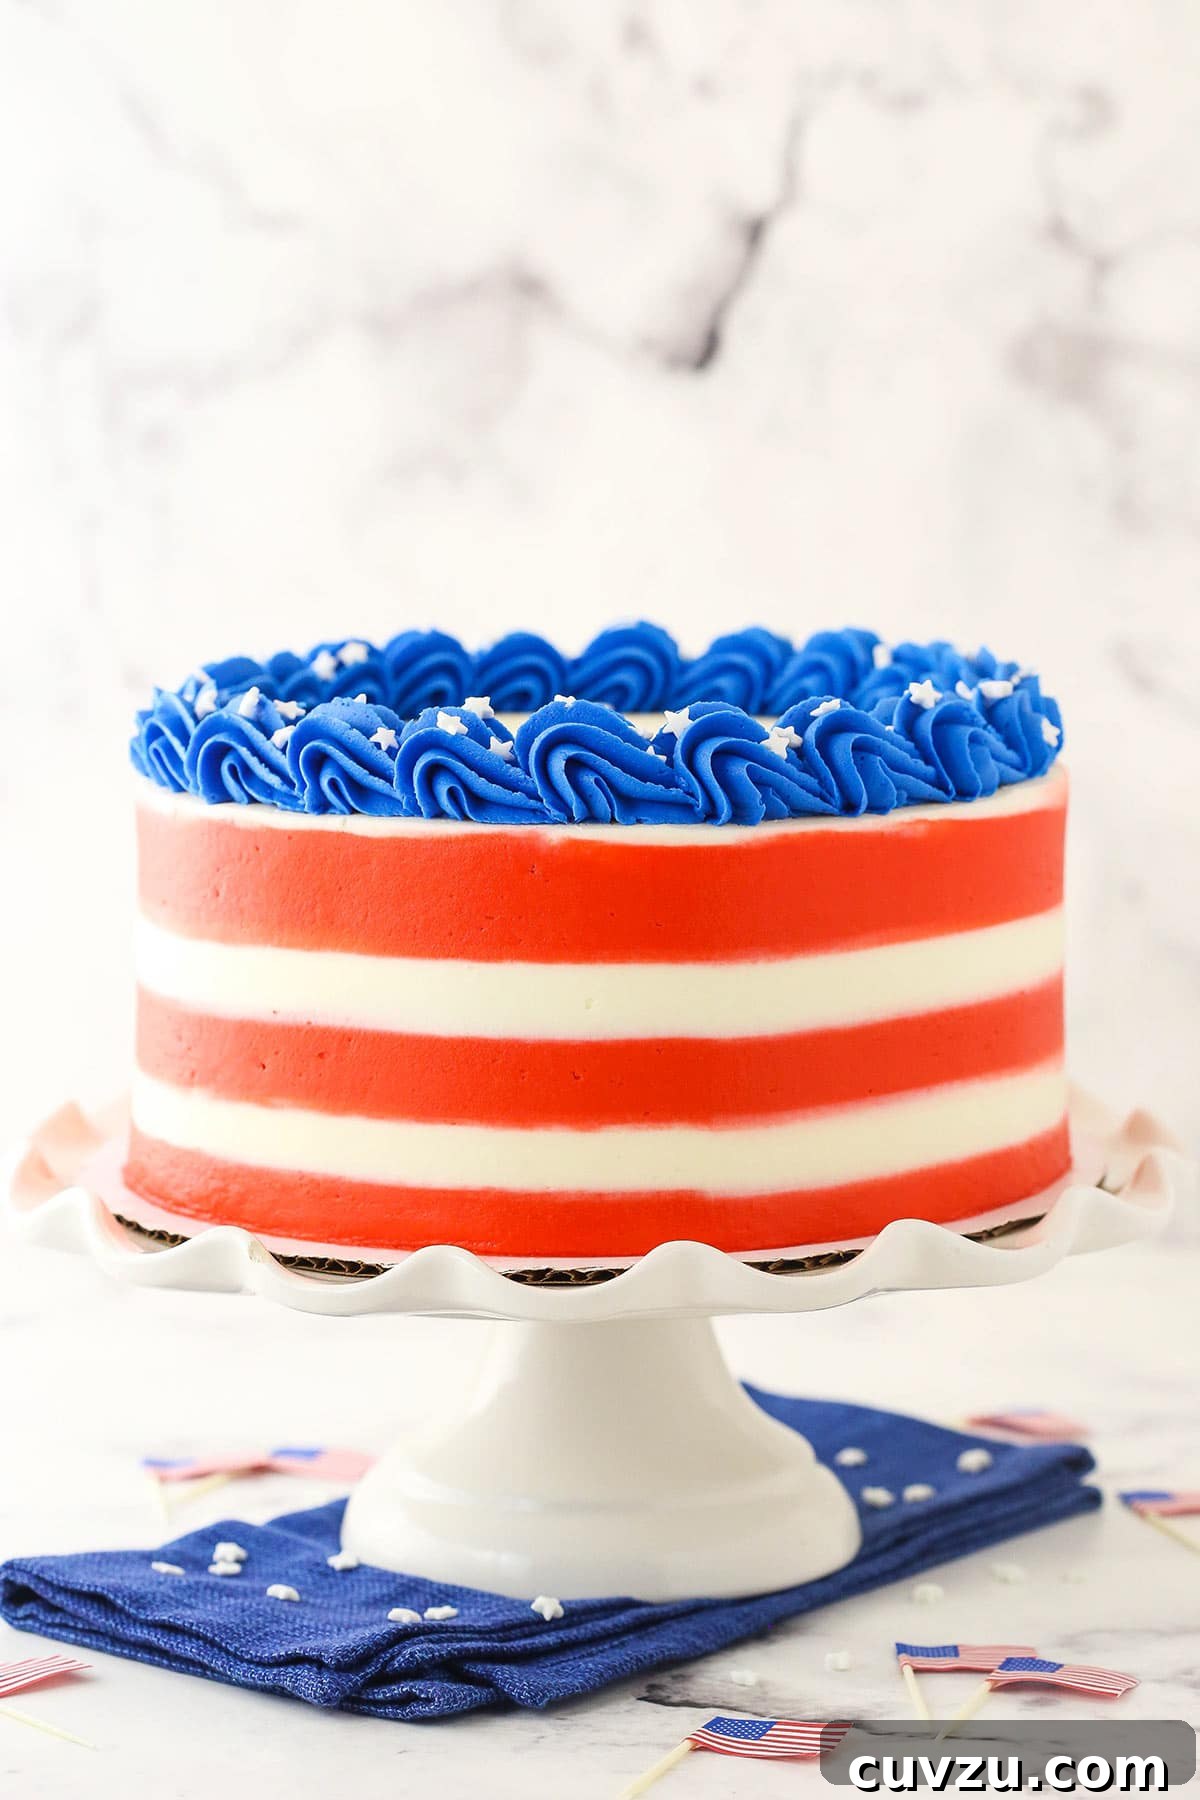
Celebrate Independence Day with an unforgettable dessert that’s as breathtaking as fireworks: the Ultimate 4th of July Layer Cake! This masterpiece is a true labor of love, designed to capture the spirit of America both inside and out. Imagine three tender, moist layers of red, white, and blue marble cake, each slice revealing a beautiful, swirling kaleidoscope of patriotic colors. Encased in a rich, velvety buttercream frosting, the exterior is meticulously decorated to resemble the glorious American flag, making it the perfect centerpiece for any celebration of freedom. It’s a showstopper that promises to impress guests and deliver a delightful flavor experience.
A Symphony of Red, White, and Blue: More Than Just a Dessert
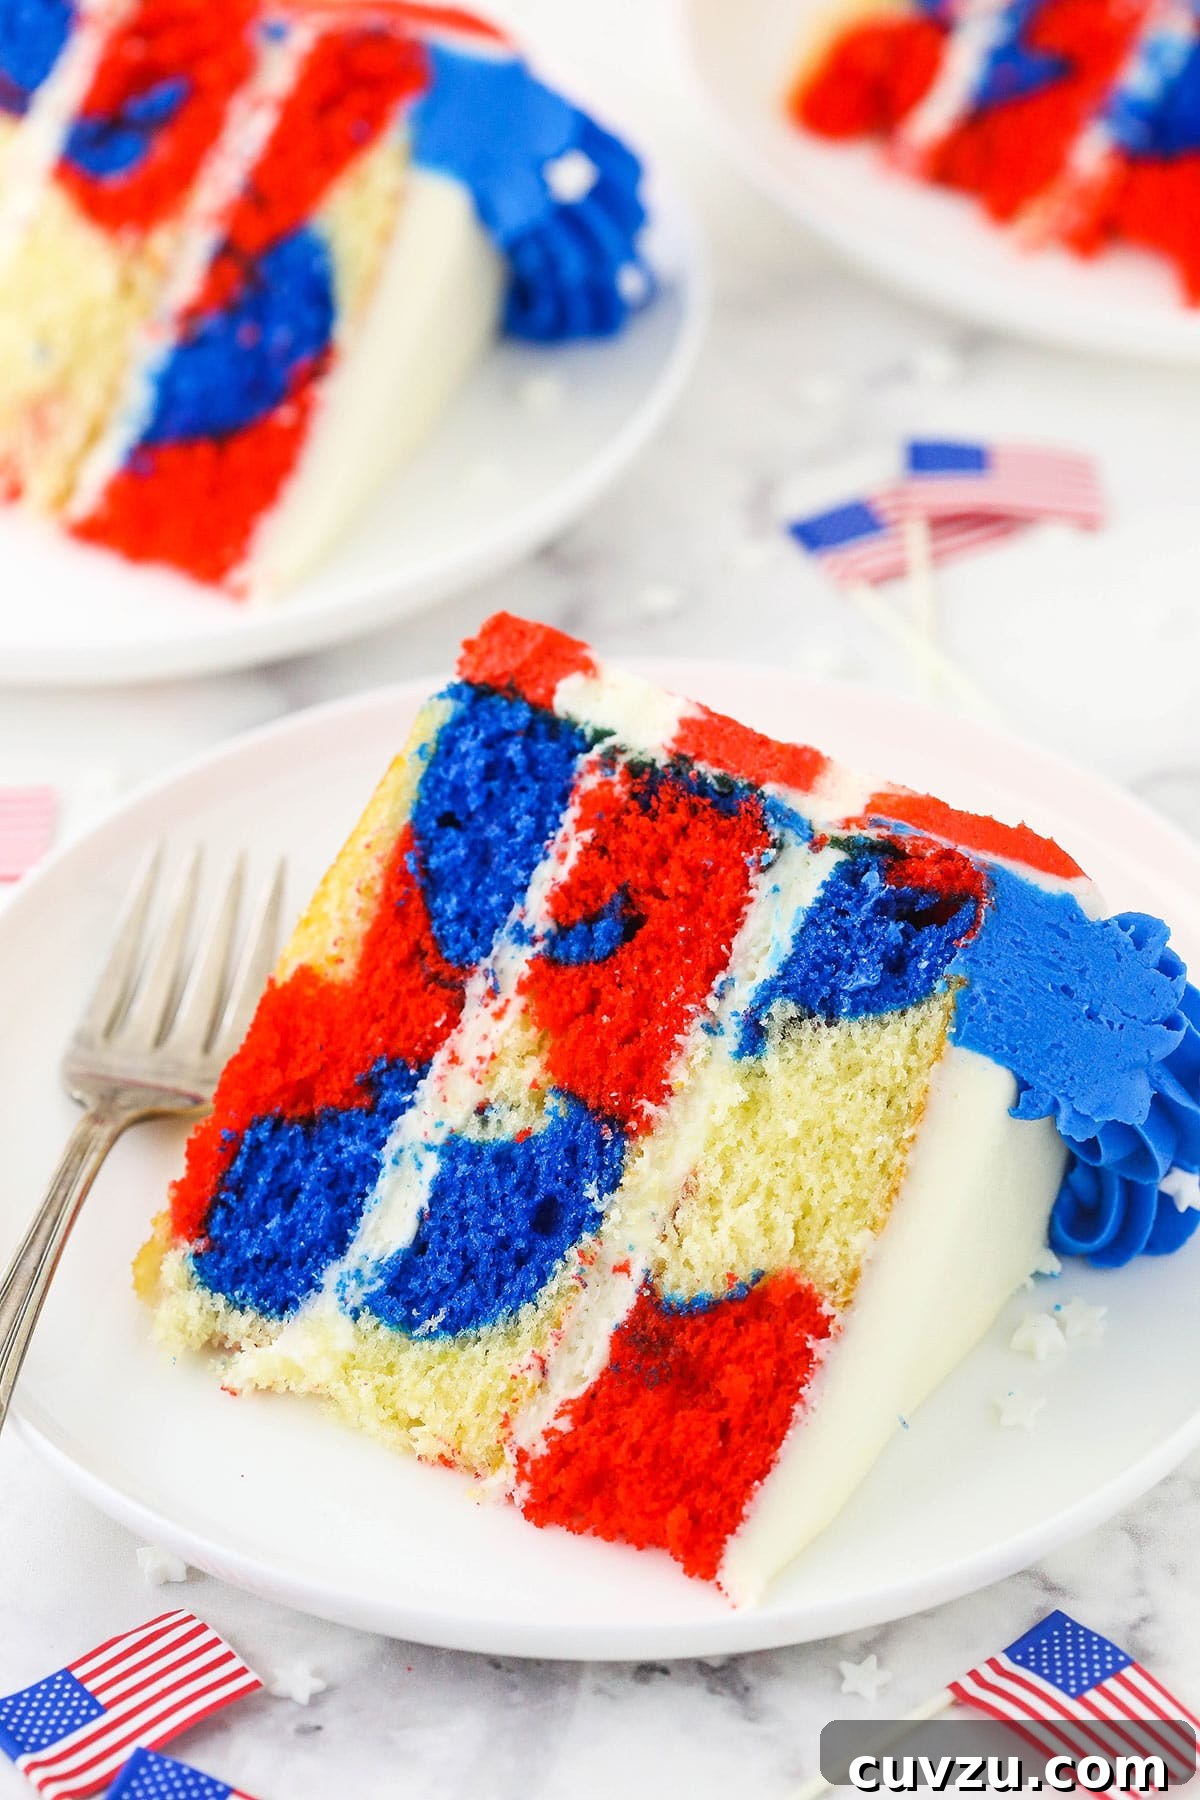
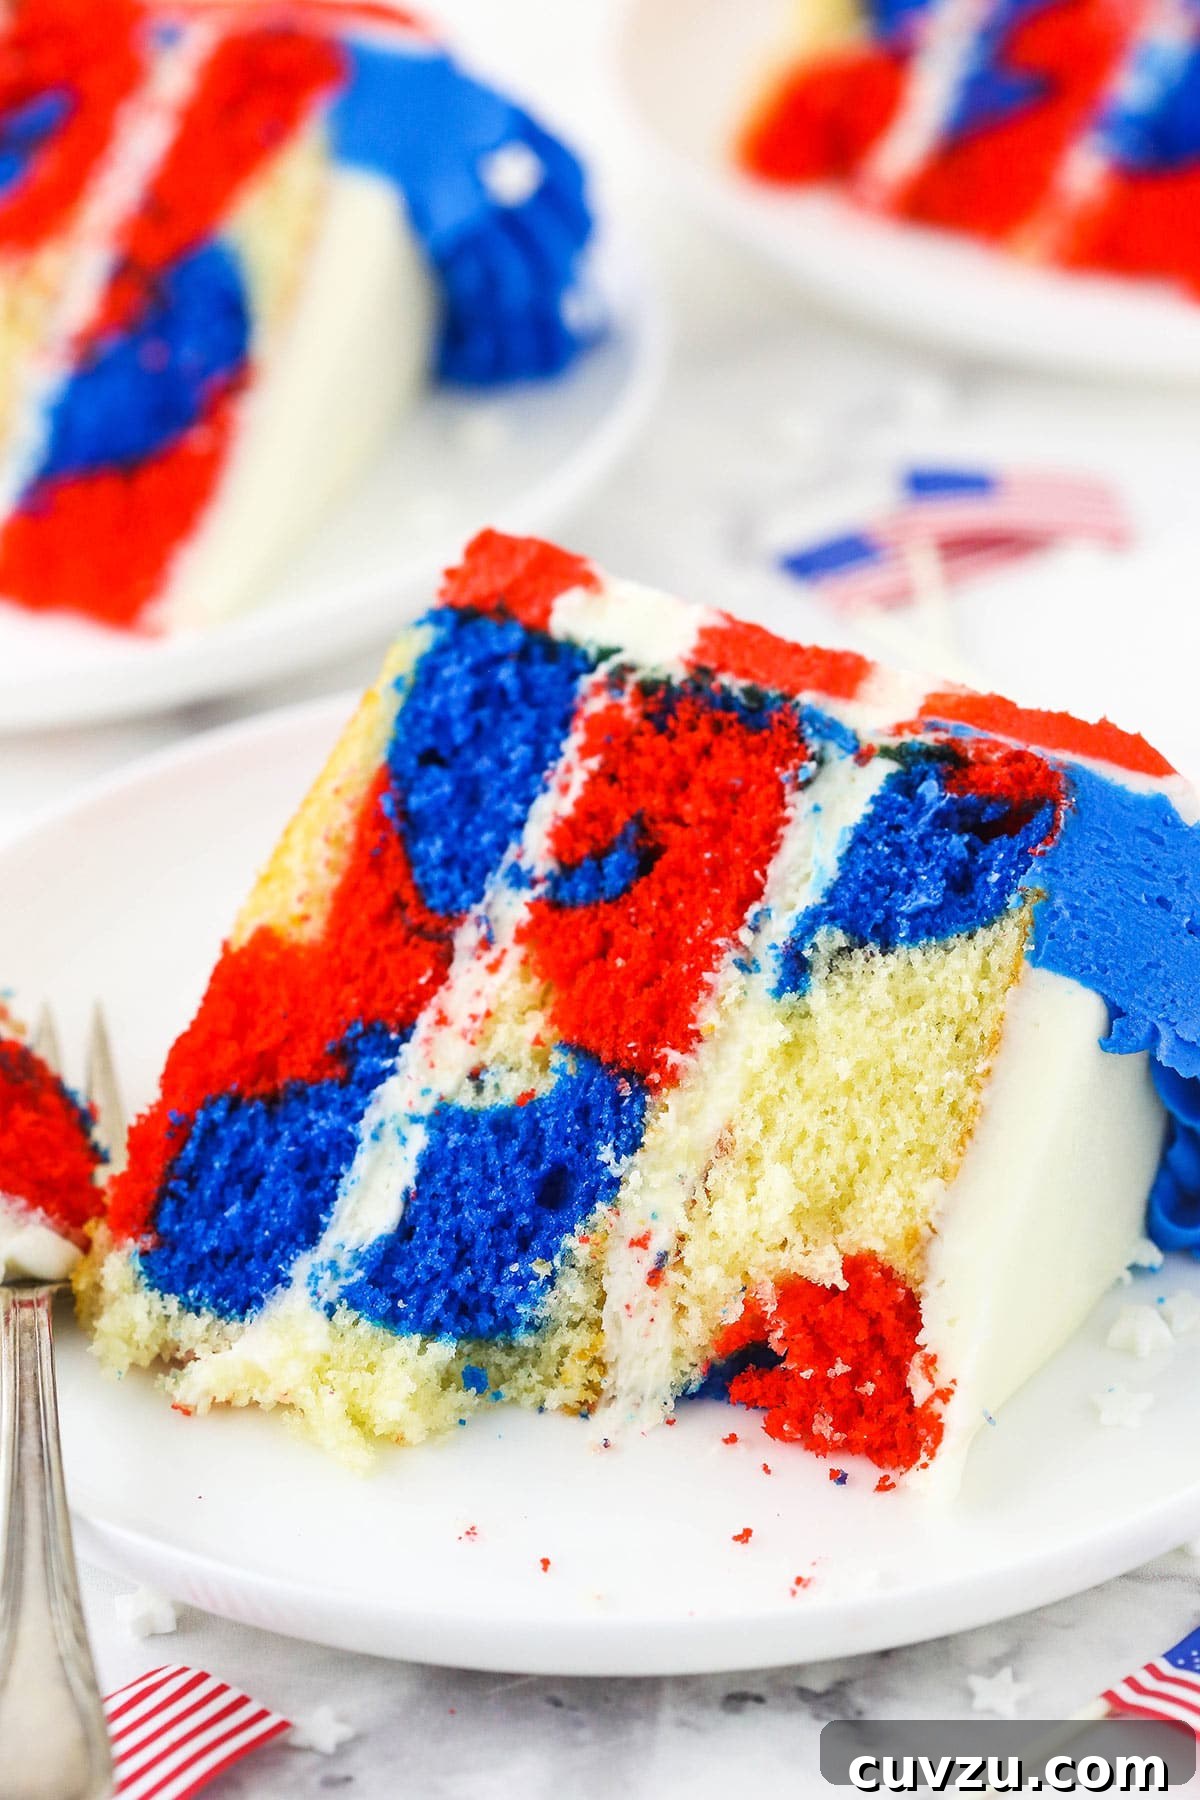
Every 4th of July, families and friends gather to enjoy good food, fun activities, and dazzling fireworks. This patriotic layer cake perfectly encapsulates that festive atmosphere, embodying all the joy and pride of America’s birthday. From the moment it graces your table, its striking American flag design, meticulously crafted from smooth buttercream, immediately draws the eye. But the real magic happens when you cut into it, revealing the vibrant red, white, and blue marble swirls within. This delightful surprise makes every slice a moment of awe and wonder, solidifying its place as a truly appropriate and heartwarming way to celebrate our nation’s independence.
Beyond its stunning appearance, this cake delivers an equally unforgettable taste experience. The cake layers themselves are incredibly moist and fluffy, a testament to thoughtful ingredient selection and precise baking techniques. Complementing the tender cake is a smooth, creamy buttercream frosting that’s rich without being overly sweet. Both the cake and the frosting are elevated by the use of high-quality vanilla extract, providing a classic, comforting flavor that appeals to everyone. This perfect harmony of texture and taste ensures that after the initial visual impact, your guests will be eager for a second helping, making this cake a true holiday favorite for years to come.
Essential Ingredients for Your Masterpiece
While this 4th of July cake might look elaborate, the ingredients required are fairly standard and readily available. The secret to its incredible flavor and texture lies in using quality components and understanding their roles. Below is a comprehensive list, with specific quantities detailed in the full recipe later in this post.
For the Vibrant Marble Cake Layers
- All-Purpose Flour (2 1/4 cups / 293g): The foundational ingredient, providing structure to the cake. For accurate measurement, always use a food scale or the ‘spoon and level’ method, where you spoon flour into your measuring cup and then level it off with a straight edge, rather than scooping directly from the bag.
- Baking Powder (2 1/2 tsp) & Baking Soda (1/4 tsp): This dynamic duo is crucial for creating the cake’s signature light and fluffy texture, reacting to create air pockets during baking. Ensure they are fresh for optimal leavening.
- Salt (1/2 tsp): A pinch of salt enhances all the other flavors, balancing the sweetness and deepening the vanilla notes.
- Unsalted Butter (1/2 cup / 112g), room temperature: Provides richness, tenderness, and flavor. Room temperature butter creams beautifully with sugar, incorporating air for a light crumb.
- Vegetable Oil (1/2 cup): Added for extra moisture and to keep the cake tender over several days, ensuring a melt-in-your-mouth texture.
- Granulated Sugar (1 1/2 cups / 310g): Sweetens the cake, contributes to moisture, and helps create a tender crumb.
- Vanilla Extract (1 tbsp): A high-quality pure vanilla extract is paramount here. It provides the classic, comforting flavor that makes this cake irresistible. Avoid imitation vanilla for the best results.
- Large Eggs (4): Act as an emulsifier, binding ingredients together, and contributing to the cake’s structure and richness. Ensure they are at room temperature for better incorporation into the batter.
- Buttermilk (1 cup / 240ml): Its acidity reacts with baking soda to tenderize the cake and add moisture, resulting in a wonderfully soft crumb. Powdered buttermilk, reconstituted, works perfectly if fresh buttermilk isn’t available.
- Blue & Red Gel Icing Colors: Absolutely essential for achieving vibrant, rich patriotic hues without compromising the cake batter’s consistency. Unlike liquid food colorings, gel colors are highly concentrated and won’t thin out your batter or buttercream, which is key for a well-structured and beautifully colored cake.
For the Velvety American Flag Buttercream
- Unsalted Butter (2 3/4 cups / 616g), room temperature: The base for a rich, creamy buttercream. Room temperature butter whips up light and airy.
- Powdered Sugar (11 cups / 1265g): Also known as confectioners’ sugar, this provides the bulk and sweetness for the frosting, dissolving smoothly to create a silky consistency.
- Vanilla Extract (1 tbsp): Again, use a high-quality extract to infuse the buttercream with a classic, delightful flavor.
- Water or Cream (6-8 tbsp / 90-120ml): Used to achieve the perfect, spreadable consistency for your frosting. Start with less and add more as needed until it’s just right. Cream will yield a richer frosting.
- Salt (to taste): A small amount of salt balances the sweetness of the powdered sugar, enhancing the overall flavor of the buttercream.
- Blue & Red Gel Icing Colors: Just like for the cake batter, gel colors are crucial for achieving intense, true red and blue shades for the flag design without altering the frosting’s perfect consistency.
Making it Gluten-Free: A Simple Adaptation
For those with dietary restrictions, this recipe can be easily adapted to be gluten-free. Simply substitute the all-purpose flour with a high-quality 1:1 gluten-free baking flour blend. It’s important to note that the same accuracy in measuring flour (using a food scale or the spoon and level method) is even more critical with gluten-free flours, as their absorption properties can vary. Additionally, always double-check the labels of your baking powder and powdered sugar to ensure they are certified gluten-free, as some brands may contain hidden gluten-containing ingredients.
Tools for the Perfect Patriotic Bake
Having the right equipment can make all the difference in ensuring a smooth and enjoyable baking process, especially when creating a multi-layered cake with intricate decoration. Here’s a list of essential tools that will help you achieve a professional-looking and delicious result:
- Three 8-inch Round Cake Pans: Essential for baking even layers. Choose pans with straight sides for easier stacking.
- Parchment Paper: For lining the bottoms of your cake pans to prevent sticking and ensure easy release.
- Non-Stick Baking Spray or Butter/Flour: For greasing the sides of the cake pans.
- Large Stand Mixer or Handheld Electric Mixer: Crucial for creaming butter and sugar, and for whipping light and fluffy buttercream.
- Large Mixing Bowls (multiple): For combining dry ingredients, wet ingredients, and for dividing and coloring the cake batter.
- Rubber Spatula: For scraping down the sides of the mixer bowl and gently folding in ingredients.
- Food Scale: Highly recommended for accurate measurement of flour and for evenly dividing cake batter and frosting.
- Wire Cooling Racks: To allow your cake layers to cool completely and prevent condensation.
- Large Serrated Knife: Ideal for leveling the cake layers to ensure a flat, even surface for stacking.
- Offset Spatula: Indispensable for spreading frosting smoothly between layers and around the cake.
- Icing Smoother (Cake Scraper): A game-changer for achieving perfectly smooth sides on your frosted cake, especially for creating sharp, clean stripes.
- Piping Bags and Large Round Piping Tip (e.g., Ateco 847): For precise application of frosting, particularly for stripes and decorative borders.
- Serving Plate or Cardboard Cake Round: For assembling and presenting your finished cake.
Step-by-Step: Baking and Decorating Your 4th of July Cake
Creating this patriotic layer cake is a rewarding experience. While it requires a bit of time, each step is straightforward, especially if you’re familiar with baking layer cakes. Follow these detailed instructions to bring your stunning red, white, and blue dessert to life.
Crafting the Red, White, and Blue Cake Layers
- Prepare for Baking: Begin by preparing three 8-inch round cake pans. Line the bottoms of each pan with parchment paper circles, then generously grease the sides to prevent sticking. Preheat your oven to 350°F (176°C) to ensure it’s ready when your batter is.
- Combine Dry Ingredients: In a medium-sized bowl, whisk together the all-purpose flour, baking powder, baking soda, and salt until well combined. Set this dry mixture aside.
- Cream Wet Ingredients: In a large mixer bowl, add the room temperature unsalted butter, vegetable oil, granulated sugar, and vanilla extract. Beat these together on medium-high speed for 2-3 minutes, or until the mixture becomes notably light in color and fluffy. This creaming process is vital for incorporating air and creating a tender cake, so do not rush it.
- Incorporate Eggs: Add the large eggs to the wet mixture, two at a time, beating well after each addition until fully combined. Make sure to scrape down the sides of the bowl frequently with a rubber spatula to ensure all ingredients are thoroughly incorporated.
- Alternating Dry and Wet Additions: Add half of the reserved dry ingredients to the wet mixture in the mixer bowl. Mix on low speed until just combined.
- Add Buttermilk: Pour in the buttermilk and mix until the batter is smooth and well combined.
- Finish with Dry Ingredients: Add the remaining dry ingredients and mix on low speed until the batter is just smooth and lump-free. Be careful not to over-mix the batter, as this can lead to a tough cake. Scrape down the bowl sides one last time to ensure everything is incorporated.
- Color the Batter: Divide the plain cake batter evenly into three separate bowls. If you have a food scale, weighing the batter at this stage ensures consistent layer thickness. Leave the batter in one bowl white. To another bowl, add red gel food coloring, stirring gently until you achieve your desired vibrant red shade. Repeat with blue gel food coloring in the third bowl for a rich blue. Stir carefully to incorporate the color without overworking the batter.
- Fill Cake Pans for Marble Effect: Drop alternating heaping spoonfuls of red, white, and blue batter into each of your prepared cake pans. Once a pan is partially filled, gently shake it from side to side to help the batter spread evenly. Continue layering the colors until all three pans are filled, aiming for roughly the same amount of batter in each pan to ensure even baking.
- Bake the Layers: Transfer the filled cake pans to the preheated oven. Bake for 20-25 minutes, or until a wooden toothpick inserted into the center of a cake layer comes out clean, indicating it’s fully baked.
- Cool Completely: Remove the cakes from the oven and let them cool in their pans on a wire rack for about 2-3 minutes. Then, carefully invert them onto the cooling racks to cool completely. This prevents condensation and allows for easier handling later.
Preparing the Smooth Buttercream Frosting
- Beat the Butter: In a clean, large mixer bowl, beat the room temperature unsalted butter on medium-high speed until it’s wonderfully smooth and creamy, about 2-3 minutes.
- First Powdered Sugar Addition: Slowly add half of the powdered sugar to the beaten butter, mixing on low speed until it’s fully incorporated and smooth.
- Add Flavorings and Liquid: Incorporate the vanilla extract, salt, and 4-5 tablespoons of water or cream. Mix until the frosting is smooth and well combined.
- Final Powdered Sugar Addition: Gradually add the remaining powdered sugar, mixing until the frosting is perfectly smooth. At this point, assess the consistency; add additional water or cream, one tablespoon at a time, until the frosting reaches a smooth, spreadable consistency that holds its shape well.
Assembling Your Edible American Flag
- Level the Cakes: Once the cake layers are completely cooled, use a large serrated knife to carefully remove any domes from their tops, creating flat, even surfaces. This step is crucial for stable and aesthetically pleasing stacked layers.
- Layer with Buttercream: Place the first cake layer onto your chosen serving plate or a cardboard cake round. Spread about 1 cup of the white buttercream evenly over the top. Carefully place the second cake layer on top, followed by another cup of frosting. Finally, add the last cake layer and spread approximately 1 cup of frosting evenly over its top surface.
- Color Remaining Frosting for Flag Design: Set aside about one cup of the remaining white frosting and color it blue using the gel icing color. Divide the rest of the buttercream in half. Leave one half white, and color the other half red with gel icing color. You should now have distinct portions of blue, white, and red frosting.
- Decorate the Sides with Stripes: To create the iconic red and white stripes on the sides of the cake, you have two options: either use an offset spatula to carefully apply alternating stripes of red and white buttercream directly onto the cake, or for more precision, load the red and white frostings into separate piping bags fitted with a large round piping tip. Apply even, straight lines around the entire circumference of the cake. Once the stripes are applied, gently run an icing smoother (cake scraper) around the outside of the cake. Do this with as few passes as possible to smooth the frosting and blend the stripes without them bleeding into each other. Smooth out the top edge of the cake and tidy up the corners as needed.
- Decorate the Top with Blue and Stars: Use the blue buttercream to pipe a decorative border around the top edge of the cake. I recommend using an Ateco tip 847 for a lovely, defined edge. To complete the flag design, scatter some festive white star sprinkles over the blue section to represent the stars on the American flag.
- Slice & Serve: Once decorated, your patriotic masterpiece is ready to be admired, sliced, and enjoyed!
Pro Tips for Baking Success
Achieving a stunning and delicious 4th of July marble cake is within reach with a few expert tips. These insights will help you avoid common pitfalls and ensure your patriotic dessert comes out flawlessly every time.
- Avoid Over-Mixing the Batter: This is a golden rule for baking tender cakes. Since you’ll be dividing and coloring two-thirds of the cake batter, it’s even more critical to ensure the initial mixing is just until combined. Over-mixed batter develops too much gluten, resulting in a dense, tough, and less fluffy cake. When incorporating the food coloring, stir it in as gently and briefly as possible until the color is uniform.
- Utilize a Food Scale for Even Distribution: For the most consistent and professional-looking cake layers, a food scale is your best friend. Weigh the total cake batter before dividing it into three portions. Then, weigh each colored portion to ensure they are perfectly equal. This not only ensures uniform baking but also creates visually balanced red, white, and blue layers. This method can also be applied to the red and white frosting portions for perfectly even stripes.
- The Magic of an Icing Smoother: While not strictly necessary, an icing smoother (or cake scraper) is highly recommended, especially when decorating with stripes. After applying the alternating red and white stripes, running the smoother around the cake allows you to achieve incredibly straight, clean lines and a professional finish. Perform this step with minimal passes to prevent the colors from bleeding into each other, preserving the distinct stripe pattern.
- Room Temperature Ingredients are Key: Ensure all cold ingredients like butter, eggs, and buttermilk are at true room temperature. This allows them to emulsify properly, creating a smoother batter and frosting, and a more uniform texture in your finished cake.
- Proper Cooling is Patience Rewarded: Resist the urge to rush the cooling process. Allow your cake layers to cool completely on wire racks before attempting to level, frost, or stack them. Warm cake is fragile, prone to crumbling, and will melt your beautiful buttercream.
- Consider a Crumb Coat: For a flawlessly smooth exterior, apply a thin layer of white buttercream all over the cake (top and sides) after the initial stacking and before applying the colored flag frosting. This “crumb coat” traps any loose crumbs, creating a clean canvas for your final decoration. Chill the cake for 15-20 minutes after the crumb coat sets before proceeding.
- Practice Makes Perfect with Piping: If you’re using piping bags for the stripes or border, a little practice on parchment paper beforehand can boost your confidence. This allows you to get a feel for the pressure and movement needed for consistent lines.
Creative Variations and Serving Suggestions
This patriotic layer cake is wonderfully versatile, perfect not just for the 4th of July, but for any occasion that calls for a touch of American pride. Here are some easy and fun ways to customize your cake and presentation:
- Simplify the Décor for Elegant Ease: If time is of the essence or you prefer a less intricate design, you can still create a stunning patriotic cake. Instead of the full flag design, frost the entire cake in plain white buttercream. Then, create a festive border by coating the bottom edge or the entire side of the cake with a generous amount of red, white, and blue sprinkles. This provides a clean, elegant look with a cheerful burst of color.
- Transform it into a Single-Layer Sheet Cake: For a more casual gathering or simpler serving, you can easily adapt this recipe to a single-layer sheet cake. Simply bake all the batter in a 9×13-inch pan instead of three round pans. Remember to reduce the oven temperature to 325°F (160°C) and adjust the baking time (it will be longer). Once cooled, you can frost it with a simplified American flag design on the surface, perhaps using piped lines and blue frosting with sprinkles in one corner.
- Alternative Finishing Touches: While white star sprinkles are a classic choice for the blue field, don’t limit your creativity! Explore different types of sprinkles to match your style. Consider using elegant silver metallic stars for a sophisticated sparkle, or find a mix of red, white, and blue star sprinkles for an extra festive touch. For a different texture and shimmer, you could even skip the stars altogether and sprinkle red or blue sanding sugar over the blue section.
- Cupcake Version: For individual servings, bake the marble batter into festive cupcakes! Simply fill cupcake liners about two-thirds full and bake for 18-22 minutes at 350°F (175°C). Frost them with a swirl of white buttercream and top with red and blue sprinkles, or create mini flag designs on each.
- Different Flavor Profiles: While vanilla is classic, consider infusing your cake layers with other flavors. A hint of almond extract could add a subtle sophistication, or a touch of lemon zest for a brighter, fresher taste in the white layers.
- Serving with Flair: Serve slices of this beautiful cake alongside a scoop of vanilla ice cream, fresh berries (strawberries, blueberries, and raspberries), or a dollop of whipped cream for an extra touch of indulgence.
Storage and Freezing for Lasting Enjoyment
Proper storage is essential to keep your magnificent 4th of July marble cake fresh and delicious for as long as possible, allowing you to enjoy leftovers without compromising quality. Here’s how to best store and even freeze your patriotic creation:
Storage Instructions:
- At Room Temperature: If your cake is fully frosted with buttercream, it can be safely stored in an airtight container at room temperature for up to 24 hours. The butter in the frosting acts as a preservative, and a cool room (around 70°F/21°C) is ideal. Keep it away from direct sunlight or heat sources.
- Refrigeration: After 24 hours at room temperature, or if your kitchen is particularly warm, it’s best to transfer any leftover cake to the refrigerator. Place it in an airtight cake carrier or a container large enough to prevent the frosting from getting squashed. The cake will remain fresh in the fridge for an additional 3-4 days. For the best flavor and texture, allow refrigerated slices to come to room temperature for about 15-30 minutes before serving. This softens the buttercream and cake layers, enhancing the overall eating experience.
Freezing Instructions:
Yes, you can absolutely freeze this cake, especially if you want to prepare the layers in advance or preserve leftovers for a later date! Freezing the cake layers before assembly is a fantastic way to break up the baking process and save time on the day of your celebration.
- Freezing Cake Layers (Unfrosted): Once your baked cake layers have cooled completely to room temperature, wrap each individual layer tightly in a double layer of plastic wrap. Ensure there are no air gaps to prevent freezer burn. Follow this with a layer of heavy-duty aluminum foil for extra protection. Properly wrapped, the cake layers can be frozen for up to 3 months. When you’re ready to assemble and decorate, simply remove the desired layers from the freezer, unwrap them, and let them thaw completely on a wire rack at room temperature. This typically takes a few hours.
- Freezing Frosted Cake (Leftovers): If you have leftover slices of frosted cake, you can freeze them too! Place individual slices on a baking sheet and freeze for about an hour until the frosting is firm. Then, wrap each frozen slice tightly in plastic wrap, followed by aluminum foil. Store in an airtight container for up to 1-2 months. Thaw individual slices in the refrigerator overnight or at room temperature for a few hours before enjoying.
At a Glance: Recipe Summary
Here’s a quick overview of the key details for creating your patriotic masterpiece:
- Author: Lindsay
- Prep Time: 1 hour 45 minutes
- Cook Time: 20 minutes
- Total Time: 2 hours 5 minutes
- Yield: 14 servings
- Category: Dessert
- Method: Oven
- Cuisine: American
Nutrition Facts (per serving)
- Calories: 1006
- Sugar: 114.8 g
- Sodium: 204.3 mg
- Fat: 52.7 g
- Carbohydrates: 132.9 g
- Protein: 4.9 g
- Cholesterol: 168.4 mg
More Festive Red, White, and Blue Desserts
If you’re looking for even more delightful and patriotic dessert ideas for the 4th of July, Memorial Day, or any American celebration, look no further! These recipes are sure to add a touch of festive flair to your table:
- Angel Food Flag Cake
- Red White & Blue Cookie Sandwiches
- American Flag Cupcake Cake