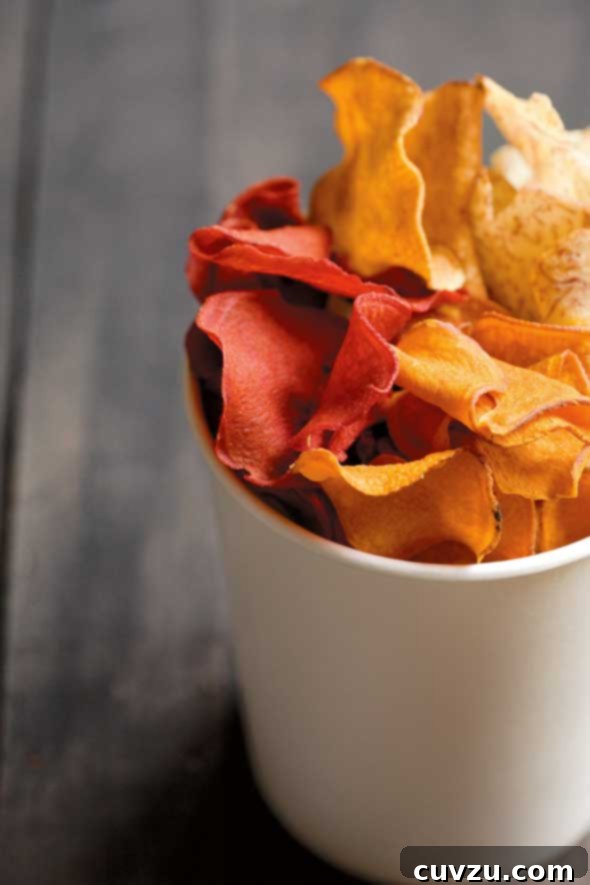
Homemade Root Vegetable Chips: Your Ultimate Guide to Crispy, Customizable Snacks
Tired of shelling out a fortune for those small, often underwhelming bags of gourmet root vegetable chips? It’s time to take matters into your own hands! This comprehensive guide will show you how to create incredible homemade root vegetable chips that are not only just as impressive as their store-bought counterparts but also come at a mere fraction of the cost. The true magic lies in the customization: you have complete freedom to choose which root vegetables to include and in what proportions. Imagine a vibrant medley of purple potatoes, striking Chioggia beets, golden beets, or subtly sweet parsnips—all tailored precisely to your taste. Say goodbye to picking out the vegetables you don’t fancy; now, every chip is a favorite!
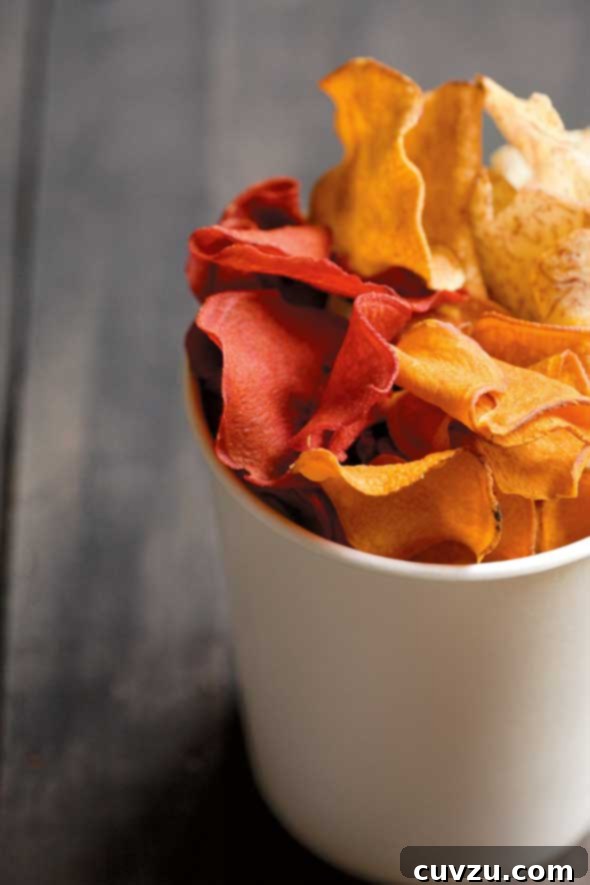
While many commercial brands offer a standard blend, this recipe empowers you to transcend those limits. Feel absolutely free to substitute and experiment with other root vegetables beyond the core ingredients. Whether you’re keen on exploring the earthy notes of various beets or the subtle sweetness of different potato varieties, the world of root vegetables is your oyster. As culinary expert Erin Coopey advises, the joy of homemade lies in the personal touch, ensuring every batch reflects your unique palate.
The Irresistible Allure of Homemade: Why Make Your Own Root Vegetable Chips?
There’s an undeniable charm and significant advantage to preparing your own snacks. When it comes to root vegetable chips, the benefits extend far beyond simple convenience:
- Superior Flavor and Freshness: Store-bought chips often suffer from a lack of fresh flavor due to processing and shelf life. Homemade chips, however, deliver an unparalleled burst of natural, vibrant taste from each vegetable, enhanced by simple, pure seasoning. The difference is truly remarkable.
- Exceptional Cost-Effectiveness: Gourmet root vegetable chips can be surprisingly pricey, making them an occasional indulgence for many. By making them at home, you can produce a substantial quantity for a fraction of what you’d spend on a small bag, making them a more accessible and satisfying snack.
- Unrivaled Customization: This is arguably the most compelling reason to go homemade. Are you tired of finding too many of one kind of chip and not enough of another in pre-packaged mixes? Here, you are the master chef. Choose only the root vegetables you adore, mix and match to your heart’s content, and experiment with different seasonings to create your signature blend.
- Complete Ingredient Control: When you craft your own chips, you have full transparency over every ingredient. This means no hidden additives, artificial flavors, or unnecessary preservatives. You select the quality of the vegetables, the type of oil, and the amount of salt, allowing for a cleaner, potentially healthier snack option tailored to your dietary preferences.
- Impressive Versatility and Presentation: A beautifully arranged platter of colourful, crispy homemade vegetable chips is a guaranteed showstopper. They are sophisticated enough to serve with wine or cocktails at elegant holiday parties, yet equally comforting as a noble side for a simple weeknight steak or a roast hen. For an extra layer of texture and flavor, crush them over creamy root vegetable soups. And for festive occasions like Hanukkah, these deep-fried delights fit right in, offering a warm, satisfying crunch. Why wait?
Selecting Your Roots: A Palette of Flavors and Textures
The foundation of exceptional root vegetable chips begins with the right selection of ingredients. While the recipe below provides a superb starting point, don’t hesitate to broaden your horizons and explore other fantastic root options:
- Taro Root: Known for its mild, slightly nutty flavor and starchy texture, taro crisps up beautifully, offering a satisfying, substantial chip. It’s a key player in many premium vegetable chip mixes.
- Sweet Potatoes: These vibrant orange roots bring a natural sweetness and robust flavor that makes them universally loved. They fry to a lovely golden hue and maintain a delightful crispness.
- Yams: Often mistaken for sweet potatoes, yams typically have a denser, drier flesh and a more earthy, less sweet flavor. They produce a heartier chip that’s equally delicious.
- Red Beets: For a striking visual impact and an earthy-sweet flavor, red beets are fantastic. Be aware that their strong crimson pigment can slightly color the frying oil, so it’s often best to fry them last to avoid tinting other chips.
- Purple Potatoes: Offer a stunning deep purple color that largely holds up after frying, providing an eye-catching chip with a slightly different potato flavor profile.
- Chioggia Beets (Candy Cane Beets): Famous for their beautiful concentric rings of red and white, these beets make visually exciting chips, though the pattern might soften during cooking. They offer a milder, sweeter beet flavor.
- Golden Beets: If you love the taste of beets but prefer to avoid the staining and intense color of red beets, golden beets are an excellent choice. They fry into lovely, sunny yellow chips with a sweeter, less earthy profile.
- Parsnips: These often-overlooked roots possess a unique, sweet, and slightly spicy flavor. When thinly sliced and fried, parsnips become incredibly delicate and intensely flavorful chips.
- Carrots: While not a traditional “chip” root, very thin slices of carrots can be fried to a crisp, offering a sweet and surprisingly addictive crunch.
- Daikon Radish: For those who appreciate a peppery kick, daikon radish yields a crisp chip with a subtle bite, making it an interesting addition to a mixed batch.
- Celeriac (Celery Root): This knobby root provides a distinctive, savory, and subtly earthy flavor that mellows beautifully when fried, creating a uniquely gourmet chip.
Always select firm, fresh root vegetables without any soft spots, sprouting, or blemishes. Quality ingredients are the first step toward exceptional chips.
Essential Equipment: Precision and Safety for Perfect Chips
The secret to consistently crispy, evenly cooked chips lies in precise preparation. These tools are indispensable:
- Mandoline or Handheld Slicer: This is a non-negotiable item for serious chip makers. A mandoline allows you to slice vegetables uniformly thin, which is absolutely critical. Uneven slices will cook at different rates, leading to a mix of burnt, soggy, and perfectly crisp chips. While a very sharp chef’s knife can work, it requires exceptional knife skills to achieve the necessary consistency. Always use the safety guard that comes with your mandoline to protect your fingers.
- Deep-Fry Thermometer (or Candy/Instant-Read Thermometer): This tool is paramount for maintaining the correct oil temperature. Guessing the temperature is a recipe for disaster: oil that’s too cool results in greasy, soggy chips, while oil that’s too hot will burn the chips before they become crisp. Consistency in temperature ensures consistency in results.
The Art of Preparation: Steps for Ultimate Crispiness
Proper preparation is key to transforming raw roots into delightful chips. Each step plays a crucial role in achieving that perfect, airy crunch.
- Slice with Unwavering Precision: Using your mandoline or handheld slicer, carefully slice each root vegetable as thinly as humanly possible. Aim for a thickness in the range of 1/16 to 1/8 inch (approximately 1.5 to 3 mm). This uniform thinness is the golden rule; inconsistent slices will lead to uneven cooking—some chips will burn while others remain soft.
- The Crucial Ice Water Soak: As you slice, immediately transfer each type of vegetable into separate large bowls filled with ice water. Allow them to soak for a minimum of 30 minutes. This essential step serves a dual purpose: it helps to draw out excess starch from the vegetables, which is vital for achieving extra crispiness, and it prevents the slices from sticking together during frying.
- Prepare Your Draining Station: While the vegetables are soaking, set up your draining area. Line two large baking sheets generously with several layers of paper towels or open brown paper bags. This absorbent surface will be essential for wicking away excess oil from your freshly fried chips.
- The Paramount Drying Process: Don’t Rush This! After the soaking period, thoroughly drain each group of vegetables. Then, using an abundance of fresh paper towels (or clean kitchen towels, though paper towels are highly recommended for beets due to their potent staining abilities), pat every single slice absolutely dry. We cannot emphasize this step enough. Any residual moisture on the vegetables will cause the hot oil to splatter dangerously and, more importantly, prevent your chips from achieving that desired crisp texture. Bone-dry is the goal!
Mastering the Fry: Achieving the Perfect Golden Crunch
Frying can seem daunting, but with a focus on temperature control and smart technique, you’ll be producing restaurant-quality chips in no time.
- Heat the Frying Oil: Pour about 8 cups of a high smoke point oil, such as rice bran oil, canola oil, or grapeseed oil, into a deep fryer or a heavy-bottomed stockpot. Heat the oil steadily until it reaches a precise temperature of 300°F (150°C). A deep-fry thermometer is your best friend here, ensuring accuracy.
- Fry in Small, Controlled Batches: This is an absolutely critical step for success. Introduce only a small handful of sliced vegetables into the hot oil at a time. Overcrowding the pot will cause a rapid drop in the oil’s temperature, leading to greasy, heavy, and ultimately soggy chips. As a strategic tip, it’s often advisable to fry red beets last, as their strong natural pigment can slightly tint the oil, potentially giving subsequent batches a rosy hue.
- Monitor, Stir, and Maintain Temperature: As the chips fry, gently but consistently stir the vegetables using a long-slotted spoon, a stir-fry spider, or chopsticks. This ensures that each chip cooks evenly and achieves uniform browning and crispiness. Continuously monitor your oil temperature, striving to maintain it within the ideal range of 300°F (150°C) and no more than 325°F (170°C). If the temperature climbs too high, your chips will scorch before they have a chance to crisp through.
- Achieving the Perfect Crispness: Continue to fry each batch for approximately 2 to 5 minutes, or until the chips transform into a light golden color and feel visibly crisp. The exact cooking time will naturally vary depending on the oil temperature and the precise thickness of your vegetable slices.
- Drain and Season Immediately: Once a batch of chips reaches that coveted crisp stage, promptly remove them from the hot oil using tongs or a slotted spoon. Hold them briefly over the pot to allow any excess oil to drain back. Immediately transfer the hot chips to your prepared paper-lined baking sheets. Crucially, generously sprinkle the hot chips with sea salt to taste right away. The salt adheres best and infuses flavor most effectively when the chips are still warm and slightly oily.
- Repeat and Enjoy: While the previous batch cools slightly, proceed to fry the next batch of vegetables. Once all your chips are fried and seasoned, allow them to cool completely to room temperature. This cooling period is essential for them to fully crisp up and set. Finally, gently toss them together in a large bowl and serve your magnificent homemade creation!
Inspired By
This delightful recipe draws inspiration from the culinary wisdom found in The Kitchen Pantry Cookbook.
Buy On Amazon
Versatile Serving Ideas & Smart Storage Tips
Homemade root vegetable chips are far too delicious and beautiful to be confined to just one use. Their versatility makes them perfect for almost any occasion:
- Elegant Appetizer: Elevate your entertaining by serving these chips with an array of gourmet dips. Think creamy roasted garlic aioli, a vibrant romesco sauce, a fresh dill and yogurt dip, or even a classic hummus. They offer a more sophisticated and flavorful alternative to ordinary crackers.
- Crunchy Side Dish: Pair these colorful chips with your favorite main courses. They make an exciting and flavorful accompaniment to grilled chicken, pan-seared fish, a hearty burger, or a light sandwich, providing a satisfying textural contrast.
- Gourmet Soup Topping: Add an unexpected crunch and depth of flavor to your soups and stews. Crush a handful of chips over a creamy butternut squash soup, a rich lentil stew, or a vibrant tomato bisque for an elevated culinary experience.
- Salad Enhancer: Break the chips into smaller pieces and sprinkle them over your favorite green salads, grain bowls, or even a pasta salad for a delightful textural pop and an extra layer of taste.
- Party Favorite: A generously sized bowl of these homemade chips will undoubtedly be the star of any gathering, from casual backyard BBQs to more formal holiday celebrations. They are universally appealing and always a hit.
Storage for Lasting Crispness
To preserve their delightful crunch, ensure your homemade chips are completely cooled before storing. Transfer them to an airtight container and keep them at room temperature. For optimal crispness and flavor, it’s best to enjoy them within 2-3 days. If they begin to lose some of their crunch over time, you can often revive them by spreading them on a baking sheet and reheating them in a low oven (around 250°F / 120°C) for a few minutes until they crisp up again.
Troubleshooting Common Chip-Making Challenges
Even with the best intentions, occasionally a batch of chips might not turn out exactly as planned. Here are solutions to some common issues:
- Soggy or Greasy Chips: This is almost always a result of insufficient drying of the vegetables before frying, an oil temperature that is too low, or overcrowding the frying pot. Ensure your sliced veggies are bone dry, meticulously maintain the oil temperature with a thermometer, and always fry in small batches.
- Burnt Chips: If your chips are scorching before they crisp, the oil temperature is likely too high. Reduce the heat slightly and monitor it closely. Uneven stirring can also lead to some chips burning while others are undercooked, so stir frequently.
- Unevenly Cooked Chips: The primary cause of this issue is inconsistent slicing. Investing in and skillfully using a mandoline (with its safety guard!) is the best way to ensure all your slices are uniform in thickness, leading to even cooking.
- Flavorless Chips: Forgetting to salt the chips immediately after they come out of the fryer is a common oversight. The heat and residual oil create the perfect surface for salt to adhere and infuse flavor. Don’t delay the seasoning!
Insights from Our Testers: Suzanne Fortier’s Experience

Suzanne Fortier, Recipe Tester
“Wow, these chips are such a great idea! I used a mix of beet, yam, parsnips, and batata (a white, low-moisture, Cuban sweet potato) for my test. Four pounds of veggies make a truly generous amount of yummy chips, which is fantastic, but I quickly learned that slice thickness and batch size are paramount for success. My initial attempts with slices a hair less than 1/8-inch proved to be too thick; they simply did not stay crisp for long.
The best chips, the ones that got perfectly brown and stayed wonderfully crisp, came from using the thinnest setting on my mandoline. This confirmed that ‘thinner is definitely better’ when it comes to homemade chips.
Equally critical was the batch size during frying. I unfortunately discovered the hard way that a batch that’s too large will drastically drop the oil temperature, resulting in unpleasantly greasy chips. Frying in small, manageable quantities is absolutely crucial for maintaining oil temperature and achieving that perfect crunch.
While all my chips were initially crisp, only the ultra-thin ones retained their crunch over time. The batata offered a fantastic flavor profile, and the parsnips were also quite lovely. The yams, though tasty, suffered from being cut too thick and ended up too soft. Interestingly, the beets, even when cooked between the recommended 5 to 8 minutes, just didn’t achieve a truly ‘chippy’ texture for me. My key takeaways are: always slice as thin as possible, and never overcrowd the pot!”
The Essential Recipe: Homemade Root Vegetable Chips
Course: Sides, Appetizers
Cuisine: American
Yields: 4 to 8 servings
Prep Time: 1 hour 15 minutes
Cook Time: 45 minutes
Total Time: 2 hours
Estimated Calories: Approximately 416 kcal per serving
Ingredients
- 1 pound taro root, thoroughly washed and peeled
- 1 pound sweet potatoes, thoroughly washed and peeled
- 1 pound yams, thoroughly washed and peeled
- 1 pound red beets, thoroughly washed and peeled (or a mix of other desired root vegetables like purple potatoes, Chioggia beets, golden beets, parsnips, etc.)
- About 8 cups high smoke point oil (e.g., rice bran oil, canola oil, or grapeseed oil), for deep-frying
- Sea salt, finely ground, to taste
Instructions
- Slice the Vegetables: Using a mandoline or a handheld slicer, carefully slice all the peeled root vegetables as thinly and uniformly as possible. Aim for a thickness between 1/16 to 1/8 inch (1.5-3mm). Uniformity is absolutely crucial for even cooking.
- Soak in Ice Water: As you slice, immediately place each type of vegetable into separate large bowls filled with ice water. Allow them to soak for a minimum of 30 minutes. This step helps to remove excess starch, contributing to a crispier end product.
- Prepare Draining Station: While the vegetables are soaking, line two large baking sheets generously with several layers of paper towels or open brown paper bags. This will serve as an absorbent surface for the fried chips.
- Thoroughly Dry Vegetables: Drain each group of soaked vegetables completely. Then, using fresh paper towels, pat each and every slice absolutely dry. This step is critical; any residual moisture will cause oil to splatter and prevent the chips from becoming crisp. (Note: Use paper towels for beets as they can stain cloth towels.)
- Heat the Frying Oil: In a deep fryer or a heavy-bottomed stockpot, pour about 8 cups of your chosen frying oil. Heat the oil to precisely 300°F (150°C), using a deep-fry or candy thermometer to monitor the temperature accurately.
- Fry in Small Batches: Once the oil is at temperature, add only a small handful of sliced vegetables to the hot oil at a time. Do not overcrowd the pot, as this will drastically lower the oil temperature and lead to greasy, soggy chips. (Pro Tip: Fry red beets last, as their color can slightly tint the oil.)
- Monitor and Stir While Frying: Gently stir the chips during frying using a long-slotted spoon, stir-fry spider, or chopsticks to ensure even browning and consistent crispiness. Maintain the oil temperature between 300°F (150°C) and no more than 325°F (170°C) to prevent the chips from scorching.
- Achieve Golden Crispness: Continue frying each batch for approximately 2 to 5 minutes, or until the chips are visibly crisp and have turned a light golden color. The exact cooking time will depend on oil temperature and chip thickness.
- Drain and Season Immediately: As each batch of chips becomes perfectly crisp, remove them from the fryer with tongs or a slotted spoon, allowing excess oil to drain back into the pot. Immediately transfer the hot chips to your prepared paper-lined baking sheets and generously sprinkle with sea salt to taste. Salt adheres best while the chips are still warm and slightly oily.
- Cool and Serve: Repeat the frying process for the remaining batches. Once all chips are fried and seasoned, allow them to cool completely to room temperature. This cooling period is important for them to set and achieve their maximum crispness. Finally, gently toss them together in a large bowl and serve.
Embarking on the journey of making homemade root vegetable chips is a rewarding culinary adventure. It offers a superior taste, texture, and a level of customization that store-bought options simply cannot match. With a little precision, patience, and the insights shared in this guide, you’ll be enjoying perfectly crispy, vibrantly flavorful chips tailored exactly to your preferences. So, gather your roots, heat your oil, and transform simple vegetables into an extraordinary snack!
Tried this delicious recipe?
We’d love to see your amazing homemade creations! Mention @leitesculinaria or tag #leitesculinaria on Instagram to share your culinary success!
Nutrition Information (Approximate)
(Please note: Nutrition information is automatically calculated based on the original recipe and should only be used as an approximation. Actual values may vary based on ingredients, preparation methods, and serving sizes.)
- Calories: 416 kcal
- Carbohydrates: 97 g
- Protein: 7 g
- Fat: 1 g
- Saturated Fat: 0.1 g
- Monounsaturated Fat: 0.1 g
- Sodium: 175 mg
- Fiber: 16 g
- Sugar: 13 g