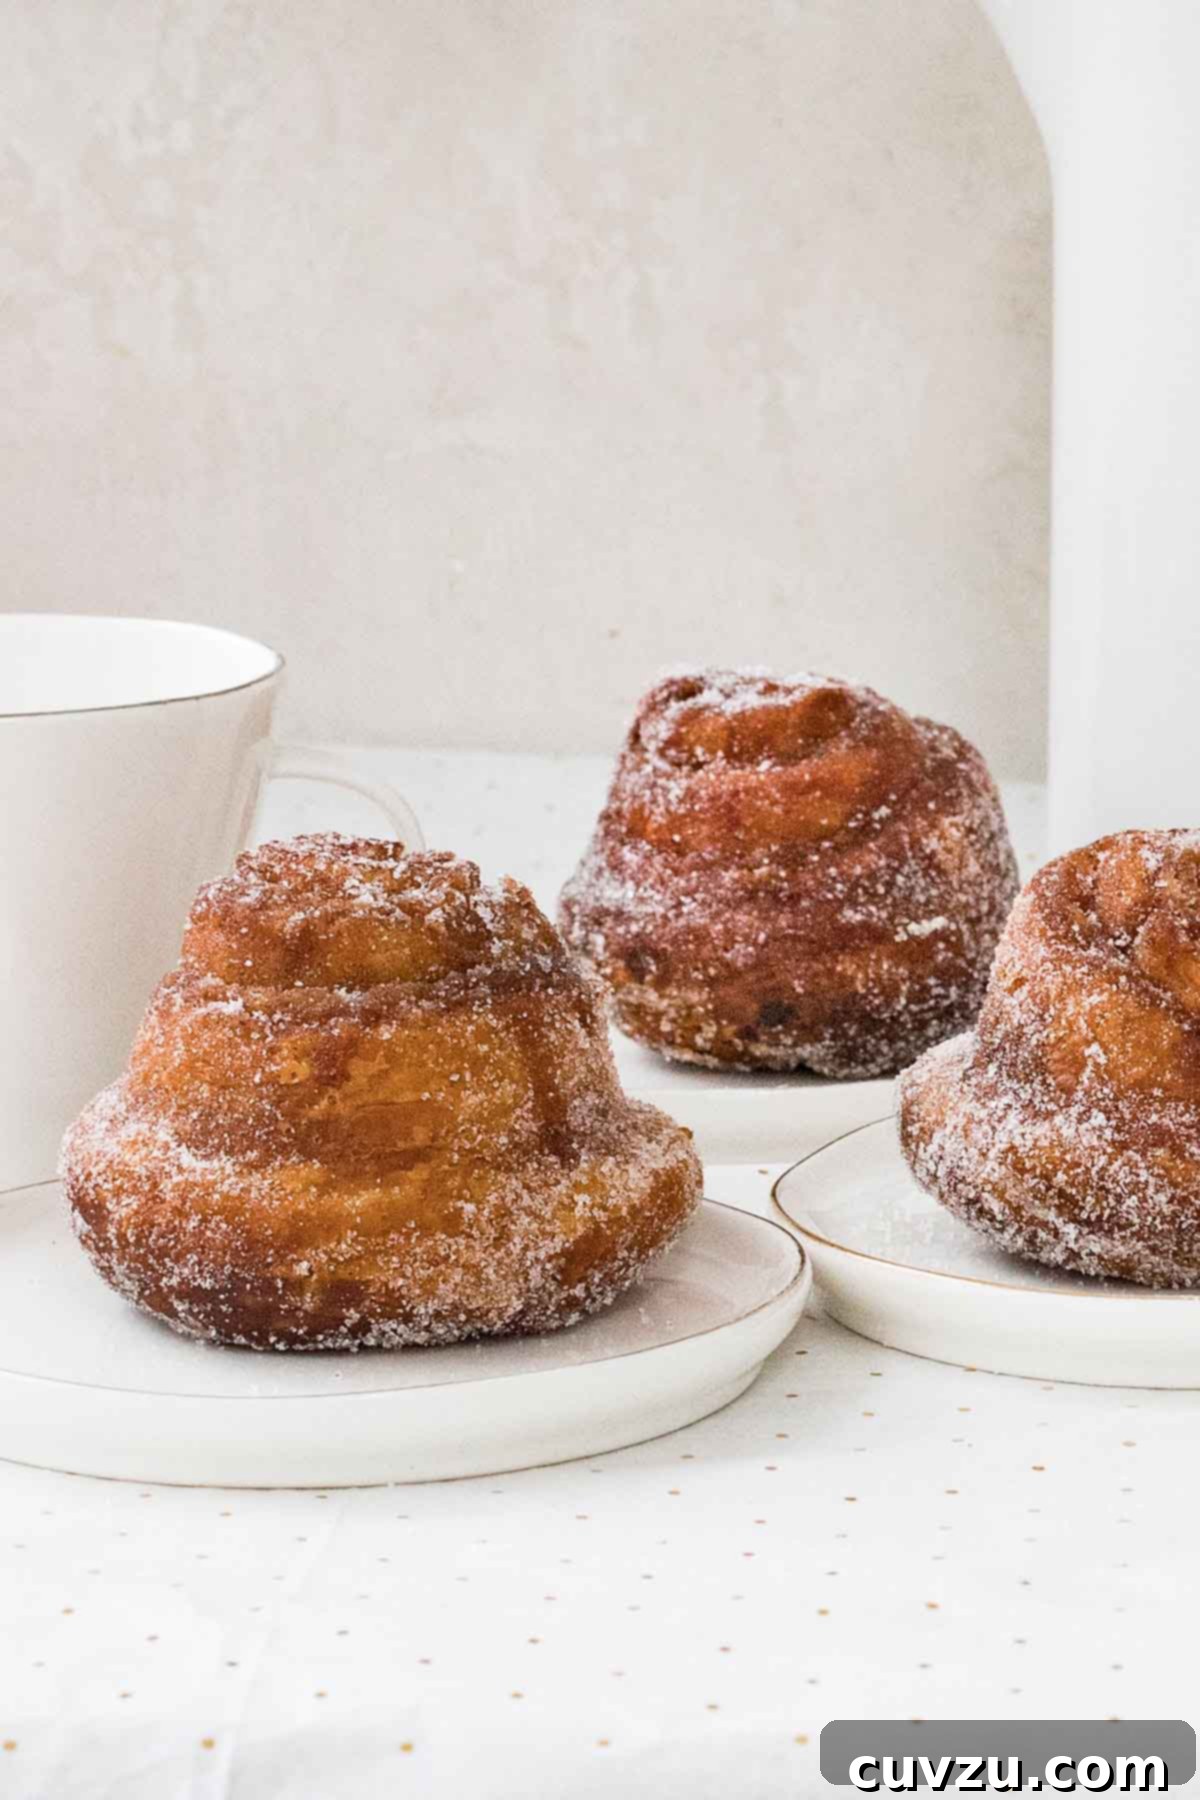
Morning buns are a truly exceptional treat, renowned for their tender, flaky layers and irresistible aroma. Crafted from a delicate croissant dough, these bakery-worthy delights offer the perfect balance of richness and lightness. What makes them even more remarkable is the convenience of preparing the dough the night before, making them an ideal choice for a relaxed weekend brunch or a special holiday breakfast. Each bun is generously filled with a delightful blend of orange-cinnamon sugar, which caramelizes beautifully during baking, infusing your entire home with a warm, festive scent that is guaranteed to entice everyone out of bed.
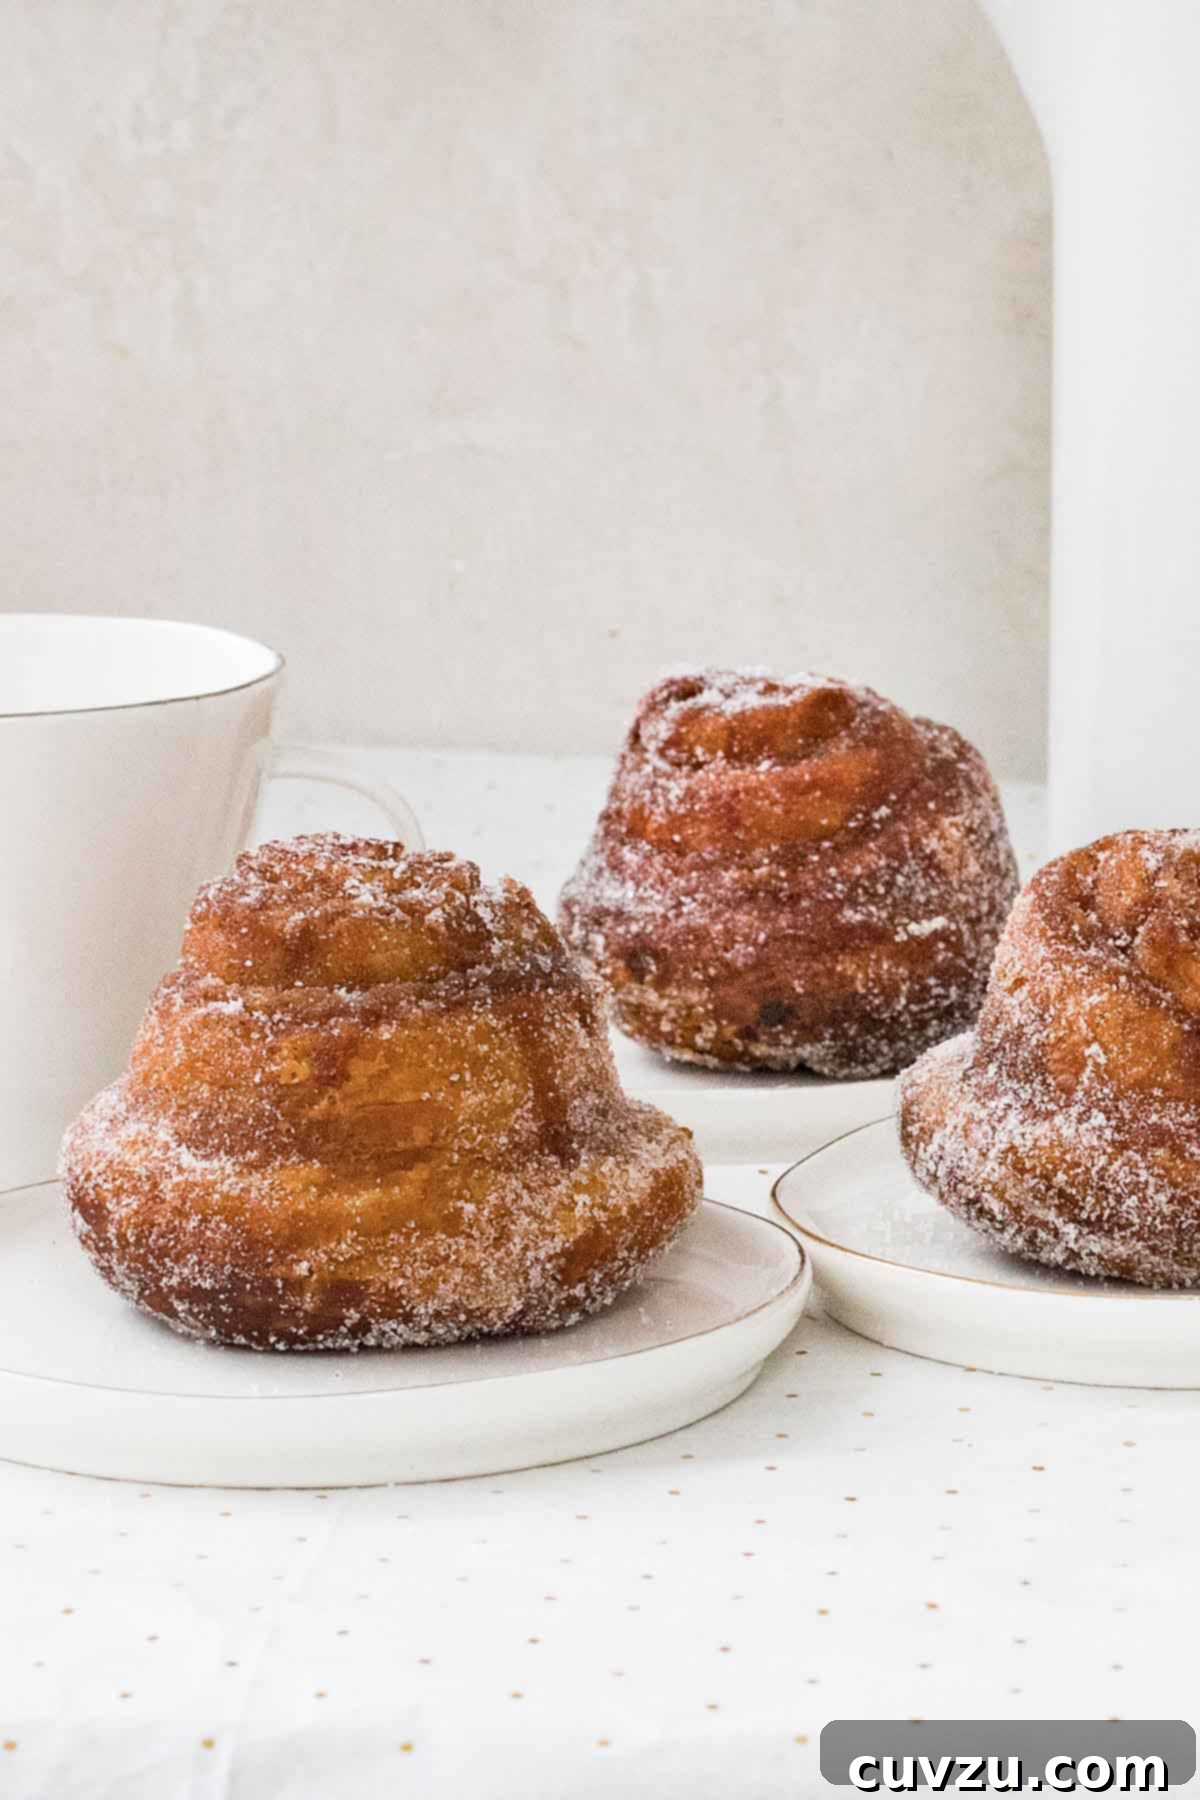
Morning Buns: Your Quick Guide
- What they are: Imagine the perfect marriage of a delicate croissant and a sweet cinnamon roll. These morning buns feature a miraculously flaky, tender dough infused with rich European butter, wrapped around a sweet, aromatic filling of cinnamon and bright orange zest. The result is a stunning, bakery-quality pastry that is both sophisticated and utterly comforting.
- Why you’ll adore them: Beyond their incredible flavor and texture, these buns are a show-stopping breakfast that offers wonderful make-ahead convenience. You can prepare most of the work the day before, allowing you to wake up to the delightful aroma of freshly baked pastries with minimal morning effort. They elevate any special occasion or simply make an ordinary day feel extraordinary.
- How to create them: The process involves crafting an easy-to-handle laminated croissant dough, generously spreading it with a vibrant orange-cinnamon sugar mixture, carefully rolling it into a log, slicing it, and baking the portions in a muffin tin until they achieve a gorgeous golden-brown hue and a sticky, caramelized bottom. A dusting of sugar finishes these masterpieces. Get ready for a truly delightful start to your day!

Achieving the perfect morning bun requires attention to a few key details. When combining the initial dough ingredients, resist the urge to overmix; excessive mixing can activate too much gluten, resulting in a tough, chewy texture rather than the desired tender flakiness. The butter and flour mixture used for laminating is crucial: it should be pliable and smooth, akin to cream cheese, allowing it to spread easily without melting. If, by chance, you leave your dough in the freezer for too long, simply allow it to sit at room temperature for a while until it becomes manageable enough to roll out with ease. The meticulous laminating process, with its series of folds and chills, is what truly develops the strength and characteristic layers of your dough. For an unparalleled depth of flavor and texture, embrace the magic of an overnight rise in the refrigerator. This slow proofing allows the yeast to work gradually, enhancing the bun’s complexity and creating a superior crumb structure.—Sarah Kieffer
Featured Review
Chef David is the absolute best! Not only is this morning bun recipe truly amazing (it even works wonderfully when using plant-based butter, which is a huge bonus!), but he personally helped me troubleshoot an issue I was having with viewing the recipe and steps on the site. Thank you so much, Chef! I would enthusiastically give you ten stars if I could!
⭐️⭐️⭐️⭐️⭐️⭐️⭐️⭐️⭐️⭐️Jean Bartels
Your Essential Morning Buns Questions, Answered
While the orange-cinnamon combination is a classic for a reason, these morning buns are incredibly versatile! For a truly festive twist, consider transforming them into miniature panettones. To achieve this, simply add 1 tablespoon of bright lemon zest to the filling mixture, alongside 1 cup (approximately 170 g) of your favorite dried and/or candied fruits. Excellent options include tart cranberries, sweet candied orange peels, succulent golden raisins, tropical dried pineapple, tender dried apricots, and flavorful dried cherries. You could also experiment with a cardamom-spiced filling or even a delicate almond paste swirl for a different flavor profile.
The overnight rise is a game-changer for convenience and flavor development. To do this, prepare the buns exactly as the recipe describes—roll out the dough, spread the filling, roll it up into a cylinder, cut the individual pieces, and carefully place them into your prepared muffin pan. However, instead of allowing them to rise at room temperature for the 1 1/2 to 2 hours mentioned in the main recipe, loosely cover the entire muffin pan with plastic wrap and transfer it to the refrigerator. Allow them to cold-proof for at least 8 hours, and up to a generous 18 hours. This slow, cold fermentation enhances both the flavor and the delicate texture. When you’re ready to bake the next morning, remove the covered buns from the refrigerator and let them sit at room temperature (still covered) until they appear visibly puffy and have doubled in size, which typically takes about 1 1/2 to 2 hours. Once they are sufficiently proofed, preheat your oven and bake them according to the recipe’s instructions. This method allows you to enjoy freshly baked pastries without the early morning rush.

More Amazing Breakfast & Brunch Recipes to Savor
Cook’s Illustrated’s Ultimate Banana Bread
1 hr 30 mins
Discover the truly definitive banana bread recipe, meticulously perfected by Cook’s Illustrated. This isn’t just banana bread; it’s a moist, flavorful masterpiece that will become your go-to recipe. Its rich banana flavor and perfectly tender crumb make it an ideal companion to your morning coffee or a delightful afternoon snack.
Effortless Homemade Rhubarb Jam
2 hrs
Elevate your breakfast spread with this incredibly easy and utterly delicious sweet-tart rhubarb jam. Its vibrant color and balanced flavor make it the perfect accompaniment to toast, scones, or even a dollop on your freshly baked morning buns. A simple recipe that yields impressive results every time.
Indulgent Chocolate-Chocolate Chip Muffins
1 hr
For the chocolate lovers among us, these double chocolate chip muffins are pure bliss in every bite. Rich, moist, and loaded with chocolate flavor, they are a fantastic way to satisfy your sweet tooth at breakfast or any time of day. Simple to make and utterly irresistible.
Zoë François’ Irresistible Monkey Bread
7 hrs 5 mins
Prepare for a true breakfast indulgence with Zoë François’ legendary monkey bread. This sweet, gooey, pull-apart bread is a joyous treat that’s perfect for sharing. Each bite is coated in a rich caramel sauce, making it a spectacular centerpiece for any brunch spread, especially when you have a bit of time to let the dough work its magic.
Now that your kitchen is filled with the tantalizing aroma of a professional bakery, why stop there? Let’s continue this delicious journey! This time-tested, award-winning banana bread recipe from Cook’s Illustrated is so moist and flavorful, it will not only have everyone’s jaws flapping with delight but also begging for the recipe. And what could possibly complement a perfect, flaky pastry better than a little something exquisite to dollop on top? This outrageously easy, sweet-tart rhubarb jam is precisely the vibrant, fruity touch needed to make your weekend brunch truly legendary and unforgettable. If you find yourself with a few more hours to spare and a craving for something truly special, you simply must—and I mean, absolutely must—whip up this sweet and gooey monkey bread. It’s a pull-apart delight that brings smiles to every face. Or perhaps your family is yearning for something deeply rich and chocolatey? In that case, this recipe for chocolate-chocolate-chip muffins promises pure, unadulterated happiness in every bite!
Share Your Experience! Write a Review
If you make this irresistible morning bun recipe, or any other delightful dish featured on Leite’s Culinaria, we warmly invite you to leave a review! Your insights are invaluable. Please consider sharing a star rating and even your best photo in the comments section below. I absolutely love hearing from you and seeing your culinary creations. – David
Featured Review
My partner had a craving for morning buns and went to Costco, but alas, they were nowhere to be found. So, I took it upon myself to embark on the adventure of making them for him! This was my first time ever attempting morning buns, and I must say, the instructions were incredibly easy to follow and very straightforward. I have to admit, the folding process was the hardest part, but I persevered and managed to get the buns looking absolutely fantastic! Overall, this is a super great and utterly delicious recipe!
Karina

Irresistible Orange-Cinnamon Morning Buns
David Leite
Ingredients
For the Croissant Dough
- Butter, for greasing your bowl
- 1 1/2 cups warm water (100°F to 110°F or 35°C to 45°C)
- 4 teaspoons active dry yeast
- 4 cups all-purpose flour, plus more for dusting your work surface
- 1/4 cup plus 1 tablespoon granulated sugar
- 2 teaspoons table salt
- 2 tablespoons (1 oz) unsalted butter, melted
For Laminating the Dough (Butter Block)
- 3 sticks (12 ounces) unsalted butter, at room temperature, plus a small amount for greasing the mixing bowl
- 1 tablespoon all-purpose flour
For the Morning Buns Filling & Coating
- 1 cup granulated sugar, divided, plus extra for coating the muffin pan
- 2 tablespoons orange zest, preferably from organic oranges for best flavor and peace of mind
- 1 tablespoon ground cinnamon
- pinch of salt
- All-purpose flour, for dusting your work surface generously
- 3 tablespoons (1 1/2 ounces) unsalted butter, melted, plus extra for generously greasing the muffin pan and lightly greasing your spatula
Instructions
Phase 1: Crafting the Croissant Dough
-
Begin by generously buttering a large mixing bowl; this will prevent your dough from sticking as it rises. In a separate small bowl or a liquid measuring cup, combine the 1 1/2 cups of warm water (ensure the temperature is between 100°F to 110°F or 35°C to 45°C, as this is ideal for yeast activation) with the 4 teaspoons of active dry yeast. Stir gently and allow the mixture to sit undisturbed for about 5 minutes, or until the yeast has fully dissolved and appears foamy, indicating it’s active.
-
In the bowl of a stand mixer equipped with the dough hook attachment, thoroughly mix together the 4 cups of all-purpose flour, the 1/4 cup plus 1 tablespoon granulated sugar, and the 2 teaspoons of table salt. Turn the mixer on to low speed, then gradually add the activated water and yeast mixture. Follow this by slowly pouring in the 2 tablespoons (1 oz) of melted unsalted butter.
-
Continue to mix the dough on low speed until all the ingredients are fully combined and the dough starts to come together, usually taking about 3 to 4 minutes. The dough will have a rough and slightly bumpy appearance, but it should form a cohesive mass. Transfer this dough to your large, greased bowl and cover it snugly with plastic wrap. Allow the dough to rise at a comfortable room temperature until it has visibly doubled in size, which typically takes between 1 1/2 to 2 hours.
-
Once risen, gently press down on the dough to release as much of the accumulated gas as possible. Carefully transfer the dough onto a large piece of plastic wrap, then gently shape it into a neat rectangle measuring approximately 10 by 12 inches (25 by 30.5 cm). Cover the dough completely with another piece of plastic wrap, place it onto a sturdy sheet pan, and move it to the refrigerator to chill for a minimum of 2 hours, or ideally, allow it to chill overnight for optimal handling.
Phase 2: Preparing the Butter Block and Laminating the Dough
-
In the bowl of a stand mixer fitted with a paddle attachment, beat the 3 sticks (12 ounces) of unsalted butter (ensure it is at room temperature for easy mixing) along with the 1 tablespoon of all-purpose flour. Beat until the mixture is beautifully creamy and thoroughly combined, a process that should take about 2 to 3 minutes. This creates your crucial butter block for lamination.
-
Now, it’s time to begin the delicate process of laminating and folding your dough to create those signature flaky layers.
-
Carefully remove the chilled dough from the refrigerator, unwrap it from the plastic, and place it onto a lightly floured work surface. Using a rolling pin, gently roll the dough into a sizable rectangle, aiming for dimensions of approximately 12 by 20 inches (30.5 by 50 cm). Once rolled, spread the prepared butter-flour mixture evenly over the entire surface of the rectangle, ensuring you leave a clear 1/2 inch (12 mm) border around all the edges.
-
Perform the first turn, often called a “letter fold”: Orient the dough so a short side is facing you. Fold one-third of the dough inward onto itself, meticulously aligning the edges. Then, fold the remaining one-third of the dough over the already folded section, creating three even layers. Rotate the dough by 90 degrees so the seam is now facing to your right and one open end is facing you. Gently roll the dough again into a rectangle, approximately 10 by 18 inches (25 by 46 cm). Note that with each subsequent roll, the rectangle will naturally become slightly smaller.
-
Repeat the letter fold process once more. To prepare for the next step and ensure the butter remains firm, sprinkle a sheet pan or plate with a touch of flour, place the folded dough onto it, and transfer it to the freezer for precisely 6 minutes. It’s crucial to set a timer here to avoid forgetting the dough and allowing it to freeze too much; this brief chill helps to firm up the butter slightly, making the subsequent turn much cleaner and less messy.
-
Remove the dough from the freezer and perform the letter fold for a third time, again ensuring the seam is positioned to your right before folding. Roll the dough out one last time into a rectangle, aiming for dimensions of about 8 by 16 inches (20 by 40.5 cm). After rolling, gently compress the dough with your rolling pin to ensure even thickness and structure.
-
If you intend to use the dough immediately, return it to the freezer for a final 6-minute chill to firm it up, then proceed directly with the recipe instructions. Alternatively, if you wish to bake later, meticulously wrap the dough in plastic wrap, place it securely in a freezer-safe bag, and freeze it for up to 2 weeks. When you’re ready to use it, simply remove the dough from the freezer the night before and place it in the refrigerator to thaw slowly and evenly.
Phase 3: Shaping Your Morning Buns
-
Prepare your muffin pan by generously buttering the insides and the top surface of a standard twelve-cup muffin pan. Following this, coat each muffin cup thoroughly with granulated sugar, ensuring it adheres well, then tap out any excess sugar. This creates a delightful caramelized crust on the bottom of each bun.
-
In a small, separate bowl, combine 1/2 cup (100 g) of the granulated sugar, the vibrant 2 tablespoons of orange zest, the aromatic 1 tablespoon of ground cinnamon, and a tiny pinch of salt. Mix these ingredients thoroughly to create your fragrant filling mixture.
-
Liberally flour your clean work surface once more. Roll out the chilled croissant dough into a precise rectangle measuring approximately 10 by 24 inches (25 by 60 cm). Once rolled, brush the entire surface of the dough with the 3 tablespoons (1 1/2 ounces) of melted unsalted butter. Then, evenly sprinkle the prepared orange-cinnamon sugar mixture over the buttered dough, gently pressing it down to ensure it adheres well.
-
Starting from one of the long sides, carefully and tightly roll up the dough into a compact cylinder. Position the rolled dough with the seam-side facing down. Using a sharp knife or a bench scraper, cut the dough into twelve equal pieces, with each piece measuring approximately 2 inches (5 cm) wide.
-
Place each individual dough piece into the prepared muffin pan, ensuring the cut-side faces down into the cup. Loosely cover the entire pan with plastic wrap and allow the dough to rise at room temperature until it has visibly doubled in size and appears wonderfully puffy. When gently pressed, the dough should feel soft and springy, similar to a marshmallow. This final rise typically takes between 2 to 2 1/2 hours.
Phase 4: Baking Your Golden Buns
-
Preheat your oven to a robust 400ºF (200ºC). This high initial heat helps create the signature flaky crust.
-
Gently remove the plastic wrap from the risen buns. With a lightly greased spatula, carefully press down on the top of each bun. Place a sturdy sheet pan on a lower oven rack – this is essential to catch any delicious drips and prevent them from burning on the bottom of your oven; however, do not place it directly under the muffin pan on the same rack, as this could interfere with proper heat circulation and baking. Bake the buns for an initial 15 minutes. After this time, carefully remove the pan from the oven and press down on the tops of the buns once more with your greased spatula. Rotate the pan 180 degrees and continue baking for approximately 20 minutes more, or until the buns are beautifully golden brown and caramelized around the edges.
Phase 5: Coating and Serving Your Freshly Baked Buns
-
While your buns are still baking, prepare your coating station: fill a pie plate or a shallow bowl with the remaining 1/2 cup (100 g) of granulated sugar. Once the buns are perfectly baked, remove the pan from the oven immediately. Without delay, carefully flip the hot buns onto a sheet pan that has been lined with parchment paper. Working quickly and using tongs to protect your hands, pick up one bun at a time and evenly coat it in the bowl of sugar, ensuring all sides are covered. Repeat this process with the remaining buns, then transfer them to a wire rack to cool slightly. These magnificent morning buns are truly at their peak when savored on the very same day they are made. Enjoy!

Adapted From
This exquisite recipe is thoughtfully adapted from the beloved cookbook, “Baking for the Holidays.”
Buy On Amazon
Explore More with AI
Nutrition Information
Please note that nutrition information is automatically calculated and should, therefore, be used only as an approximation for dietary planning.
Insights from Our Recipe Testers’ Reviews
Jessie Hagan
As Jessie Hagan eloquently put it, “Morning buns, midday buns, dinner buns, dessert buns, can’t-sleep-in-the-middle-of-the-night buns, mend-a-broken-heart buns…whatever, these are anytime buns.” She perfectly captures the universal appeal and comforting nature of these pastries. She advises that while these buns aren’t a spur-of-the-moment creation, they are incredibly rewarding for a day spent at home, allowing you to gradually work through the dough stages. It’s not a labor-intensive recipe, but rather one that unfolds in steps, leading to those exquisite buttery layers and sticky, sweet merriment. That moment when you carefully flip out the hot, golden buns and roll them in sugar, then take that first glorious bite, truly makes time stand still. The experience of biting into these is like receiving a warm hug – gooey on the inside and wonderfully flaky throughout.
Jessie also offered insightful variations. For households with citrus skeptics, she suggests omitting the orange zest; the buns remain pure perfection without it. For the adventurous, she pondered the possibility of incorporating a softened chocolate hazelnut spread into the butter layer of the croissant dough, a variation that sounds utterly divine, though untested. Furthermore, she provided invaluable tips for enjoyment beyond baking day: they reheat beautifully! A quick 20 to 30 seconds in the microwave revives that “just-baked” feeling. And for any rare leftovers several days later, her ingenious suggestion is to chop them up, douse them in almond milk, and bake them into a delightful bread pudding, with any additional mix-ins your heart desires!
Denise McCormick
Denise McCormick aptly describes this as a “monster recipe” in terms of its multi-step process, yet she highlights that preparing the dough up to the freezing stage makes it perfectly palatable for special occasions or when hosting weekend guests. She was particularly impressed by the final texture, noting its delightful flakiness and croissant-like quality, subtly enhanced by a hint of orange at the base of the muffin. Sprinkled with fine caster sugar after baking, these buns were deemed just right for an elegant brunch or a memorable holiday breakfast. Her baking insights were precise:
The initial 15-minute bake resulted in a gorgeous brown color and visibly puffy, beautiful buns. However, recognizing the height of the dough, Denise astutely suspected that the centers would require additional baking time for thorough cooking. An extra 8 minutes after rotating the pan proved to be the perfect adjustment, yielding a beautifully gooey yet fully cooked center, complemented by an even more browned and caramelized top. This attention to baking detail ensures a consistently perfect result for home bakers.
Trisha T.
Trisha T. proclaimed that these morning buns would “not be out of place in my favorite local cafe or bakery,” a high compliment indeed. She and her partner raved about their deliciousness for days after baking. She highlighted their exquisite texture: crispy and flaky on top, transitioning into a wonderfully soft, almost caramelized bottom section – making for an utterly delightful pastry experience. Despite never having made croissant dough before, Trisha found the overall process far less intimidating than she had initially imagined. Her strategy of making the dough about a week in advance and freezing it, then thawing it the night before baking, proved to be a surprisingly easy and effective way to manage the time-consuming aspects of the recipe.
Trisha enthusiastically plans to make these buns again, especially when guests are visiting, so they too can marvel at the glorious orange-scented cinnamon sugar goodness. She shared a practical tip for reheating: gently warm them at 375°F (190°C) for about 8 minutes on the second day. This method successfully re-crisped the tops and warmed them through beautifully, resulting in a delicious second-day treat. Her experience underscores that while the recipe takes time, the impressive and delicious outcome makes every step worthwhile, proving that even a novice baker can achieve bakery-quality results.