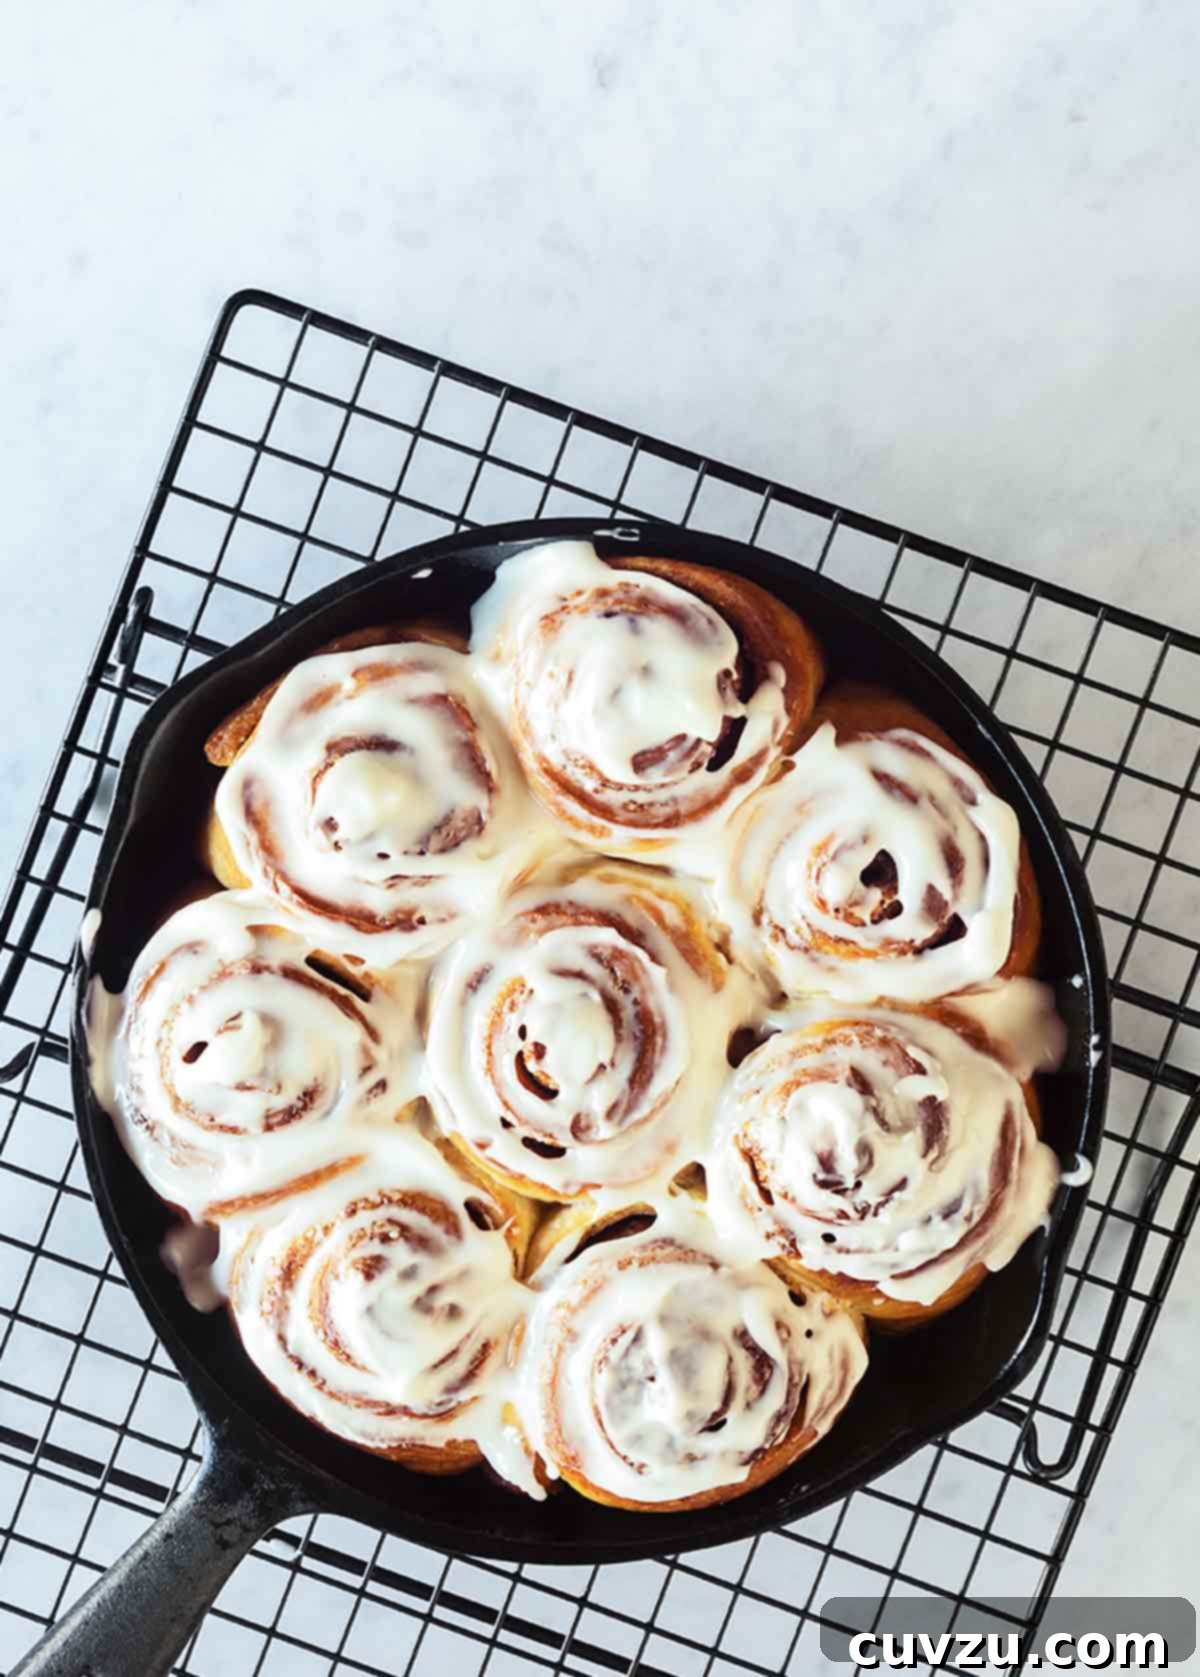
These biscuit cinnamon rolls are a revelation for anyone who loves the comforting taste of homemade cinnamon buns but simply doesn’t have the luxury of time – or the patience for yeast. This brilliant shortcut recipe delivers intensely spiced, tender rolls, generously lavished with a tangy buttermilk cream cheese icing, making them an instant favorite for busy mornings or spontaneous sweet cravings.
Imagine waking up to the irresistible aroma of warm cinnamon rolls without the usual early start or the extensive proofing time. That’s the magic these biscuit cinnamon rolls bring to your kitchen. They are quick to prepare, incredibly easy to bake, and yield a delightfully gooey, sticky, and sweet treat that is guaranteed to please. Forget the long waits associated with traditional yeast-raised varieties; these little lovelies offer nearly instant gratification, making them a game-changer for weekend breakfasts or impromptu dessert desires.

Why Our Testers Adore This Recipe
Our dedicated recipe testers were absolutely thrilled with these cinnamon rolls. Tester Bonnie D. praised them as “a quick and easy alternative to the traditional cinnamon roll,” highlighting their convenience without compromising on flavor. Greg C. was particularly delighted by the rolls’ texture, describing them as “soft and chewy” with an abundance of coveted crispy, caramelized edges. These glowing reviews underscore why this recipe stands out as a true winner.
Understanding Key Ingredients
While simplicity is at the heart of this recipe, certain ingredients play a crucial role in achieving that perfect texture and flavor. Here’s a closer look at the stars of our biscuit cinnamon rolls:
- Buttermilk: The Secret to Tender Biscuits
Buttermilk is a fundamental component of outstanding biscuits, and its inclusion in this recipe is no exception. It imparts a delightful, subtle tang that perfectly balances the sweetness of the cinnamon filling. More importantly, the acidity in buttermilk reacts with the baking soda and baking powder, helping to tenderize the dough significantly. This chemical reaction creates a lighter, softer, and more tender crumb, transforming ordinary biscuit dough into something truly special. If you don’t have buttermilk on hand, don’t worry! You can easily create a homemade substitute (see our FAQ section for instructions).
- Cream Cheese: For the Ultimate Icing
The luscious cream cheese icing is the crowning glory of these cinnamon rolls. For the richest, creamiest, and most indulgent frosting, we highly recommend using full-fat cream cheese. Its higher fat content contributes to a smoother texture and a more luxurious mouthfeel. It is absolutely essential that your cream cheese is at room temperature before you begin mixing. Cold cream cheese will be difficult to combine smoothly with other ingredients, often resulting in a lumpy, inconsistent frosting. Allowing it to soften ensures a silky-smooth glaze that melts beautifully over the warm rolls.
A Glimpse into the Baking Process: Easy Steps to Deliciousness
Crafting these delectable biscuit cinnamon rolls is a straightforward process designed for efficiency and enjoyment. Here’s a narrative overview of how it all comes together:
- Prepare the Irresistible Brown Sugar Filling: The journey to flavor begins with creating a rich, spiced brown sugar mixture. Combine dark brown sugar, a touch of granulated sugar, aromatic ground cinnamon, and a hint of cloves and salt. A drizzle of melted butter helps bring this mixture together, giving it a moist, sand-like texture that will infuse every bite of your rolls with warmth and sweetness.
- Whip Up the Buttermilk Biscuit Dough: Next, you’ll prepare the simple, no-fuss biscuit dough. Dry ingredients like flour, baking powder, and baking soda are whisked together, while buttermilk and melted butter form the wet components. These two are then gently combined with a wooden spoon, forming a shaggy dough that hints at the flaky goodness to come.
- Shape and Fill with Spice: The shaggy dough is briefly kneaded until it just comes together smoothly. This quick kneading ensures tenderness without developing too much gluten. It’s then patted into a neat rectangle, brushed with more melted butter, and generously sprinkled with the prepared brown sugar filling. A gentle press ensures the filling adheres perfectly to the dough.
- Roll, Slice, and Arrange: The dough, now a canvas of buttery spice, is carefully rolled into a tight log. Precision cutting transforms this log into eight uniform pieces, each a promise of future delight. A slight flatten of each roll not only helps seal the edges but also contributes to their beautiful spiral appearance when baked.
- Bake to Golden Perfection: The prepared rolls are nestled into a baking pan, brushed with a final kiss of butter, and sent into a hot oven. The heat works its magic, turning the dough golden brown and caramelizing the sugary edges, creating an enticing texture contrast. A brief cooling period allows them to set slightly before the grand finale.
- Craft the Silky Cream Cheese Frosting: While the rolls cool, a luxurious buttermilk cream cheese frosting is swiftly prepared. Room-temperature cream cheese and buttermilk are whisked until smooth, then confectioners’ sugar is sifted in and whisked until a velvety, pourable icing is achieved. This smooth, tangy-sweet glaze is then drizzled generously over the warm, freshly baked cinnamon rolls, completing their irresistible transformation.
Common Questions About Biscuit Cinnamon Rolls
We’ve gathered some frequently asked questions to help you master these delicious biscuit cinnamon rolls and customize them to your liking.
- Can I add raisins or nuts to the biscuits?
Absolutely! Adding mix-ins like raisins or chopped toasted nuts is a fantastic way to enhance the flavor and texture of these rolls. Simply sprinkle them over the dough during step 6 of the main recipe, right after you’ve spread the brown sugar-and-cinnamon mixture. Ensure they are evenly distributed before rolling the dough into a log.
- What are the best serving suggestions for these cinnamon rolls?
These versatile cinnamon roll biscuits are perfect for various occasions. For a lighter breakfast or snack, serve them alongside a bowl of fresh seasonal fruit and a steaming cup of coffee or tea. If you’re planning a more elaborate weekend brunch, they make an excellent complement to savory dishes like fluffy scrambled eggs and crispy bacon, creating a balanced and satisfying spread.
- How can I make homemade buttermilk if I don’t have any?
No buttermilk on hand? No problem! You can easily create a substitute with ingredients you likely already have. Measure 1 tablespoon plus 1 teaspoon of lemon juice (or white vinegar) into a liquid measuring cup. Add enough milk (any kind, though whole milk works best for richness) to reach the 1 1/4 cups mark. Stir gently and let the mixture sit for about 5 minutes. The milk will curdle slightly, indicating it’s ready to use as a buttermilk substitute, providing similar acidity and tenderizing properties.
- Can I prepare these biscuit cinnamon rolls in advance?
While these rolls are undeniably best enjoyed fresh from the oven, you can prepare the dough and filling the night before. Once you’ve rolled, filled, and sliced the dough, arrange the rolls in your prepared baking pan, cover them tightly with plastic wrap, and refrigerate overnight. In the morning, let them sit at room temperature for about 15-20 minutes while your oven preheats, then bake as directed. This allows for a quicker assembly on busy mornings.
- What kind of pan should I use for baking?
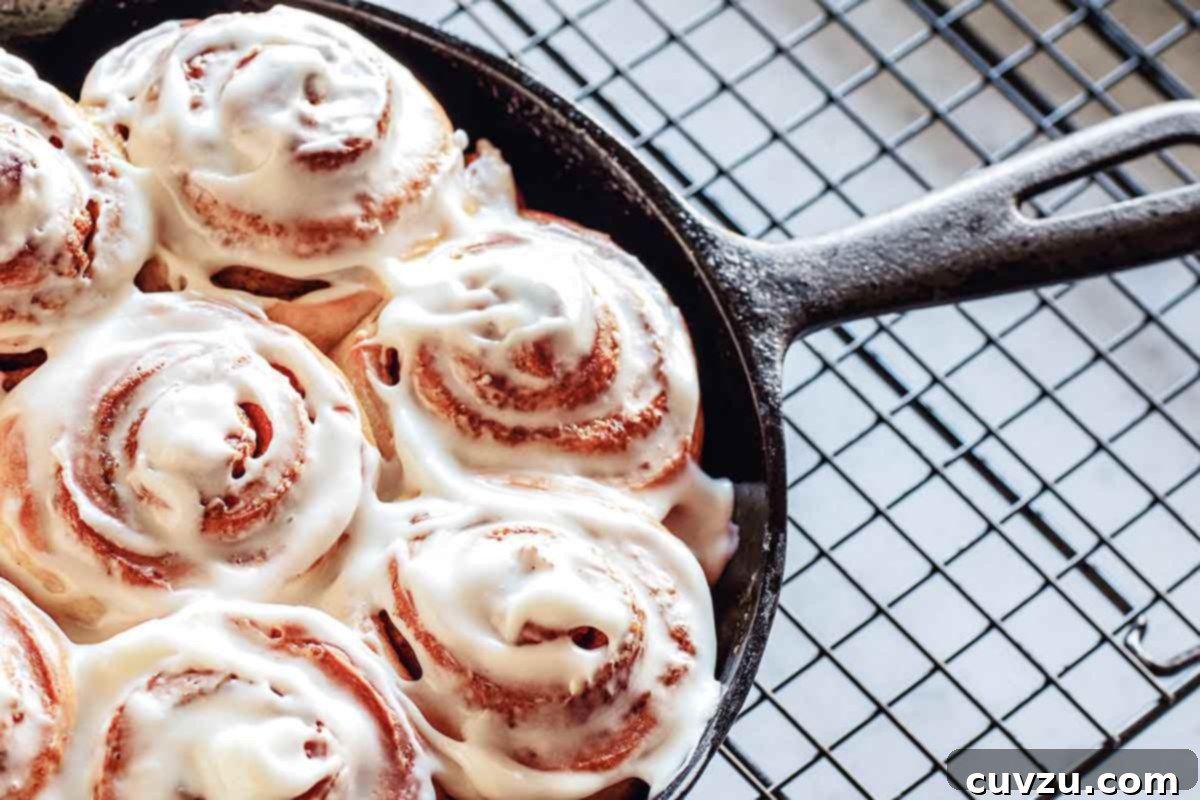
A round 9-inch nonstick cake pan or a similar-sized cast-iron skillet works wonderfully for baking these rolls. The round shape encourages them to nestle together, creating those wonderfully soft centers and chewy, caramelized edges. Ensure your pan is greased well to prevent sticking and aid in easy removal.
Expert Tips for Perfect Biscuit Cinnamon Rolls & Troubleshooting Common Issues
Even though this recipe is designed for ease, a few expert tips can elevate your baking experience and help you achieve flawless results every time. Here’s how to ensure success and tackle any minor challenges:
- Storage and Reheating for Optimal Freshness: While these frosted biscuits are truly at their peak when served fresh on the day they are made, leftovers can be stored. Place them in an airtight container and refrigerate for 1 to 2 days. To bring them back to life, gently reheat them in the microwave for a few seconds until warmed through, or in a warm oven (around 300°F/150°C) for about 5-10 minutes, until heated through and soft.
- Avoid Overworking the Dough: This is perhaps the most crucial tip for tender biscuits. When kneading the dough, aim for minimal handling. You want it to come together just until it’s smooth and no longer shaggy. Overworking the dough will develop the gluten too much, resulting in tough, chewy biscuits instead of the light, tender texture we desire.
- The Serrated Knife Advantage for Slicing: For clean, even slices that don’t squish your beautifully rolled dough, use a sharp serrated knife. The saw-like edge of a serrated knife cuts through the layers of dough and filling with less pressure, preserving the spiral shape and preventing the filling from oozing out excessively.
- Dealing with Sticky Dough: If your biscuit dough feels excessively sticky and soft, making it challenging to handle, don’t despair! Simply cover the dough and refrigerate it for about 20 minutes. The chill will help the butter firm up and make the dough much easier to work with, allowing you to shape it without frustration.
- Streamlined Cleanup with Parchment Paper: Glazing cinnamon rolls can sometimes be a messy affair. For significantly easier cleanup, place a piece of parchment paper or aluminum foil under your wire cooling rack before drizzling the icing over the buns. This will catch any drips and prevent your countertop from becoming a sticky mess.
- Achieving Crispy, Caramelized Edges: One of the highlights of these rolls is the slightly crispy, caramelized edges. To encourage this, ensure your oven is preheated to the correct temperature (425°F/220°C). The high heat is essential for quickly setting the dough and caramelizing the sugars in the filling, creating that delightful textural contrast.
- Don’t Be Afraid of the “Shaggy” Dough: When combining the wet and dry ingredients for the biscuit dough, it’s perfectly normal for the mixture to appear “shaggy” or crumbly. Resist the urge to add more liquid. It will come together with a minimal amount of kneading on your floured surface.
Explore More Delicious Biscuit Recipes
If you’ve fallen in love with the ease and versatility of biscuit-based baking, you’ll want to explore these other fantastic recipes. From sweet to savory, biscuits offer a world of culinary possibilities!
Share Your Experience: Write a Review
We love hearing from our community! If you make this biscuit cinnamon roll recipe, or any other dish featured on LC, please consider leaving a review, a star rating, and your best photo in the comments below. Your feedback truly inspires us and helps others discover new favorites.
These biscuit cinnamon rolls were fabulous. I made them right before a meeting in which everyone was on a diet, and they were gone in seconds. This is the perfect cinnamon roll recipe for people who don’t have time to let them rise, and they’re so good!
paige
Biscuit Cinnamon Rolls
These biscuit cinnamon rolls are quick and easy, laced with spice, and lavished with buttermilk cream cheese icing. A shortcut recipe when you want the taste of homemade buns but don’t have the time—or the yeast.
David Leite
Ingredients
For the biscuit cinnamon rolls
- 1 stick (4 oz) unsalted butter, melted
- 3/4 cup dark brown sugar, packed
- 6 tablespoons granulated sugar
- 2 teaspoons ground cinnamon
- 1/8 teaspoon ground cloves
- 1/8 teaspoon plus 1/2 teaspoon salt
- 2 1/2 cups unbleached all-purpose flour, plus more for the work surface
- 1 1/4 teaspoons baking powder
- 1/2 teaspoon baking soda
- 1 1/4 cups buttermilk (either low-fat or full-fat)
For the icing
- 2 tablespoons cream cheese, room temperature
- 2 tablespoons buttermilk
- 1 cup confectioners’ sugar
Instructions
Make the biscuit cinnamon rolls
- Preheat the oven to 425°F (220°C) and adjust an oven rack to the upper-middle position. Brush a round 9-inch nonstick cake pan with 1 tablespoon butter.
- In a small bowl, combine the brown sugar, 4 tablespoons granulated sugar, cinnamon, cloves, and 1/8 teaspoon salt. Add 1 tablespoon melted butter and stir with a fork or your fingers until the mixture resembles wet sand.
- In a large bowl, whisk together the flour, remaining 2 tablespoons granulated sugar, baking powder, baking soda, and remaining 1/2 teaspoon salt.
- In a measuring cup, whisk together the buttermilk and 2 tablespoons butter. Add the liquid to the dry ingredients and stir with a wooden spoon until the liquid is absorbed. The dough will probably look shaggy. No worries.
- Transfer the dough to a lightly floured work surface and knead just until smooth and no longer shaggy, anywhere from 30 seconds to 2 minutes.
- Pat the dough with your hands into a 12-by-9-inch rectangle. Brush the dough with 2 tablespoons melted butter. Sprinkle the dough evenly with the brown sugar filling, leaving a 1/2-inch border. Press the filling firmly into the dough.
- Using a bench scraper or metal spatula, loosen the dough from the work surface. Starting at a long side, roll the dough, pressing lightly, to form a tight log. Pinch the seam to seal. Roll the log so its seam-side down on your work surface.
- Cut the log evenly into 8 portions. Turn each portion onto a flat side and use your hand to slightly flatten. This should seal the open edges and keep the filling in place.
- Place 1 roll in the center of the prepared skillet or pan and then place the remaining 7 rolls around the roll in the center. Brush the rolls with the remaining 2 tablespoons butter.
- Bake until the edges of the rolls are golden brown, 23 to 25 minutes.
- Transfer the skillet or pan to a wire rack. Let the rolls cool for about 5 minutes before icing. If desired, you can use an offset metal spatula to loosen the buns from the skillet or pan and, wearing oven mitts, place a large plate over the pan and invert the rolls onto the plate. Place the cooling rack on the plate and invert the rolls onto the rack.
Make the icing
- In a large bowl, whisk the cream cheese and buttermilk until thick and smooth (the mixture may first look like cottage cheese). Sift the confectioners’ sugar over the mixture and whisk until a smooth icing forms, about 30 seconds.
Frost the biscuit cinnamon rolls
- Spoon the glaze evenly over the biscuit cinnamon rolls. If you removed them from the skillet or pan, line a rimmed baking sheet with parchment paper and place the rack with the rolls on the baking sheet for ease of cleanup.
- Devour immediately.
Notes
- Storage: These are best served the day they’re made but can be stored in the fridge in a sealed container for 1 to 2 days. Reheat in the microwave or in a warm oven until heated through.
- Easier slicing: Use a serrated knife to slice your biscuit dough for cleaner cuts.
- Adding mix-ins: To add raisins or nuts to the dough, sprinkle them over the dough when you add the brown-sugar filling.
Adapted From
The Quick Recipe
Buy On Amazon
Nutrition Information
Calories: 455 kcal
Carbohydrates: 77 g
Protein: 6 g
Fat: 14 g
Saturated Fat: 9 g
Monounsaturated Fat: 4 g
Trans Fat: 1 g
Cholesterol: 39 mg
Sodium: 169 mg
Fiber: 1 g
Sugar: 46 g
Nutrition information is automatically calculated, so should only be used as an approximation.
Tried this recipe?
Mention @leitesculinaria or tag #leitesculinaria!
Insights from Our Recipe Testers
Olivia Bleitz
This biscuit cinnamon rolls recipe yielded surprisingly good results. I don’t make a lot of cinnamon rolls because they’re always best the first day and, unless you’re getting out of bed at 4 am on a Saturday, how is one really going to make that happen on a weekend? Enter this recipe!
These biscuit cinnamon rolls were easy to put together and produced a nice result. The icing was delicious and had a good balance of sweet and tangy–I think the addition of the cream cheese is a must. It didn’t quite have that soft, spongy texture that cinnamon rolls that have been allowed to rise have, but these are still very good for a 30-minute process.
The process was really easy to follow and, while it’s a minor thing, I really liked that you melt the whole stick of butter and then portion it out over the course of the recipe. I had roughly a third too much filling.
I was skeptical about being able to “whisk” a couple of tablespoons of cream cheese into the buttermilk and powdered sugar, but it all worked out ok. I probably would have used my stand mixer if it hadn’t explicitly said to “whisk,” but it was nice that the whole recipe came together with a bowl and wooden spoon.
There were a couple of these leftover the next day and (in the name of science!) I tried one to see how they’d held up overnight in the fridge. A quick 20 seconds in the microwave and it really came back to life and had a nice texture.
For servings, due to user error (and maybe an inability to count), I ended up with 9 cinnamon rolls, after trimming 1/4 inch off each end to make them more uniform. It did make them fit together a little nicer in my 9-inch cake pan.
Bonnie Depew
A quick and easy alternative to traditional cinnamon rolls—perfect for when you want the taste but don’t have the time. The biscuits were moist and tender, and the filling had just the right combination of cinnamon and cloves for a delightful taste.
Greg Crawford
I was extremely skeptical that a non-yeast cinnamon roll dough would do justice to this incredible pastry. While it was a bit of a challenge to work with (not that yeast doughs sometimes aren’t), wow, the results were spectacular. I really loved baking them in a round pan because there were lots of edges with that brown, crisp, sweet je ne sais quoi.
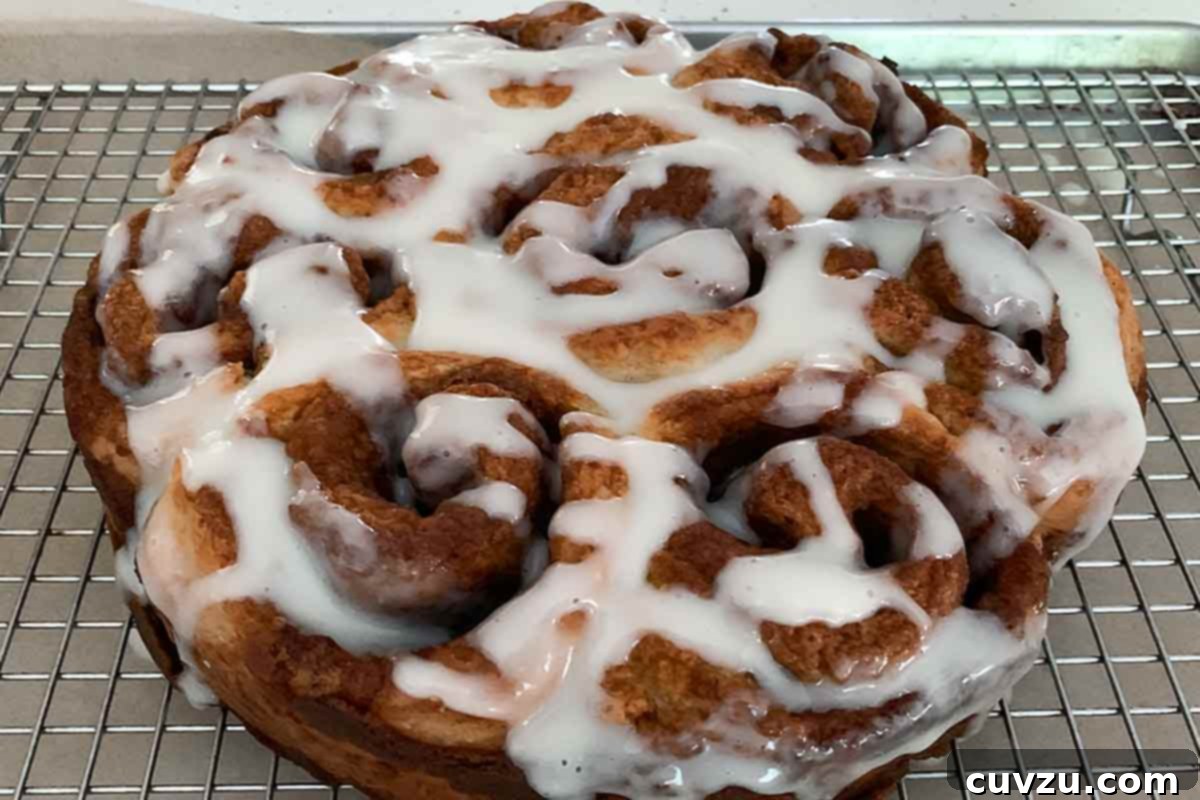
These cinnamon rolls were soft and chewy, just the way they’re supposed to be.
The icing was really good, but I prefer a more cream-cheesy version. The only trouble I had, and it probably was because the dough was a bit sticky, was that my roll wasn’t very tight, so when the rolls expanded in the oven, there were some gaps, which meant the filling kind of sank to the bottom. But there it caramelized, so it was all good.
A traditionalist, I’m not likely to make this recipe my new go-to cinnamon roll, but it will sure be nice having it in my back pocket for that spur-of-the-moment, “Hey, let’s have cinnamon rolls for breakfast today!”
It took a couple of minutes to get the wet ingredients incorporated into the dry and I needed to sprinkle the dough with a little additional flour. Also, I needed a constant coating of flour on my mat.
I thought flipping onto a plate and then onto a cooling rack would be complicated (fearing the rolls wouldn’t come out of the pan), but it was not at all. The instructions were clear.
Debbie Gigliotti
I will preface this by saying if you’re wanting a sweet, gooey biscuit that goes together quickly, then this recipe a 10. It’s great warm out of the oven, and the next day it was still quite good, soft, and tasty.
It’s not to be compared with a yeast cinnamon roll. But it’s a good one to add to your recipe box of quick biscuits.
Be sure you don’t put parchment in your pan thinking there will be a quick release of goo on the bottom because if your pan is nonstick, it will plop right out. The oven does need to be 425°F. I did my biscuit cinnamon rolls at closer to 375°F as I didn’t trust that high temperature, but it’s needed to caramelize the butter and sugar filling.
I did the double-plate flip to get it out of the pan and then back onto a nice plate. I drizzled the icing over, and it made a nice presentation. The sugar filling looks like a lot, and it is.
Some might consider them a bit sweet, but it makes you forget you’re eating a soft biscuit. So it’s a good thing. They are big biscuits, and 1/2 is sufficient with a cup of hot coffee with a plate of scrambled eggs and ham.
Judy O.
I loved the taste of these cinnamon rolls. They weren’t the neatest little spirals as depicted in the picture, but I forged ahead and decided to bake them regardless. They were still delicious…my husband ate the entire pan!
I’d do a test run of this recipe before trying it out for company brunch, but the results, even if you run into trouble with the dough, is scrumptious. And right out of the oven…fantastic.