Pain d’Épi: Master the Art of French Wheat Sheaf Bread at Home
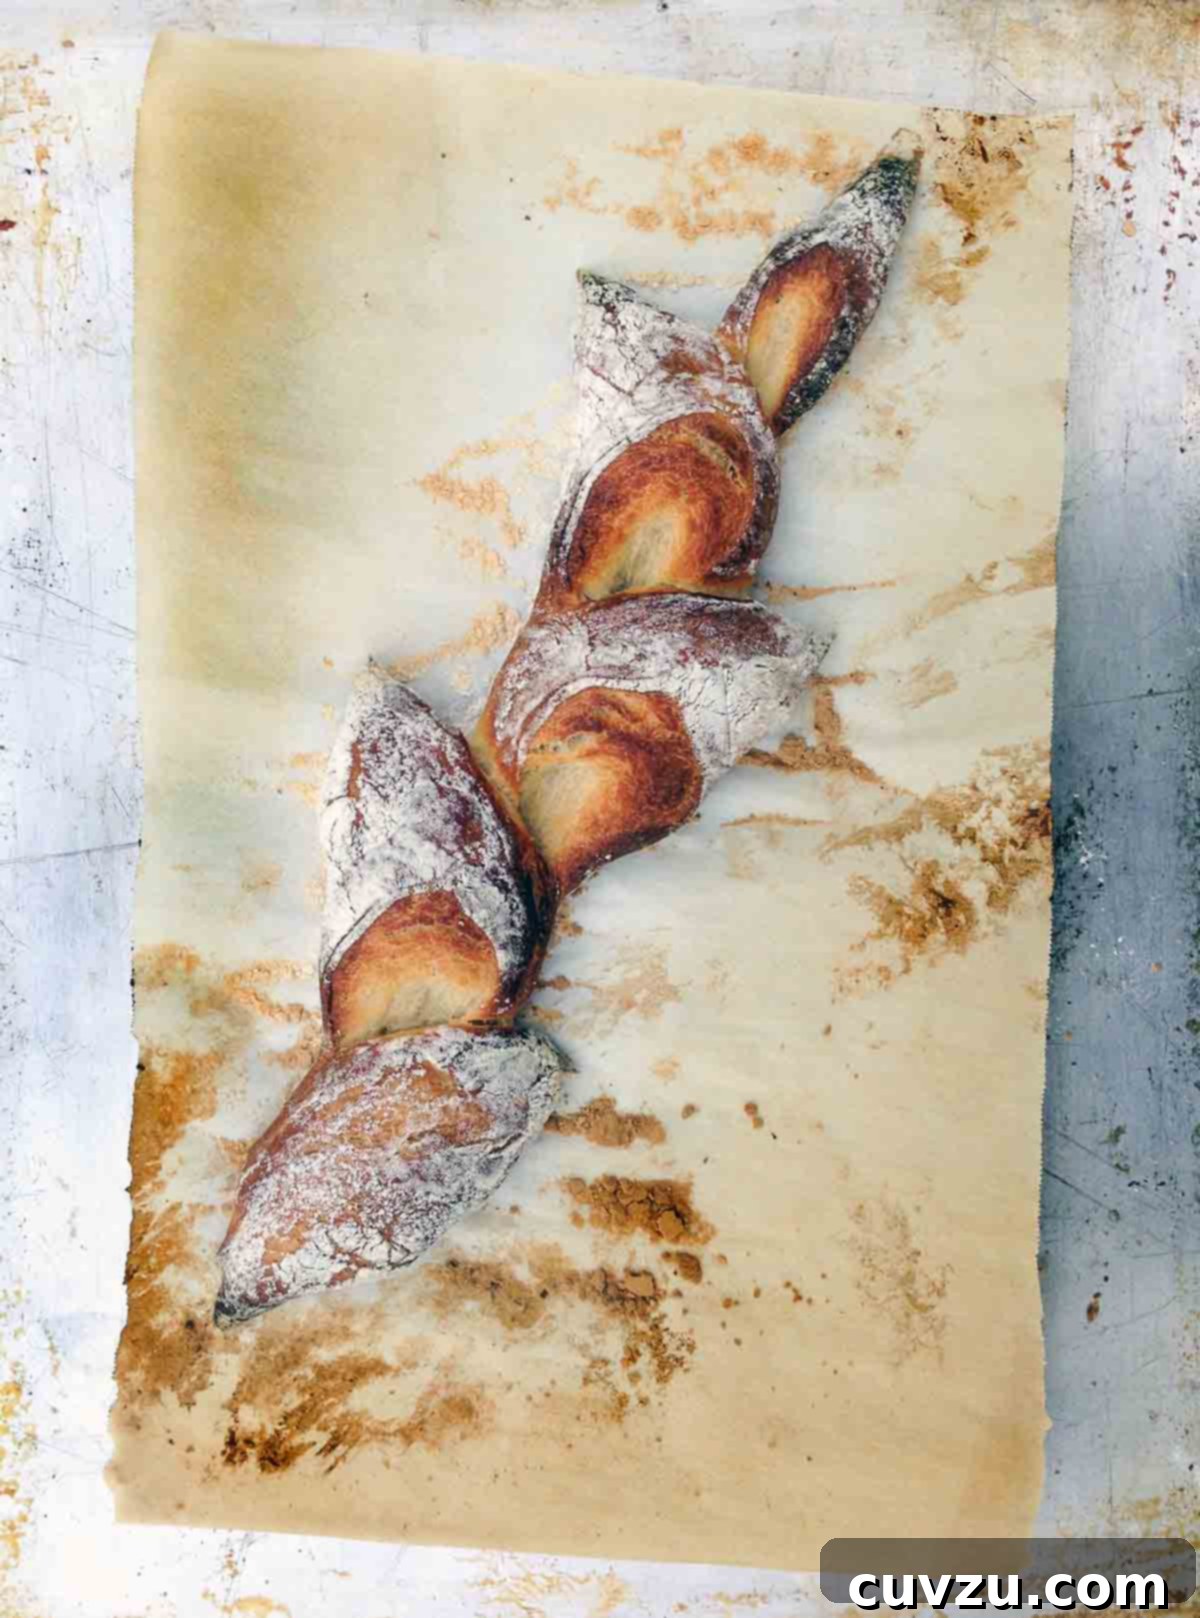
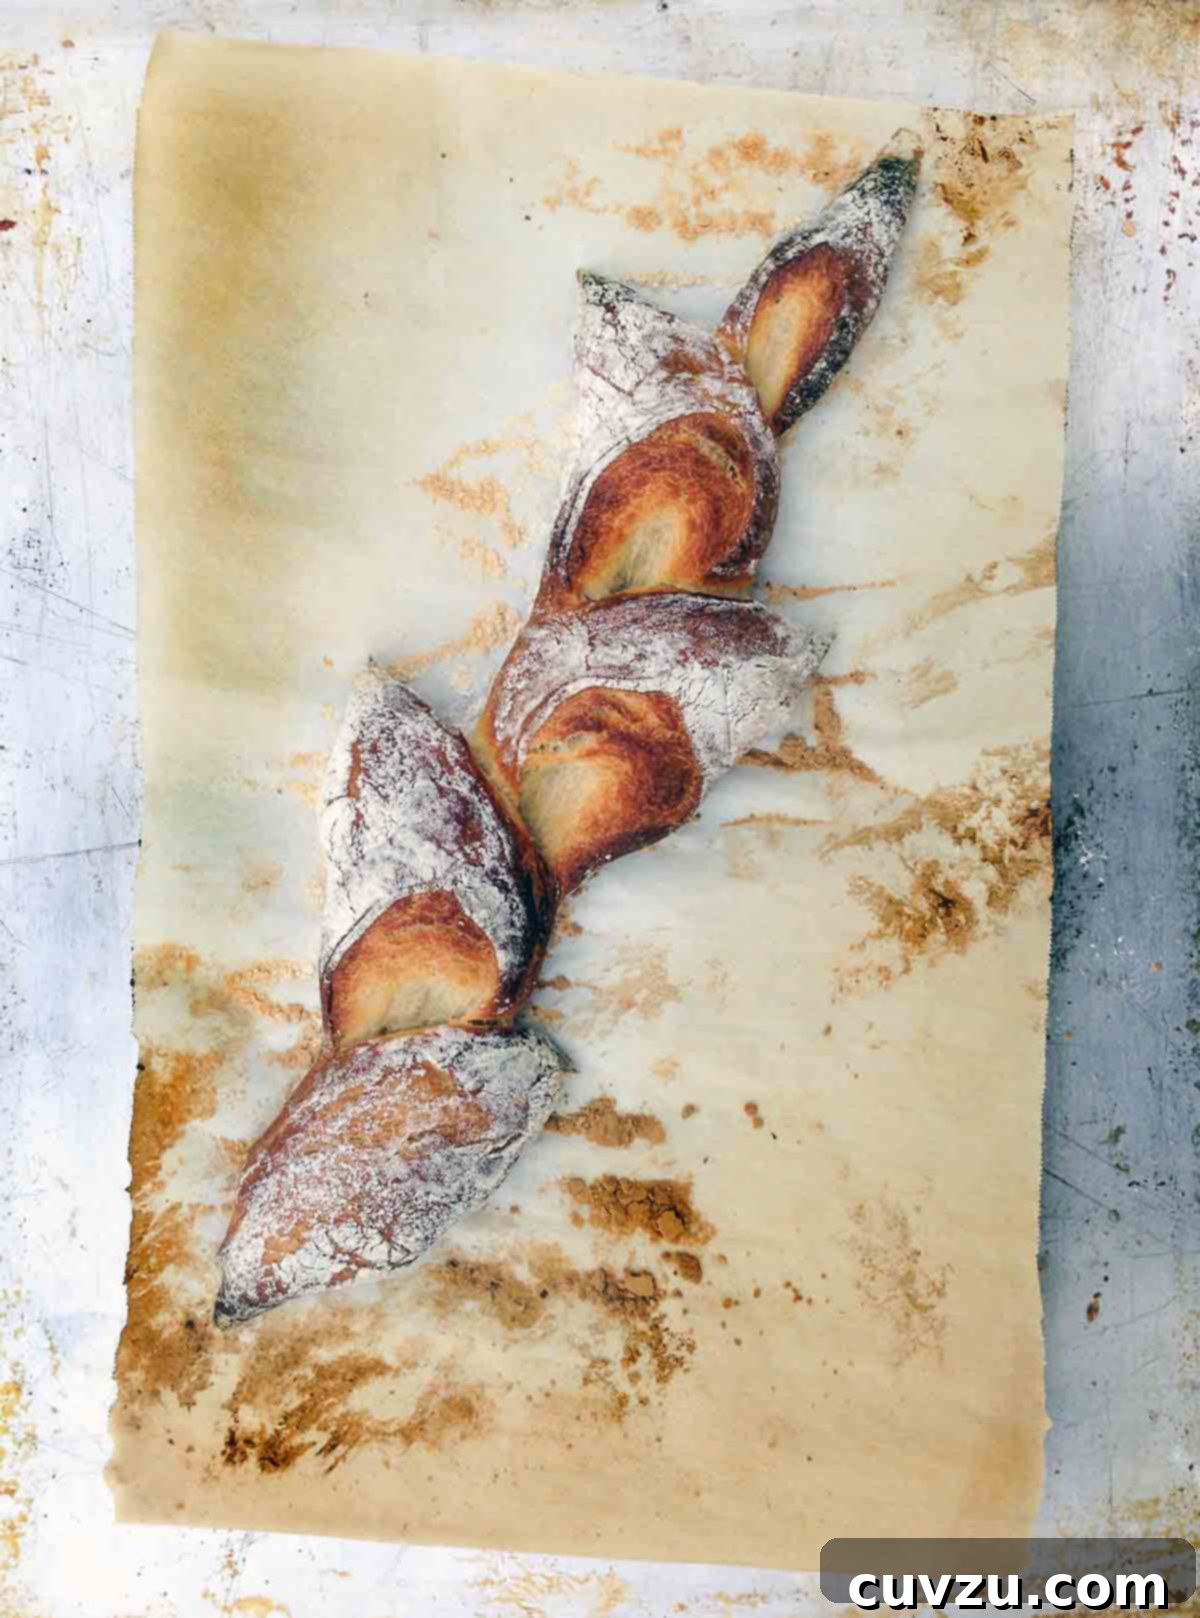
Pain d’épi, also known as wheat sheaf bread, is a truly enchanting French tradition that transforms a simple baguette into a work of culinary art. Dating back centuries, this visually stunning bread mirrors the rustic elegance of a wheat stalk, offering the same exquisite flavor and delightful texture as a classic baguette but with an undeniably impressive presentation. The best part? This seemingly complex artisan bread is surprisingly achievable for home bakers, even for those who might have considered themselves “bread challenged” in the past.
Listen to More Baking Insights
For more engaging discussions about food, baking, and culinary adventures, tune into our podcast. You might discover additional tips and inspiration for your next kitchen project!
My Journey to Perfect Pain d’Épi: A Baker’s Triumph
For years, ever since I first dabbled in the world of baking back in 1995, the Pain d’épi held a special, almost mythical allure for me. Its elegant form, resembling a graceful stalk of wheat, was something I admired from afar, a baking aspiration that seemed just out of reach. My early attempts at bread making, frankly, were less than stellar. Bread and I had a complicated relationship; the dough often seemed to defy my best efforts, leading to frustrating results.
That all changed when I discovered the revolutionary approach developed by Zoë and Jeff. Their method transformed my baking experience, making it possible to consistently produce loaf after gorgeous loaf with a flawless texture and truly remarkable flavor. Yet, even with this newfound confidence, I harbored a slight uncertainty about tackling the distinctive Pain d’épi. The intricate cuts seemed daunting, a hurdle I wasn’t sure I could overcome.
My first two attempts at shaping the Pain d’épi were, to put it mildly, comical failures. The loaves emerged from the oven resembling abstract art, perhaps more akin to a whimsical Jeff Koons balloon sculpture than a traditional French bread. Feeling defeated but not entirely discouraged, I reached out to Zoë, whose kind and generous spirit is as legendary as her baking expertise. She quickly identified my missteps: I wasn’t holding the scissors at a sufficiently shallow angle, and I wasn’t snipping deep enough into the dough.
Armed with her invaluable advice, I approached the next loaf with renewed determination. This time, I held the scissors practically parallel to the counter, making sure to snip almost to the very bottom of the dough. And just like that, the magic happened. The loaf transformed into a marvelously pointed, deeply browned Pain d’épi, each “grain” of wheat perfectly defined. It was a moment of pure triumph, a loaf so magnificent, I’m quite certain it would evoke envy even among les français themselves! This journey proved that with the right technique and a little guidance, even the most intimidating bakes can become a source of immense pride and delicious satisfaction. – David Leite
Pain d’Épi | Rustic Wheat Sheaf Bread Recipe
By David Leite
Saved
- PIN
Sides, Appetizer, Bread
French, European
14
servings (or 2-3 large loaves)
211
kcal
15
2
2
15
Video Tutorial: Achieving the Perfect Wheat Sheaf Cut
Watch this video to see exactly how to make the distinctive cuts that give Pain d’Épi its beautiful wheat sheaf appearance. It’s easier than you think!
Essential Equipment for Artisan Bread
-
Pizza peel (or a baking sheet turned upside down): Crucial for safely transferring your delicate dough to the hot baking stone. A regular baking sheet flipped over works just as well.
-
Baking stone or heavy baking steel: Essential for achieving that perfect crispy crust and even heat distribution, mimicking a professional baker’s oven.
-
5-quart bowl or lidded (non-airtight) food container: For mixing and storing your dough during its extended cold proof.
-
Sharp kitchen scissors: The key tool for making the decorative cuts that define Pain d’Épi. Ensure they are clean and sharp.
-
Metal broiler tray or roasting pan: Used to create steam in the oven, which is vital for developing a beautiful, crusty exterior on your bread.
Ingredients for No-Knead Pain d’Épi (US Standard)
This simple list of ingredients is all you need to create truly exceptional artisan bread at home. Quality ingredients will elevate your final product.
Dough Foundation
-
1 1/2 tablespoons granulated yeast, (equivalent to 2 standard packets) -
1 1/2 tablespoons kosher salt (do not substitute with table salt, which is much saltier) -
3 cups lukewarm water (around 100-110°F or 38-43°C, warm to the touch but not hot) -
6 1/2 cups bread flour, (for optimal chewiness and crust, or substitute with 7 cups all-purpose flour for a slightly different texture). You’ll also need a little extra for dusting your work surface and hands during shaping.
Step-by-Step Instructions for Pain d’Épi
Follow these detailed instructions to create a truly impressive loaf of Pain d’Épi, from mixing your no-knead dough to shaping and baking it to perfection.
Phase 1: Mix and Store the No-Knead Dough
-
In a spacious 5-quart bowl or a food container with a lid (ensure it’s not completely airtight to allow for gas escape), combine the granulated yeast and kosher salt with the lukewarm water. Stir gently to dissolve the yeast and salt completely.
-
Gradually add the flour to the liquid mixture. Use a sturdy spoon for hand mixing, or if you have a heavy-duty stand mixer, attach the paddle attachment for easier incorporation. Mix until all the flour is fully moistened and no dry streaks remain. The dough will be shaggy and sticky – this is perfectly normal for a no-knead dough.
☞ TESTER TIP: If you’re mixing by hand and find the dough particularly sticky or resistant, dampen your hands under cold water before handling. This will prevent the dough from adhering excessively to your fingers, making it easier to incorporate the last bits of flour and achieve a cohesive mixture.
-
Once mixed, partially cover the bowl or container. Remember, it should not be sealed airtight; the dough needs to breathe and release gases as it ferments. Allow the dough to rest at room temperature for a minimum of 2 hours. During this initial rise, the dough will visibly expand, developing air pockets and its characteristic flavor.
-
While the dough can be used immediately after its initial 2-hour rise, you’ll find it significantly easier to handle and shape once it has chilled. For best results, transfer the dough to a lidded (but still not airtight) container and refrigerate it for at least overnight. This cold proofing period can extend for up to 14 days, offering incredible flexibility for fresh bread whenever you desire it. The longer it chills, the more complex its flavor will become.
Phase 2: Shape and Bake Your Pain d’Épi Masterpiece
-
On your baking day, lightly dust the surface of your chilled dough with flour. Using a clean, floured hand, cut off a 1/2-pound piece of dough – this is roughly the size of a large peach. Dust this portion with a bit more flour, then quickly and gently shape it into a ball. Do this by stretching the surface of the dough around to the bottom, effectively creating surface tension, and rotating the ball a quarter turn with each stretch. This helps create a smooth exterior. Let the shaped dough ball rest on your floured surface for about 10 minutes to relax the gluten. Return the remaining dough to the refrigerator for future use.
-
After the brief rest, gently reshape the dough ball into a rough rectangular form. Then, using the palms of your hands and a light touch, carefully roll the dough into an elongated baguette shape. Aim for a length of about 16 inches, tapering the ends slightly to create the classic baguette form. Avoid pressing too hard, which can deflate the dough.
-
Carefully transfer your shaped baguette onto a pizza peel (or an upside-down baking sheet) that has been generously covered with parchment paper. Cover the dough loosely with a clean kitchen towel or plastic wrap (sprayed lightly with oil to prevent sticking) and let it rest and rise for approximately 40 minutes at room temperature. This is the final proof, allowing the bread to become light and airy before baking.
-
About 20-30 minutes before your dough finishes its final rise, preheat your oven to a blazing 450°F (232°C). Place your baking stone or heavy baking sheet on the middle rack. Crucially, position an empty metal broiler tray, roasting pan, or any other oven-safe, low-sided pan on a lower shelf. This pan will be used to create steam, which is essential for a crispy crust. Ensure the lower pan won’t interfere with the rising bread on the middle rack.
-
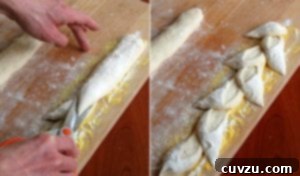
Just before placing the loaf in the oven, lightly dust the top of the baguette with a fine layer of flour. Now, for the signature Pain d’Épi cuts: Lightly slick the blades of a very sharp pair of kitchen scissors with a neutral oil (like vegetable or canola oil) to prevent sticking. Holding the scissors at a shallow 25° angle relative to the dough, make crosswise cuts near the top of the baguette shape. Cut almost all the way to the bottom, stopping about a quarter inch from the base. After each cut, gently fold the cut piece over to the side, alternating sides with each subsequent cut (left, then right, then left). Continue this process down the entire length of the loaf. When you’re finished, you should see a beautiful, segmented wheat sheaf shape. Voila! Your Pain d’Épi is ready for baking.

-
Carefully and swiftly slide the prepared Pain d’Épi directly onto the preheated baking stone or baking sheet in the oven. Immediately and carefully pour 1 cup of hot water into the empty metal pan on the lower rack – this will create the necessary steam. Quickly close the oven door to trap the steam. Bake for 25 to 30 minutes, or until the loaf is deeply golden brown, sounds hollow when tapped on the bottom, and has a firm, crusty exterior.
-
Once baked, transfer the bread to a wire rack and allow it to cool completely before attempting to break off the individual wheat-stalk shapes. Cooling is crucial for the internal structure to set and for the crust to remain crisp. Then, break off delicious chunks, savor the aroma, and sigh with utter contentment at your freshly baked artisan bread.
Baker’s Notes & Expert Tips
The Magic of “5-Minute” No-Knead Bread: Unlocking Artisan Baking
Yes, it’s true! You can indeed make incredibly flavorful artisan bread with just 5 minutes of *active* hands-on time. The brilliance of this no-knead method lies in its simplicity and efficiency. While we haven’t yet discovered a way to miraculously shape and bake a loaf in 5 minutes (though we’re always experimenting!), the minimal effort required for mixing and the extended cold proof transform baking from a chore into a delightful, flexible process. This approach allows the yeast and enzymes to work their magic slowly, developing deep flavors and a wonderfully airy crumb without the need for extensive kneading. If you enjoy this method, you may also wish to explore the artisan boule recipe from the same acclaimed authors, which offers the same authentic taste with an even simpler shaping process.
The Advantages of Cold Proofing
Refrigerating the dough for an extended period, known as cold proofing, offers several significant benefits. Firstly, it develops a more complex, nuanced flavor profile in the bread, similar to sourdough. Secondly, the cold temperature makes the high-hydration dough much easier to handle and shape, preventing stickiness. Lastly, it provides incredible scheduling flexibility, allowing you to bake a fresh loaf whenever the craving strikes, without having to start from scratch each time.
Achieving a Professional Crust
The steam created by pouring hot water into a preheated pan in the oven is crucial. This burst of steam delays the setting of the crust, allowing the bread to expand fully before a crisp, golden brown exterior forms. Without sufficient steam, your crust might be tough and less appealing. For an even greater burst of steam, some bakers also lightly mist the oven walls with a spray bottle during the first few minutes of baking.
Troubleshooting Your Cuts
If your Pain d’Épi cuts aren’t as distinct or open as you’d like, remember David Leite’s key advice: ensure your scissors are very sharp and lightly oiled, hold them at a shallow angle (around 25 degrees to the dough), and cut deep enough – almost to the bottom of the loaf. Practice makes perfect, so don’t be discouraged if your first attempt isn’t flawless. The bread will still be delicious!
Inspired By
This remarkable method for Pain d’Épi is adapted from the groundbreaking book, “The New Artisan Bread in Five Minutes a Day,” which revolutionized home baking with its simple yet effective techniques.
Buy On Amazon
Nutrition Information (per serving)
Calories: 211 kcal
Carbohydrates: 42 g
Protein: 7 g
Fat: 1 g
Saturated Fat: 1 g
Monounsaturated Fat: 1 g
Sodium: 751 mg
Fiber: 2 g
Sugar: 1 g
Nutrition information is automatically calculated and should be used as an approximation. Exact values may vary based on specific ingredients and preparation methods.
Tried this exquisite Pain d’Épi recipe?
Share your beautiful creations with us! Mention @leitesculinaria or tag #leitesculinaria on Instagram to show off your wheat sheaf bread!
Insights from Our Recipe Testers
Our dedicated team of recipe testers put this Pain d’Épi recipe through its paces, offering valuable feedback and real-world tips to ensure your baking success. Here’s what they had to say:
Henry Tsai
Henry found this Pain d’Épi recipe to be a fantastic evolution of the popular no-knead methodology. He particularly praised its innovative approach of using a cold proof in the refrigerator, stating, “This is a great variation on the no-knead methodology, but takes it up a notch by making it easy to enjoy freshly baked bread at any time.” He emphasized the incredible flexibility this method provides, allowing the dough to keep for up to 14 days. This means home bakers can portion out dough whenever a fresh loaf is desired, making artisan bread a truly accessible daily pleasure. Henry also highlighted the efficiency of the second proof, which requires only 40 minutes after quick shaping. He even suggested an optional simplification: “Skipping the cutting of the dough might also be an option for those looking for a simple shape.” With a baking time of just about 25 minutes, it’s possible to have a warm, crusty bread on the table in just over an hour. Henry concluded, “This is a recipe I definitely will be keeping in rotation,” a strong endorsement for its convenience and delicious results.
Jenny Latreille
Jenny was absolutely delighted with the outcome of this recipe, particularly noting how the finished loaves looked “rather impressive for a beginning bread baker.” She produced 7 small loaves, as suggested, but also speculated that larger loaves could be easily made with minor adjustments. Jenny admitted to some initial skepticism about adding yeast and salt to the water simultaneously, but her fears were quickly assuaged: “the dough still rose and by the next morning, I had a full bowl of smooth, elastic dough that was full of air and smelled delicious.” She tested the dough’s longevity by baking 3 loaves on the first morning and the remaining 4 on the second, confirming that “as long as the dough is well covered, it doesn’t dry out and still makes a great loaf.” Her overall impression was one of pleasant surprise: “Honestly, there isn’t much to say about this recipe except that it is so much easier than it looks. Actually, it’s much easier than most of the other bread recipes that I’ve tried so far.” The final verdict from Jenny? “And the results are fantastic—a tender crumb with a crispy crust and they look really lovely, too!”
Elie Nassar
Elie Nassar, with his discerning baker’s eye, highly praised the flavor development of the dough after its cold rest in the refrigerator. He underscored the importance of working with cold dough: “I like the instruction to work with the dough cold from the fridge. This one is a high hydration dough and is tricky to work with if at room temperature.” The recipe yields enough dough for 7 baguettes or epis, and Elie made 4 loaves, using the remaining dough for three excellent pizzas – demonstrating the dough’s versatility! For his second batch, Elie experimented with a couple of modifications that yielded exceptional results, leading to “excellent epi with crispy crust, deep caramel color, and perfect cuts very much like the picture.” He shared two key insights:
- Oil Your Scissors: “I sprayed my scissors with a little cooking oil (PAM and NOT PAM for Baking) before cutting. This made a huge difference in the neatness and definition of the cuts. If you do not have PAM, any oil rubbed on the blades will work.” This simple tip prevents the dough from sticking to the blades, ensuring cleaner, more defined “wheat grains.”
- Increase Heat and Steam: “I baked it at 500°F and I used a water spray bottle to spray the oven walls every 30 seconds for the first 2 minutes. Much better results and finished baking in about 25 minutes.” By increasing the oven temperature and actively introducing steam, Elie achieved an even crispier crust and a richer, more caramelized color, mimicking professional bakery conditions.
Elie’s meticulous testing and practical tips are invaluable for any home baker aiming to perfect their Pain d’Épi.