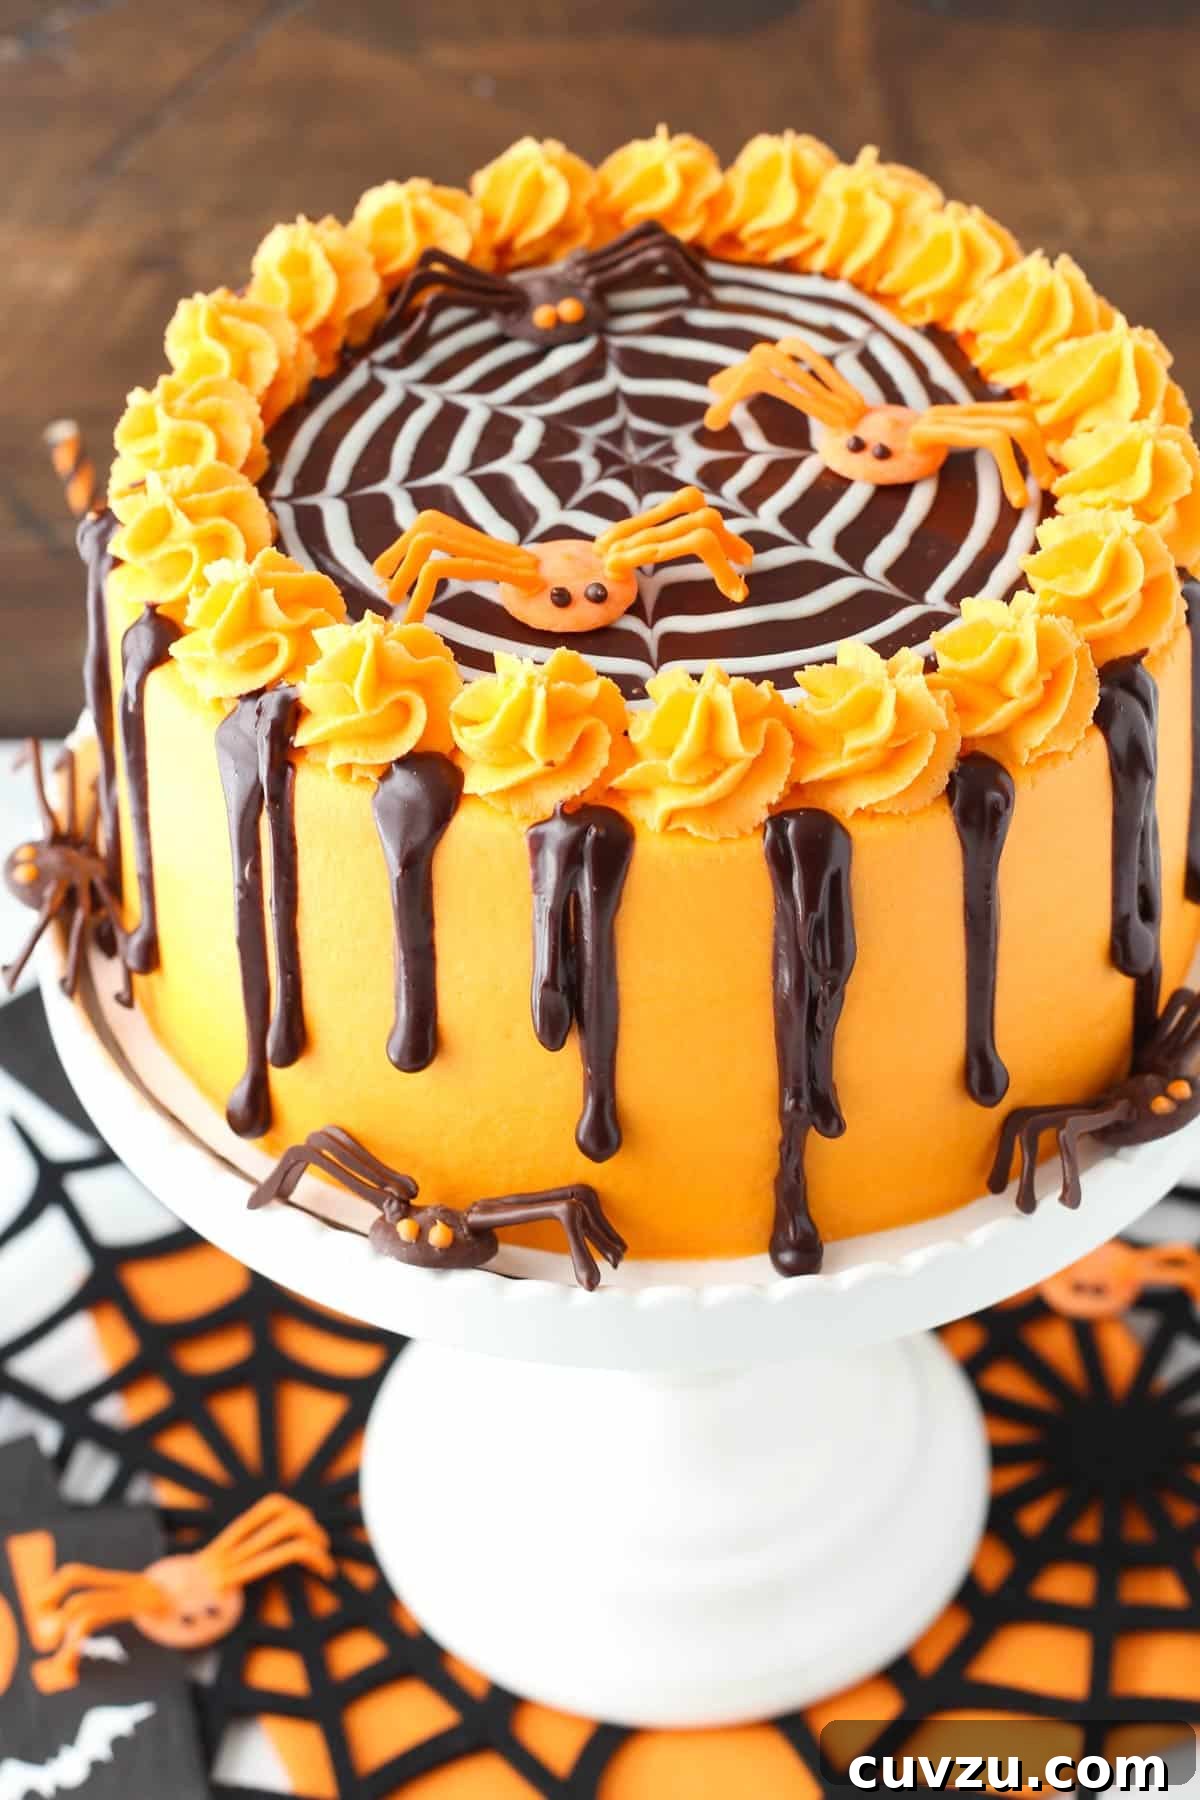
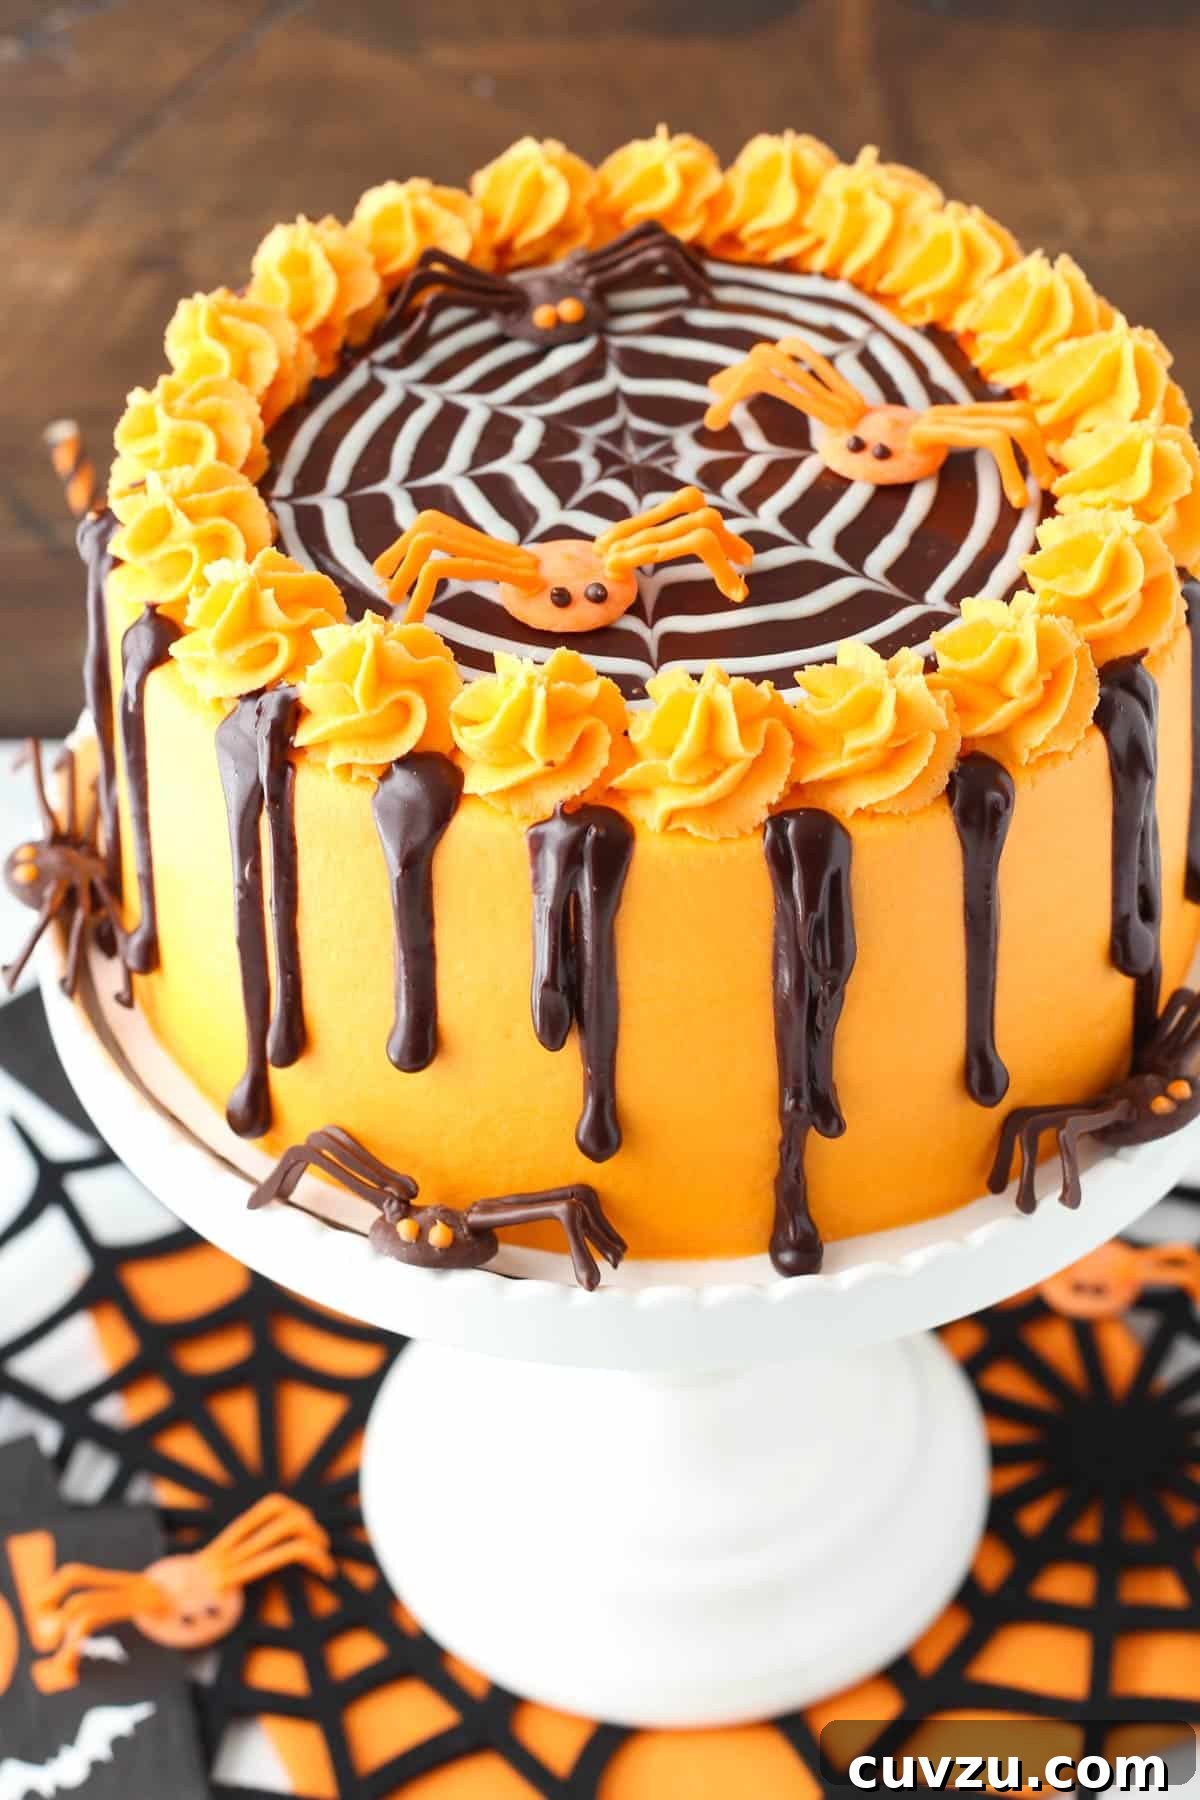
This Spiderweb Chocolate Cake with Vanilla Frosting is more than just a dessert; it’s the ultimate centerpiece for your Halloween celebrations! While the cake itself is a marvelously moist and rich chocolate creation, perfect for any occasion, its festive spiderweb design and charming chocolate spiders truly transform it into a spook-tacular treat that embodies the spirit of October. Get ready to impress your guests with a cake that’s as delicious as it is visually stunning!
This post is proudly sponsored by Challenge Dairy. All opinions and love for baking with quality ingredients are entirely my own.
Embracing the Halloween Spirit: More Than Just Costumes
Can you believe October is already here? The year seems to be flying by at warp speed, but I must admit, I’m absolutely thrilled. October signals the unofficial start of “the holidays,” kicking off with the most enchanting of them all: Halloween! While my days of elaborate adult costumes are mostly behind me, the joy of Halloween remains, primarily through baking and, of course, dressing up my beloved black Labrador. She’s quite the character, and in her superhero cape, she truly becomes “Super Girl.” We often sit outside to hand out candy, allowing everyone to admire her adorable costume without the doorbell frenzy. It’s a fantastic way to spread cheer and show off her sweet, non-scary side!
The Magic of a Spook-tacular Centerpiece: Why This Cake Steals the Show
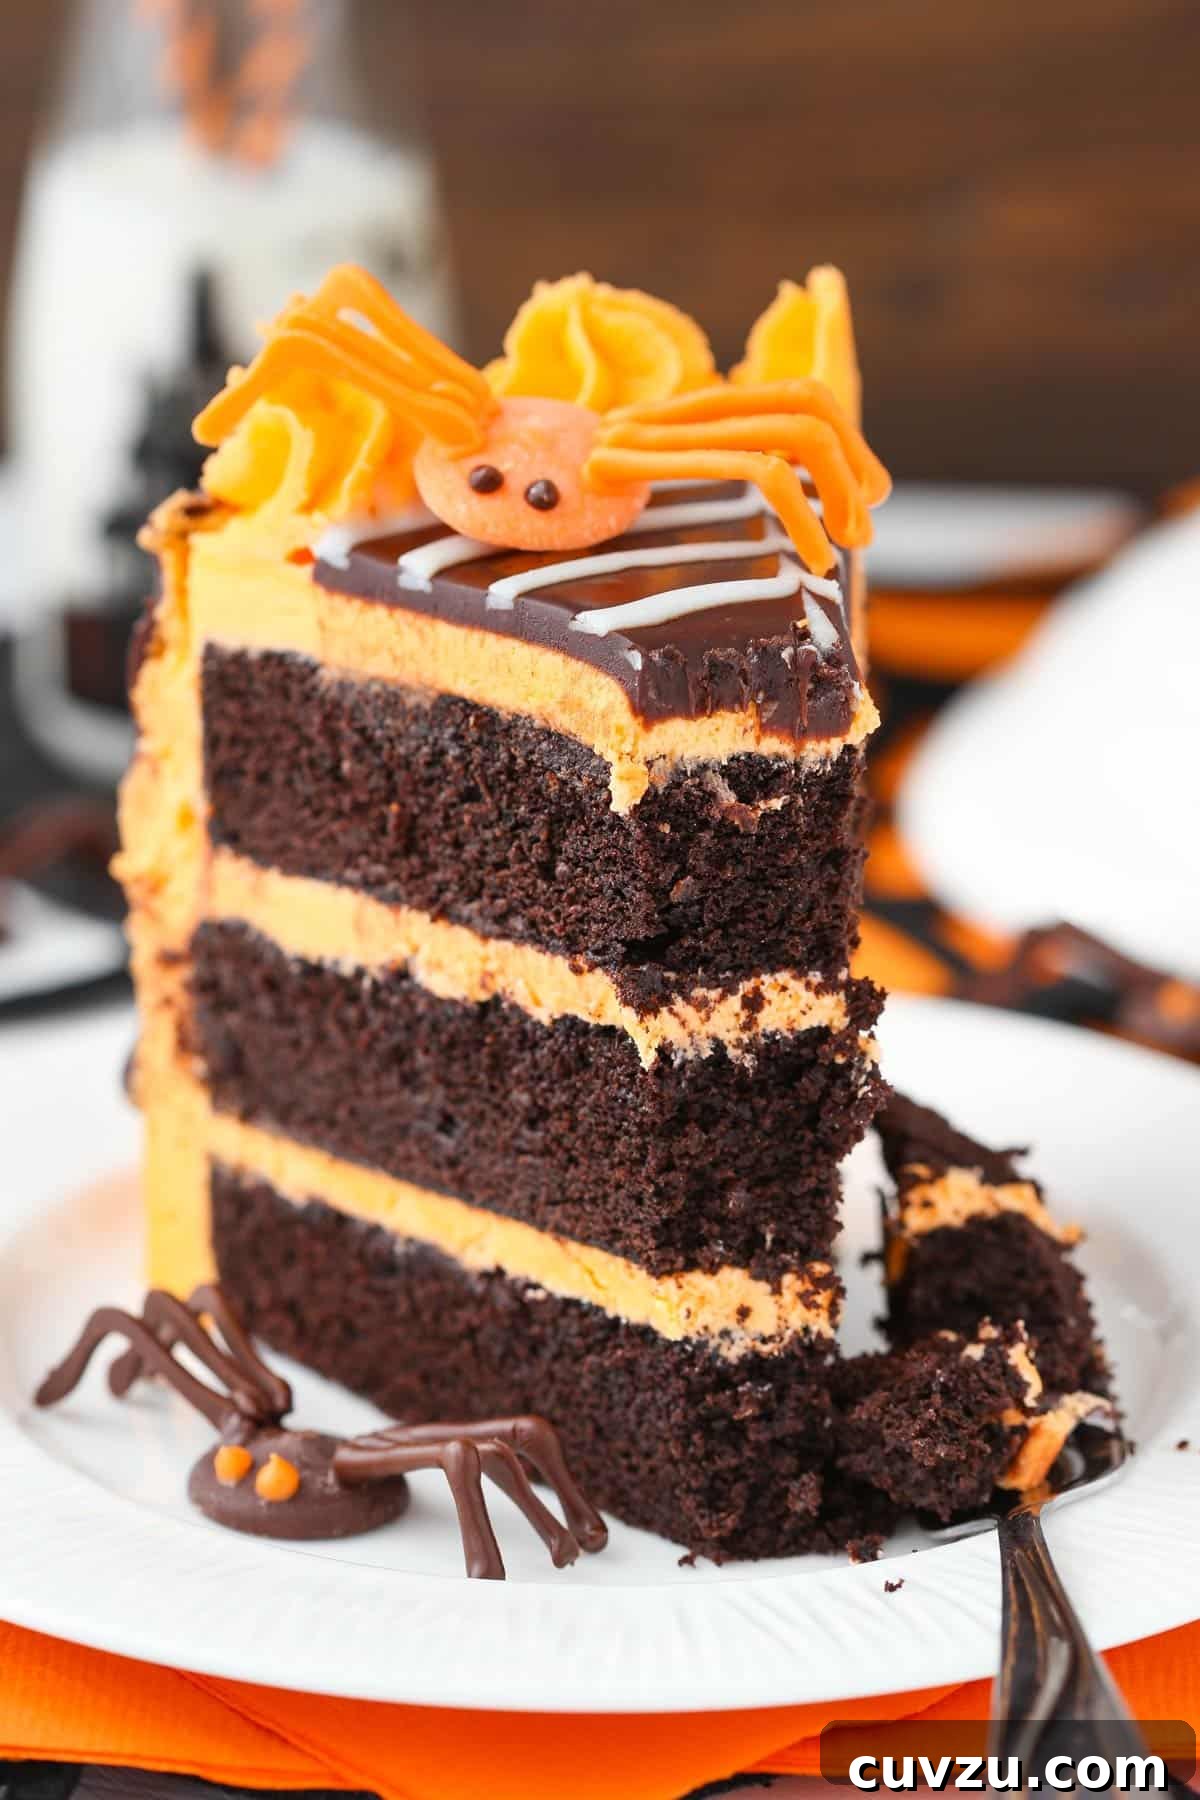
Just like my furry friend’s costume transforms her into a friendly hero, this spiderweb chocolate cake takes the traditionally creepy imagery of spiders and turns it into something delightfully fun and inviting. Let’s be honest, real spiders can be quite unsettling, but the adorable chocolate creations adorning this cake are so charming, even arachnophobes might find themselves falling in love! This cake isn’t just a treat for the taste buds; it’s a visual spectacle that perfectly captures the playful essence of Halloween.
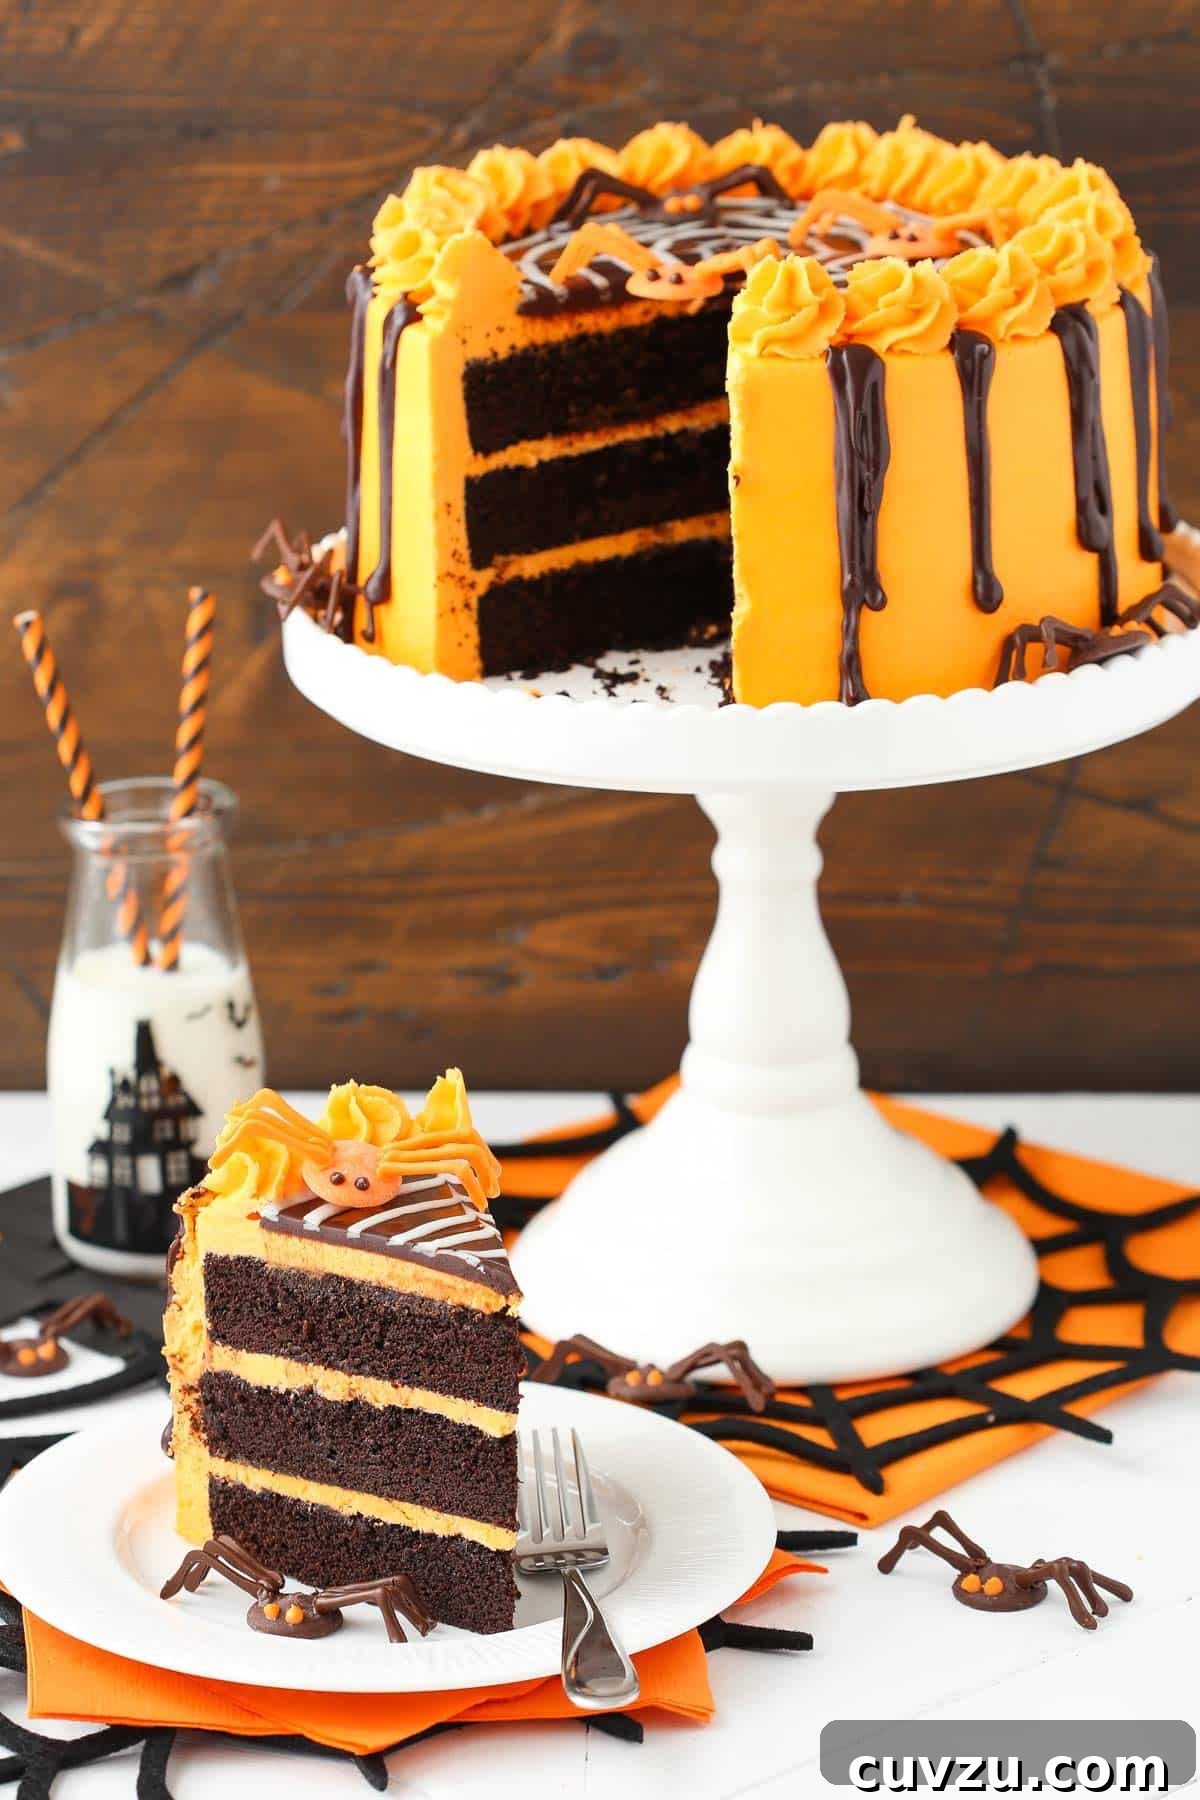
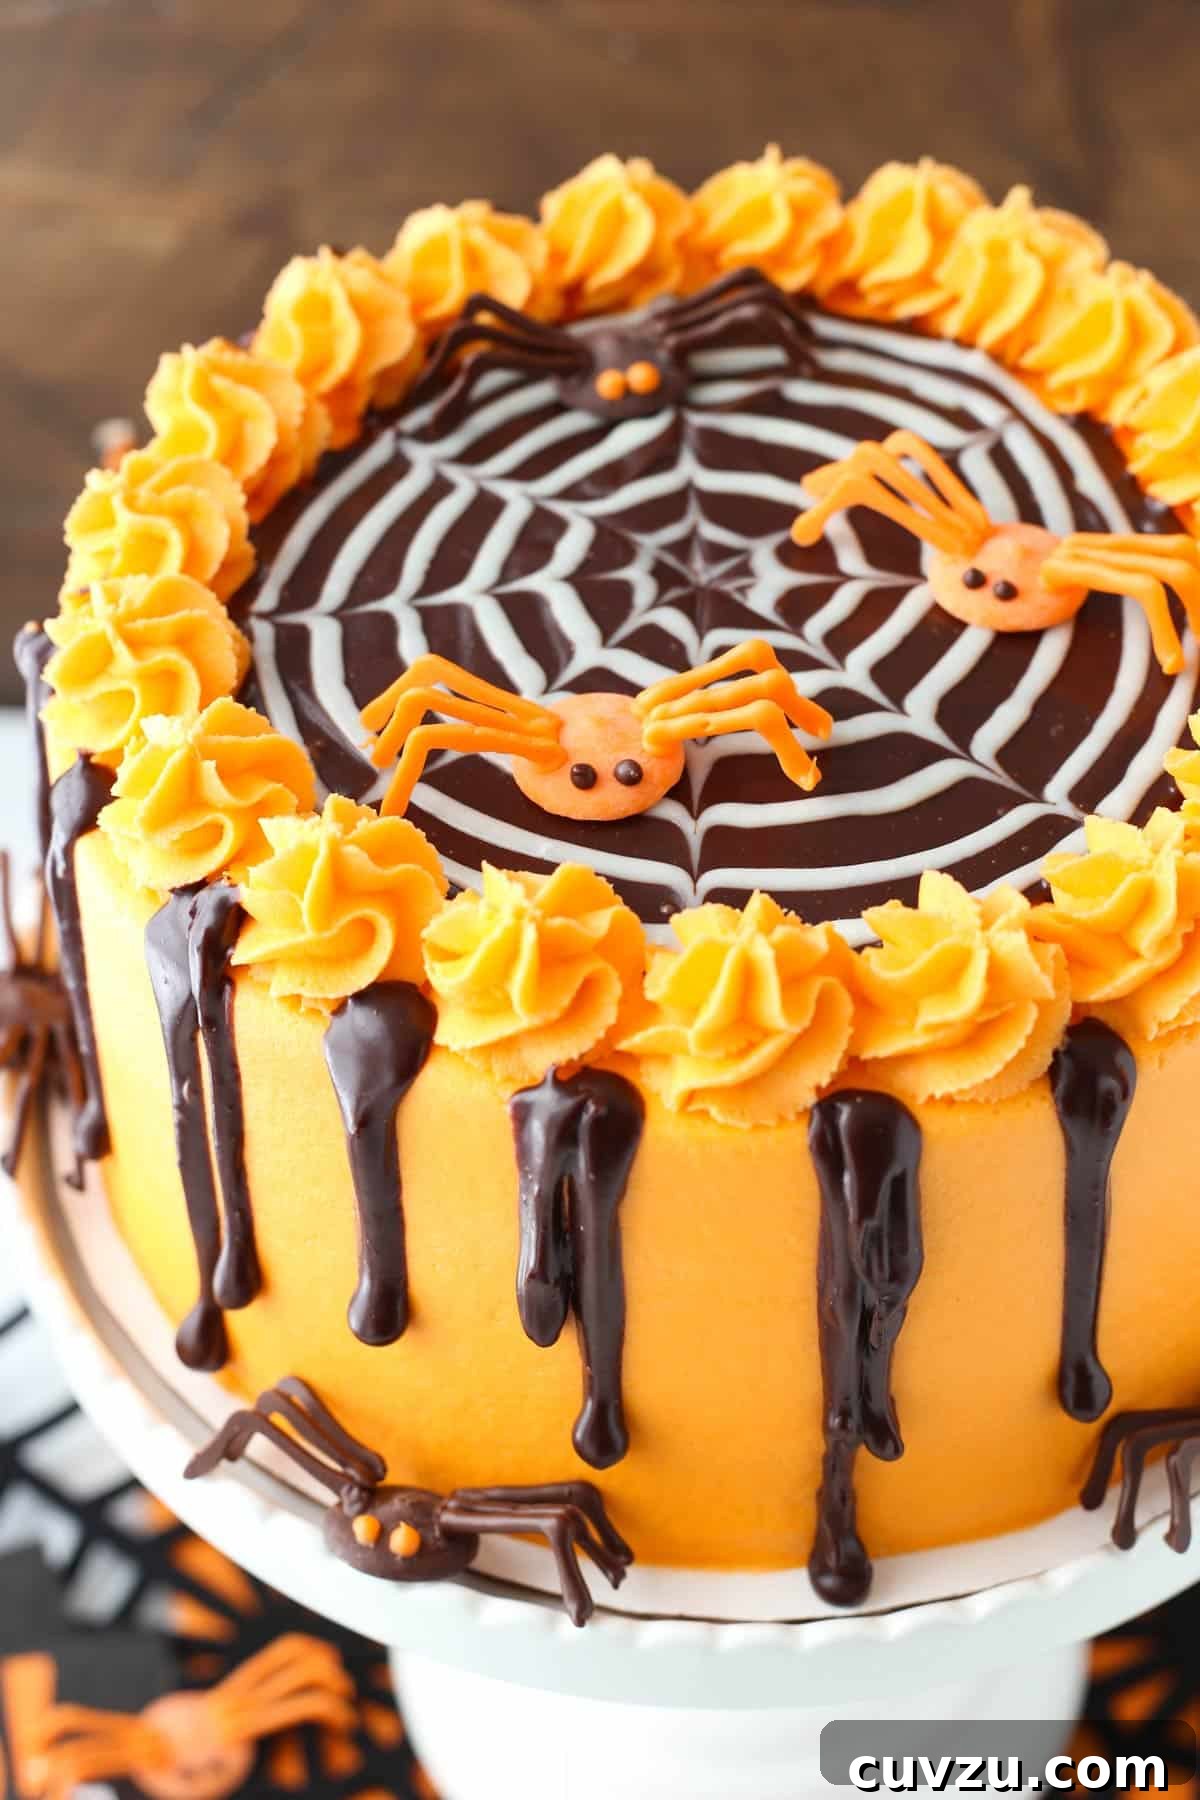
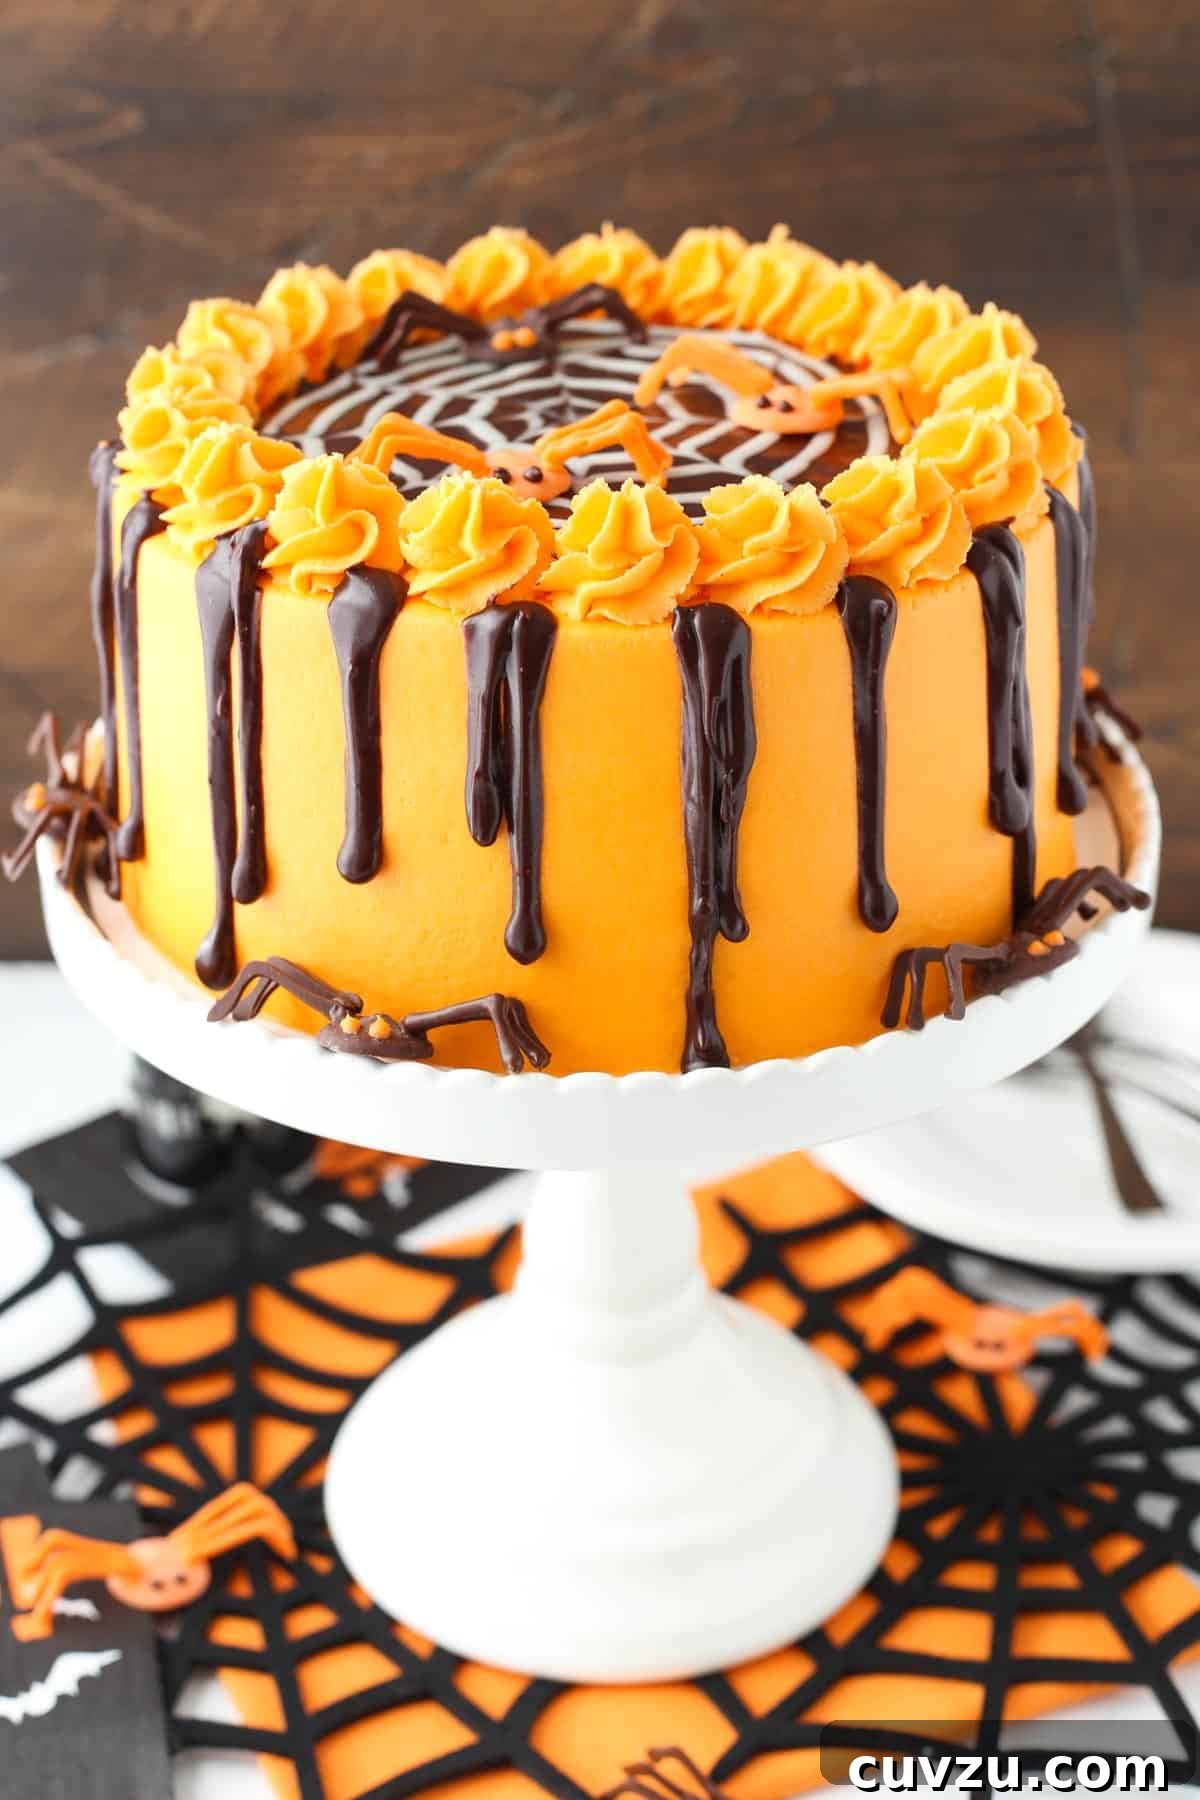
The beauty of this dessert lies not only in its rich flavor but also in the ingenious simplicity of its decorations. The spiders, crafted from melting chocolates, are surprisingly easy to create. You’ll use round chocolate pieces for the bodies, then pipe delicate, long legs using melted chocolate. A tiny dab of melted chocolate ensures they adhere perfectly to the bodies, resulting in a collection of incredibly cute, long-legged arachnids that will bring smiles, not shivers, to your Halloween gathering.
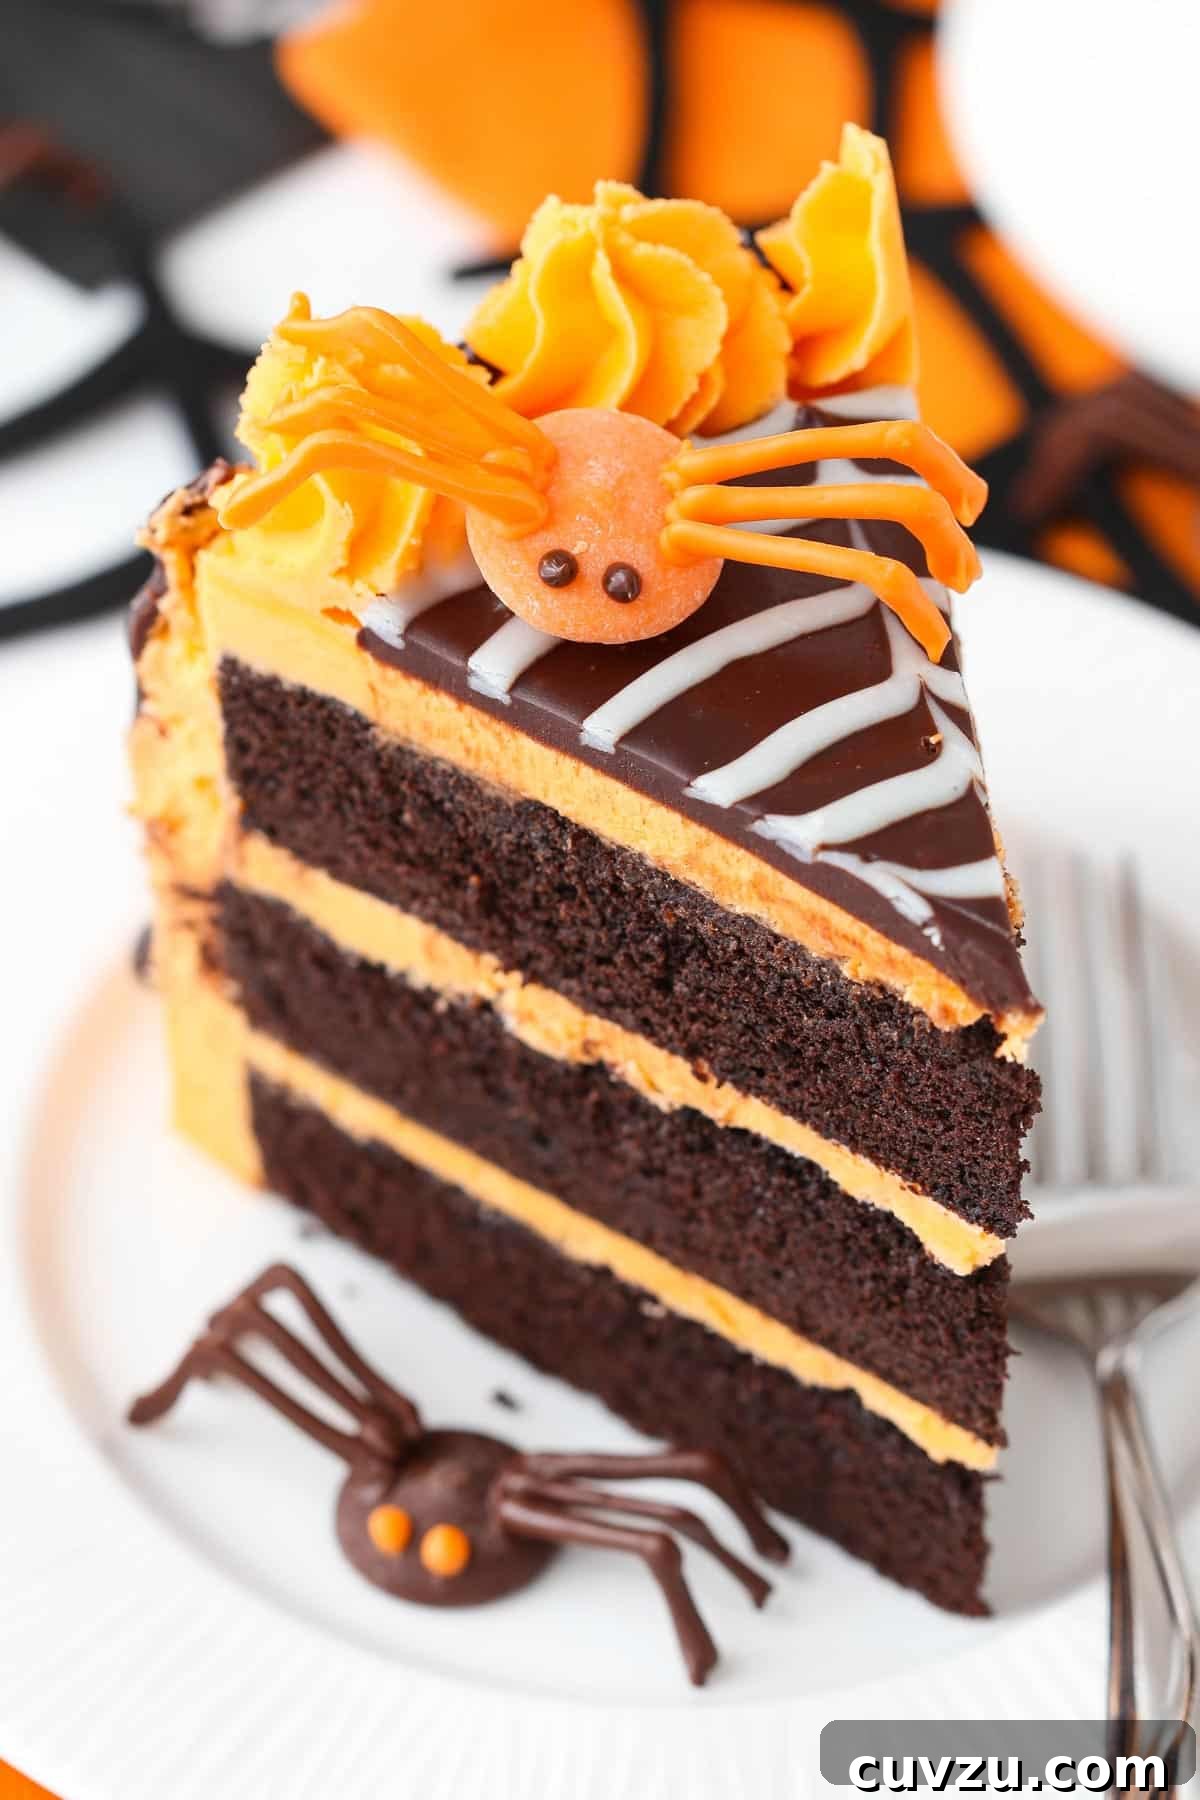
The spiderweb itself is an artistic triumph achieved with minimal effort. A smooth layer of dark chocolate ganache forms the backdrop, over which a swirl of contrasting white chocolate ganache is piped. With a simple toothpick, you then draw lines from the center outwards, effortlessly transforming the concentric circles into an intricate, spooky spiderweb. It’s a quick technique that yields impressive results, making your cake look professionally decorated with ease.
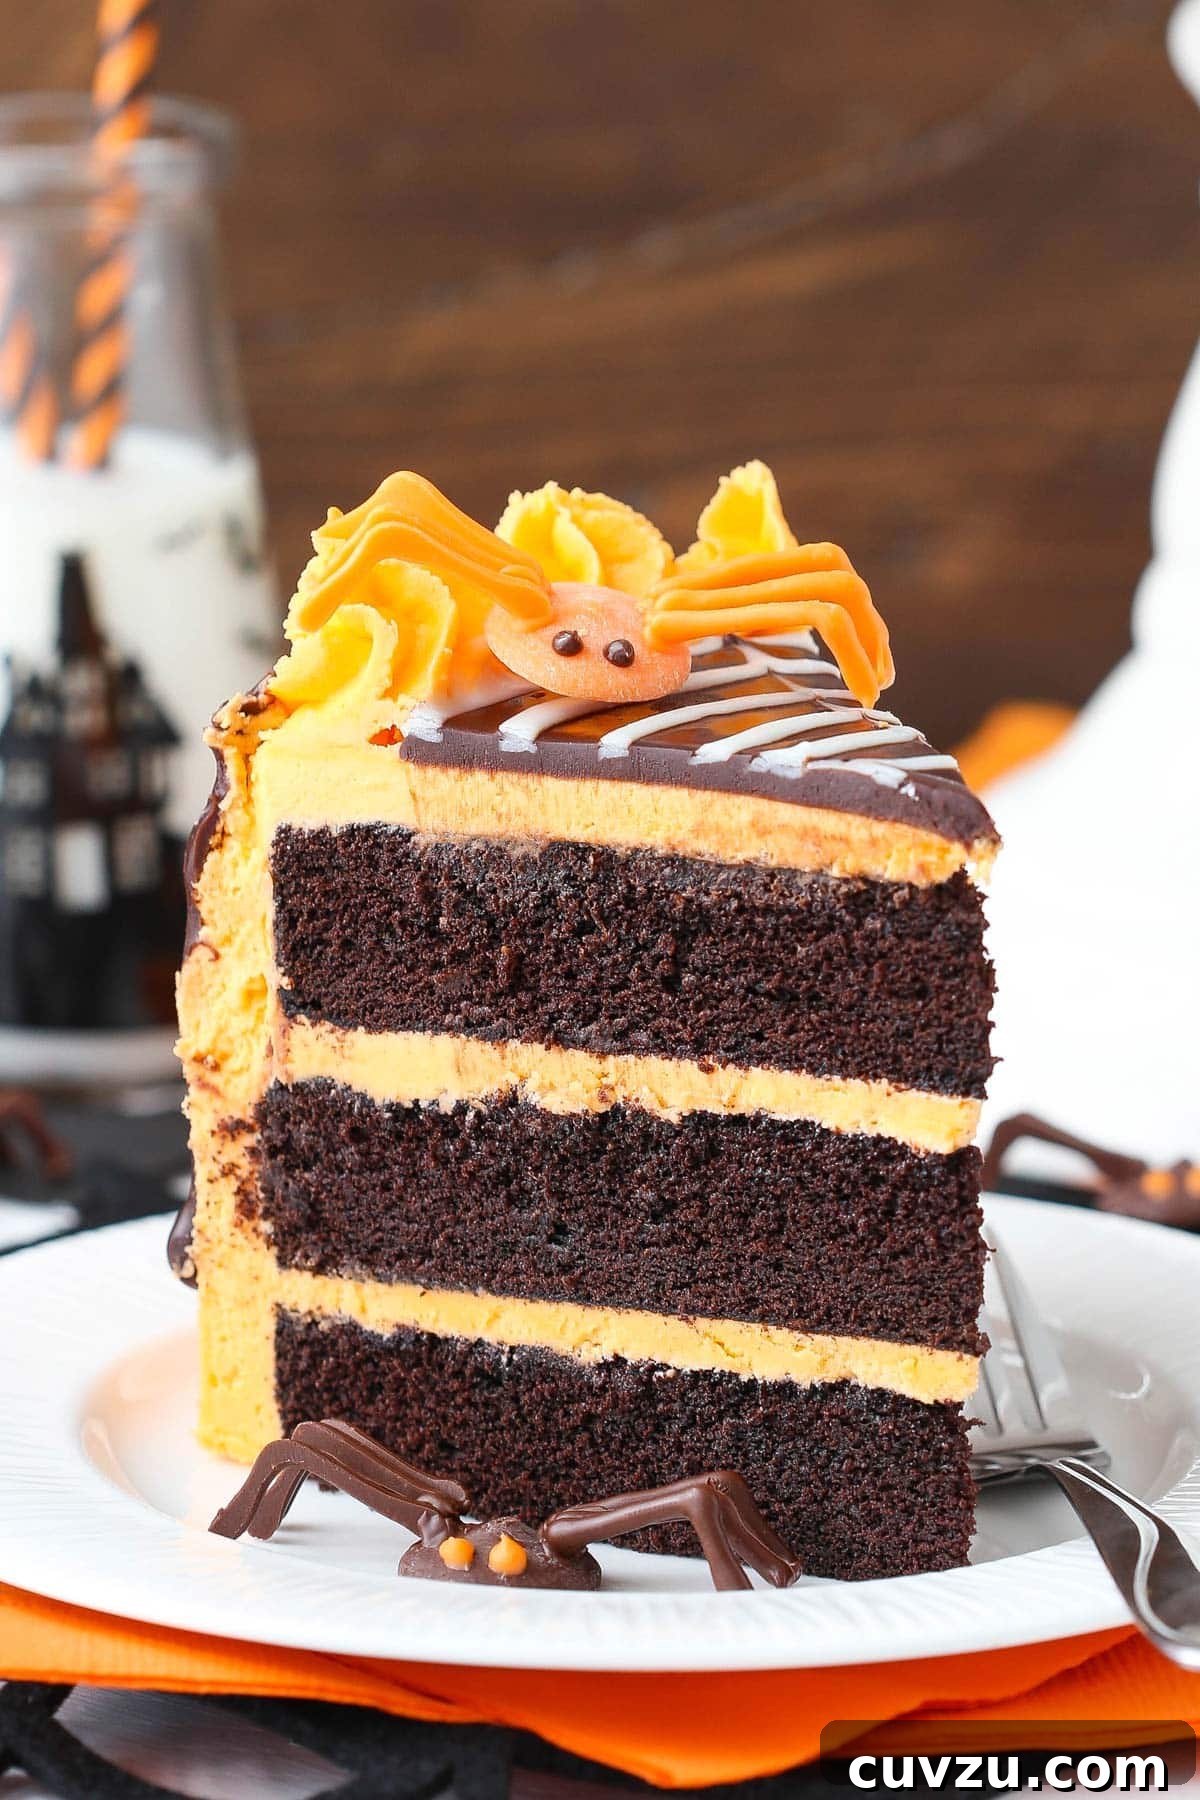
Beneath all this Halloween artistry lies an exceptionally delicious chocolate cake. Its deep, dark shade provides the perfect foundation for the decorations, enhancing the spooky aesthetic without compromising on taste. Each bite offers a rich, satisfying chocolate flavor complemented by the creamy vanilla frosting.
Crafting the Perfect Chocolate Cake: A Foundation of Flavor and Moisture
Creating this Halloween masterpiece starts with a phenomenal chocolate cake base. The secret to its light, fluffy, and incredibly moist texture begins with a crucial first step: creaming the butter and sugar thoroughly. For a full 3 to 4 minutes, you’ll beat Challenge butter and sugar together until the mixture is visibly lighter in color and wonderfully fluffy. This process incorporates air into the batter, which is essential for that coveted soft crumb.
I cannot overstate my affection for Challenge butter and the pleasure of working with their products. Made from 100% sweet cream, their butter travels from farm to fridge in a mere two days, ensuring unparalleled freshness and quality. My mom introduced me to Challenge about a year ago, and I’ve been a loyal fan ever since. Using such high-quality butter truly elevates the flavor and texture of both the cake and the frosting.
Following the creaming, eggs are added one at a time, each fully incorporated to maintain the batter’s smooth consistency. Next, a unique mixture of water, vanilla extract, and dark cocoa powder, pre-whisked to a sour cream-like texture, is gently folded in. This ensures the rich chocolate flavor is evenly distributed throughout. The final stages involve alternating additions of dry ingredients (flour, baking soda, salt) and milk, creating a balanced batter that bakes into a perfectly tender cake. Proper mixing, without overworking the gluten, is key here to keep the cake light and airy.
Unleashing Your Inner Halloween Artist: Decorating Your Spiderweb Cake
The Vanilla Buttercream: A Canvas of Creamy Goodness
Once your chocolate cake layers are baked and cooled, it’s time for the delightful vanilla buttercream. This frosting acts as the perfect canvas for our Halloween theme. Tinted a vibrant orange, it provides a striking contrast to the dark chocolate cake and the spooky spiderweb design. As with the cake, the quality of your butter is paramount for a truly exceptional buttercream. Choosing Challenge butter ensures a smooth, rich, and stable frosting that is a joy to work with and even more delightful to taste.
Spinning the Spiderweb: A Simple Yet Striking Design
The spiderweb decoration is deceptively simple but incredibly effective. Begin by preparing a rich chocolate ganache. Once it’s spread evenly over the top of your frosted cake, prepare a lighter white chocolate ganache. Pipe this white ganache in a spiral pattern, starting from the center and working your way outwards. Then, with a clean toothpick, gently drag lines from the center of the cake towards the outer edge, creating the classic radiating web effect. This technique is quick, easy, and yields a professional-looking design every time.
Crafting Charming Spiders: From Melting Chocolate to Creepy-Cute Toppings
No spiderweb cake would be complete without its inhabitants! These chocolate spiders are fun to make and add a wonderful playful touch. Using melting chocolates (both orange and dark cocoa for variety), pipe delicate “L” shaped legs onto parchment paper. Once set, a small dollop of melted chocolate on the body of your chosen round chocolate (which forms the spider’s body) will allow you to attach the legs. Hold them in place for about 30 seconds until they set. Finally, pipe tiny eyes with contrasting melted chocolate. Arrange these adorable spiders strategically on and around your cake for a truly captivating Halloween display.
When all elements come together – the tender, moist chocolate cake, the creamy orange vanilla buttercream, the intricate chocolate spiderweb, and the cute little chocolate spiders – you’ll have created a truly unforgettable Halloween treat. This cake is not just a dessert; it’s an experience, guaranteed to delight everyone who takes a bite. I know you’ll love making and sharing it as much as I do!
Spiderweb Chocolate Cake with Vanilla Frosting Recipe
Spiderweb Chocolate Cake with Vanilla Frosting
Rated 5 out of 5 stars from 5 reviews
- Author: Life, Love and Sugar
- Prep Time: 45 minutes
- Cook Time: 30 minutes
- Total Time: 1 hour 15 minutes
- Yield: 12–14 Slices
- Category: Dessert
- Method: Oven
- Cuisine: American
Description
This Spiderweb Chocolate Cake with Vanilla Frosting is an awesome chocolate cake recipe for Halloween! The cake alone is actually perfect for any time – super moist and delicious – but the fun decorations are perfect for a spook-tacular Halloween!
Ingredients
CHOCOLATE CAKE
- 1 cup (224g) unsalted Challenge butter
- 2 cups (414g) sugar
- 4 eggs
- 1 tsp vanilla extract
- 3/4 cup (180ml) water
- 3/4 cup (85g) dark cocoa powder blend
- 2 cups (260g) all purpose flour
- 1 tsp baking soda
- 1/2 tsp salt
- 3/4 cup (180ml) milk
VANILLA BUTTERCREAM
- 1 1/2 cups (336g) salted Challenge butter
- 1 1/4 cups (237g) shortening
- 10 1/2 cups (1208g) powdered sugar
- 1 1/2 tbsp vanilla extract
- 3–4 tbsp (90ml-105ml) water
- Orange icing color
CHOCOLATE GANACHE
- 4 oz semi sweet chocolate chips
- 5 tbsp (75ml) heavy whipping cream
WHITE CHOCOLATE GANACHE
- 2 oz white chocolate chips
- 1 tbsp (15ml) heavy whipping cream
- Orange melting chocolate
- Dark cocoa melting chocolate
Instructions
TO MAKE THE CAKE LAYERS:
- Preheat the oven to 350°F (176°C). Line the bottom of three 8-inch (20cm) cake pans with parchment paper and grease the sides.
- Beat butter and sugar until light in color and fluffy, about 3-4 minutes.
- Add eggs one at a time, beating just until blended.
- Add vanilla, water and cocoa powder to another bowl and whisk until smooth.
- Add chocolate mixture to batter and mix until combined. Scrape down the sides of the bowl as needed to make sure everything is well combined.
- Combine flour, baking soda and salt in a separate bowl.
- Alternate adding the flour mixture and milk to the batter. Begin by adding half of the dry mix, then mix well. Add the milk and mix well, scraping down the sides as needed. Add the remaining flour mixture and mix until smooth.
- Divide batter between the cake pans. Bake for 26-30 minutes, or until a toothpick inserted comes out with a few crumbs.
- Remove cakes from the oven and allow to cool for 3-4 minutes, then remove from pans to a cooling rack to finish cooling.
- While the cakes cool, make the frosting. Beat the butter and shortening together until smooth.
- Slowly add about 1/2 of the powdered sugar, mixing until smooth between each addition of powdered sugar.
- Add the vanilla extract and 3 tablespoons of water to the frosting and mix until smooth.
- Slowly add the remaining powdered sugar, mixing until smooth between each addition of powdered sugar.
- Add additional water to the frosting, as needed to get a smooth consistency.
TO PUT THE CAKE TOGETHER:
- Use a large serrated knife to remove the domes from the tops of the cake layers so that they are flat.
- Place the first layer of cake on your serving plate or on a cardboard cake circle.
- Spread 1 cup (240g) of frosting into an even layer.
- Add the second layer of cake, then another cup (240g) of frosting.
- Top the cake with the third layer of cake.
- Frost the outside of the cake with the remaining frosting. For help getting a smooth finish, refer to my tutorial on how to frost a smooth cake with buttercream.
- Pipe a swirl border of frosting around the top edge of the cake. Set the cake aside.
TO DECORATE THE CAKE:
- To make the chocolate ganache, add the chocolate chips to a metal or glass bowl. Microwave the heavy whipping cream until boiling, then pour over the chocolate chips. Cover the bowl with clear wrap for about 5 minutes, then whisk chocolate until smooth.
- Use a spoon or piping bag with tip to drizzle chocolate down the sides of the cake, between each frosting swirl.
- To make the white chocolate ganache, add the white chocolate chips to a metal or glass bowl. Microwave the heavy whipping cream until boiling, then pour over the white chocolate chips. Cover the bowl with clear wrap for about 3 minutes, then whisk chocolate until smooth. If needed, microwave the mixture for another 5-10 seconds, then continue whisking until smooth.
- Reheat the chocolate ganache slightly, if needed, then spread remaining chocolate ganache evenly onto the top of the cake, inside the border.
- Pipe a swirl onto the top of the chocolate ganache, starting from the center of the cake and spiraling out towards the border of the cake.
- Use a toothpick to create the web effect. Place the toothpick in the center and drag it out towards the border to create a line. I drew 8 lines total.
TO MAKE THE SPIDERS:
- Melt the orange melting chocolate and place into a piping bag with a small round tip (I used a Wilton 4). You could also use a ziplock bag with a corner cut off. Pipe the legs in the shape of an “L”. You’ll need 6 legs per spider, for about 3 or 4 spiders. Repeat with the dark cocoa melting chocolate.
- Once the legs are made and cooled, set out 4 or 5 circles of melting chocolate for the bodies. Working with one leg at a time, pipe a small dot of melted chocolate onto the side of the body and place a leg in position. Hold it in place for about 30 seconds, or until you can take your hand away and it stays in place. Add 3 legs to each side of the body.
- To make the eyes, microwave the chocolate on 10 second intervals, stirring between each until melted, and pipe the eyes onto the bodies.
- Place the spiders on top of and around the cake.
- Refrigerate the cake until ready to serve. The cake is best served at room temperature.
Notes
I used Wilton Candy Melts for the melting chocolates.
Nutrition
- Serving Size: 1 Slice
- Calories: 1120
- Sugar: 117.2 g
- Sodium: 223.3 mg
- Fat: 63.9 g
- Carbohydrates: 135.6 g
- Protein: 8 g
- Cholesterol: 152.9 mg
Extend Your Halloween Feast: Other Spook-tacular Dessert Ideas
Looking for more ways to add a touch of sweet spookiness to your Halloween festivities? Here are some fantastic recipes to inspire your dessert table:
- Mini Candy Corn Cheesecakes
- Spiderweb Chocolate Tart
- Halloween Monster Cookies
- Bat Oreo Cookie Balls
- Spooky Halloween Marble Cake
- Easy Mummy Rice Krispie Treats
Enjoy creating these delightful treats and have a wonderfully sweet and spooky Halloween!