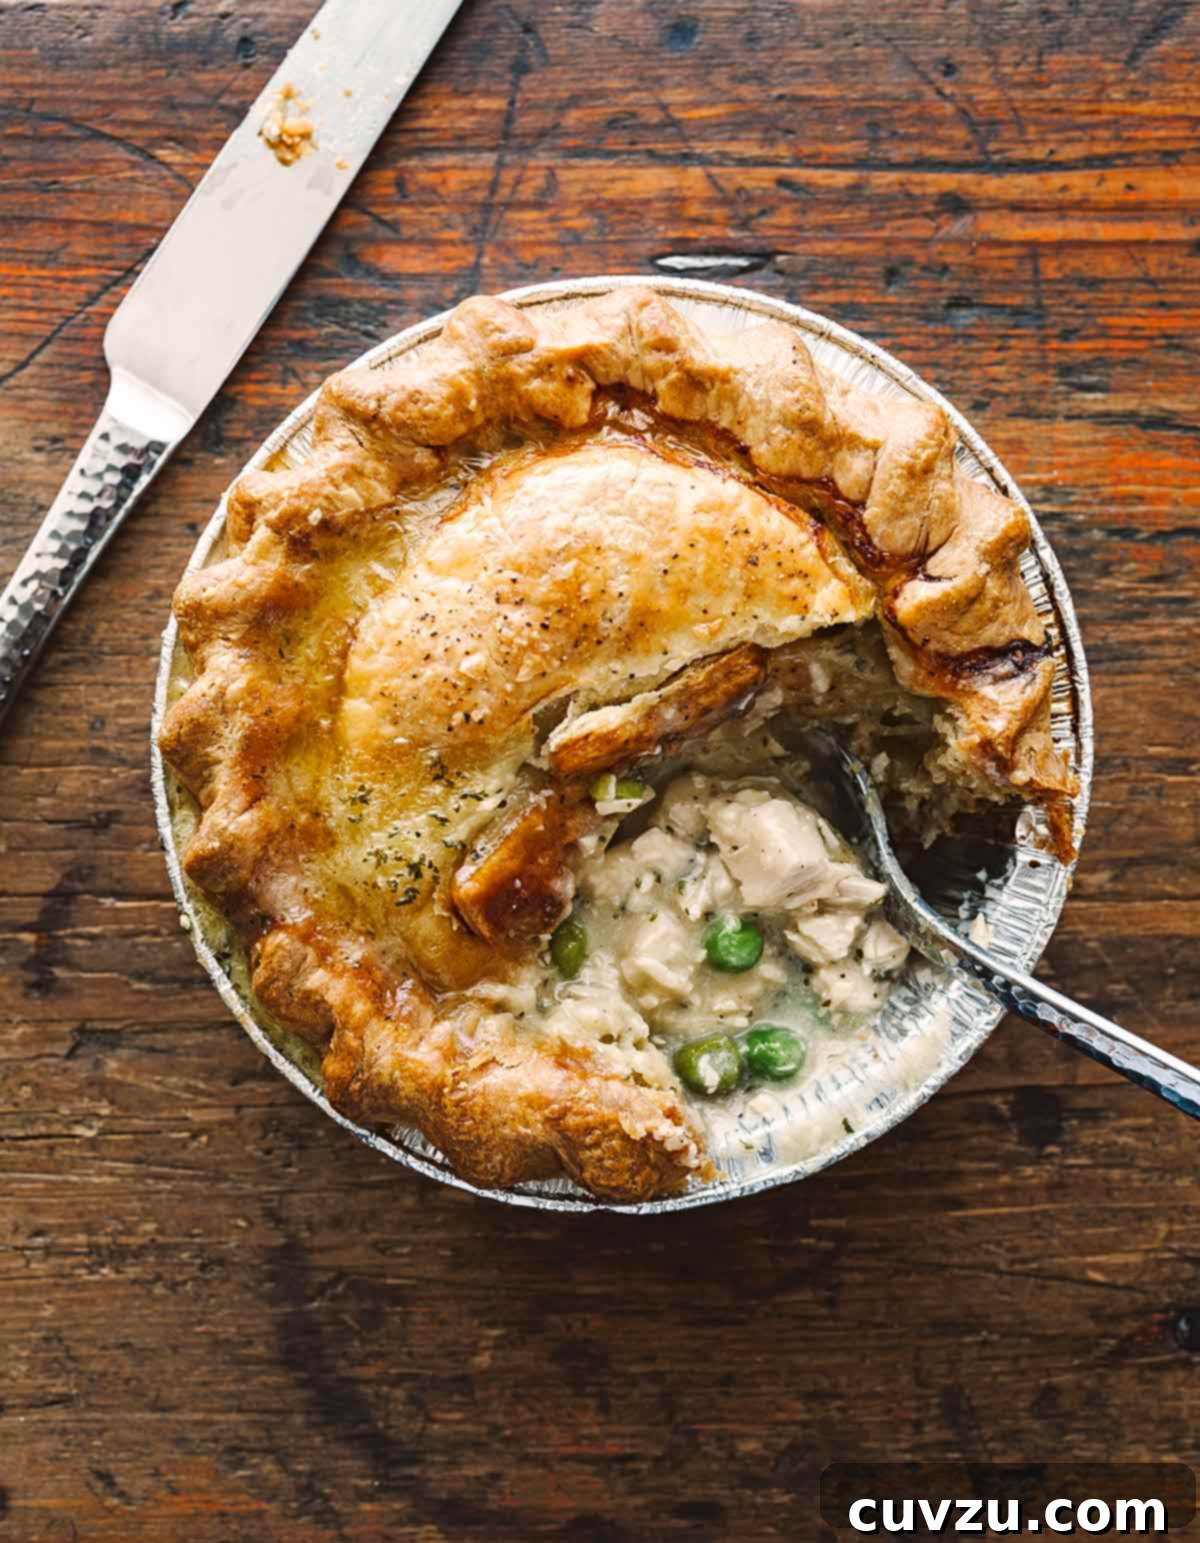
The Ultimate Homemade Rosemary Chicken Pot Pie: A Comfort Food Classic Reinvented
Dive into the exquisite world of homemade chicken pot pie, where tradition meets a touch of modern culinary elegance. This recipe isn’t just about feeding your hunger; it’s about nourishing your soul with layers of tender, rosemary-baked chicken, sweet onions, vibrant peas, and crisp carrots, all suspended in a luxuriously creamy sauce. Each individual pot pie is lovingly sealed within a golden, buttery, and impossibly flaky pie crust, offering a perfectly portioned delight that you won’t want to share. Prepare to transform your understanding of classic comfort food with this elevated take on a timeless favorite.
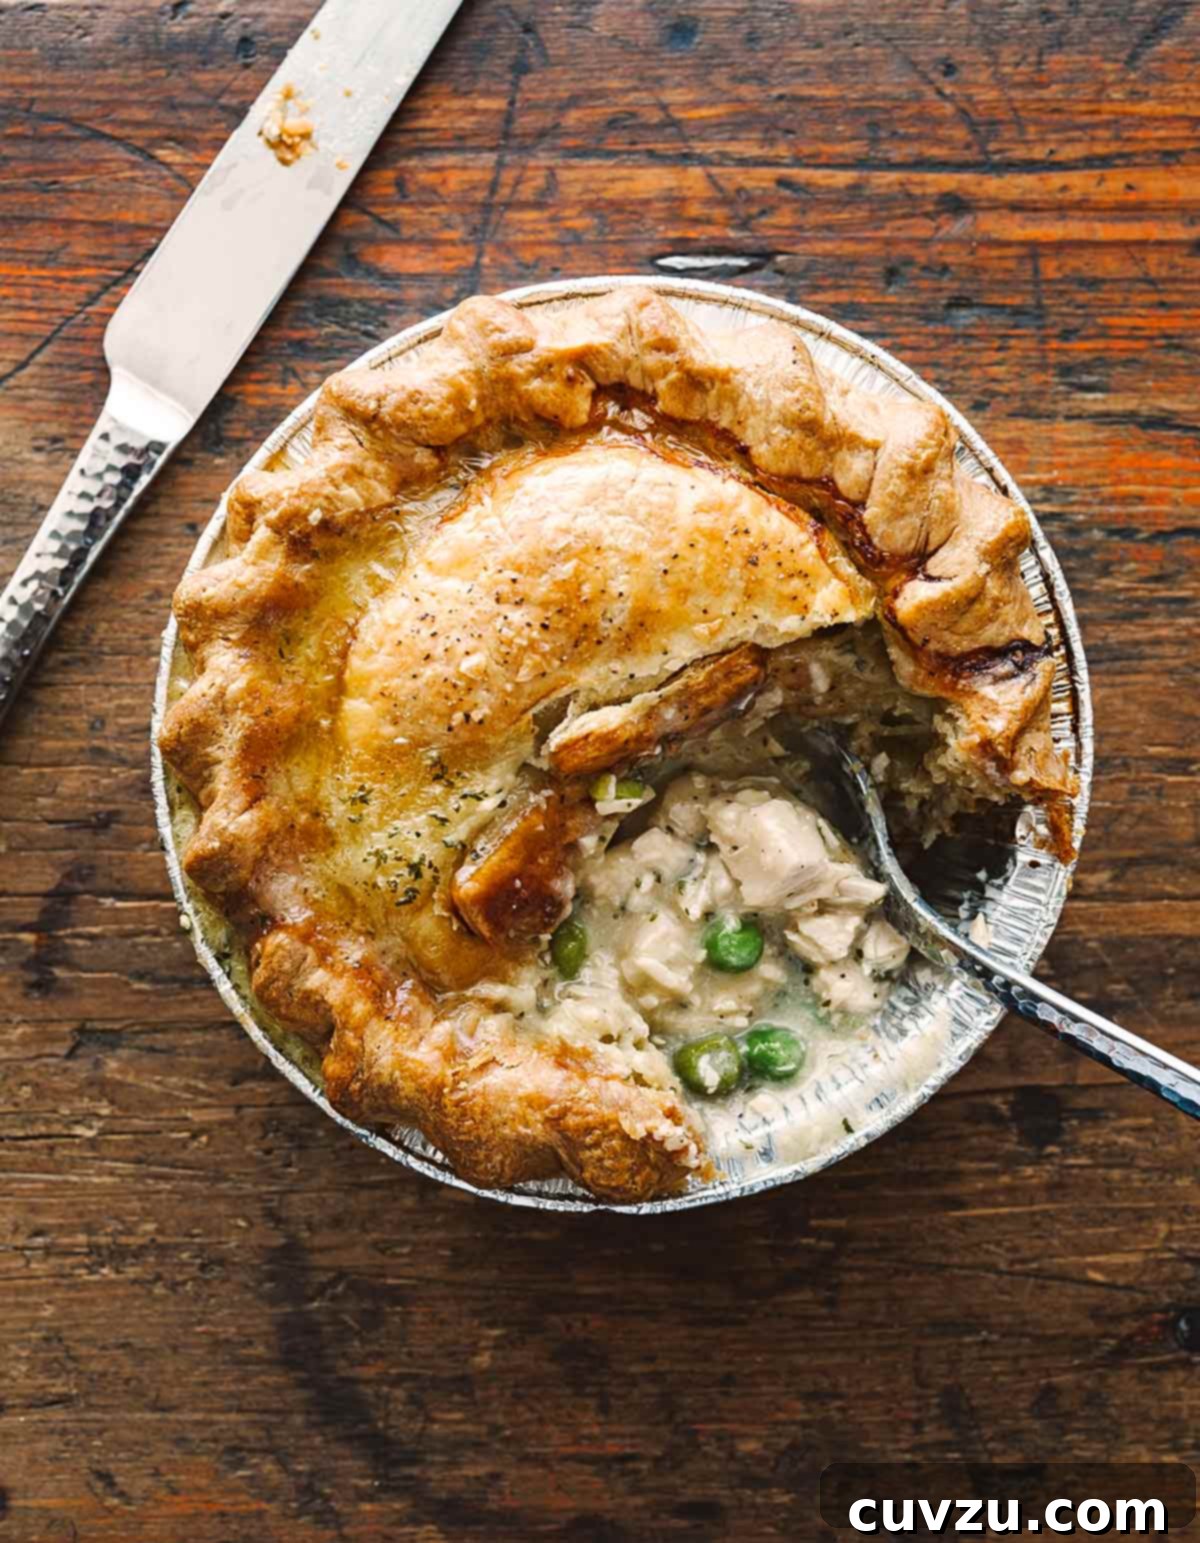
When the craving for classic comfort food strikes, few dishes can rival the heartwarming appeal of homemade chicken pot pie. Yet, our version takes this beloved staple a step further, infusing it with thoughtful refinements that elevate it beyond what you might remember from childhood. We begin with succulent chicken, generously seasoned and baked with aromatic rosemary, ensuring every bite is bursting with flavor. The cream sauce achieves a delicate balance, rich and satisfying without being overly heavy. And, of course, the quintessential peas and carrots are cooked to tender perfection, avoiding any hint of mushiness. All these delightful components are lovingly encased beneath a marvelously buttery and crisp crust.
This recipe is crafted for those who appreciate the details—the subtle enhancements that transform a familiar dish into something truly extraordinary. It’s a testament to how simple yet significant flourishes can create an unforgettable dining experience. Once you try these nuanced tweaks, we’re confident you’ll agree that this isn’t just any chicken pot pie; it’s *the* chicken pot pie you’ll crave again and again.–David Leite

Homemade Chicken Pot Pie
Indulge in this ultimate homemade chicken pot pie, featuring tender rosemary-baked chicken, sweet onions, peas, and carrots in a rich, creamy sauce, all enrobed in a golden, buttery pie crust. Crafted as individual servings, you can savor every bite without having to share this delicious comfort food masterpiece.
David Leite
Mains
American
4
pot pies
1230
kcal
45 minutes
1 hour
1 hour 45 minutes
Equipment
- Four 5-inch (13-cm) individual pie pans (individual ramekins or other sized pie pans will also work here, though the yield may change)
- Large saucepan or Dutch oven
- Rimmed baking sheet
- Whisk
- Wooden spoon or spatula
Ingredients
For the Rosemary Chicken
The star of our pot pie, this chicken is infused with fresh rosemary for an aromatic depth that elevates the entire dish.
- 6 (2 1/2 lbs total) boneless, skinless chicken breasts
- 2 tablespoons extra-virgin olive oil
- Kosher salt and freshly ground black pepper, to taste
- 1 tablespoon finely chopped fresh rosemary
For the Rich & Creamy Filling
This luscious filling is the heart of the pot pie, combining tender vegetables and a perfectly balanced creamy sauce that is rich without being overwhelming.
- 1 1/2 sticks (6 oz) unsalted butter
- 3 cups (13 oz) chopped yellow onions (about 3 medium)
- 3/4 cup unbleached all-purpose flour
- 4 cups canned chicken broth or homemade chicken stock
- 1 cup heavy cream
- 2 teaspoons kosher salt
- 1 teaspoon freshly ground black pepper
- 2 cups (10 oz) chopped carrots
- One (10-ounce) package frozen green peas
- 1/2 cup (1 oz) finely chopped fresh parsley
- 4 store-bought pastry crusts or 4 batches homemade single crust pie dough*
- 1 large egg whisked with 1 tablespoon water (for egg wash)
- Sea salt and coarsely ground black pepper, for garnish
Instructions
Step 1: Prepare the Oven
- Preheat your oven to a robust 450°F (230°C). This initial high temperature helps create that wonderfully crisp and golden crust.
Step 2: Prepare the Rosemary Chicken
- Begin by rubbing the boneless, skinless chicken breasts generously with extra-virgin olive oil. Season them liberally with kosher salt, freshly ground black pepper, and the finely chopped fresh rosemary. Arrange the seasoned chicken on a rimmed baking sheet.
- Bake the chicken in the preheated oven for 15 to 20 minutes, or until it is just cooked through and no longer pink in the center. Avoid overcooking to ensure the chicken remains tender and moist.
- Once baked, remove the chicken from the oven and allow it to cool slightly on the baking sheet. This resting period helps the juices redistribute. After cooling, coarsely chop the chicken into bite-sized pieces. Set aside.
Step 3: Craft the Pot Pie Filling
- In a large saucepan or Dutch oven, melt the unsalted butter over medium-low heat. Add the chopped yellow onions and cook, stirring occasionally, until they become translucent and softened, which typically takes about 10 to 15 minutes. This slow cooking allows the onions to release their sweet flavor without browning.
- Gradually whisk in the all-purpose flour to create a roux. Continue whisking constantly for approximately 2 minutes until you achieve a thick, golden-brown paste. Be mindful not to let it burn; the goal is a nutty aroma and a slight browning.
- While continuously whisking, slowly pour in the chicken broth, ensuring the mixture is completely blended and no lumps remain. Scrape down the sides of the pot to incorporate any stuck roux. Reduce the heat to low, then stir in the heavy cream, kosher salt, and black pepper. Whisk for another minute or so until the sauce begins to thicken slightly. Remove the pan from the heat.
- Using a wooden spoon or spatula, fold in the chopped carrots, frozen green peas, fresh parsley, and the pre-cooked chopped chicken. Stir until all ingredients are evenly distributed and coated in the creamy sauce. Let the filling cool completely. Cooling is crucial to prevent the pie crust from becoming soggy during assembly.
Step 4: Assemble the Individual Pot Pies
- If using homemade pie dough, roll out all four discs. If using store-bought pastry crusts, carefully remove them from their packaging and tins. For a flakier, less heavy crust, roll store-bought crusts a little thinner than their original thickness.
- Using inverted bowls or templates, cut each large pastry sheet into four 9-inch (23-cm) rounds for the bottom crusts and four 7 1/2-inch (19-cm) rounds for the top crusts.
- Gently drape each larger dough round into an individual 5-inch (13-cm) pie pan (approximately 2 inches or 5 cm deep) without stretching the dough. Allow the excess dough to drape over the sides of the pan. Place these filled pie pans onto a rimmed baking sheet for easier handling and to catch any potential drips during baking.
- Evenly divide the cooled chicken pot pie mixture among the four prepared pie shells. You may have some leftover filling depending on the exact size of your pie pans. Don’t discard it! This extra filling can be frozen for a future pot pie or simply reheated and enjoyed as a savory stew with a side of crusty bread.
- In a small bowl, whisk together the large egg with 1 tablespoon of water to create an egg wash. Lightly brush the rim of the bottom dough with this egg wash. Then, carefully place a smaller round of dough over the top of each pot pie, centering it.
- Gently pinch the edges of the top and bottom crusts together to create a secure seal. Trim any excess dough around the outside edge of the pans, leaving about a 1/2-inch (12 mm) overhang. Roll this overhang inward, towards the top of the pans, just inside the rim, and then crimp the edges decoratively with your fingers or the tines of a fork. This not only seals the pie but also creates a beautiful edge.
- Brush the top crusts of each pot pie generously with the remaining egg wash. Using a sharp knife, cut a couple of small slits in the center of each top crust; these vents allow steam to escape, preventing the crust from becoming soggy. Finally, sprinkle the tops with a pinch of sea salt and coarsely ground black pepper for added flavor and visual appeal.
Step 5: Bake and Serve
- Bake the pot pies on the rimmed baking sheet in the preheated 450°F (230°C) oven. After 30 minutes, rotate the baking sheet 180 degrees to ensure even browning. Continue baking for an additional 20 to 30 minutes, or until the filling is bubbling robustly out of the slits and the crusts are a deep, golden brown.
- If you notice the edges of the pastry browning too quickly during baking, you can loosely cover them with strips of aluminum foil molded around the rim of each pot pie. This will protect the crust from over-browning while the center bakes.
- Once baked to perfection, remove the pot pies from the oven. Let them cool slightly for about 10-15 minutes before serving. This cooling period allows the filling to set and prevents burns from the hot, bubbling interior. Serve warm and enjoy your individual masterpiece!
Notes & Tips for Success
Make Your Homemade Pie Crust Savory
To infuse your pie dough with an even deeper savory flavor that beautifully complements the rosemary chicken filling, consider stirring 1/2 teaspoon of finely chopped fresh rosemary into the dry ingredients of your pie dough mixture before adding any water. This subtle addition will tie all the flavors together harmoniously.
Make Ahead Option
This recipe is excellent for meal prep! You can bake the chicken, chop the vegetables, and prepare the pie dough a day in advance. Store the cooked chicken and chopped vegetables in separate airtight containers in the refrigerator. Wrap the pie dough discs tightly in plastic wrap and refrigerate. When ready to assemble, simply prepare the filling sauce and proceed with the remaining steps.
Freezing Instructions
For future meals, individual pot pies can be assembled (up to the point of egg washing and baking) and then frozen. Place the assembled but unbaked pot pies on a baking sheet and freeze until solid. Once solid, wrap each pot pie individually in plastic wrap and then in aluminum foil. They can be stored in the freezer for up to 3 months. When ready to bake, thaw in the refrigerator overnight, then proceed with the egg wash, sprinkling of salt and pepper, and baking as directed, possibly adding 10-15 minutes to the baking time.
Serving Suggestions
Pair these rich and hearty pot pies with a fresh, crisp green salad tossed with a bright vinaigrette. The acidity of the dressing will cut through the richness of the pot pie, creating a perfectly balanced meal. A side of steamed green beans or roasted asparagus would also make a delightful accompaniment.
Adapted From
Red Truck Bakery Cookbook
Buy On Amazon
Nutrition
Serving: 1 pot pie
Calories: 1230 kcal
Carbohydrates: 90 g
Protein: 80 g
Fat: 61 g
Saturated Fat: 24 g
Monounsaturated Fat: 24 g
Trans Fat: 0.05 g
Cholesterol: 249 mg
Sodium: 1988 mg
Fiber: 11 g
Sugar: 13 g
Nutrition information is automatically calculated and should be used as an approximation.
Tried this recipe?
Mention @leitesculinaria or tag #leitesculinaria! Share your culinary creations with our community!
Recipe Testers’ Reviews: What Our Cooks Thought
Patty Fabian
“We absolutely adored these pot pies! While they might require a bit of time and effort to prepare, the overwhelmingly positive feedback you’ll receive makes every minute worthwhile. These aren’t your average pot pies; they are sophisticated, brimming with rosemary-infused chicken breast meat, perfectly cooked vegetables, fresh herbs, and a truly rich, luscious cream sauce.
I found it convenient to prepare these earlier in the day, omitting only the final egg wash, salt, and pepper. I kept them covered with plastic wrap in the refrigerator until dinner time. As the oven preheated, I simply added the finishing touches. For simplicity, I opted for store-bought crusts, rolling them out extra thin to achieve a lighter, flakier texture. The final sprinkle of sea salt and freshly ground pepper on the top crust truly elevated the flavor profile.
Serving these to guests was a treat; everyone was incredibly impressed by their unique flavor and elegant presentation—definitely a step above ordinary chicken pot pie. A fresh green salad with a zesty vinaigrette proved to be the ideal accompaniment, beautifully cutting through the richness of the filling. This recipe yielded four individual pot pies, plus enough leftover filling to generously fill a 10-by-7-inch baking dish. The next day, I baked the leftover filling (without a crust) at 400°F for 45 minutes, and it was fantastic as a standalone stew, served simply with crackers.”
Linda Pacchiano
“This recipe delivers a wonderfully traditional chicken pot pie. What truly makes it shine and elevates it to a gourmet level is the thoughtful inclusion of fresh chopped rosemary, both in the baked chicken and subtly in the crust itself. This creates a cohesive and aromatic flavor experience.
Be prepared to allocate at least 3 1/2 hours from start to finish, so planning your time is key. To streamline dinner preparation, I highly recommend baking the chicken, chopping all the vegetables, and preparing the pie dough the day before. These components can be stored in the refrigerator until you’re ready for assembly and baking, making the process much quicker on a busy weeknight.
I used 5-inch disposable pie pans, which closely resembled those in the recipe photo, and I was able to produce seven individual pot pies. I’ve frozen several of them for later enjoyment and am looking forward to baking them directly from frozen.”
Kristen Kennedy
“The finished pot pie truly hit all the right notes for ‘comfort food,’ offering a satisfying, stick-to-your-ribs consistency and a truly home-cooked flavor. Many of my friends, myself included, are actively trying to reduce our carbohydrate intake. With this in mind, I decided to follow the recipe exactly as written but omitted the pie crust. Instead, I simply baked the chicken mixture in a Dutch oven for the prescribed amount of time.
While the filling was cooking, I rolled out some puff pastry, cut it into 1-inch strips, and twisted them into ‘straws.’ I brushed these with the egg wash, sprinkled them with salt and pepper, and slid them onto the lower shelf of the oven during the final 15 minutes of the pot pie mixture’s cooking time. This ingenious approach provided my guests with the option of dipping the pastry straws into the flavorful chicken mixture. Honestly, the filling was so utterly delicious and rich that it didn’t even need them. The kids, however, absolutely loved dunking the pastry straws into the savory stew, and this method allowed the adults to indulge in the richness without completely abandoning their healthful eating habits.”
Helena Pereira
“This classic recipe for comfort food is simply delicious. With a creamy and flavorful filling and a delightfully crunchy crust, it’s incredibly versatile. It works exceptionally well with leftover chicken, making it a fantastic way to utilize ingredients you already have on hand. What’s more, it’s so straightforward to prepare, making it an ideal recipe for beginner cooks or for anyone with limited time in the kitchen.
Following this recipe to prepare these tarts allows you the wonderful convenience of freezing enough portions for several family meals. This foresight significantly streamlines weekly meal planning and reduces time spent on housework, offering delicious, ready-to-bake comfort whenever you need it.”
Amy Wilschut
“I absolutely love, love this Chicken Pot Pie. It truly delivered on all fronts as far as comfort food goes. It tasted delicious, was incredibly comforting, and remarkably nostalgia-inducing. It vividly reminded me of enjoying Swanson Chicken Pot Pie on our ‘fancy’ TV trays when I was a child in the 1970s – but this homemade version is infinitely better!
I opted for store-bought pie crusts, and the only individual pie pans I could find were 5-inch foil ones. I successfully made six 5-inch pot pies using the crust from two pie crust packages. I did have to get a bit creative to evenly distribute the pieces for each pie pan, as cutting perfect circles from a larger, already-rolled crust can be tricky. However, pie crust is quite forgiving and easy to piece back together, resulting in a more rustic, less ‘perfect’ looking pie—which, to me, is part of its charm, as long as it tastes good!
After filling the six pot pies quite amply, I still seemed to have an excess of filling, at least a few cups leftover. I decided to bake three pot pies immediately and freeze the other three for a later date, so my feedback on taste is based solely on the freshly baked pies. My only minor point of concern was with the baking instructions. The recipe initially notes an oven temperature of 450°F. That seemed rather high for baking a pie for a full hour. I decided to monitor it very closely, and indeed, after just 30 minutes of baking, the crust was perfectly golden, and the filling had reached an internal temperature of 160°F. Based on this, I recommend keeping a close eye on your pies and adjusting baking time as needed to prevent over-browning.”