The Ultimate Guide to Making Homemade Yogurt: Foolproof and Delicious Every Time
Imagine a world where creamy, tangy yogurt is always fresh, perfectly tailored to your taste, and incredibly easy to make right in your own kitchen. This guide will show you exactly how to achieve foolproof, fabulous homemade yogurt every single time. Forget about expensive, specialized yogurt makers or complicated techniques. All you truly need are a few basic ingredients, some essential kitchen tools, and our detailed, step-by-step instructions. You’ll be surprised at how simple it is to whip up a batch in the evening and wake up to a magical transformation by morning.
Making yogurt at home offers a multitude of benefits that extend far beyond simply saving a few dollars. When you craft your own yogurt, you gain complete control over the ingredients, ensuring no unwanted additives, artificial flavors, or excessive sugars find their way into your healthy snack. You can choose organic milk, experiment with different fat contents, and even adjust the tartness and thickness to your exact preference. Furthermore, homemade yogurt often boasts a richer, fresher flavor profile and a more vibrant community of live, active cultures, which are crucial for digestive health. It’s a truly rewarding culinary experience that connects you more deeply with the food you eat.
The Science Behind Yogurt Making
At its heart, yogurt making is a fascinating process of fermentation. It involves introducing beneficial bacteria, known as “live active cultures,” into milk. These bacteria consume the lactose (natural sugar) in the milk and convert it into lactic acid. This increase in acidity causes the milk proteins to coagulate and thicken, resulting in the creamy texture and tangy flavor we associate with yogurt. The key to successful homemade yogurt lies in providing the ideal environment for these cultures to thrive: a consistent, warm temperature for several hours. This guide will help you manage these variables to create perfect yogurt every time.
Choosing the Right Milk for Homemade Yogurt
As insightful words from Janet Fletcher, the creator of this recipe and author of Yogurt, reveal, your choice of milk significantly impacts your final product.
You Can Make Yogurt with Any Type of Milk
The beauty of homemade yogurt is its versatility. You can use nonfat, low-fat, or whole milk, and milk from various animals such as cows, goats, or sheep. Each choice offers a distinct texture and flavor. Whole milk, for instance, yields a richer, more luxurious yogurt with a satisfying mouthfeel due to its higher fat content. If you’re fortunate enough to have access to sheep milk, you’ll discover it’s exceptionally high in both fat and protein, producing an incredibly luscious and thick yogurt. For those seeking an extra-rich, dessert-like yogurt, consider adding a small amount of half-and-half or heavy cream. Start with a ratio of about 10 percent cream to 90 percent milk and adjust based on your desired indulgence.
Achieving Your Desired Yogurt Thickness
While fat contributes to the creamy sensation, it’s primarily protein that gives yogurt its thickness. If you opt for reduced-fat milk (nonfat or low-fat), incorporating instant nonfat dry milk is highly recommended. A ratio of 2 tablespoons per 1 quart of milk significantly boosts the solids content, resulting in a firmer, thicker yogurt that partially compensates for the lack of fat. Even with whole milk, a touch of instant nonfat dry milk can enhance firmness and overall satisfaction, which is why many experienced yogurt makers include it. Instant dry milk is preferred because it dissolves readily, minimizing whisking effort and ensuring a smooth consistency. This technique mirrors how commercial yogurt producers concentrate milk solids for a consistent, thick product. Goat’s milk naturally has fewer solids than cow’s milk, leading to a thinner, more delicate yogurt. To thicken goat’s milk yogurt, whisk in two tablespoons of instant nonfat dry milk per quart. While cow’s milk powder is generally fine, always consider allergies. Dry goat’s milk is an option but can be more expensive and harder to source.
Always Start with Fresh Milk
The foundation of great yogurt is fresh milk. Always begin your yogurt-making process with milk from an unopened, recently purchased container. This ensures you’re starting with the highest quality base and minimizes the risk of introducing undesirable bacteria that could compromise your culture.
Crucial Food Safety and Preparation Steps
Beyond freshness, proper milk preparation is paramount for both food safety and optimal yogurt texture. Even if you’re using freshly opened pasteurized milk, it is essential to heat it to at least 185°F (85°C) before introducing your culture, as detailed in the instructions below. While pasteurization eliminates harmful pathogens, it doesn’t sterilize the milk completely. Heating the milk to 185°F (85°C) and holding it at that temperature for a few minutes serves two critical purposes:
- **Eliminates Competing Bacteria:** This heat treatment neutralizes any residual bacteria that could compete with your beneficial yogurt cultures, ensuring your starter has the best chance to thrive and produce consistent results.
- **Denatures Milk Proteins:** The heat denatures, or unwinds, the milk proteins. When these proteins cool and interact with the lactic acid produced by the culture, they coagulate into a uniform, single mass rather than clumpy curds. This process also creates a more stable yogurt structure that is less prone to syneresis (whey separation).
By following these heating guidelines, you’re not just ensuring safety but also laying the groundwork for a beautifully smooth, firm, and stable homemade yogurt.
How To Make Homemade Yogurt
David Leite
Equipment You’ll Need
-
**Instant-Read Thermometer:** Crucial for monitoring milk temperatures accurately.
-
**Heavy-Bottomed Saucepan (2-3 quart):** Prevents scorching the milk.
-
**Whisk:** For dissolving dry milk and stirring.
-
**Incubation Setup:** A method to maintain a consistent warm temperature (see “How To Choose An Incubation Method For Your Homemade Yogurt” below).
-
**Clean Jars or Non-Reactive Container(s):** For incubating and storing your yogurt.
-
**Large Bowl (optional):** For an ice bath to rapidly cool milk.
-
**Cheesecloth and Colander/Strainer (optional):** If you desire thicker, Greek-style yogurt.
Ingredients for Your Homemade Yogurt
- 1 quart milk of any type (whole, low-fat, non-fat, cow, goat, or sheep)
- 2 tablespoons instant non-fat dry milk (optional, but highly recommended for thicker yogurt, especially with low-fat or non-fat milk)
- 2 tablespoons plain yogurt with live active cultures, at room temperature (Ensure it has “live active cultures” listed on the label)
Step-by-Step Instructions for Homemade Yogurt
-
**1. Assemble and Sanitize Equipment:** Before you begin, gather all necessary equipment (refer to “How To Choose An Incubation Method For Your Homemade Yogurt” below). It’s crucial to have everything ready, as timing is key once the milk is prepared. Ensure all your equipment – saucepan, whisk, thermometer, jars, etc. – is scrupulously clean and free of any soap residue, which can inhibit bacterial growth and compromise your yogurt culture.
-
**2. Heat the Milk:** Pour the milk into a 2- to 3-quart (1.8- to 2.8-liter) stainless steel saucepan. If using, whisk in the instant nonfat dry milk thoroughly until dissolved. Place the pan over medium-low heat.
* **For Thicker Yogurt:** Heat the milk until it reaches 195°F (91°C) on an instant-read thermometer. Whisk frequently to prevent scorching at the bottom of the pan. Maintain this temperature at or near 195°F (91°C) for a full 10 minutes, continuing to whisk often. This prolonged heating denatures more milk proteins, leading to a firmer, richer yogurt. Remove the pan from the heat after 10 minutes.
* **For Thinner Yogurt:** If you prefer a thinner yogurt, heat the milk until it registers between 180°F (82°C) and 185°F (85°C), whisking constantly to prevent scorching, which should take about 10 minutes. Once it reaches this temperature, remove it from the heat. -
**3. Cool the Milk:** Cover the saucepan and allow the milk to cool to a temperature between 110°F (43°C) and 115°F (46°C). This typically takes about 1 1⁄4 hours at room temperature. To significantly speed up the cooling process, carefully place the saucepan in a large bowl or sink filled with ice water, stirring the milk continuously. With this method, the milk temperature can plummet to the ideal culturing range in under 5 minutes, so monitor it very closely with your thermometer. If the temperature drops too low (below 110°F [43°C]), gently rewarm the milk over low heat on the stove until it reaches the 110°F (43°C) to 115°F (46°C) range.
-
**4. Prepare Incubation Jars or Container:** While the milk is cooling, prepare your containers. You can use a single 1-quart (946 ml) jar, several smaller jars that total 1 quart, or the jars specifically designed for an electric yogurt maker. Wash them thoroughly with hot, soapy water, rinse well, and then fill them with hot water. Let them stand to warm up. Replace the hot water if it cools, ensuring the jars are warm when you’re ready to fill them. Drain them just before filling. Alternatively, after heating and draining, you can place jars in a preheated electric yogurt maker to keep them warm. Remember, you’re not limited to jars; any nonreactive (non-aluminum) glass or earthenware bowl, or even the saucepan you heated the milk in, can serve as an incubation container. Just ensure your chosen container will fit in your refrigerator, as you’ll need to chill the yogurt in it directly after it sets to avoid disturbing the fragile curd.
-
**5. Temper and Add Starter Culture:** In a small, clean bowl, place your 2 tablespoons of room-temperature plain yogurt (your starter culture). Whisk in about 1 cup of the cooled milk until smooth. This “tempering” step helps to gently bring the starter culture up to the milk’s temperature, preventing shock and ensuring even distribution. Pour this tempered mixture back into the saucepan with the remaining cooled milk. Whisk gently but thoroughly to fully incorporate the culture without creating excessive foam, which can lead to a less smooth yogurt. Immediately pour the inoculated milk into your prepared warm jar(s) and cover them loosely with lids or plastic wrap.
-
**6. Incubate for Perfection:** Place the covered jar(s) in your chosen incubation environment (refer to “How To Choose An Incubation Method For Your Homemade Yogurt” below). Maintain the ideal temperature range of 105°F (41°C) to 115°F (46°C) consistently. It’s crucial to avoid moving or disturbing the yogurt while it ferments, as agitation can break the delicate curd and result in a thin, inconsistent product. Begin checking for the yogurt’s set after 4 hours, and then at least once per hour thereafter. The incubation time can vary significantly, ranging from 4 to 12 hours, or even longer, depending on your exact incubation temperature and the strength of your starter culture. The longer the incubation, the more lactic acid the culture produces, leading to a tangier yogurt. If you prefer a milder flavor, aim to stop incubation as soon as the yogurt has firmed sufficiently.
-
**7. Check for Set and Chill:** To determine if your homemade yogurt has set, gently tilt the jar or container. If the yogurt has a firm, custard-like appearance and does not flow readily, it has set sufficiently. If it still appears jiggly or liquidy, continue incubating for another hour, checking again. Be aware that over-incubation can cause the yogurt to become excessively tart or even separate. If you notice a layer of clear liquid (whey) on the surface, it usually indicates the yogurt fermented a little too long or too quickly and has started to separate. You can gently pour off this surface whey or, after chilling the yogurt, stir it back in. Avoid stirring in the whey *before* chilling, as the curd will be too fragile and may break apart. Once set, cover the yogurt tightly and immediately transfer it to the refrigerator. Chill for at least several hours (preferably 4-6 hours or overnight) to halt the fermentation process and allow the curd to fully firm up.
-
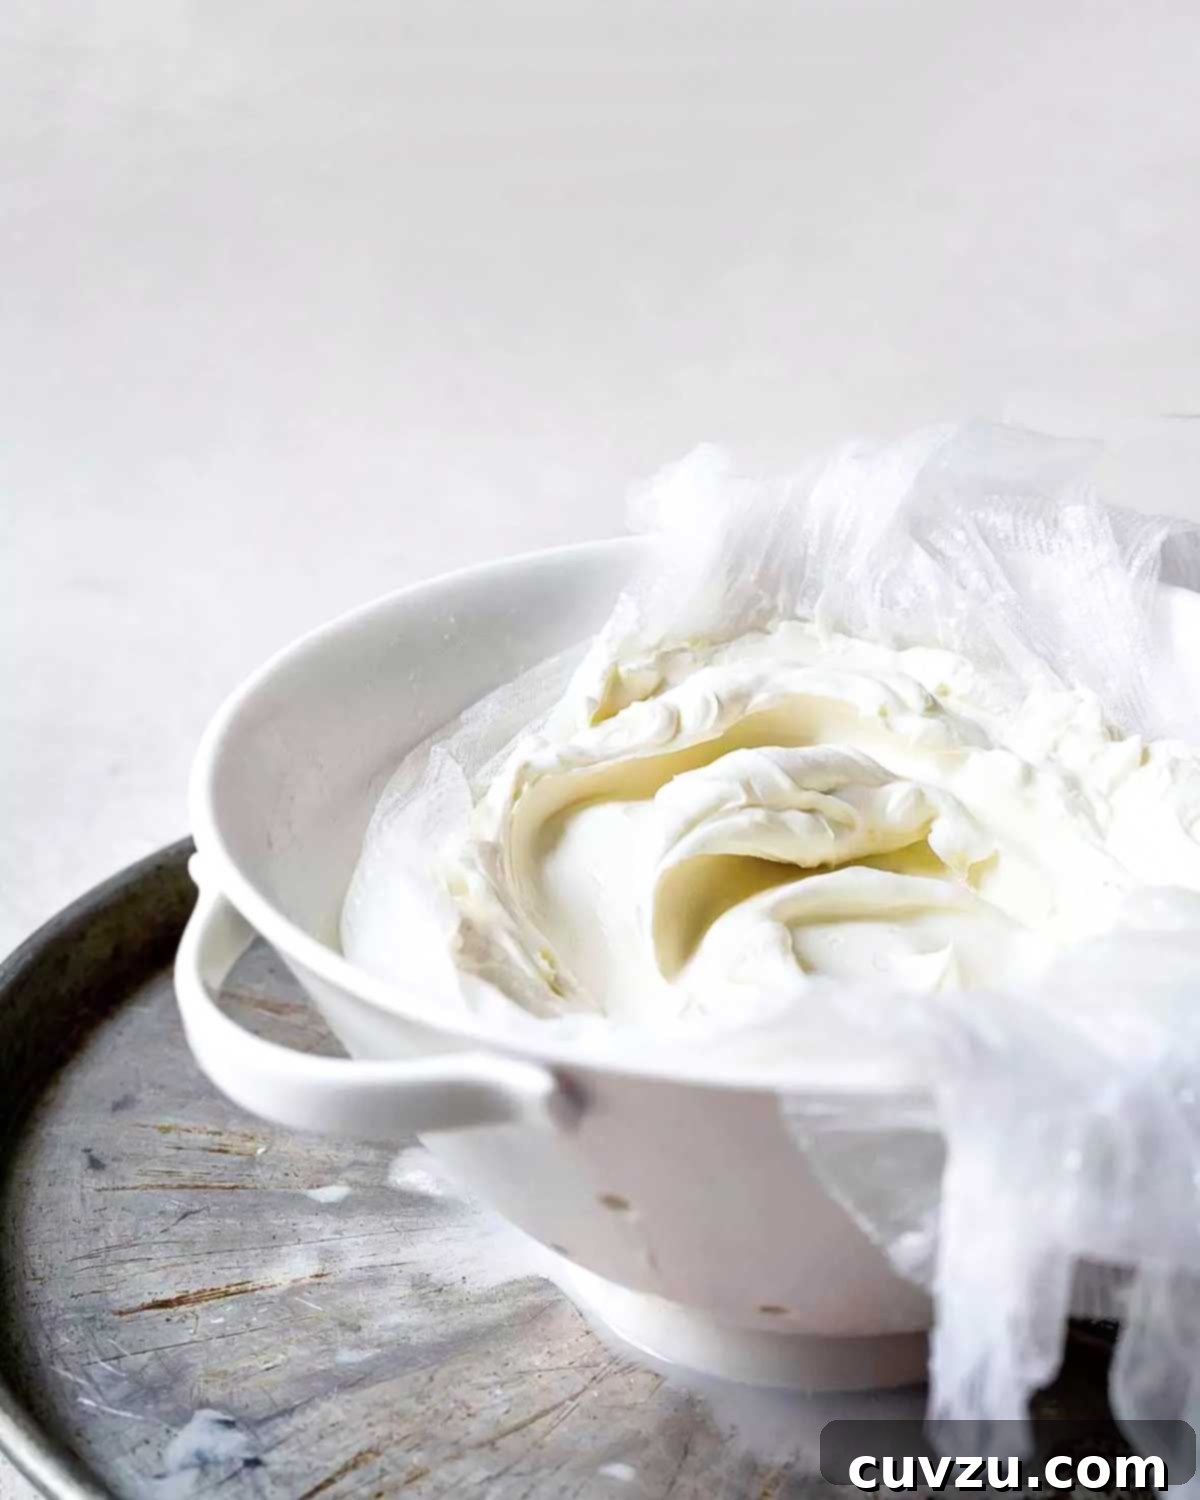
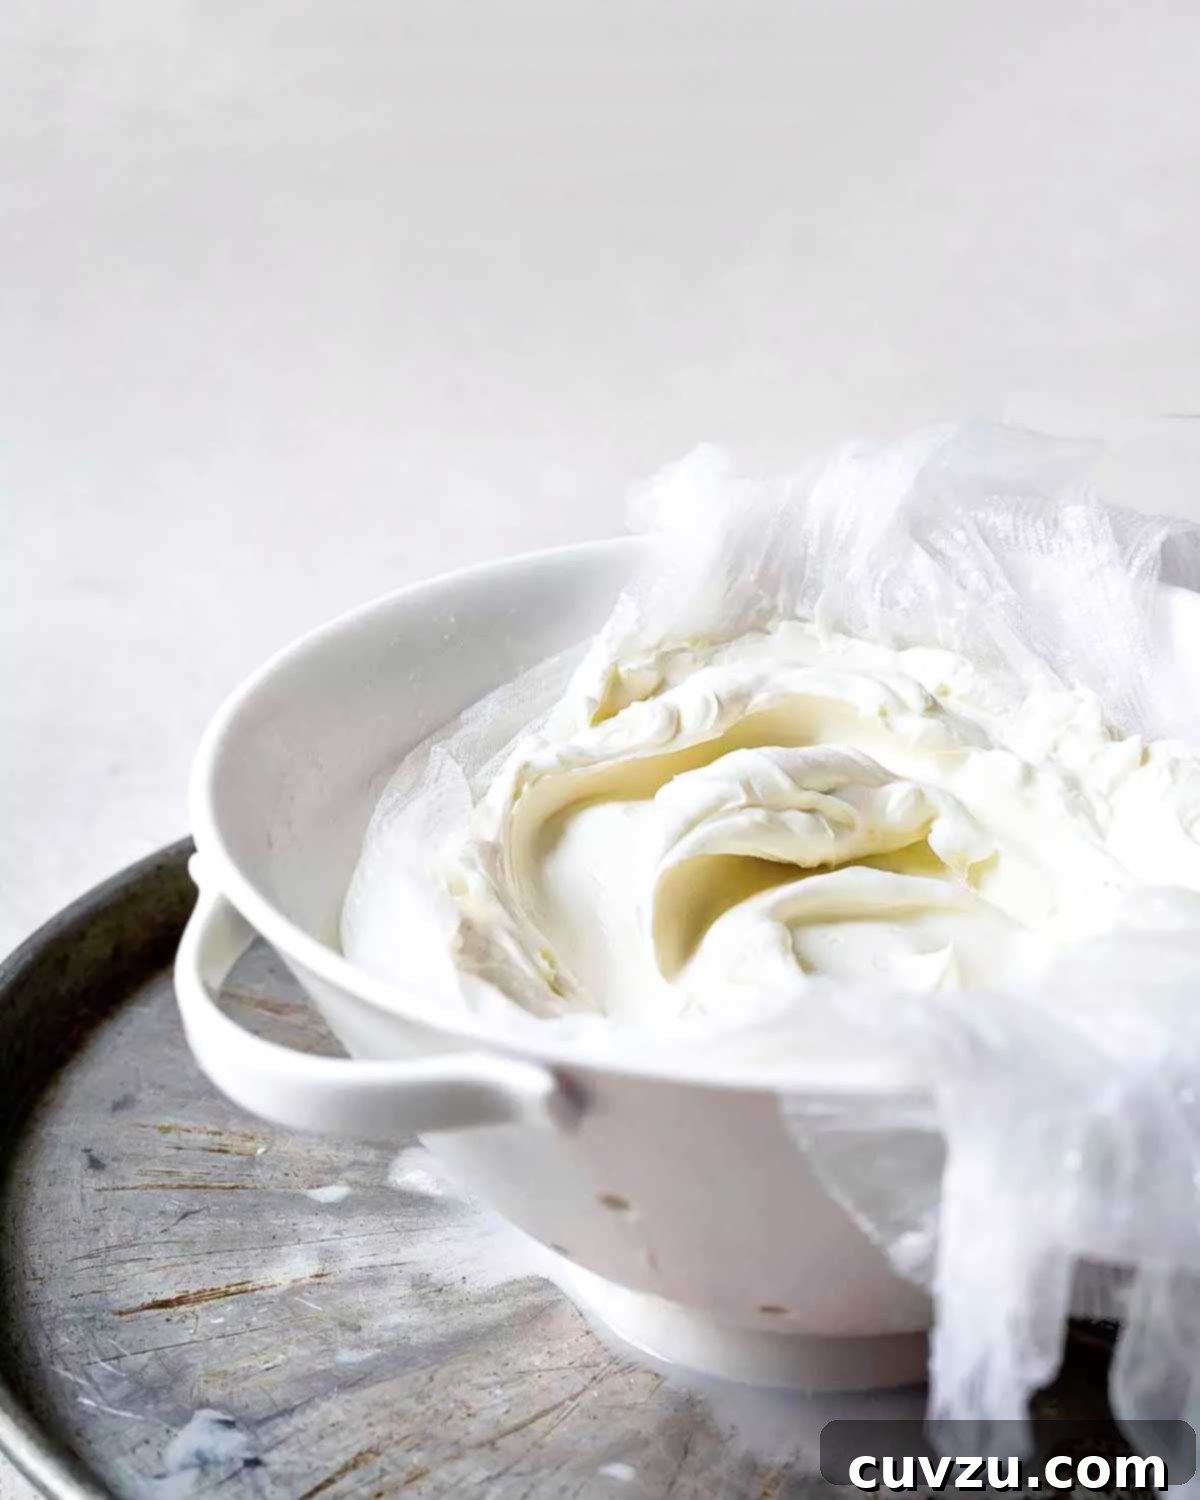
**8. Optional: Drain for Thicker Yogurt (Greek Yogurt):** After your yogurt has thoroughly chilled in the refrigerator for several hours, give it a taste test. If you desire an even thicker, creamier consistency, similar to Greek yogurt, draining is the answer. Draining removes excess whey, dramatically improving the texture, making it more dense, mellow, and extending its shelf life. Drained yogurt is also often easier for those with lactose sensitivity to digest.
To drain, carefully pour the chilled yogurt into a colander or fine-mesh strainer that has been lined with three layers of dampened cheesecloth. Place this setup over a bowl to catch the draining whey. Cover the yogurt with a plate or another cloth (this protects it, rather than presses it) and refrigerate. Allow it to drain until it achieves your preferred consistency. After about an hour, the yogurt will be noticeably thicker. For a true Greek yogurt consistency, which is thick and palate-coating, you may need to drain it for 3 to 4 hours, or even longer, depending on your initial yogurt and desired firmness. If you accidentally drain it too much, simply whisk some of the collected whey back into the yogurt until you reach your desired texture. Once drained, scrape the thick yogurt into an airtight container, cover, and refrigerate.
Remember, homemade yogurt naturally exhibits some variability from batch to batch. Unlike commercial operations with their strict controls, your home yogurt “factory” is influenced by factors such as the specific milk and culture used, subtle differences in heating and cooling, and variations in fermentation time and temperature. Embrace this experimentation! Keep notes on your methods and results over time, and you will gradually discover the perfect combination that consistently yields yogurt with the ideal texture and flavor for you.
Important Notes: Mastering Your Incubation Method
How To Choose Your Incubation Method
The single most critical factor for successful homemade yogurt is maintaining a consistent incubation temperature. Your goal is to coddle the live active cultures, keeping them within their optimal temperature range of approximately 105°F (41°C) to 115°F (46°C) for several hours. Temperatures of 118°F (48°C) or higher can be lethal to most cultures, rendering them inactive. Conversely, if the incubation temperature drops below 105°F (41°C), the culture may produce more polysaccharides, resulting in a slimy or “ropy” yogurt, or it might not set at all.
It is essential to decide on and test your incubation method *before* you start making yogurt. A simple test involves filling a jar with water heated to 115°F (46°C) and placing it in your chosen incubation spot. Monitor its temperature with an instant-read thermometer every hour or so for at least 5 hours to ensure the temperature remains within the desired range.
**Using a Yogurt-Making Appliance:** If you have an electric yogurt maker, always follow the manufacturer’s instructions. For your first use, and periodically thereafter, it’s wise to verify its internal temperature using the water-filled jar method described above. If your appliance consistently produces good yogurt, there’s no need to question its thermostat. However, if you experience inconsistent results or batches that fail to set, a malfunctioning thermostat could be the culprit.
**Creating a Warm Environment (No Appliance):** Many successful homemade yogurt makers create their own incubation setups. This requires a bit more ingenuity to maintain the target temperature for several hours.
* **Gas Oven with Pilot Light:** Some gas ovens, especially older models, can provide enough gentle warmth from a pilot light. To test this, preheat your oven to its lowest setting, then turn it off. Place your water-filled jar inside and monitor the temperature hourly for at least 5 hours. (Note: Many newer ovens lack pilot lights.)
* **Insulated Container/Cooler:** A picnic cooler partially filled with warm water (around 110-115°F / 43-46°C) can act as an effective incubator. Place your covered yogurt jars inside the warm water bath, close the cooler, and check periodically.
* **Electric Blanket or Heating Pad:** Wrap your yogurt jars in an electric blanket or place them on a heating pad set to a low setting. Use a towel between the jars and the heating element to prevent direct, excessive heat.
* **Styrofoam Container with Low-Wattage Light Bulb:** A jury-rigged Styrofoam container with a very low-wattage incandescent light bulb (like a nightlight bulb) can provide consistent warmth. Be careful to ensure proper ventilation and avoid fire hazards.
* **Warm Spots in Your Home:** A consistently warm spot, such as near a radiator (but not directly on it), in a sunny window (if the sun is reliable), or in an airing cupboard, can sometimes work.
* **Food Dehydrator:** If your food dehydrator has removable shelves and can be set to a low enough temperature (105-115°F), it can be an excellent incubator.
* **Slow Cooker:** Some people heat milk directly in a countertop slow cooker, then unplug it once the milk cools to culturing temperature. Wrapping the pot with towels can help maintain the temperature during incubation.
* **Blanket Method (Traditional):** My personal favorite, and a centuries-old method, involves insulating the yogurt jars with blankets. After filling warm jars, I wrap them in kitchen dish towels to prevent soiling. Then, I create a “nest” with blankets – one underneath, one on top, and an extra one around them if the house is cool. This creates a cozy, insulated environment that helps maintain the temperature. I typically leave this undisturbed for 4 to 5 hours before checking. If not set, I check every half hour thereafter.
Regardless of the method you choose, the golden rule of incubation is to avoid jostling or moving the yogurt. It prefers to remain undisturbed to set properly.
Troubleshooting Common Homemade Yogurt Issues
Even with the best instructions, variations can occur. Here are some common issues and how to address them:
- **Yogurt is too thin or hasn’t set:**
- **Incubation temperature was too low:** The cultures weren’t active enough. Ensure your incubation method maintains 105-115°F (41-46°C).
- **Incubation time was too short:** Give it more time. Some batches take up to 12 hours or more.
- **Starter culture wasn’t active:** Always use fresh yogurt with “live active cultures” clearly stated on the label. Avoid flavored or sweetened yogurts as starters.
- **Milk wasn’t heated enough (for thickness):** If you aimed for thicker yogurt, ensure you heated to 195°F (91°C) for the full 10 minutes.
- **Contamination:** Ensure all equipment is scrupulously clean.
- **Yogurt is slimy or ropy:**
- **Incubation temperature was too low:** This encourages different bacterial byproducts. Re-check your incubation temperature.
- **Certain starter cultures:** Some strains of bacteria naturally produce more polysaccharides, leading to a ropy texture. Try a different starter if this is a recurring issue.
- **Yogurt is too tart:**
- **Over-incubation:** The longer it ferments, the more lactic acid is produced. Next time, check for set earlier and refrigerate as soon as it’s firm enough for your liking.
- **Excessive whey separation:**
- **Over-incubation or too high temperature:** This can cause the curd to contract too much, expelling whey.
- **Undisturbed curd:** Moving the yogurt too much during incubation can also lead to separation.
- **It’s normal:** A small amount of whey is natural. You can pour it off, stir it back in (after chilling), or drain it for thicker yogurt.
Don’t be discouraged by an imperfect batch. Each attempt is a learning opportunity, and with practice, you’ll master the art of making perfect homemade yogurt!
Serving Suggestions for Your Homemade Yogurt
Once you’ve made your delicious homemade yogurt, the possibilities are endless! Here are a few ideas to enjoy your fresh creation:
- **Simple & Classic:** Enjoy it plain for a pure taste, or drizzle with a touch of honey, maple syrup, or agave nectar.
- **Fruit & Granola Parfait:** Layer with fresh berries, sliced bananas, or any fruit of your choice, topped with crunchy granola.
- **Savory Delights:** Use it as a base for dips like tzatziki, a creamy dressing for salads, or a cooling accompaniment to spicy dishes.
- **Smoothies:** Blend with your favorite fruits and a splash of milk or juice for a nutritious and refreshing beverage.
- **Baking:** Incorporate it into recipes for muffins, quick breads, or cakes for added moisture and a subtle tang.
- **Lassi:** Blend with fruit and a pinch of cardamom for a traditional Indian yogurt drink.

Adapted From
Yogurt
Buy On Amazon
Explore More with AI
Nutrition Information
Nutrition information is automatically calculated, so should only be used as an approximation.
Recipe Testers’ Reviews
Linda McElroy
I really appreciate this homemade yogurt recipe with all its helpful notes and information. Making homemade yogurt is as simple as can be, but there are many variables that can affect the final outcome, and the author really tried to cover all the bases. Let’s get to my results-—this was the BEST yogurt I’ve ever made!
What caught my attention about this recipe were two notes that I hadn’t seen in other recipes. One was to use milk powder for a thicker result. The other was the direction to heat the milk to 195°F and sustain it for 10 minutes if a thicker product is desired. In my previous attempts at making yogurt, I have ended up straining it to obtain a thicker yogurt. I don’t like doing that for a couple of reasons—you lose product and also it’s a pain.
I tested my first batch using four 1-cup canning jars and they took about 5 1/2 hours to complete. I used whole milk and instant milk powder. The incubating temperature seemed to range from 115°F to 120°F. My incubation method was to place the jars in a warm water bath in a large pot, cover it with a lid, and place it in a slightly warm oven. One step that I would recommend is to strain the milk before ladling it into jars as there’s always a bit of flotsam and jetsam. I strained the mik into a 1-quart measuring cup so that it was easy to pour into the jars. I call this a good recipe and method to follow for perfect yogurt.
Lydia Brimage
Although this homemade yogurt recipe looked intimidating because there was a lot of information to read, the recipe was in fact simple and was not particularly time-consuming.
Hands-on time was about 37 minutes, which was heating the milk up rather slowly on my electric cooker. I incubated the yogurt overnight in an airing cupboard. Total time taken was 37 minutes to heat the milk, 1 hour of cooling to about 43°C, and then overnight incubation to set the yogurt, so in total about 15 and a half hours. I opted for the thicker version of the yogurt and so heated it to 91°C for 10 minutes. I left the mix to cool for 1 hour at room temperature. I checked the incubated yogurt after 4 hours but it had not set at all, and I thought perhaps it would not set, but by the next day it was smooth and set. Total incubation time was about 13 hours.
The yogurt was softly set, more runny underneath the surface than on top, and so perhaps it could have been left to set for longer. The yogurt alone tasted quite mild and not at all bitter as some homemade yogurt I’ve made in the past. I made a fruit compote with frozen berries and sugar and stirred this through the finished yogurt. The texture was really smooth and without lumps. I think the recipe gives interesting details on the process of making yogurt.