Festive Peppermint Chocolate Cake: Your Ultimate Holiday Baking Guide
Indulge in the spirit of the season with this spectacular Peppermint Chocolate Cake. This show-stopping dessert features three tender, incredibly moist layers of rich chocolate cake, generously filled and frosted with a dreamy, vibrant peppermint buttercream, studded with delightful peppermint pieces. Crowned with a luxurious chocolate ganache drip, this cake is not just a dessert, but a centerpiece, perfect for transforming any Christmas party or holiday gathering into an unforgettable celebration.

Why This Chocolate Peppermint Cake Will Be Your New Holiday Favorite
The enchanting combination of peppermint and chocolate is a quintessential flavor pairing that instantly evokes the magic of the holiday season. It’s a taste that brings warmth, joy, and a touch of festive nostalgia. Beyond its irresistible flavor, there are countless reasons why this chocolate peppermint cake will quickly become a cherished tradition in your home:
- Effortless Elegance: Don’t let its impressive appearance fool you; this cake is surprisingly simple to create. The foundation of this dessert is my go-to, incredibly easy chocolate cake recipe, designed for minimal fuss and maximum flavor. It employs a straightforward mixing method that brings the batter together in mere minutes, making it accessible even for novice bakers.
- Unrivaled Moisture: Say goodbye to dry, crumbly cakes! The secret to the exceptionally moist chocolate cake layers lies in the strategic use of vegetable oil. This ingredient ensures a supremely tender crumb that remains delightful for days, providing an unbeatable texture that melts in your mouth with every bite.
- A Symphony of Festive Flavors: The marriage of rich, dark chocolate and cool, invigorating peppermint is a match made in culinary heaven. It perfectly captures the essence of classic holiday treats like peppermint bark, transporting you back to cherished childhood memories. This flavor profile isn’t just delicious; it’s an experience that truly gets you into the holiday spirit.
- Visually Stunning & Impressive: Prepare for compliments! Not only will the exquisite taste of this cake leave your guests asking for the recipe (or where you bought it!), but its striking appearance is also guaranteed to impress. The vibrant pop of red from the crushed peppermint pieces against the dark chocolate and white frosting creates a beautiful, festive contrast that makes it a true showstopper at any holiday table.
- Perfect for Any Occasion: While it screams “Christmas,” this cake is versatile enough for any winter celebration, birthday, or even just a cozy evening in. Its festive charm and delightful taste make it a crowd-pleaser for all ages.

Essential Ingredients for Your Peppermint Chocolate Masterpiece
Crafting this delectable chocolate peppermint cake requires a few key ingredients, each playing a vital role in achieving its perfect balance of flavor and texture. Below is a comprehensive list, but for precise measurements and quantities, always refer to the detailed recipe card at the end of this article.
For the Decadent Chocolate Cake Layers:
- All-Purpose Flour: The structural backbone of our cake. Proper measurement is crucial; I highly recommend using a food scale for accuracy. Too much flour is a common culprit for dry cakes.
- Granulated Sugar: Beyond sweetness, sugar contributes significantly to the cake’s tender crumb and helps retain moisture, ensuring a soft, delightful texture.
- Natural Unsweetened Cocoa Powder: This provides the deep, rich chocolate flavor. While natural unsweetened cocoa is ideal for this recipe, Dutch-processed cocoa powder can be used, though it might result in a slightly different rise and color due to its different acidity level.
- Baking Soda: Our primary leavening agent, baking soda reacts with the acidic cocoa powder to create a beautiful rise and contributes to the cake’s tender, airy texture.
- Salt: A pinch of salt is transformative, balancing the sweetness, intensifying the chocolate flavor, and preventing the cake from tasting bland. Never skip this!
- Large Eggs: Eggs provide structure, richness, and moisture. Ensure they are large in size for consistent results, as medium or extra-large eggs can alter the batter’s consistency.
- Milk (2% recommended): Milk adds moisture and contributes to a rich, soft crumb. 2% milk works wonderfully, but whole milk or even buttermilk can be substituted for slight variations in richness and tang.
- Vegetable Oil: This is a game-changer for moisture. Vegetable oil ensures the cake layers are exceptionally moist and tender. Do not substitute with butter, as it will significantly change the texture and result in a less moist cake.
- Vanilla Extract: A universal flavor enhancer, vanilla complements and deepens the chocolate notes beautifully.
- Hot Water: Crucial for “blooming” the cocoa powder. Mixing cocoa with hot water helps it dissolve fully, intensifying its flavor and creating a richer, more profound chocolate taste in the cake.
For the Silky Peppermint Buttercream:
- Unsalted Butter (Room Temperature): The foundation of any great buttercream. Starting with softened, room-temperature butter is essential for a smooth, lump-free frosting. Cold butter will result in a stiff, chunky frosting.
- Powdered Sugar (Confectioners’ Sugar): Provides sweetness and structure, giving the buttercream its volume and ideal consistency for spreading and piping. Adjust the amount to your preferred sweetness, but be mindful that changes can affect the frosting’s consistency.
- Heavy Cream: Essential for achieving a creamy, luscious buttercream. It helps adjust the frosting’s consistency, allowing you to thin it as needed for perfect spreadability and pipe-ability. Its high fat content ensures a rich and smooth finish.
- Vanilla Extract and Peppermint Extract: The star flavor duo. The vanilla extract provides a subtle sweetness that wonderfully balances the strong peppermint, preventing it from tasting artificial or “toothpaste-y.” Use high-quality extracts for the best flavor.
- Salt (Optional but Recommended): A tiny pinch of salt cuts through the sweetness of the powdered sugar, amplifying the overall flavor of the buttercream and making it more complex and delicious.
- Peppermint Pieces (Crushed Candy Canes): These delightful additions provide a wonderful crunch and an extra burst of peppermint flavor, both between the cake layers and as a festive decoration. They also add a beautiful pop of red color.
For the Irresistible Chocolate Ganache Drip:
- Semi-Sweet Chocolate Chips: The base for our glossy ganache. Semi-sweet chocolate offers a balanced flavor. Dark or milk chocolate chips can also be used, but note that they may slightly alter the ganache’s consistency and sweetness.
- Heavy Whipping Cream: When combined with hot chocolate, heavy cream creates a luxurious, smooth ganache. Its high fat content is key for a creamy texture. Adjusting the cream quantity will thicken or thin the ganache as desired. Substituting with milk or other liquids will result in a much thinner consistency.
Step-by-Step Guide: Crafting Your Chocolate Peppermint Cake
Creating this stunning chocolate peppermint cake is a delightful process, broken down into manageable steps. This overview provides the essential actions, but remember to consult the full recipe card below for detailed measurements, temperatures, and timing to ensure your cake turns out perfectly every time.
Part 1: Baking the Perfect Chocolate Cake Layers
- Prepare for Baking: Begin by preheating your oven to 300°F (148°C). Take three 8-inch round cake pans and line their bottoms with parchment paper circles. Lightly grease the sides of the pans to prevent sticking, ensuring your cakes release cleanly.
- Combine the Dry Wonders: In a large mixing bowl, whisk together the all-purpose flour, granulated sugar, cocoa powder, baking soda, and salt. Ensure these dry ingredients are thoroughly combined and free of lumps for an even bake.
- Integrate the Wet Ingredients: To the dry mixture, add the large eggs, milk, and vegetable oil. Mix these wet ingredients into the dry until they are just combined. Be careful not to over-mix at this stage, as it can lead to a tough cake.


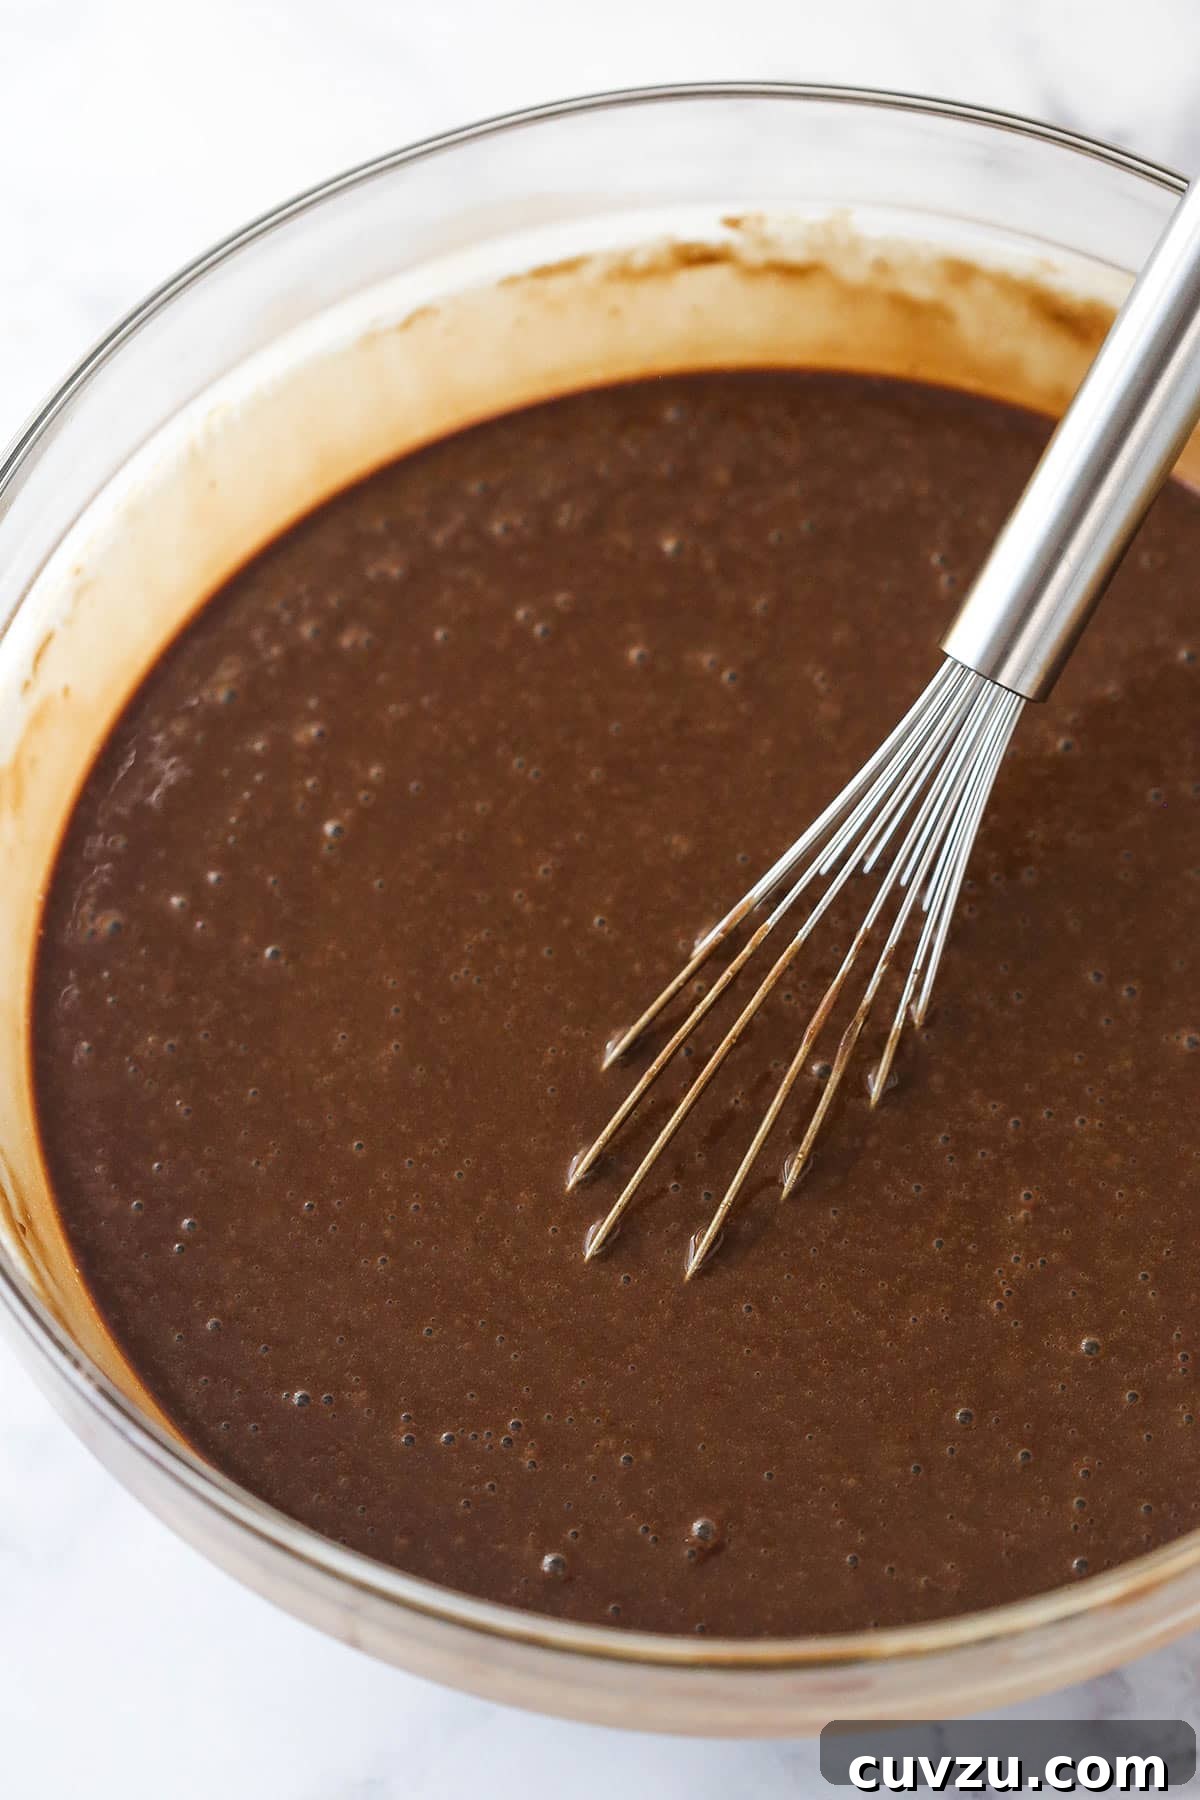
- Bloom the Cocoa: In a separate small bowl, combine the vanilla extract with the hot water. Pour this mixture into your cake batter. Stir gently until everything is well incorporated. Don’t be alarmed; the batter will be noticeably thin at this point – this is perfectly normal and contributes to the cake’s incredible moisture.
- Bake to Perfection: Divide the thin batter evenly among your three prepared cake pans. Transfer them to the preheated oven and bake for approximately 30-33 minutes, or until a wooden toothpick inserted into the center of a cake comes out with only a few moist crumbs attached.
- Cooling Process: Once baked, remove the cakes from the oven and allow them to cool in their pans for about 10 minutes. This helps them firm up before transferring. After 10 minutes, carefully invert them onto wire cooling racks to cool completely. Patience is key here; warm cakes will melt your frosting!

Part 2: Crafting the Peppermint Buttercream and Assembling Your Cake
- Begin the Buttercream: In a large mixing bowl with an electric mixer, beat the room-temperature unsalted butter on medium speed until it is light, fluffy, and smooth. This typically takes 3-5 minutes.
- First Sugar Addition: Gradually add about half of the powdered sugar to the butter, mixing on low speed until fully incorporated. Once combined, increase speed to medium and beat until smooth and creamy.
- Flavor Infusion: Add 3 tablespoons of heavy cream, along with the vanilla extract, peppermint extract, and a pinch of salt. Beat on medium speed until the flavors are well distributed and the mixture is smooth.
- Final Sugar & Consistency: Slowly add the remaining powdered sugar, mixing on low until combined, then beat on medium until the buttercream is light, fluffy, and smooth. If the frosting feels too thick, add additional heavy cream, one tablespoon at a time, until you reach your desired consistency.
- Prepare Cake Layers: Using a large serrated knife, carefully level the tops of your cooled cake layers by gently removing any domes. This ensures your cake stacks perfectly even and stable.
- First Layer & Filling: Place the first leveled cake layer onto your desired serving plate or a sturdy cardboard cake round. Spread an even layer of about 1 cup of peppermint buttercream over the top.
- Peppermint Crunch: Sprinkle 2 tablespoons of crushed peppermint pieces generously over the buttercream. Gently press them into the frosting. Then, spread a very thin layer of buttercream over a few spots of the peppermint pieces; this helps the next cake layer adhere securely.
- Stacking & Repeating: Carefully place the second cake layer on top of the first, aligning it. Repeat the filling process: spread another cup of buttercream, sprinkle with the remaining 2 tablespoons of peppermint pieces, and add a thin top layer of frosting.
- Final Layer & Crumb Coat: Gently place the third and final cake layer on top. Apply a thin, even “crumb coat” of buttercream all over the top and sides of the entire cake. This traps any loose crumbs and creates a smooth base for your final frosting layer. Chill the cake in the refrigerator for 15-20 minutes to set the crumb coat.
- Final Frosting: Once the crumb coat is firm, apply the remaining buttercream to the outside of the cake, creating a smooth and elegant finish. Refer to my guide on how to frost a smooth cake for expert tips.


- Prepare the Chocolate Ganache: In a medium heatproof bowl, place your semi-sweet chocolate chips. In a small saucepan, heat the heavy whipping cream just until it begins to boil, then immediately pour it over the chocolate chips. Allow the mixture to sit undisturbed for 2-3 minutes to let the chocolate melt.
- Whisk to Perfection: After waiting, gently whisk the chocolate and cream mixture together until it is completely smooth, glossy, and emulsified. If it appears too thick, you can add a tiny bit more warm cream; if too thin, let it cool slightly.
- The Signature Drip: Once the ganache is at a pourable but not-too-thin consistency, carefully drizzle it around the edge of the chilled cake, allowing it to drip naturally down the sides. For precision and ease, I highly recommend using a squeeze bottle. Consult my post on How to Make a Chocolate Drip Cake for detailed guidance.
- Final Decorations: Allow the chocolate ganache to set and firm up slightly (this may take 10-20 minutes in a cool room or briefly in the fridge). Using the remaining peppermint buttercream and a decorative piping tip (such as Ateco tip 847 for beautiful shells), pipe a border or rosettes around the top edge of the cake. Finish by sprinkling additional crushed peppermint pieces over the top for a final festive flourish.

Expert Tips for a Flawless Chocolate Peppermint Cake
Achieving a perfectly textured, incredibly flavorful, and beautifully presented chocolate peppermint cake is easier than you think with these expert tips and tricks. Follow these guidelines, and you’ll soon master the art of layer cake baking:
- Avoid Over-Mixing the Batter: When combining your wet and dry ingredients for the cake, mix only until just combined. Over-mixing can over-develop the gluten in the flour, leading to a dense, tough cake rather than the desired light and moist crumb.
- Ensure Complete Cooling: This is a non-negotiable step! Your cake layers must be completely cooled before you attempt to assemble and frost them. Even slightly warm cakes will cause your beautiful buttercream to melt and slide right off, turning your masterpiece into a messy disaster.
- Level Up Your Layers: Don’t skip the step of removing the domes from your cake layers using a serrated knife. Level layers are crucial for a stable, evenly stacked cake that looks professionally made. Uneven layers can cause your cake to lean or collapse.
- Master Buttercream Consistency: The success of your frosting hinges on its consistency. If it’s too stiff, it will be difficult to spread smoothly; if it’s too runny, it won’t hold its shape and will slide off the cake. Learning to adjust the amounts of powdered sugar and heavy cream is vital. Refer to my guide on achieving the right frosting consistency to confidently adapt your buttercream.
- Frost Like a Pro: For that impeccably smooth finish, consider reviewing my detailed post on how to frost a smooth cake with buttercream before you begin. It covers essential techniques that will elevate your cake decorating skills.
- Perfect Your Chocolate Drip: The chocolate ganache drip adds a touch of professional elegance. For the prettiest, most picture-perfect peppermint chocolate cake, I highly recommend checking out my comprehensive guide on How to Make a Chocolate Drip Cake. Using a squeeze bottle for drizzling makes the process much easier and more precise.
- Quality Extracts Matter: For the best peppermint flavor that’s fresh and vibrant, not artificial, invest in high-quality peppermint extract. A little goes a long way, so start with the recommended amount and adjust to your taste.

Optimal Storage for Your Peppermint Chocolate Cake
To ensure your delightful peppermint chocolate cake remains fresh and delicious for as long as possible, proper storage is key. While it can tolerate room temperature for a short period, refrigeration is generally recommended for longevity and safety. For the absolute best flavor and texture, always aim to serve this cake at room temperature or only slightly cool.
- Refrigerator Storage: After its initial debut, store your cake in an airtight cake carrier to protect it from drying out and absorbing other fridge odors. If a carrier isn’t available, wrap the cake gently with a couple of layers of plastic wrap. For decorated cakes, you can insert a few toothpicks into the top to tent the plastic wrap away from the frosting. Alternatively, if you’ve already sliced into the cake, arrange individual slices in a single layer within an airtight container. Stored correctly, this peppermint-chocolate dream will remain fresh and enjoyable for up to 5 days in the refrigerator.
- Freezer Storage: The components of this cake are quite freezer-friendly, allowing you to prepare ahead or preserve leftovers.
- Individual Layers/Buttercream: You can confidently freeze the un-frosted cake layers and the buttercream separately for up to 3 months. Wrap cooled cake layers tightly in plastic wrap, then aluminum foil. Store buttercream in an airtight container. Thaw in the refrigerator overnight before assembling.
- Fully Frosted Cake: While I typically advise against freezing fully frosted cakes due to potential texture changes, this particular cake holds up surprisingly well. To freeze the entire cake, place it in the freezer for a couple of hours until the frosting is firm to the touch. Then, wrap the whole cake tightly in a double layer of plastic wrap, followed by a layer of aluminum foil. This helps prevent freezer burn.
- Leftover Slices: For individual slices, wrap each piece tightly in plastic wrap, then place them in a single layer in an airtight freezer-safe container.
Store the cake or slices in the freezer for up to 3 months. When ready to enjoy, allow the cake or slices to thaw slowly in the refrigerator overnight. For optimal taste and texture, bring it to room temperature for about 30-60 minutes before serving. Note that condensation during thawing might slightly affect the integrity of the peppermint pieces within the cake layers, but the flavor will remain superb.
Explore More Festive Peppermint Desserts
As the holiday season approaches, there’s no better time to embrace the delightful and refreshing flavor of peppermint! If this chocolate peppermint cake has sparked your craving for more minty treats, here are some of my other favorite recipes guaranteed to bring joy to your taste buds and festive cheer to your kitchen:
- Peppermint Bark Cookies: A delightful fusion of classic holiday bark and a chewy cookie.
- Homemade Peppermint Patties: Soft, minty centers enrobed in rich dark chocolate.
- No-Bake Peppermint Cheesecake: A cool, creamy, and incredibly easy holiday indulgence.
- Chocolate-Dipped Peppermint Chocolate Sugar Cookies: Double the chocolate, double the peppermint, double the fun!
- Classic Peppermint Sugar Cookies: Simple, buttery, and perfectly minty.
- Peppermint Brownie Ice Cream Cake: The ultimate frozen treat for peppermint lovers.
- Peppermint Chip Layer Cake: Another festive layer cake option with delightful peppermint chips.
- Peppermint Chocolate Thumbprint Cookies: Small, sweet, and bursting with holiday flavor.
Peppermint Chocolate Cake
No reviews
- Author: Lindsay Conchar
- Prep Time: 1 hour 15 minutes
- Cook Time: 30 minutes
- Total Time: 1 hour 45 minutes
- Yield: 12–14 slices
- Category: Dessert
- Method: Oven
- Cuisine: American
Description
This Peppermint Chocolate Cake is made with three layers of moist chocolate cake that are filled and frosted with peppermint buttercream and peppermint pieces! It’s finished off with a beautiful chocolate drip and is perfect for Christmas!
Ingredients
Chocolate Cake Layers
- 2 cups (260g) all-purpose flour (measured correctly)
- 2 cups (414g) sugar
- 3/4 cup (85g) natural unsweetened cocoa powder
- 2 tsp baking soda
- 1 tsp salt
- 2 large eggs
- 1 cup (240ml) milk
- 1 cup (240ml) vegetable oil
- 1 1/2 tsp vanilla extract
- 1 cup (240ml) hot water
Peppermint Buttercream
- 2 1/2 cups (560g) unsalted butter, room temperature
- 10 cups (1150g) powdered sugar
- 3–6 tbsp (45ml-90ml) heavy cream
- 1 tsp vanilla extract
- 1 tbsp peppermint extract
- Pinch of salt
- ¼ cup peppermint pieces, plus additional for decorating
Chocolate Ganache
- 3 oz (1/2 cup | 85g) semi-sweet chocolate chips
- 1/4 cup heavy whipping cream
Instructions
Make the Cakes
- Preheat oven to 300°F (148°C). Prepare three 8-inch cake pans with parchment paper circles in the bottom, and grease the sides.
- Add flour, sugar, cocoa powder, baking soda and salt to a large bowl and whisk together.
- Add the eggs, milk and vegetable oil to the dry ingredients and mix until well combined.
- Add vanilla to the hot water, then pour into the batter. Mix until well combined. The batter will be very thin.
- Divide batter evenly between cakes pans and bake for 30-33 minutes, or until a toothpick comes out with a few crumbs.
- Remove cakes from oven and allow to cool for about 10 minutes, then remove to cooling racks to cool completely.
Make the Buttercream
- To make the buttercream, beat the butter until smooth.
- Add half of the powdered sugar and mix until well combined and smooth.
- Add 3 tablespoons of heavy cream, vanilla and peppermint extracts and salt and mix until well combined and smooth.
- Slowly add the remaining powdered sugar and mix until well combined smooth. Add additional heavy cream, as needed to get the right consistency of frosting.
To Assemble the Cake
- To put the cake together, use a large serrated knife to remove the domes from the top of the cakes so that they’re flat. These cakes don’t have a large dome, but I like to make sure they’re completely flat.
- Place the first cake on a serving plate or a cardboard cake round.
- Spread about 1 cup of buttercream evenly on top of the cake. Sprinkle two tablespoons of peppermint pieces over the top of the buttercream and press down into the frosting a bit. Spread a super thin layer of buttercream over the peppermint pieces in a few places to help the next cake layer have something to stick to.
- Add the second layer of cake, another cup of buttercream and the remaining 2 tablespoons of peppermint pieces.
- Top the cake with the remaining layer and frost the outside of the cake. Refer to my tutorial for frosting a smooth cake, if needed.
- To make the chocolate ganache, add the chocolate chips to a medium sized bowl.
- Heat the heavy whipping cream just until it begins to boil, then pour it over the chocolate chips. Allow it to sit for 2-3 minutes, then stir until smooth.
- Drizzle the chocolate ganache around the edge of the cake. I like to use a squeeze bottle for drizzling around the edges. (See my tips on making a chocolate drip cake.)
- Allow the ganache to firm up a bit, then pipe shells with the remainder of the frosting around the top edge of the cake. I used Ateco tip 847. Decorate with additional peppermint pieces, if desired.
- Store cake in an air-tight container. It should be fine at room temperature for up to 24 hours, then should be refrigerated. Serve at room temperature or only slightly cool, not cold. The cake is best if eaten within 4-5 days.
Nutrition
- Serving Size: 1 Slice
- Calories: 976
- Sugar: 138.1 g
- Sodium: 490.3 mg
- Fat: 43.3 g
- Carbohydrates: 151.5 g
- Protein: 4.2 g
- Cholesterol: 96.1 mg