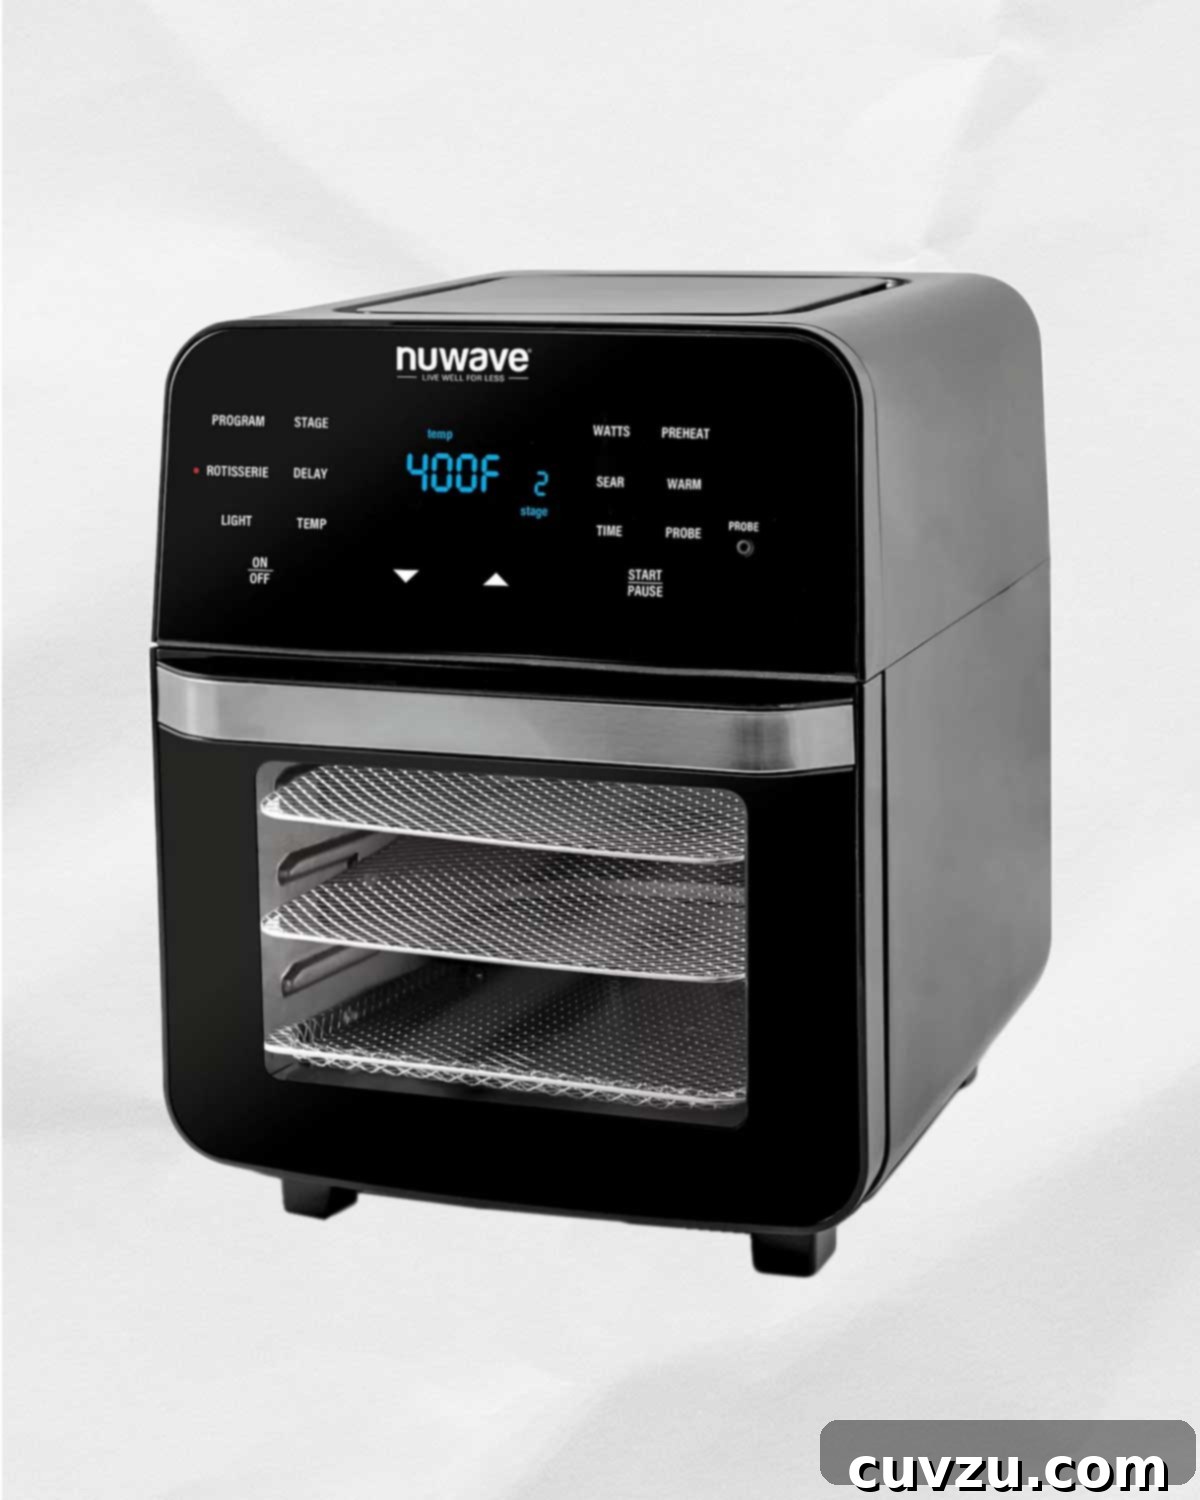
Embarking on a culinary adventure can sometimes mean stepping out of your comfort zone and embracing new kitchen technology. For many, the air fryer has represented just such a leap. This is the story of one of our recipe testers, who, after years of skepticism, finally decided to give this ubiquitous appliance a try. Here’s what unfolded in her kitchen and how it fundamentally reshaped her approach to everyday cooking.
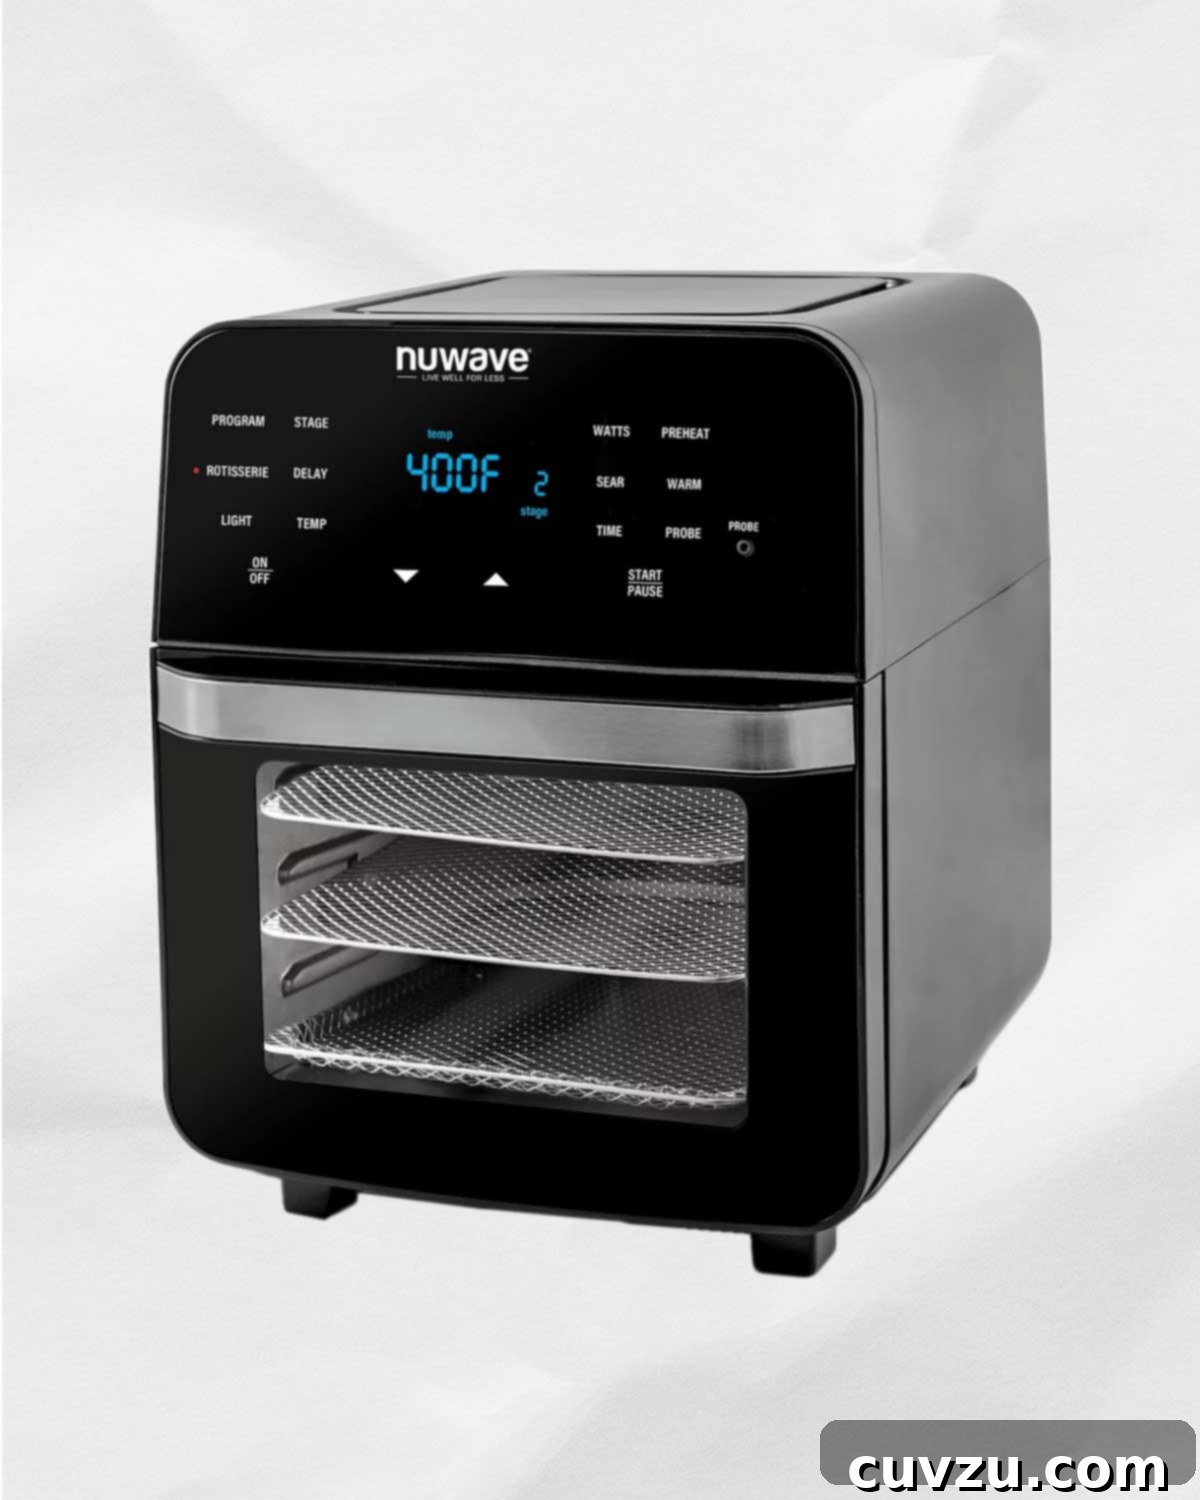
My First Air Fryer Experience: A Beginner’s Journey to Crispy Delights and Culinary Confidence
For years, the phrase “air fryer” seemed inescapable. It permeated every corner of the culinary world, from glossy cookbook covers and bustling food websites to endless social media feeds and even the checkout aisle of grocery stores. Honestly, I initially dismissed it as just another fleeting kitchen fad, akin to those single-purpose gadgets that promise revolution but quickly gather dust. Yet, the air fryer proved to be different. My friends were not only still raving about theirs but actively swapping recipes and ingenious tips. My own mother, usually resistant to new kitchen tech, had even put an air fryer at the top of her birthday wish list. And me? Well, until very recently, I harbored a profound ignorance about what an air fryer actually was, let alone how it worked. I was perpetually stuck in a state of confusion, pondering, “Do they truly fry, or do they simply cook with air?”
Despite my cluelessness, curiosity eventually got the better of me. So, when the opportunity arose to finally test an air fryer, I seized it without hesitation. The time had come to unravel this modern kitchen enigma and catch up with the culinary zeitgeist. With absolutely zero prior knowledge of air fryers or the art of air frying, I dedicated myself to extensive online research while eagerly awaiting the arrival of my chosen unit: the NuWave Brio 14Qt Digital Air Fryer with Probe. This preparatory phase proved invaluable, laying the groundwork for what would become a surprising and delightful transformation in my cooking habits.
Demystifying the Air Fryer: What Is It, and How Does It Work?
Before delving into the delicious outcomes, it’s crucial to address the fundamental question that plagued me for so long: what exactly is an air fryer? And please, no laughter—many of us, even seasoned home cooks, still don’t fully grasp the basic mechanics of this popular appliance. My personal confession: before I started my research, the term “air fryer” somehow always conjured images of a greasy “deep fryer” in my mind. The “air” part felt like a confusing, secondary detail, and since I wasn’t particularly keen on deep-frying, I had largely dismissed the entire category. I couldn’t have been more mistaken.
In essence, an air fryer is a compact, countertop appliance that functions much like a miniature convection oven. It’s not designed for deep-frying in the traditional sense, which involves submerging food in a vat of hot oil. Instead, air fryers achieve a similar crispiness and browning effect using significantly less oil. The magic happens through a powerful heating element, typically an electric coil, combined with a high-speed fan. This fan rapidly circulates intensely hot air around the food, creating a superheated environment that mimics the effects of deep-frying or roasting. This consistent, even distribution of heat ensures that every surface of the food is cooked thoroughly and develops a crispy, golden-brown exterior.
The minimal amount of oil often used with air-fried foods plays a critical role. When applied to food, this small amount of oil is rapidly heated and atomized, coating the food in a fine mist that contributes to the signature crispy texture. Simultaneously, steam released from the food’s natural moisture helps to cook items from the inside out, ensuring they remain tender while achieving that coveted crunch on the outside. This ingenious method not only yields delectable results but also significantly reduces the amount of fat in your meals, making for a healthier cooking option. Furthermore, the contained cooking environment and reduced oil usage translate directly into a much easier cleanup process, a benefit any home cook can appreciate.
Understanding Your Options: The Two Main Types of Air Fryers
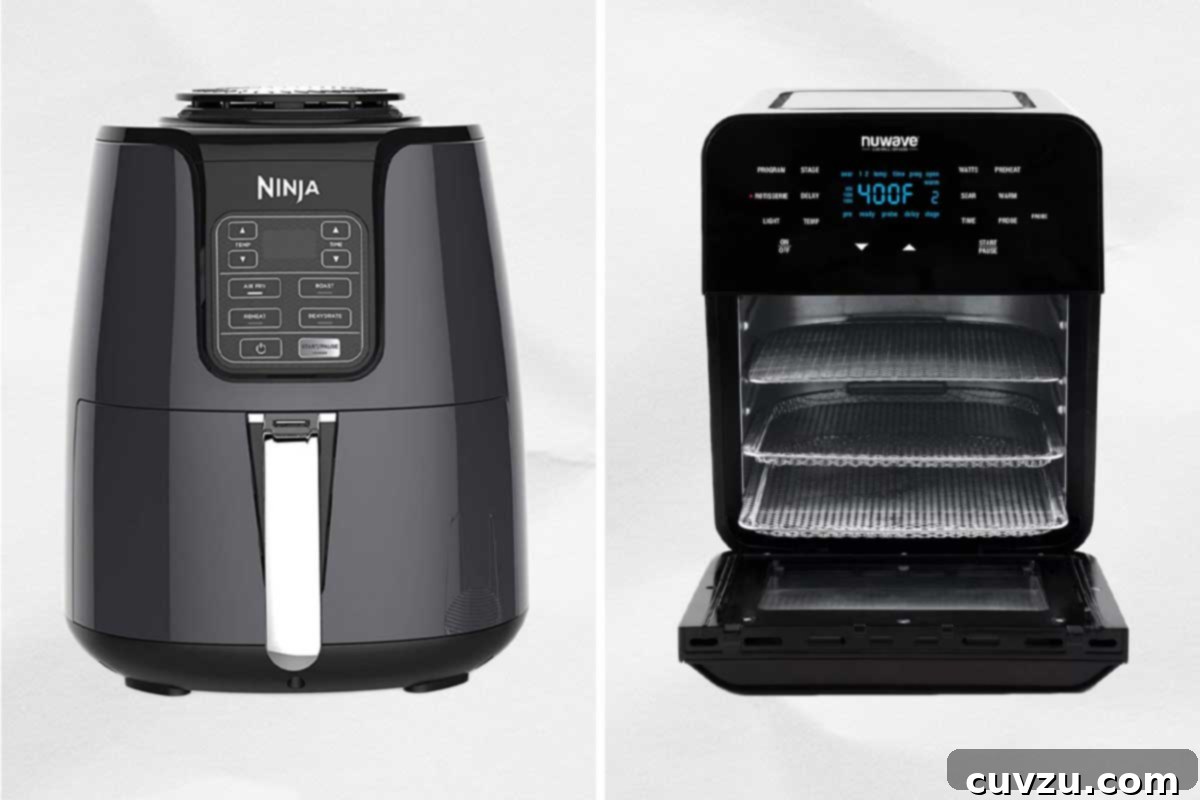
Upon diving into the world of air fryers, I quickly discovered that the market generally offers two primary types, each catering to different culinary needs and kitchen setups. Understanding these distinctions is key to selecting the right appliance for your home.
The most common design is the **basket-type air fryer**. These models are characterized by a pull-out drawer containing a perforated basket where food is placed for cooking. Their compact, often egg-shaped or cylindrical form factor makes them ideal for smaller kitchens or for individuals primarily interested in straightforward air frying tasks. They excel at producing crispy fries, chicken nuggets, and other quick-snack items. While efficient for dedicated air frying, their capacity is typically limited, and their functionality is largely focused on this single cooking method. If your primary goal is to achieve quick, crispy results for smaller portions, a basket-type air fryer might be your perfect match.
For those seeking greater versatility and more expansive cooking capabilities, the **multi-function air fryer** is an excellent choice. These units often resemble compact toaster ovens or even mini convection ovens, featuring a hinged door and internal racks rather than a pull-out basket. Their design allows for a wider array of functions beyond just air frying, including rotisserie cooking, grilling, roasting, dehydrating, and even baking. Multi-function air fryers generally boast a larger internal capacity, making them suitable for cooking bigger batches or entire meals. They frequently come equipped with advanced digital controls, preset functions for popular dishes, and an impressive range of accessories to enhance their utility. For cooks who desire a single appliance that can tackle multiple cooking styles and offer greater flexibility, the multi-function model is a game-changer.
The unit I tested, the NuWave Brio 14Qt Digital Air Fryer with Probe, falls squarely into the multi-function category. Its generous 14-quart capacity and comprehensive feature set truly impressed me. It arrived with an astounding 100 preset functions, simplifying cooking immensely. For instance, preparing frozen onion rings became a breeze. I simply selected Preset #78, placed 12 ounces of frozen onion rings inside, and the machine automatically knew to air fry them for 8 minutes at 400°F (200°C). The accompanying guide provided helpful recommendations for quantities and noted that minor adjustments might be necessary to achieve desired crispiness, but the starting point was always reliable.
A key differentiator for multi-function air fryers like the NuWave Brio is their interior configuration. Instead of a single basket, they typically feature multiple stainless steel racks, a drip plate to catch any oils, and a suite of specialized accessories. My NuWave Brio came fully equipped with a reversible Grill/Griddle plate, a stainless steel Rotisserie Skewer (perfect for whole chickens!), a stainless steel Rotisserie Basket (ideal for tumbling vegetables or delicate fish), and a stainless steel Roasting Drum (fantastic for achieving perfectly roasted nuts or even homemade popcorn). Beyond these, additional accessories such as baking pans and silicone cups can be purchased, further expanding its culinary prowess. This level of versatility truly makes it a powerhouse appliance in any kitchen.
While I haven’t yet experienced a basket-type air fryer, my time with the NuWave Brio was so transformative and positive that I formed an almost affectionate bond with it. I even named her Olivia. Yes, we’re on a first-name basis. That’s how much I’ve come to treasure her presence in my kitchen.
Unlocking Culinary Possibilities: What Can You Cook in an Air Fryer?

With Olivia cleaned and her manual thoroughly devoured, it was finally time to dive into the practical side of air frying. Armed with a healthy dose of beginner’s caution and zero practical skills, I started slowly, relying on the recipes provided in the cookbook that accompanied the air fryer. My inaugural dishes were Air-Fried Tortilla Chips, followed by Citrus Green Beans. These recipes were ideal for a novice, featuring minimal ingredients and straightforward instructions.
For the tortilla chips, the recipe guided me to preheat the machine, set the temperature to 390°F (200°C), and cook for 4 minutes. The controls of the NuWave Brio proved remarkably intuitive. I prepped the tortillas, lightly oiled them, and then navigated the digital panel:
- ON/OFF button
- LIGHT button (because I absolutely wanted to watch the magic unfold!)
- PREHEAT button
- UP ARROW until the display showed 390°F
- START/PAUSE button
- TIME button
- DOWN ARROW until the timer read 4 minutes (it defaults to 15 minutes)
Olivia began preheating, helpfully beeping once she reached the target temperature. I opened the door, carefully placed the tortillas inside, and closed it. The air fryer automatically resumed cooking, and the timer began its countdown. Four minutes later, the unit powered off, signaling completion. I retrieved the perfectly crisped tortilla chips, seasoned them to my liking, and voilà! Easy, crunchy, and customized chips, fresh from the fryer. I was genuinely surprised and delighted by how user-friendly Olivia’s controls were.
Encouraged by my initial successes, I expanded my repertoire. I efficiently warmed up various frozen prepared foods, including pizza puffs and egg rolls, achieving a crispiness far superior to microwave reheating. I also experimented with simple from-scratch recipes like crisped chickpeas, which became an instant favorite. These quick, easy victories significantly elevated our family’s snacking game.
Next on the menu were homemade chicken wings and garlic bread. Both were resounding hits. The chicken wings were absolutely delicious, tender on the inside with a fantastic crispy skin. I did find myself adjusting the cooking time slightly, adding a minute here and there until they reached our preferred level of crispiness, but this flexibility was a testament to the air fryer’s adaptability. The garlic bread was an impromptu culinary improvisation one evening. I sliced two hoagie rolls, lightly “toasted” them in Olivia for 2 minutes at 350°F (175°C), then pulled them out, rubbed them with fresh garlic, slathered them with butter, and returned them to the air fryer. Through the viewing window, I watched until the tops were beautifully golden and bubbly—a simple, yet profoundly satisfying creation.
However, my journey wasn’t without its missteps. I must admit, with a blush of shame, that I completely ruined two pieces of salmon. Not just ruined, but utterly demolished them. They emerged dry beyond belief, practically on the verge of turning to dust. It’s embarrassing to recount, but it was a crucial part of my learning curve. In my enthusiasm, I completely forgot to adjust down the time and temperature from the conventional oven recipe, a caution explicitly highlighted in the instruction manual. I was so disheartened by this first major fail with Olivia. But my husband, ever the optimist, simply chuckled and asked, “So, what are we ordering on our pizza tonight?”
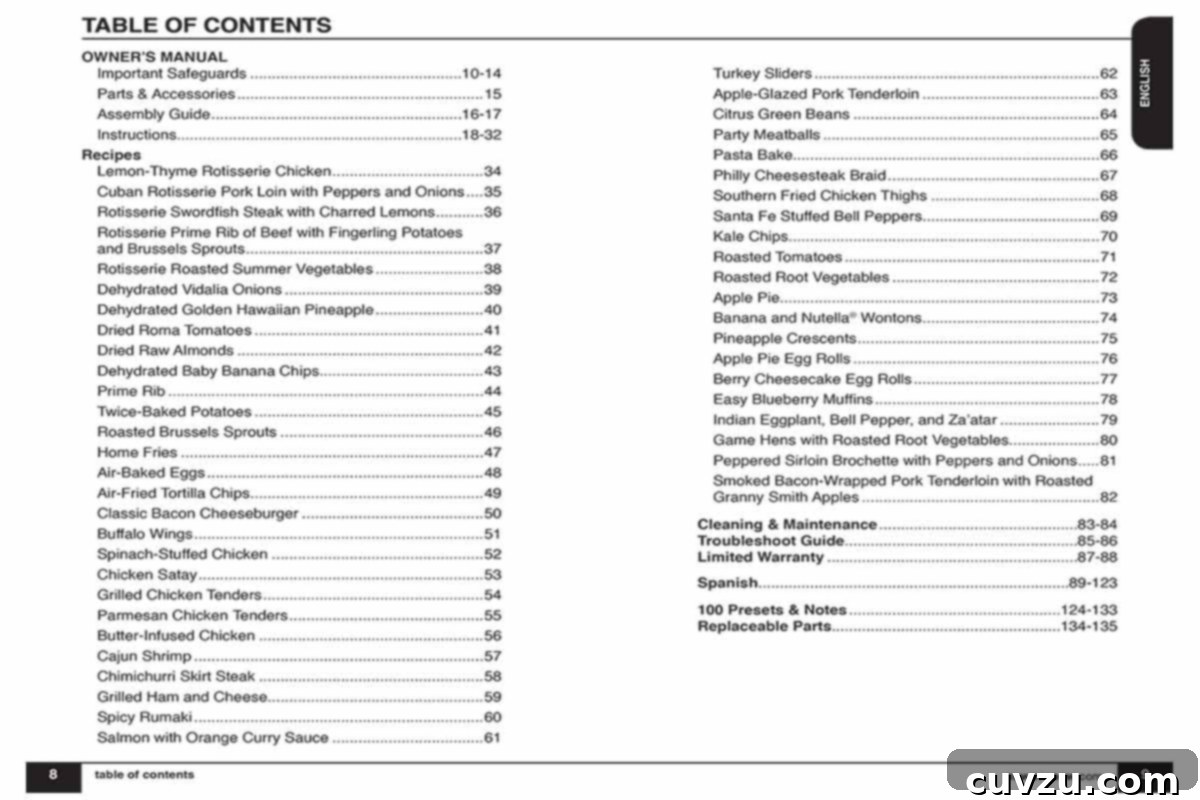
That incident drove home the importance of the manual, which I’ve since referred back to multiple times. Both the main instruction manual and the Quickstart Guide have proven incredibly useful and brimming with valuable information, especially the Quickstart Guide’s simple step-by-step processes and comprehensive Cooking Guide. This whole experience has been a new way of cooking for me, requiring a shift in mindset.
I now find myself consistently cooking at slightly lower temperatures and checking on food more frequently. The fear of overcooking, especially after the salmon incident, encourages me to go slow and easy. My confidence is steadily growing, and I’m confident I’ll master the art of air frying. One thing is certain: I am truly enjoying the process and the delicious results.
Choosing Your Perfect Air Fryer: A Buyer’s Guide

With a multitude of air fryers on the market, selecting the right one can feel daunting. To simplify your decision, here are several key factors to consider, ensuring your new appliance perfectly aligns with your cooking style and kitchen needs:
Functions: What Are Your Culinary Goals?
Consider how you primarily envision using your air fryer. Are you looking for a simple appliance to crisp up frozen snacks and make quick sides? A basic basket-style air fryer might suffice. Or do you dream of a more versatile kitchen companion that can also roast a small chicken, dehydrate fruits, grill vegetables, or even bake? In that case, a multi-function air fryer (like the oven-style models) with various presets and accessory options would be a better fit. Think about the specific dishes you want to prepare most often.
Size: Capacity and Counter Space
The internal capacity of an air fryer is crucial. How many people will you typically be cooking for? A small 2-3 quart basket fryer is excellent for one or two individuals, while a larger 5-6 quart model is better for small families. Multi-function air fryers can range from 10 to 26 quarts, accommodating larger families or even small roasts. Simultaneously, evaluate the available counter space in your kitchen. Air fryers, especially the larger multi-function ones, can be quite bulky. Measure your intended spot to ensure a comfortable fit, allowing for proper ventilation.
Wattage: Power Requirements and Electrical Circuits
Most air fryers operate within a range of 800 to 2100 watts. This is a significant power draw, comparable to other high-wattage appliances like microwaves or toasters. Before purchasing, verify that your kitchen outlets can support the electrical demands of your chosen unit. Overloading a circuit can cause breakers to trip, interrupting your cooking and potentially posing a safety hazard. If you have an older home, this consideration becomes even more important.
Intuitive Controls: Ease of Use
The user interface can greatly impact your cooking experience. Do the controls feel logical and easy to understand? Are they clearly labeled? Some models feature simple analog dials, while others boast sophisticated digital displays with numerous preset programs. Consider whether you prefer the straightforwardness of manual temperature and time settings or the convenience of one-touch presets. Flexibility in adjusting settings is also a plus, allowing you to fine-tune recipes to your preference.
Easy Cleanup: A Cook’s Best Friend
No one enjoys arduous cleaning after a meal. Look for air fryers with non-stick, dishwasher-safe components, such as baskets, trays, and drip pans. Removable doors, like on my NuWave Brio, can also significantly simplify cleaning. The easier your air fryer is to clean, the more frequently and happily you’ll use it.
Setting Up for Success: Essential First Steps with Your New Air Fryer
NuWave
Once you’ve unboxed your new air fryer, the excitement to start cooking is palpable, and you’re likely eager for recipes. However, before you even think about your first air-fried meal, there are a few critical steps to ensure a safe and successful cooking journey.
Read the Instruction Manual – Seriously!
I know, I know. Who actually enjoys reading appliance manuals? But when it comes to air fryers, this step is non-negotiable. Air fryers operate at very high temperatures, effectively acting as mini convection ovens. Understanding how your specific unit works, its safety features, and any unique operating instructions is paramount. Skipping the manual could lead to anything from minor culinary mishaps (remember my salmon incineration?) to more serious safety concerns. Take the time to familiarize yourself with your machine; it’s an investment in both your cooking success and your kitchen safety.
Initial Cleaning and Preparation
After reading the manual, your next step should be to remove all detachable parts – baskets, trays, racks, drip pans – and give them a thorough wash with warm, soapy water. This removes any manufacturing residues or dust and ensures your first meal is prepared in a clean environment.
Strategic Placement for Safety and Performance
Choosing the right location for your air fryer in your kitchen is crucial. Always refer to your manual for specific placement guidelines, as these can vary by model. Generally, you’ll want to place your air fryer on a heat-resistant surface, such as a granite countertop, a cutting board, or a silicone mat. More importantly, ensure there’s ample clear space around the unit, typically three to eight inches away from walls, cabinets, and any flammable materials. This allows for proper heat dissipation and safe venting of hot air and steam. I position Olivia in the center of my kitchen island when in use, which provides excellent air circulation and peace of mind.
Even after initial placement, I recommend double-checking the unit’s position during operation. Given that you’ll often place food inside and walk away for a few minutes, you need to be confident it’s in a secure spot. My NuWave Brio, for instance, gets warm on the top and sides, and it vents from the back. While this rear venting is normal (and can even smell delightful when cooking things like banana bread!), you must be aware of how far the heat and vented steam travel to ensure it doesn’t create an unsafe situation, especially near backsplashes or overhead cabinets.
Understanding Noise Levels
Finally, be prepared for some fan noise when your air fryer is running. This is entirely normal, as the high-speed fan is what drives the convection cooking process. Different models will have varying noise levels; the NuWave Brio I tested produces what I consider “acceptable noise”—a gentle hum rather than a distracting roar. This factor might influence where you choose to place your air fryer, especially if you have an open-concept living space.
Mastering Your Multi-Function Air Fryer: Essential Tips for Optimal Results
Once your air fryer is set up and you’re ready to cook, a few key techniques and considerations can significantly enhance your results, especially when using a versatile multi-function model.
To Preheat or Not to Preheat? Always Consult Your Recipe.
Unlike traditional ovens, preheating an air fryer is often optional, depending on the recipe. Some dishes benefit from a preheated environment for immediate crisping, while others cook perfectly fine from a cold start. If preheating is required, rejoice—your air fryer will reach temperature far quicker than your conventional oven. Olivia, for example, preheats to 350°F (175°C) in less than four minutes!
Oil Usage: Less is More for Crispness
Air fryers utilize dry heat, so adding a small amount of oil to your food is often beneficial. It prevents drying out and helps achieve that desirable golden, crispy exterior. However, the key is moderation: you’ll need significantly less oil than you think. I’m still refining this balance; too much oil can lead to soggy results, while too little can leave food dry and less flavorful.
Prioritize High Smoke Point Oils
This is a crucial tip for both flavor and safety! Always use oils with a high smoke point, meaning they can withstand high temperatures without breaking down and producing smoke or off-flavors. Excellent choices include vegetable oil, canola oil, peanut oil, and especially avocado oil, which I prefer for its neutral flavor and very high smoke point (though it can be pricier, you use so little that it’s worth the investment). Olive oil, particularly extra virgin, has a lower smoke point and is generally not suitable for the high temperatures of air frying; save it for finishing dishes or lower-heat cooking.
Select Baking Dishes Wisely for Air Circulation
Any ovenproof dish or pan made of metal, glass, ceramic, or silicone can typically be used in an air fryer. However, the critical factor is size. Choose a dish or pan that leaves ample room (at least an inch or two) on all sides for hot air to circulate freely. This unrestricted airflow is what allows the air fryer to cook food evenly and achieve crispiness.
Never Block the Fan
The fan is the heart of your air fryer’s convection system. Ensure there’s always space between your food and the fan, which is usually located at the top of the unit. For lighter foods that could “fly away” (like pepperoni slices or small tortilla pieces), place them on lower racks or secure them under heavier food items to prevent them from making contact with the fan.
Strategic Use of Aluminum Foil and Parchment Paper
Both aluminum foil and parchment paper can be safely used in an air fryer, but with precautions. Always secure them, either by wrapping them around food or tucking them under heavier items, to prevent them from coming loose and being sucked into the fan. Trim pieces so they don’t block airflow around the food or the unit’s vents. They are particularly useful for preventing breading from sticking to mesh trays or for easy cleanup when cooking messier items.
Avoid Crowding: The Golden Rule of Air Frying
This applies to both horizontal and vertical spacing. When placing food on trays, leave a small gap between individual pieces to allow hot air to reach all surfaces. If you’re using multiple trays, arrange food so that air can still circulate between the trays. Overcrowding, whether horizontal or vertical, will steam your food instead of crisping it, resulting in unevenly cooked and soggy results. If you have a large quantity of food, it’s always better to cook in smaller batches.
Stack Your Meals for Efficient Cooking
For multi-rack air fryers, you can cleverly stack your meals. Place meats or items that might drip on the top rack, directly above your vegetables or starchy sides on a lower rack. This allows the flavorful juices from the top layer to baste the food below, adding extra flavor and moisture.
Adjust Temperatures and Times from Conventional Recipes
As a general rule of thumb, when adapting a standard oven recipe for an air fryer, you’ll typically want to lower the oven temperature by approximately 20 to 25°F (11 to 14°C). Additionally, plan to check your food for doneness earlier than the original recipe suggests, as air fryers often cook faster due to their efficient heat circulation. Start checking a few minutes before the expected time and adjust as needed.
Don’t Be Afraid to Open the Door and Check
One of the great features of most air fryers is that it’s perfectly fine to open the door or pull out the basket to check on your food. The unit will automatically “pause” both the timer and the cooking process, so there’s no need to turn it off. Once you’re done checking, flipping, or shaking, simply close the unit, and cooking will recommence exactly where it left off.
Rotate Your Trays for Even Browning
When cooking with multiple trays in a multi-function air fryer, particularly if one tray is closer to the heating element, consider rotating the trays halfway through the cooking process. This ensures all items receive equitable exposure to the heat, leading to more uniform cooking and browning.
Prevent Overfilling Baking Pans
If you’re using your air fryer for baking, standard baking pans will work. However, avoid overfilling them. The goal is to prevent the top of baked goods from “cresting” too high and potentially being blown around by the circulating air, which can result in lopsided cakes or loaves and a messy interior.
Revitalize Leftovers: Say Goodbye to Soggy Bottoms
This is perhaps one of my favorite air fryer superpowers! You absolutely can, and should, reheat leftovers in your air fryer. Foods like pizza, fried chicken, spring rolls, or anything that benefits from a crispy texture are wonderfully rejuvenated. The air fryer restores their crispness, making them taste almost as good as fresh, far superior to the often-soggy results from a microwave. Say goodbye to sad, soft leftovers!
Maintaining Your Appliance: Simple Steps for Cleaning an Air Fryer

unclepodger
Proper cleaning and maintenance are essential for extending the lifespan of your air fryer, ensuring optimal performance, and preventing potential issues like smoking. While “cleaning after each use” might sound daunting, trust me, it’s far easier than you might imagine and incredibly worthwhile.
Clean After Every Use: A Habit Worth Forming
Make it a habit to clean the interior of your air fryer and all removable parts after each use. This frequent cleaning prevents oil and food residue from baking onto surfaces, which can become incredibly stubborn over time. Regular wiping down immediately after cooling makes cleanup quicker and easier, and crucially, it prevents the accumulation of oil buildup that can cause your unit to smoke during future operations. A little effort after each meal saves a lot of hassle later on.
Dishwasher Safe Components and Specific Cleaning Tips
Your manual will provide specific guidance on which parts are dishwasher safe. Many air fryer components, such as baskets, trays, and drip pans, are designed to go straight into the dishwasher, greatly simplifying the cleaning process. The NuWave Brio I tested, for example, has interior surfaces that can be easily wiped down with soap and water, and fortunately, all its trays and the drip pan are dishwasher friendly. A feature I particularly appreciate is the removable door on the NuWave Brio, which allows for thorough cleaning of all glass and interior surfaces without awkward maneuvering.
A specific recommendation for cleaning stainless steel trays: use a gentle touch when handwashing to remove stuck-on food. While generally sturdy, these trays can sometimes bend or warp if excessive pressure is applied to a localized area during scrubbing. I’ve found that a quick soak in warm, soapy water effectively loosens most food residue, allowing for a gentle scrub to remove anything remaining. After this, they can typically go into the dishwasher for a final, sanitizing wash.
Occasional Heating Element Cleaning
Periodically, you will also need to clean the heating element, which is usually located at the top interior of the unit. Your manual should provide detailed instructions for this, often recommending gentle wiping once the unit is completely cool and unplugged. This prevents accumulated grease from affecting performance or generating odors.
My Air Fryer Love Affair: Unanticipated Joys and Future Culinary Adventures
My journey from air fryer skeptic to ardent enthusiast has been nothing short of delightful. I am well and truly hooked on air frying, and Olivia, my NuWave Brio 14Qt Digital Air Fryer with Probe, has earned a permanent and cherished spot in my kitchen. What I truly adore about her, beyond the crispy results, is the sheer convenience and the invaluable safety net of her automatic shut-off feature. Unlike a conventional oven that continues to radiate heat even after the timer dings, Olivia powers down completely once the countdown reaches zero. Whether I’m toasting nuts, crisping chicken wings, or simply reheating leftover pizza, the unit stops producing heat when the timer expires. This might seem like a basic function, but for a busy cook like me, it’s like having a mini-insurance policy that grants a few precious extra minutes of grace—and believe me, I’ve needed it on several occasions.
This automatic shut-off means I can finally toast nuts without the constant worry of burning them. I simply set the temperature to 300°F (150°C) and the timer to 3 minutes. I can either diligently watch through the clear viewing window as the magic unfolds, checking the color and inhaling the perfect aroma of toastiness, or I can confidently walk away to attend to other tasks, knowing Olivia will take care of the rest.
One unexpected benefit that I’ve come to deeply appreciate is the additional oven space Olivia provides, particularly given her relatively compact size compared to a full-sized oven. This extra capacity has already proven incredibly handy when I’ve needed to bake multiple items simultaneously at different temperatures. This versatility promises to be a true luxury during the bustling holiday season, alleviating the usual oven-juggling stress.
Furthermore, I’m excited about utilizing the air fryer extensively during the warmer months. Given its small footprint and rapid preheating capabilities, I’ll be able to cook a wide array of dishes without the discomfort of heating up my entire kitchen, making summer cooking much more enjoyable.
While I’m still actively working on converting my conventional oven recipes to air fryer specifications and fine-tuning the exact amount of oil to use—a process that isn’t always intuitive for me—each day brings new insights and improvements. I diligently keep notes on what works and what doesn’t, learning and adapting as I go. My confidence continues to grow with every successful dish.
If I had one wish, it would be for more recipes specifically tailored for air fryers with multiple trays, as most available recipes seem to be written for the basket-style models. That said, I’m not discouraged in the slightest. My culinary imagination is buzzing with so many more possibilities to explore: perfectly crisp hot dogs, succulent rotisserie chicken, beautifully grilled meats, homemade dehydrated fruit snacks, and even air-fried popcorn. The NuWave Brio 14Qt Digital Air Fryer with Probe truly offers endless options, and I fully intend to try them all!
NuWave provided Leite’s Culinaria with the air fryer (heretofore known as Olivia) for us to try in a home kitchen. All opinions expressed in the article are based solely on our writer’s personal experience with the machine.