How to Make Natural Food Coloring: Your Ultimate Guide to DIY Plant-Based Dyes
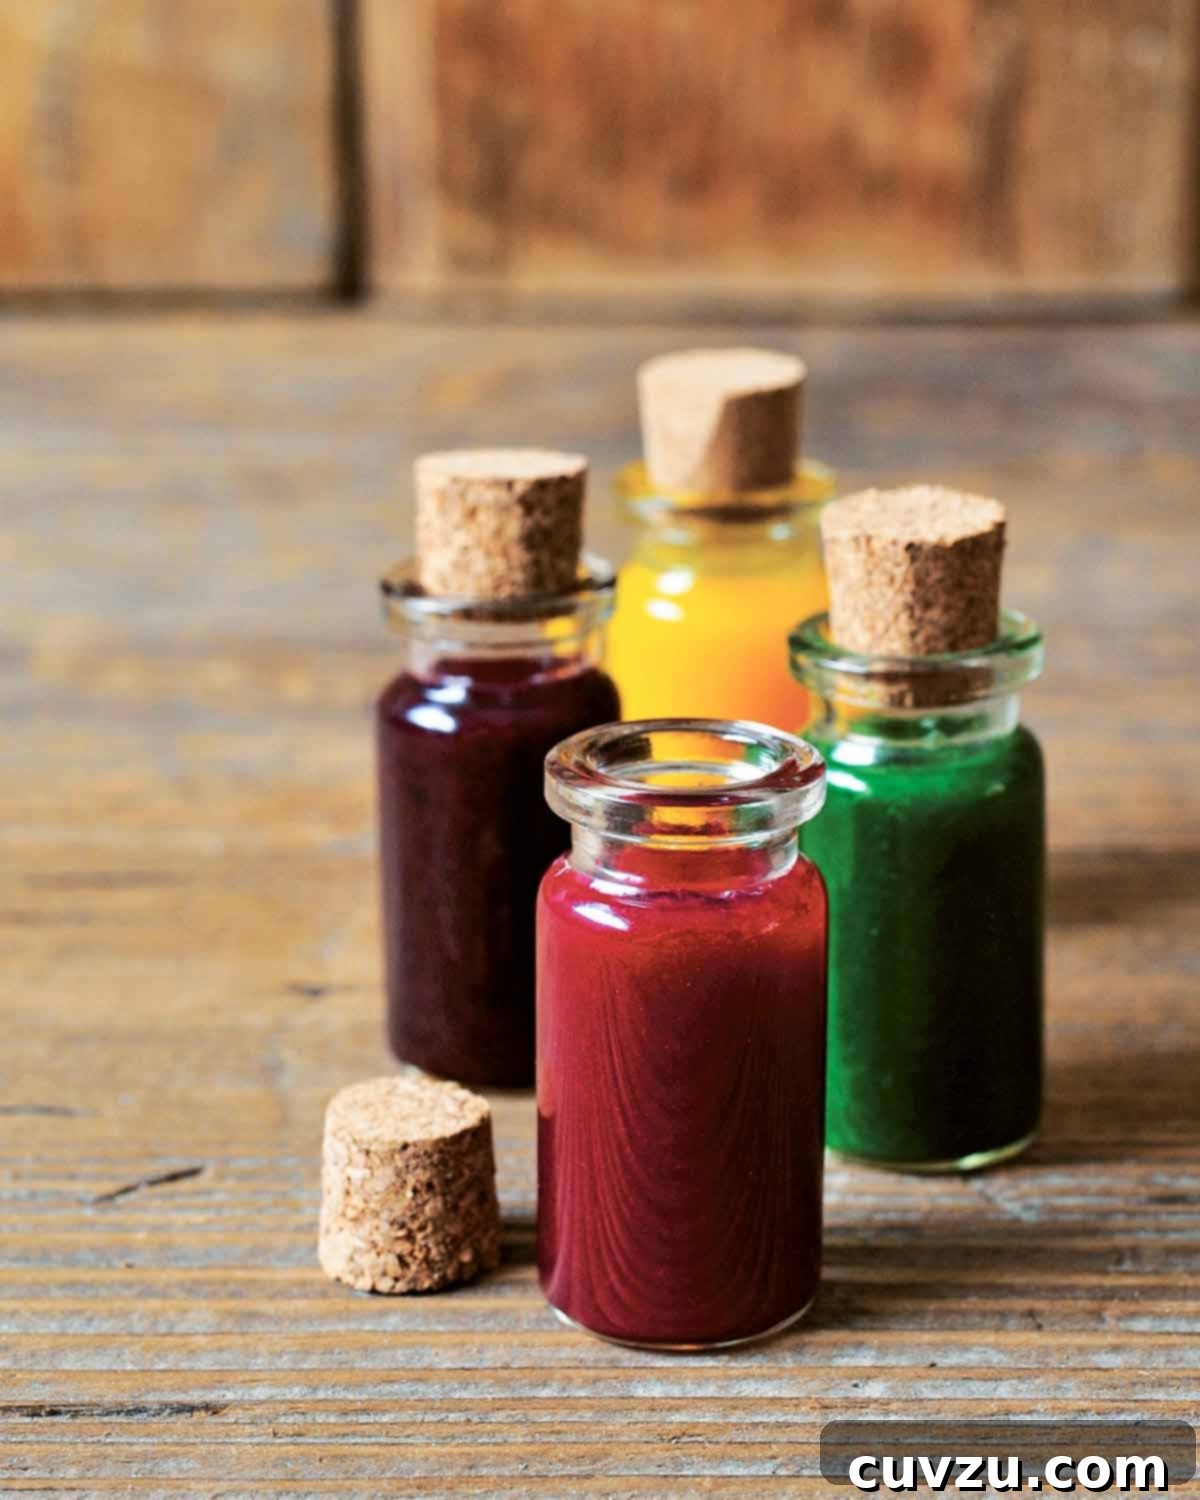
Imagine adding beautiful, vibrant colors to your desserts, frostings, and baked goods without a single artificial ingredient. The answer is surprisingly simple and incredibly rewarding: homemade natural food coloring! Crafted from everyday fruits and vegetables, these dyes offer stunning shades of pink, purple, green, and yellow, free from artificial additives, harsh preservatives, and exorbitant prices. Dive into the world of natural coloring and transform your culinary creations with wholesome, plant-based hues.
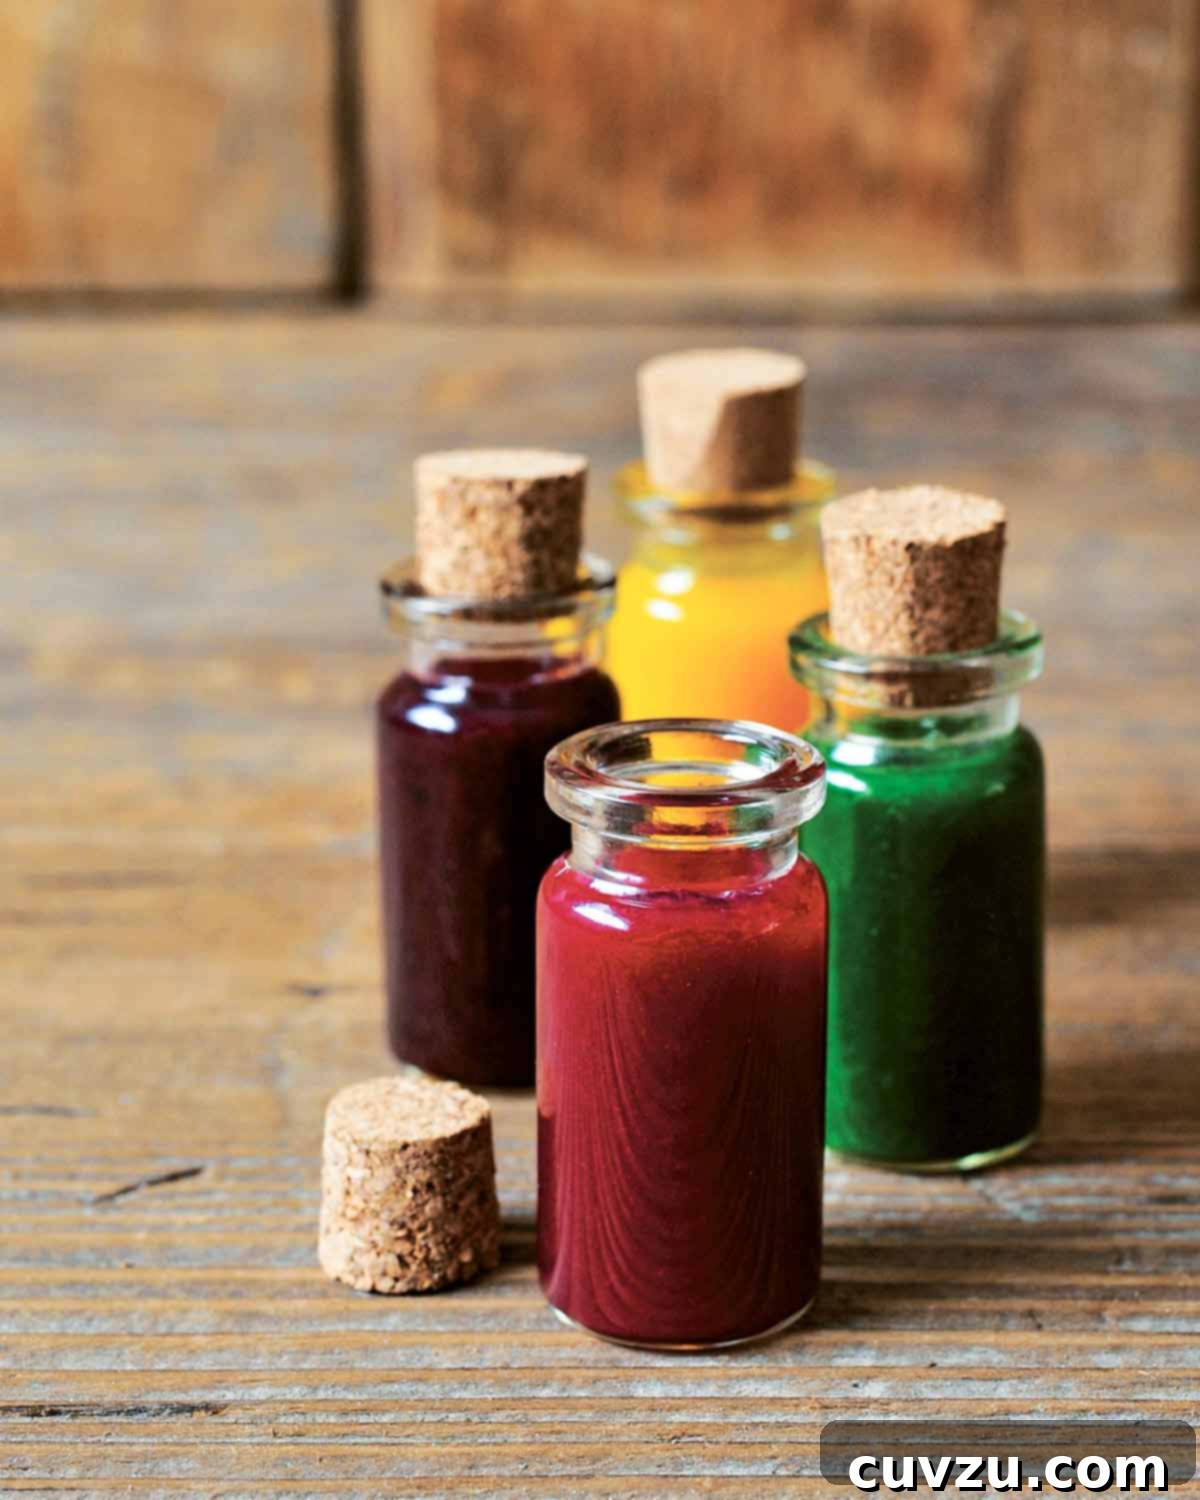
For countless years, the search for a truly reliable and all-natural food coloring recipe has been a passionate pursuit for many home cooks and professional chefs alike. After extensive trials and numerous approaches, we are thrilled to share the definitive DIY natural food coloring method. This recipe is a triumph, delivering pure, vivid colors using only the essence of fruits, vegetables, and water. Say goodbye to artificial colors, unwanted preservatives, and the hefty price tags often associated with specialty dyes. This is truly the natural solution you’ve been waiting for.–David Leite
Why Choose Natural Food Coloring? Unveiling the Benefits
Making the switch to natural food coloring is more than just a trend; it’s a conscious decision that offers a multitude of advantages for your health, your wallet, and your culinary adventures. Unlike the synthetic dyes commonly found in store-bought options, which are often petroleum-derived and have raised health concerns, natural alternatives provide a wholesome and safe way to add color to your food.
- Health-Conscious Choice: The primary benefit is knowing exactly what goes into your food. By utilizing nutrient-rich fruits and vegetables, you’re avoiding artificial chemicals and potential allergens often found in synthetic dyes, making it ideal for families and individuals with dietary sensitivities.
- Pure Ingredients, No Additives: Commercial food colorings frequently include a blend of various dyes, preservatives, and stabilizers. Our homemade versions are refreshingly simple, consisting of pure fruit or vegetable extracts and water.
- Budget-Friendly: You might already have many of the necessary ingredients in your kitchen, making natural food coloring a significantly more economical choice than purchasing expensive artificial dyes from specialty stores. It leverages ingredients that often go unused or are readily available.
- Eco-Friendly Approach: Reducing your consumption of synthetic products and supporting the natural growth of plants for pigments contributes to a more sustainable and environmentally conscious kitchen.
- Fun and Educational for All Ages: The process of creating these dyes can be a delightful and educational activity, especially for children. It’s a wonderful way to introduce them to the origins of colors in nature and spark an interest in healthy eating.
- Elegant Pastel Tones: While natural dyes typically produce softer, more subdued pastel shades rather than eye-popping neons, these gentle hues often impart a sophisticated, organic, and truly appealing aesthetic to your baked goods and dishes. The natural softness adds a unique charm.
- Minimal Flavor Impact (Often Desirable): With careful application, the flavor contribution from most natural dyes is minimal. In some cases, like with blueberries, a subtle fruitiness can even enhance the overall taste experience, offering an added dimension of flavor.
Natural Food Coloring FAQs: Your Questions Answered
How do natural food dyes compare to artificial store-bought coloring in terms of color intensity?
It’s crucial to set realistic expectations when working with natural food colorings. When incorporated into frostings, icings, or batters, these dyes will typically create beautiful pastel and earthy shades. They won’t achieve the intense, almost neon vibrancy often associated with synthetic food colorings. This difference stems from their natural origins; plant pigments inherently offer a softer, more organic palette. However, the trade-off is significant: you gain peace of mind from using all-natural, single-ingredient colors that are free from artificial chemicals and often gentler on the digestive system. There’s a distinct, authentic charm in the subtle elegance of natural hues.
Will the flavor of the natural food coloring ingredients be noticeable in my food?
To a certain extent, a faint flavor from the natural ingredients might be detectable, especially if a larger quantity of the dye is used. The more concentrated the food coloring, the more its inherent flavor profile will emerge. In some instances, this flavor addition is welcomed and desirable, such as the subtle fruity notes from blueberry coloring in a dessert. However, if the base ingredient has a strong or potentially polarizing taste (e.g., spinach), it’s advisable to begin with a small amount of the dye. Gradually increase the quantity while frequently tasting your mixture to ensure the flavor remains balanced and doesn’t overwhelm the primary taste of your dish. The goal is always a harmonious blend of color and taste.
What is the shelf life of homemade natural food colorings, and how should they be stored?
Homemade natural food colorings are best stored in clean, airtight containers in the refrigerator. Under these conditions, they typically maintain their quality and vibrancy for up to 2 weeks. Some dyes, particularly those made from powdered spices like turmeric, may last slightly longer. For extended preservation, many liquid dyes can be frozen. Simply pour them into ice cube trays, freeze until solid, then transfer the frozen cubes to a freezer-safe bag or container. When ready to use, thaw the desired amount in the refrigerator. Always visually inspect and smell the dye before use to check for any signs of spoilage, such as mold, off-odors, or significant color changes.
What essential equipment is needed to prepare natural food dyes at home?
Fortunately, making natural food coloring doesn’t require a lot of specialized kitchen gadgets. The most crucial piece of equipment is a high-speed blender or a robust food processor, which is essential for pureeing fruits and vegetables into a smooth, consistent liquid or paste. A fine-mesh sieve or several layers of cheesecloth will also be indispensable for straining out any pulp or solids, ensuring a clear and smooth liquid dye. Additionally, you’ll need small saucepans for simmering or boiling certain ingredients, standard measuring spoons and cups, and a selection of airtight jars or containers for proper storage of your freshly made colorings.
Can I use natural food coloring for any recipe that calls for artificial dyes?
Yes, in most cases, you can substitute natural food coloring for artificial dyes in various recipes, particularly in baking, frosting, and beverage applications. However, keep in mind the difference in color intensity, expecting softer, pastel results rather than vibrant, artificial tones. It’s also wise to consider the moisture content. Since natural dyes are typically liquid, you might need to slightly reduce other liquids in your recipe, especially for delicate mixtures like macarons or specific batters. For recipes that require very precise chemical reactions (e.g., certain meringues or candies where liquid balance is critical), introduce natural dyes gradually and observe any changes in texture or consistency. Always start with a small amount and increase as needed.
How To Make Natural Food Coloring
Learn to easily create stunning natural food colors from scratch. This comprehensive guide provides simple recipes for pink, purple, green, and yellow dyes using everyday fruits and vegetables, free from artificial additives and high costs. Perfect for adding a wholesome touch to any dish!
David Leite
Dessert, Baking, Decorating
Global, American
Approx. 2-3 tablespoons of each color
5 minutes
5-10 minutes (varies per color)
10-15 minutes (plus cooling)
Ingredients
For Pink Food Coloring (Yields approx. 2 tablespoons)
- 1/4 cup canned beets, drained (or fresh cooked beets)
- 1 teaspoon drained beet juice from the can (or reserved cooking liquid from fresh beets)
For Yellow Food Coloring (Yields approx. 2 tablespoons)
- 1/4 cup water
- 1/2 teaspoon ground turmeric
For Purple Food Coloring (Yields approx. 2 tablespoons)
- 1/4 cup blueberries, fresh or frozen (if frozen, thaw and drain well)
- 2 teaspoons water
For Green Food Coloring (Yields approx. 3 tablespoons)
- 1 cup spinach, fresh or frozen (if frozen, thaw and drain thoroughly)
- 3 tablespoons water, plus more as needed
Instructions
Follow the specific instructions for each color below. The general principle involves blending or simmering ingredients to extract their pigment, followed by straining to ensure a smooth, pure liquid dye. Cleanliness is key for longer shelf life.
-
Pink Food Coloring (from Beets)
In a high-speed blender or food processor, combine the well-drained canned beets (or cooked fresh beets) with 1 teaspoon of the beet juice (from the can or reserved cooking liquid). Blend the mixture thoroughly until it achieves a completely smooth, concentrated paste. For a finer, pulp-free dye, you may press the mixture through a fine-mesh sieve, ensuring to extract all the valuable liquid. Transfer this vibrant pink liquid to an airtight container and refrigerate for up to 2 weeks. Begin by adding 1 teaspoon to your icings, frostings, or cake batter to impart a beautiful pink hue, gradually adding more until your desired shade is reached.
-
Yellow Food Coloring (from Turmeric)
In a small saucepan, combine 1/4 cup of water with 1/2 teaspoon of ground turmeric. Bring the mixture to a gentle boil, then reduce the heat and simmer for 3 to 5 minutes, allowing the turmeric to fully infuse the water with its rich yellow pigment. Remove the saucepan from the heat and let the mixture cool completely to room temperature. Store the cooled yellow liquid in an airtight container in the refrigerator for up to 2 weeks. Important Note: Turmeric is a powerful natural dye and can easily stain countertops, clothing, and even skin. Use caution and protective measures (like gloves and aprons) when handling. Start by adding 1 teaspoon to your frostings, icings, or batters, increasing the amount for a more intense yellow color.
-
Purple Food Coloring (from Blueberries)
Combine the fresh blueberries (or thawed and thoroughly drained frozen blueberries) with 2 teaspoons of water in a high-speed blender or food processor. Blend the ingredients until a smooth puree is formed. To create a clear, brilliant purple dye, carefully pass the blended mixture through a fine-mesh sieve. Press down firmly on the solids with the back of a spoon to extract as much liquid as possible, separating it from the berry skins and pulp. Store the concentrated purple liquid in an airtight container in the refrigerator for up to 2 weeks. Incorporate 1 teaspoon into your desired food items (such as icings or glazes) to achieve a lovely purple shade, adding more for increased depth of color.
-
Green Food Coloring (from Spinach)
If using fresh spinach: In a small saucepan, immerse 1 cup of fresh spinach in just enough water to cover it. Bring to a boil and blanch for approximately 5 minutes. Drain the spinach thoroughly, discarding the cooking liquid, and allow it to cool slightly. If using frozen spinach: Ensure it is completely thawed and very well-drained before proceeding. Transfer the blanched (or thawed and drained) spinach along with 3 tablespoons of water to a high-speed blender or food processor. Blend until the mixture is completely smooth. If the mixture remains lumpy or resists blending smoothly, add additional water, 1 tablespoon at a time, until a desired smooth consistency is achieved. You may strain the mixture if a pulp-free dye is preferred, then let it cool completely before storing. This green dye can be kept in an airtight container in the refrigerator for up to 2 weeks. Use 1 teaspoon as a starting point for coloring icings, frostings, or batter, adjusting the quantity for a deeper green.
Expert Tips for Optimal Results and Storage
While making natural food coloring is a straightforward process, these expert tips will help you maximize your results and ensure the best quality dyes:
- Achieving Deeper Hues: For more intense colors, consider concentrating your dyes further. For instance, you can simmer the extracted liquid (like beet juice) over low heat until it reduces and thickens, intensifying the color. Patience is key, as natural colors require more time and volume than synthetic ones.
- Always Taste and Adjust: When incorporating natural dyes, especially those with distinct flavors like spinach or blueberries, always taste your frosting, batter, or dough. Adjust the quantity of dye carefully to ensure the flavor profile of your finished dish remains balanced and delicious.
- The Importance of Straining: While optional for some applications, straining your blended fruit and vegetable purees through a fine-mesh sieve or cheesecloth is highly recommended. This step removes any fibrous pulp, resulting in a smooth, clear liquid dye that won’t alter the texture of your delicate frostings or batters.
- Proper Storage Techniques: To maximize shelf life, always store your homemade natural food colorings in meticulously clean, airtight containers. Refrigerate them promptly and label each container with the creation date. For longer storage, many liquid dyes can be successfully frozen in small portions, such as ice cube trays.
- Handling Potent Dyes (e.g., Turmeric): Certain natural pigments, like turmeric, are incredibly potent and can easily stain surfaces, clothing, and skin. When working with these ingredients, it’s wise to use separate utensils, cutting boards, and wear protective gloves and an apron. Clean up any spills immediately.
- Embrace the Natural Palette: Develop an appreciation for the softer, more organic tones that these natural dyes produce. They lend a sophisticated and authentic charm to your culinary creations, offering a refreshing alternative to the artificial brightness of synthetic colors.
- Consider pH Levels: The pH level of your ingredients can sometimes affect the final color of certain natural dyes. For example, red cabbage can yield shades from pink to blue depending on acidity. Experimenting with a tiny drop of lemon juice (acid) or baking soda solution (alkaline) can sometimes shift the hue slightly, creating even more color possibilities.

Adapted From
Decadent Gluten-Free Vegan Baking
Buy On Amazon
Creative Applications for Your Homemade Natural Food Colors
Once you’ve successfully created your beautiful batch of natural food colorings, a world of culinary and creative possibilities opens up. These plant-based dyes can infuse vibrant life into a wide array of dishes and projects, offering a healthy and visually appealing alternative to artificial options. Get ready to experiment and delight!
In the Kitchen:
- Baking and Confections:
- Cakes and Cupcakes: Stir the dyes directly into cake or cupcake batter to create stunningly colored interiors, perfect for themed parties or festive occasions.
- Frostings, Icings, and Glazes: Swirl these natural liquid colors into buttercream, cream cheese frosting, royal icing, or simple sugar glazes. Remember that natural colors excel at producing charming pastel effects, which can add an elegant touch to any dessert.
- Cookies and Macarons: Use them to color cookie dough or for delicate decorating on sugar cookies and French macarons, achieving sophisticated hues.
- Bread and Pasta Dough: Add a unique visual appeal to homemade bread or pasta by kneading in a bit of natural dye. Imagine green spinach pasta or pink beet bread!
- Beverages and Drinks:
- Smoothies and Juices: Naturally enhance the visual appeal of your fruit and vegetable smoothies, health shots, or fresh juices.
- Cocktails and Mocktails: Elevate your drink presentations by creating visually stunning layered beverages or adding a subtle hint of color to clear drinks for special gatherings.
- Breakfast and Snacks:
- Yogurt and Oatmeal: Brighten up plain yogurt, cottage cheese, or oatmeal with a stir of natural dye for a fun and nutritious start to the day.
- Pancakes and Waffles: Add a playful splash of color to your pancake or waffle batter, transforming breakfast into a festive treat for children and adults alike.
- Fruit Dips: Color cream cheese, Greek yogurt, or whipped cream-based dips for fruit platters.
- Other Culinary Delights:
- Rice and Grains: Gently color cooked rice or quinoa for visually appealing side dishes.
- Mashed Potatoes: A small amount of beet dye can turn mashed potatoes into a fun pink side!
Beyond Edible Applications:
- Homemade Playdough: A fantastic, non-toxic, and safe way to color homemade playdough for young children, offering peace of mind during playtime.
- Easter Eggs: Achieve beautifully muted and organically colored Easter eggs, perfect for a traditional and chemical-free holiday craft.
- Sensory Bins: Use natural dyes to color rice, pasta, or chickpeas for engaging sensory play activities for kids.
Always remember that the final color intensity will be influenced by the quantity of dye used and the inherent base color of the food item. A pure white frosting will showcase natural colors more vividly than, for instance, a chocolate batter. Experiment, have fun, and enjoy the wholesome beauty these natural colors bring!
Nutrition Information (Approximation per teaspoon)
Serving: 1 teaspoon
Calories: 1 kcal
Carbohydrates: 0.1 g
Protein: 0.03 g
Fat: 0.01 g
Saturated Fat: 0.001 g
Monounsaturated Fat: 0.001 g
Sodium: 1 mg
Fiber: 0.04 g
Sugar: 0.1 g
Nutrition information is automatically calculated and should only be used as an approximation. Exact values may vary based on specific ingredients and preparation methods.
Tried this recipe?
Share your beautiful creations! Mention @leitesculinaria or tag #leitesculinaria on Instagram!
Recipe Testers’ Reviews
Elizabeth and Lena Alvarez
These instructions for making natural food coloring were incredibly straightforward and efficient. Each color came together quickly, taking less than 5 minutes of active preparation time (excluding the cooling period). Our young testers, aged 8 and 10, thoroughly enjoyed swirling the finished dyes into vanilla yogurt. The resulting colors were absolutely charming – a soft green, a sunny lemony yellow, a gentle light purple, and a delicate pale pink that elicited the most enthusiastic “Ooooh!” and “Ahhhh!” from the children.
A few observations from our experience: Our blender wasn’t exceptionally powerful, so some mixtures were a bit chunky. We easily remedied this by straining each color through a fine-mesh sieve, which added only about 30 seconds to the overall process. We also utilized fresh beets and fresh turmeric, finely grating them before use. The fresh turmeric yielded an especially bright, fresh, and satisfying lemon yellow. A word of caution: turmeric is a potent dye and will stain! Ensure everyone wears an apron when working with it. This simple recipe was a joy to make, and we definitely plan on making these natural colors again.
Robert Castagna
Given the increasing concerns about artificial colorings in our food supply, trying this natural food coloring recipe was a refreshing and welcomed experience. For the pink shade, I personally found that using cooked fresh beets and their cooking water produced excellent results. The purple coloring, made from blueberries, was incredibly fast to prepare, taking only about 5 minutes from start to cleanup. For the green, I successfully used fresh spinach, and the color payoff was remarkable.
Discover more inspiring stories and invaluable feedback from our dedicated recipe testers who help bring these wonderful recipes to life. Their insights ensure every recipe is a success in your kitchen!