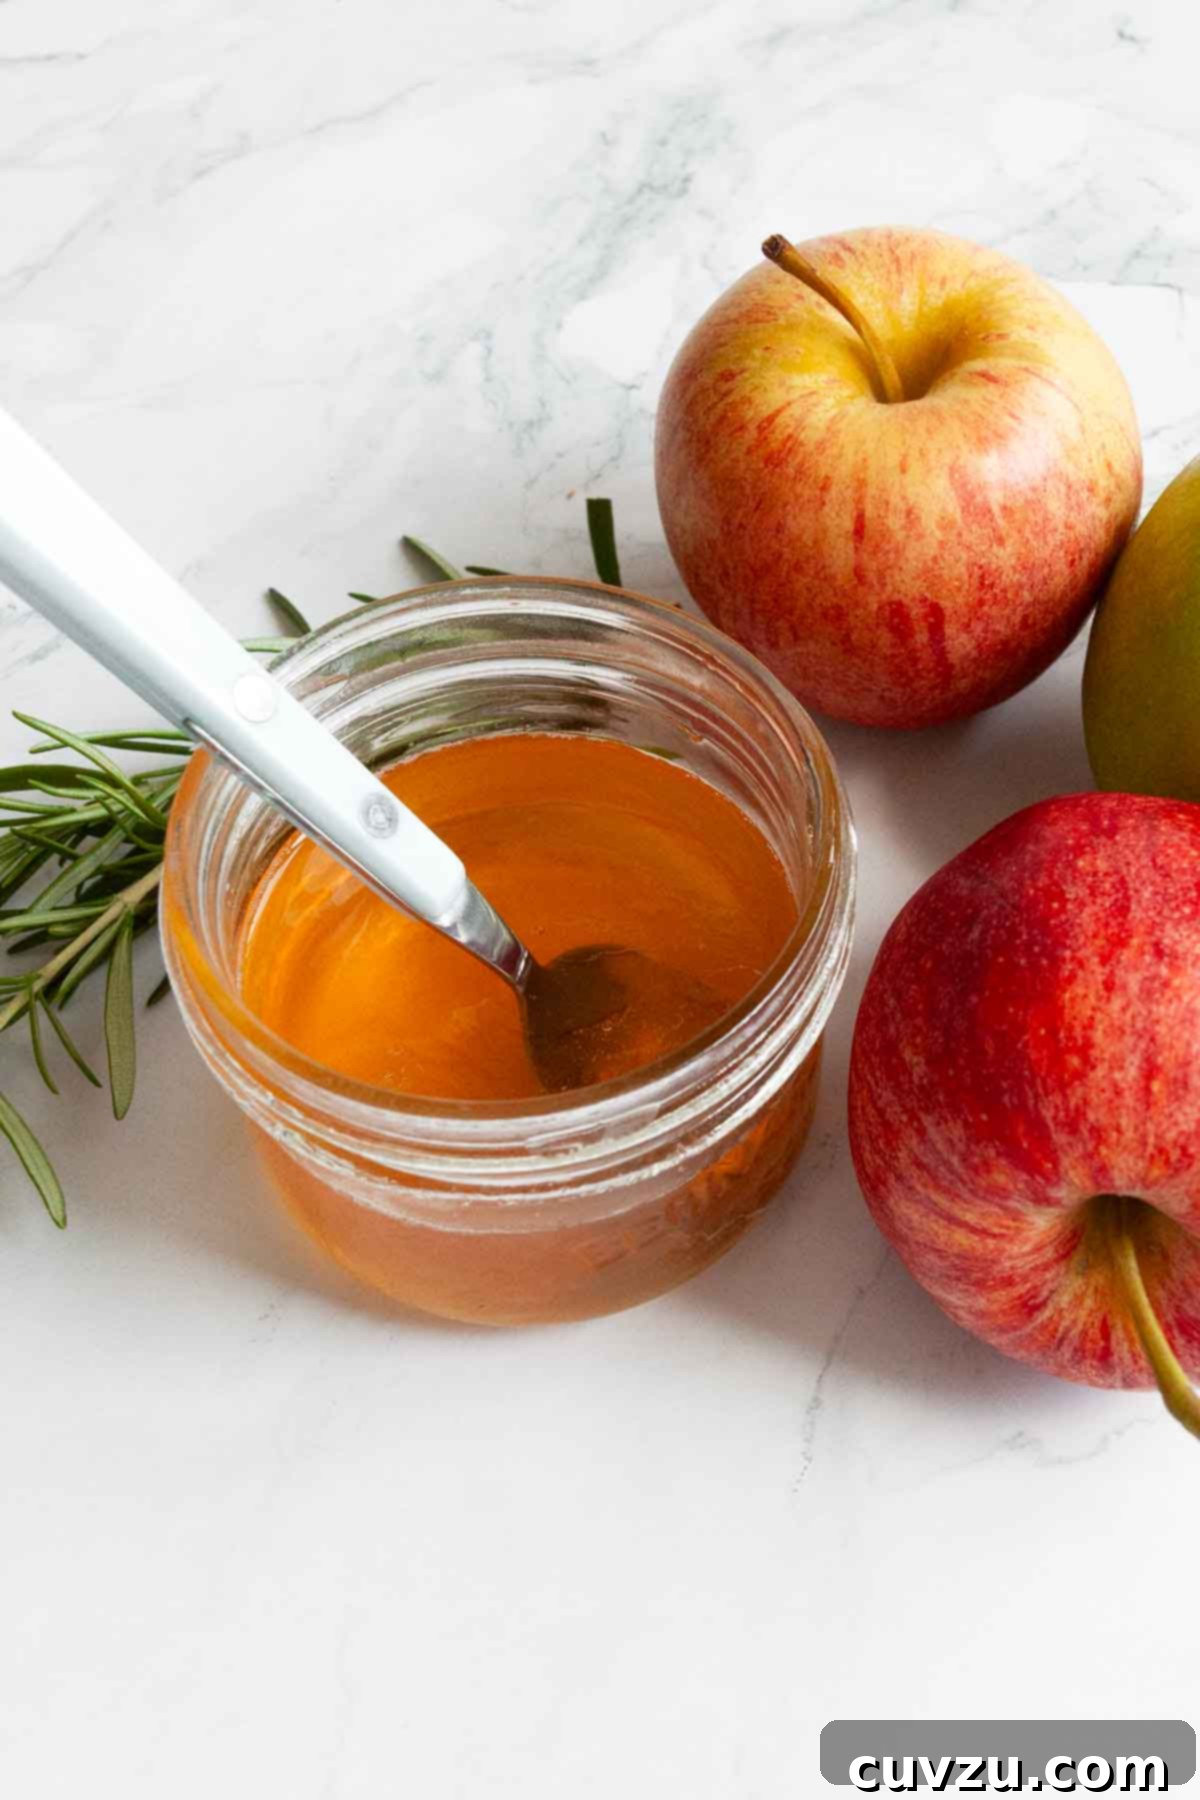
This exquisite homemade apple jelly recipe transcends ordinary preserves, artfully blending the sweet tang of apples with the aromatic warmth of honey, the subtle herbaceous whisper of fresh rosemary, and a bright zest of lemon. Crafted without any added pectin, it relies on the natural setting power of apples, resulting in a beautifully clear and vibrant jelly. Whether you choose to process it for long-term storage and thoughtful gifting, or simply keep a batch chilled in your refrigerator for immediate enjoyment, its uniquely sweet and savory profile makes it an incredibly versatile accompaniment to nearly any dish, from breakfast toast to elegant cheese boards.
Quick Glance: Your Essential Apple Jelly Questions Answered
- What makes this jelly special? This is a sophisticated and clear apple jelly, subtly infused with the unexpected savory note of fresh rosemary, brightened by a splash of lemon juice, and sweetened with a delightful blend of granulated sugar and fragrant honey. Its unique flavor profile truly sets it apart.
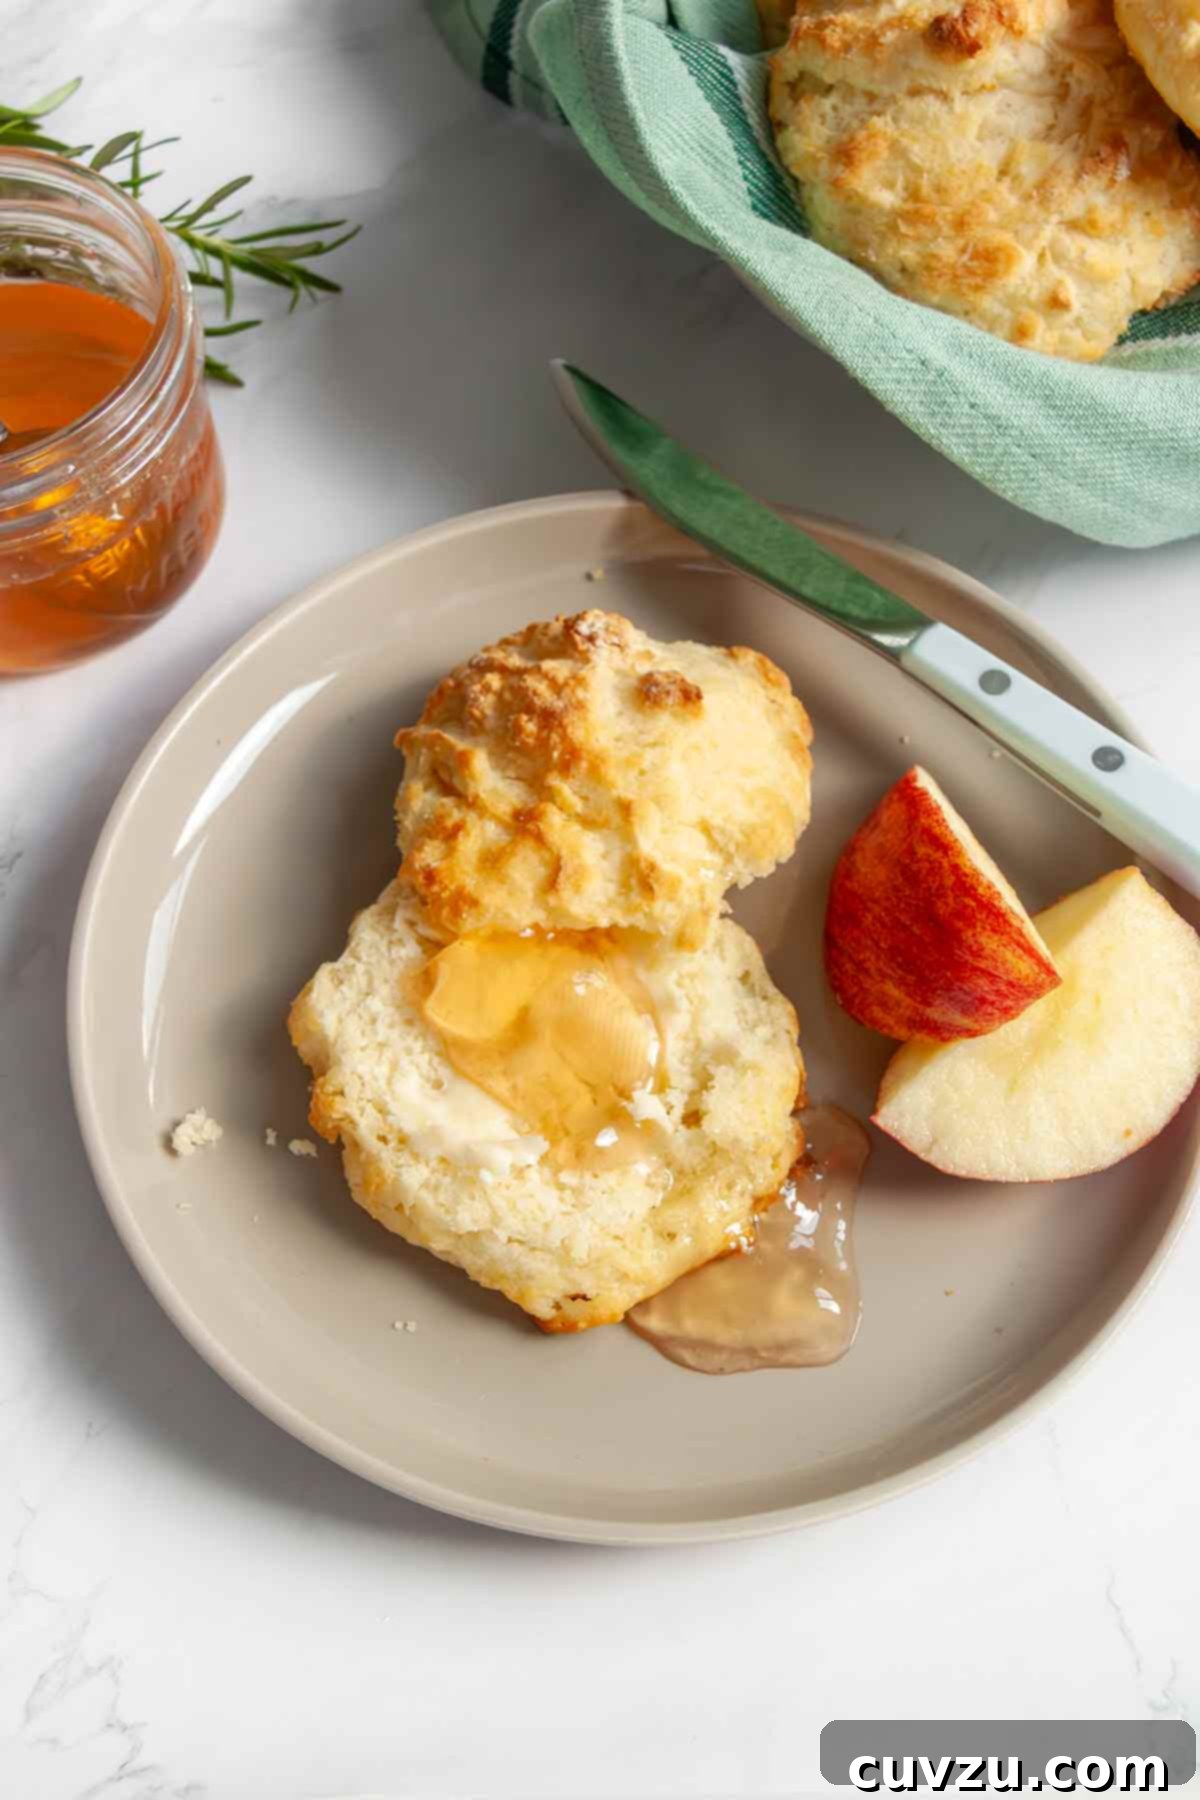
- Why will I adore this recipe? Prepare to fall in love with this preserve for its incredible versatility. It’s a gourmet condiment that effortlessly elevates both sweet and savory applications, pairing beautifully with everything from a sophisticated cheese board and succulent roasted meats to a simple, warm, buttered biscuit or a slice of morning toast.
- How challenging is it to make? The process is straightforward: begin by gently chopping and simmering apples with fresh rosemary to extract a rich, pectin-filled juice. Strain this liquid carefully without pressing to ensure maximum clarity. Finally, boil the exquisite liquid with sugar and honey until it reaches the perfect setting consistency, easily tested with our reliable “wrinkle test.”
Featured Review
A beautiful recipe with precise instructions. I have doubled the recipe, and it came out perfect. Thank you for sharing.
Sumeet
This exceptional small-batch apple jelly masterfully bridges the gap between sweet and savory flavors, making it a truly versatile addition to your culinary repertoire. Imagine it generously spread on a warm slice of toast, elevating it beyond the ordinary, or spooned onto freshly baked savory scones for a delightful contrast. Its herbaceous depth and subtle sweetness make it an ideal accompaniment for rich roast meats, adding a vibrant counterpoint, or as a sophisticated element on a cheese plate, complementing both mild and strong varieties beautifully. It’s also superb with cold cuts and enhances the flavor of virtually all cheeses.
Beyond spreads and pairings, this honey rosemary apple jelly shines as a glistening glaze for fruit tarts. To achieve this elegant finish, gently warm the jelly in a small saucepan until it becomes fluid. Then, with a pastry brush, liberally coat your freshly baked apple or apricot tart, allowing it to cool and set into a beautiful, glossy sheen. The lemon juice plays a dual role in this recipe: it not only heightens the overall flavor, infusing a vibrant tang that balances the sweetness, but also crucially aids the pectin – the natural gelling agent present in apples – in working more effectively to achieve that perfect set. While the inclusion of honey means this jelly won’t possess the absolute crystal clarity often associated with sugar-only jellies, it contributes a stunning benefit: as the mixture simmers and boils, it develops an utterly divine, deep pinky-orange hue that is visually captivating.–Hattie Ellis

What Our Recipe Testers Raved About
Our diligent recipe testers were absolutely thrilled to discover that this effortless apple jelly proved to be a flawless companion for a wide spectrum of sweet and savory dishes. Suzanne Fortier, one of our experienced testers, eloquently described it as “a more complex flavor profile than simply sweet, showcasing pronounced honey undertones beautifully complemented by subtle, earthy herbal notes.” This delicate balance of flavors makes it truly stand out among traditional jellies, offering an unexpected depth that captivated everyone who tried it.
Understanding Your Ingredients for Perfect Apple Jelly
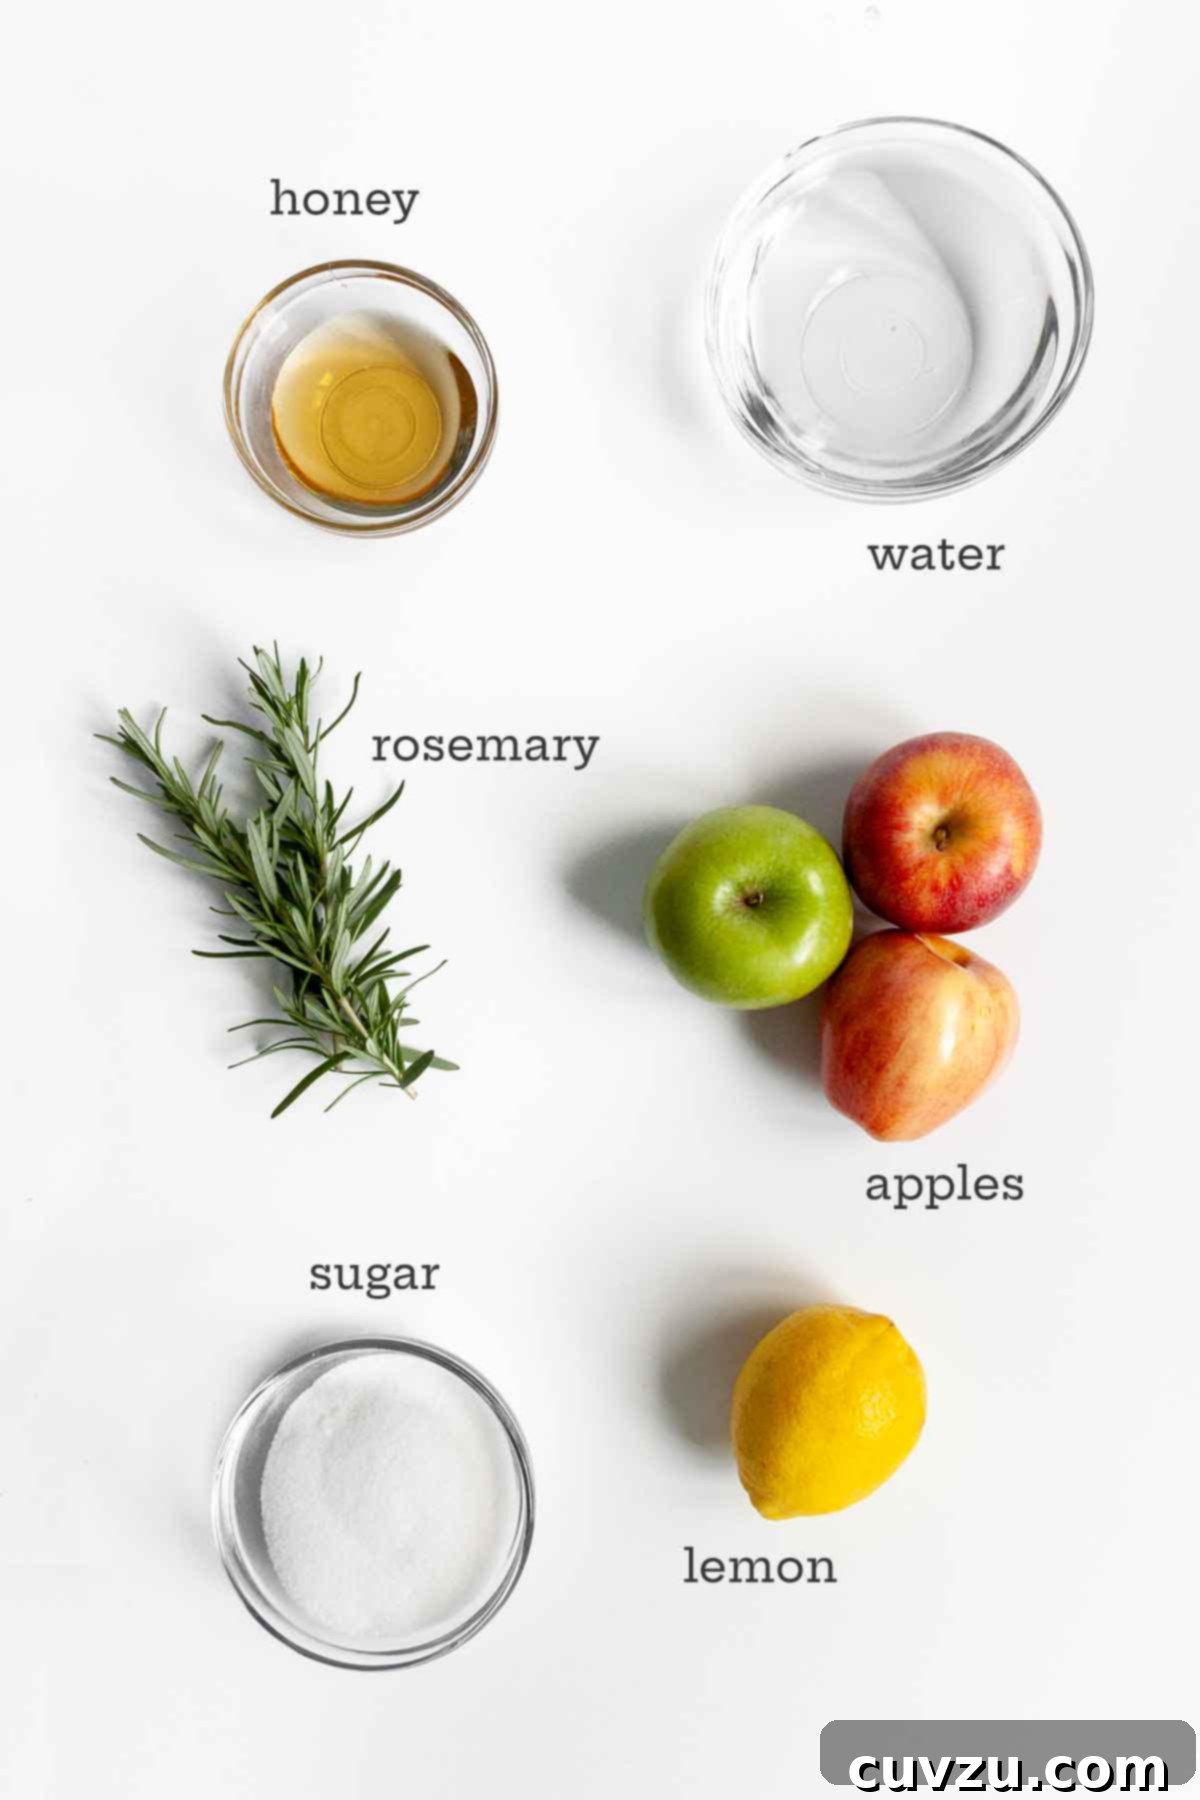
- Apples – The Natural Pectin Source: The beauty of this recipe lies in its reliance on the natural pectin found in apples, eliminating the need for any artificial additives. You have the flexibility to use any type of eating apple you prefer, or even a delightful combination of varieties, to create your unique jelly. For the best setting results and a firmer jelly, consider using green or slightly underripe apples, as these typically boast higher levels of natural pectin. Popular choices include Granny Smith for its tartness and high pectin, or Cortland and Golden Delicious for a balanced flavor and good pectin content.
- Rosemary – The Herbaceous Twist: Fresh rosemary is the secret ingredient that elevates this apple jelly from good to extraordinary. It imparts a wonderfully subtle, earthy, and aromatic undertone that beautifully complements the sweetness of the apples and honey. Be mindful not to overdo it, as the goal is a gentle hint, not an overpowering flavor.
- Honey – Sweetness with Depth: The choice of honey significantly impacts the final flavor of your homemade apple jelly. Since the distinct taste of the honey will be noticeable in the finished preserve, it is crucial to select a mild-flavored, high-quality honey that you genuinely enjoy. Varieties such as clover or wildflower honey are excellent choices, offering a delicate floral sweetness that harmonizes perfectly with the other ingredients. Avoid strong-flavored varieties, like buckwheat or chestnut honey, as their robust profiles will likely overwhelm the delicate balance of the apple and rosemary, making them less suitable for this particular recipe.
- Lemon Juice – Brightness and Boost: Freshly squeezed lemon juice isn’t just for flavor; it’s a vital component for ensuring your jelly sets properly. The acidity in lemon juice works synergistically with the apple’s natural pectin, helping it activate and form a firm, beautiful gel. It also adds a bright, zesty counterpoint that cuts through the sweetness, enhancing the overall taste experience.
Crafting Your Honey Rosemary Apple Jelly: A Detailed Guide
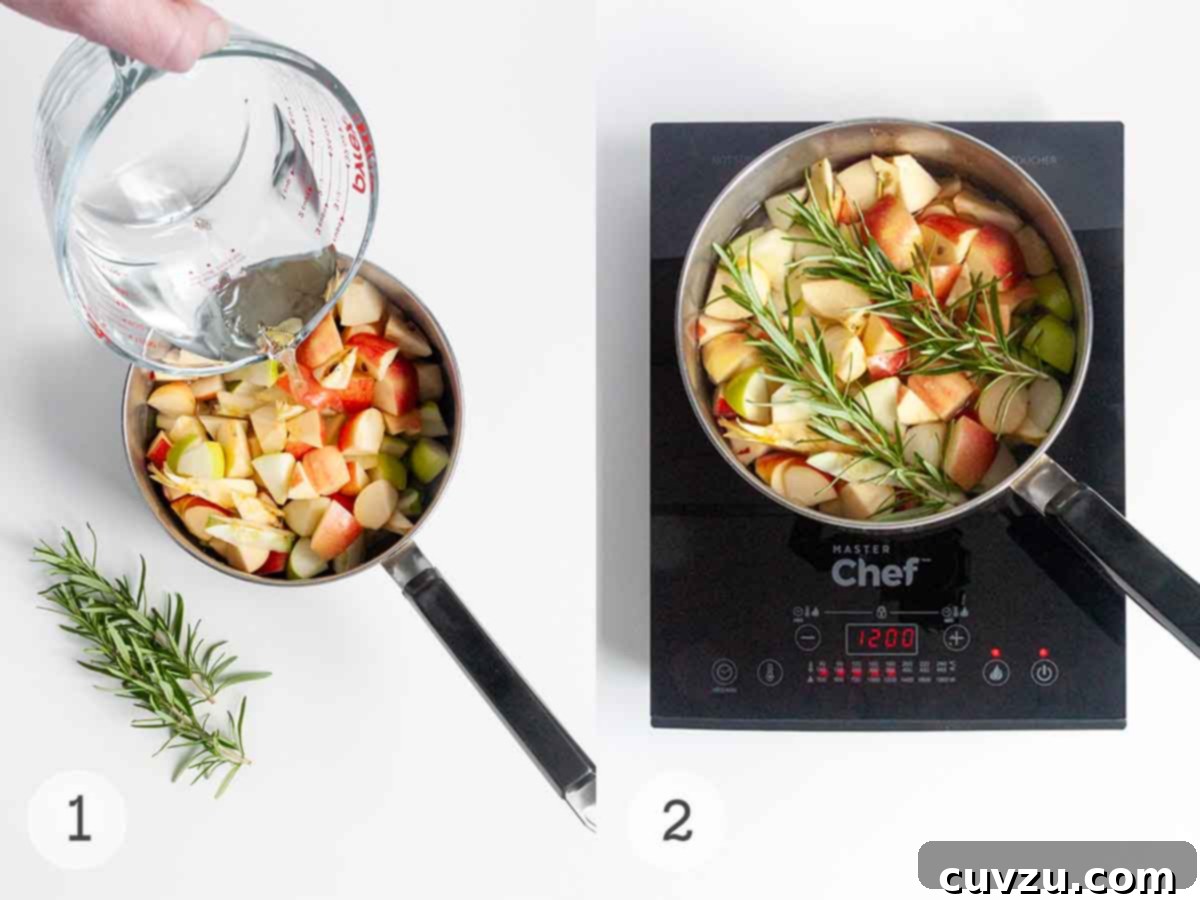
- Prepare the Apples for Maximum Pectin Extraction: Begin by thoroughly washing your apples. There’s no need for tedious peeling or coring here! Simply cut each apple into quarters, removing any stems or visibly bruised spots. Roughly chop the quartered apples into small, manageable chunks. Place all the chopped apples, including their skins, cores, and seeds, into a large, heavy-bottomed pot. The skins, cores, and seeds are rich in natural pectin, which is essential for your jelly to set without added commercial pectin.
- Infuse and Simmer for Flavorful Juice: Pour the measured cold water over the chopped apples in the pot. Add the two large sprigs of fresh rosemary, pushing them gently into the apple mixture. Bring the mixture to a rolling boil over medium-high heat, then immediately reduce the heat to a gentle simmer. Allow the apples to simmer uncovered for approximately 45 minutes, or until they are very soft and mushy. This extended simmer time is crucial for extracting both the apple’s juice and its natural pectin, along with the aromatic oils from the rosemary.
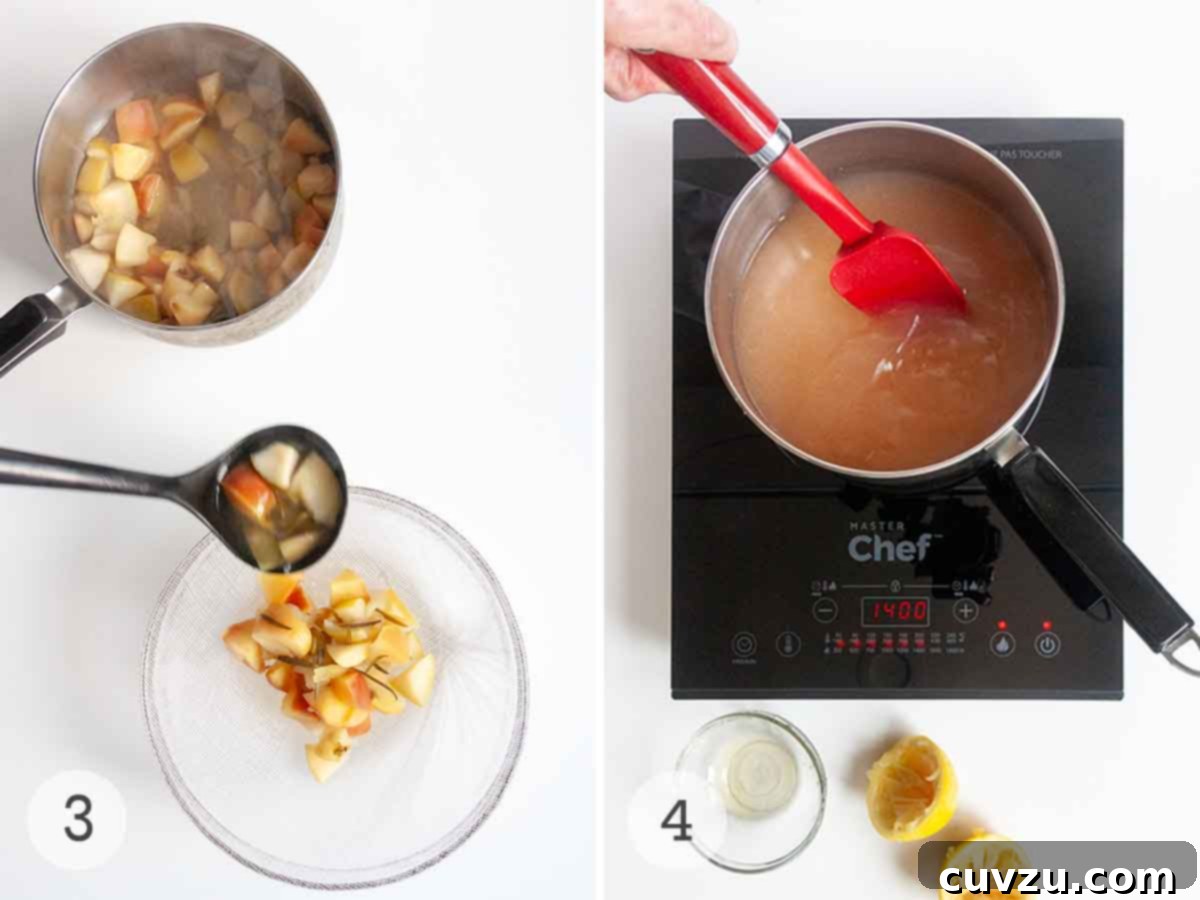
- The Critical Straining Process for Clarity: Once the apples are thoroughly cooked, it’s time for the straining. Drape several layers of clean cheesecloth over a large colander, which is then set over a spacious bowl. Carefully ladle the hot apple and rosemary mixture into the cheesecloth-lined colander. The key to clear jelly is patience: allow the juice to drip through the cheesecloth, undisturbed, for 3 to 4 hours. **Do not squeeze the cheesecloth or press the apple mixture.** Squeezing will force apple pulp through, resulting in cloudy jelly, which we want to avoid for that beautiful, translucent finish. While the juice is slowly dripping, place a small saucer or ceramic plate in your freezer – this will be essential for the “wrinkle test” later.
- Combine and Boil to Setting Point: Once you have a sufficient amount of strained apple juice (measure it accurately), transfer this precious liquid to a clean, heavy-bottomed pan. For every 18 ounces (500 ml) of apple liquid, incorporate 9 ounces (250 g) of granulated sugar, 5 ½ ounces (150 g) of your chosen mild honey, and the freshly squeezed juice of 1 lemon. Stir the mixture gently over medium heat until all the sugar has completely dissolved. Once dissolved, increase the heat and bring the mixture to a vigorous, rolling boil. Maintain this rapid boil for approximately 10 to 15 minutes, stirring occasionally to prevent sticking and ensure even cooking.
- Perform the “Wrinkle Test” for Perfect Set: After about 10 minutes of boiling, remove the chilled saucer from the freezer. Spoon a small teaspoon of the hot jelly mixture onto the cold saucer and return it to the fridge for 1 minute. After a minute, gently push the cooled jelly with your fingertip. If the surface wrinkles or leaves a distinct trail when pushed, it has reached the “setting point.” If it remains liquid, continue to boil the mixture for a few more minutes, then repeat the test with a clean, cold saucer. Remember to turn off the heat while testing to prevent overcooking. The exact boiling time can vary significantly, depending on the apples’ pectin content and the pot’s heat, so consistent testing is key.
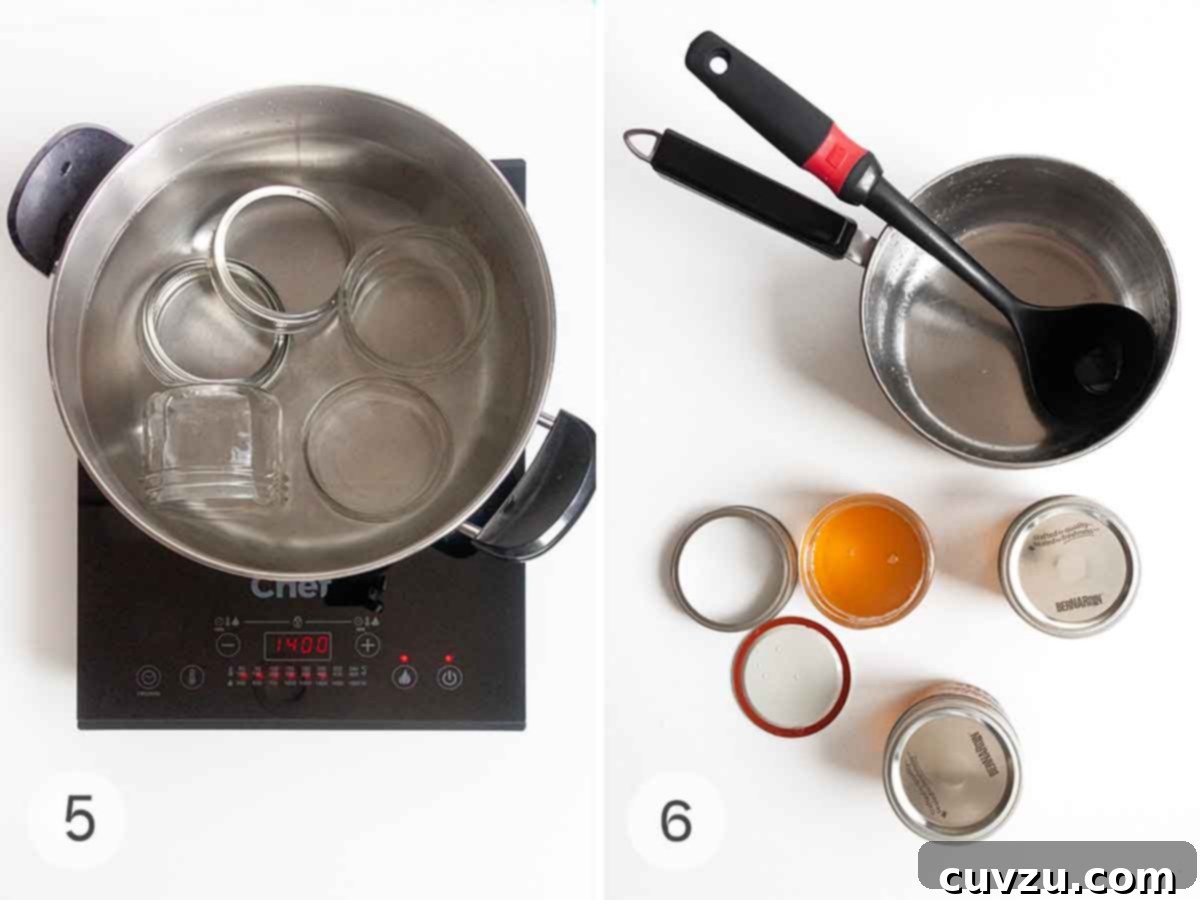
- Sterilize Jars and Can for Long-Term Enjoyment: While your jelly is coming to a set, sterilize your canning jars and lids (rings can be sterilized too, but they don’t form the seal). This typically involves submerging them in boiling water for at least 10 minutes. Once the jelly has reached its setting point, remove any foam or “scum” from the surface with a spoon. Let the jelly rest for 10 minutes off the heat, allowing any air bubbles to rise. Ladle the hot apple jelly into the hot, sterilized jars, leaving about ¼ inch of headspace. Wipe the rims clean, secure with sterilized lids and rings, and process in a boiling water bath canner according to the manufacturer’s directions (or our detailed guide below) for long-term storage. The jelly will fully set as it cools in the jars. Store in a cool, dark place for up to 1 year. Once opened, refrigerate and consume within 3 weeks.
Your Top Apple Jelly Questions, Answered in Detail
While canning is ideal for extended shelf life and makes for wonderful gifts, it’s not strictly necessary for enjoying this delicious apple jelly. You can absolutely proceed with the recipe through the setting point (step 6), then simply ladle the hot jelly into clean jars or containers. Allow it to cool completely on the counter, then stash it in your refrigerator. When stored in the fridge, this homemade jelly will retain its freshness and flavor for approximately 6 weeks, ready to be enjoyed at your leisure.
This sweet and savory apple jelly is incredibly versatile! As the author Hattie Ellis suggests, it truly shines as a sophisticated element on a charcuterie or cheese platter, providing a delightful contrast to savory meats and rich cheeses. For breakfast or brunch, it’s heavenly schmeared generously on warm, buttered toast, fluffy scones, or light and airy homemade biscuits. Don’t limit it to breakfast, though! Serve it alongside roasted meats like pork loin, turkey, or chicken to add a bright, herbaceous glaze. You can also warm it gently and brush it over fresh fruit tarts – such as apple or apricot – to give them a beautiful, professional-looking shine and an extra layer of flavor.
This is a crucial step for achieving a perfect set without relying on commercial pectin. Apple skins and seeds, along with the cores, are naturally very high in pectin. When you simmer these parts along with the apple flesh and water, you are efficiently extracting as much of this natural gelling agent as possible. This ensures that when the sugar and lemon juice are added later, the pectin will activate effectively, allowing your homemade apple jelly to set properly into a firm, glistening preserve. It’s nature’s own setting agent at work!
The good news is that almost any flavorful eating apple will yield excellent jelly! Our testers found that Cortland apples work exceptionally well, providing a great balance of sweetness and tartness with good pectin. Other highly popular choices include Granny Smith apples, which are fantastic for their high pectin content and tart flavor that helps create a firm, bright jelly. Golden Delicious apples are another excellent option, known for their pleasant balance of sweetness and tartness, contributing to a wonderfully flavored preserve. Using a mix of varieties can also create a more complex and interesting flavor profile.
Pro Tips & Troubleshooting for Jelly Making Success
- Choose Your Fruit Wisely: Always opt for barely ripe or slightly underripe fruit when making jelly. Overripe fruit has significantly reduced levels of natural pectin, which is essential for proper setting. Using fruit that is too ripe can result in a runny or soft-set jelly that doesn’t hold its shape.
- Master the Setting Point with a Thermometer: While the “wrinkle test” is reliable, an instant-read thermometer provides an even more precise measurement for when your apple jelly has reached its perfect setting point. Jams and jellies typically set at 220°F (104°C) at sea level. This precise temperature indicates that enough water has evaporated and the sugar concentration is ideal for gelling.
- Adjust for High Altitude Canning: If you reside at a high altitude, water boils at a lower temperature, which can affect canning processing times. To ensure the safety and proper sealing of your canned jelly, it is crucial to adjust the processing time accordingly. As a general rule, for every 1,000 feet (305 meters) above sea level, you may need to increase your boiling water bath processing time by an additional minute for every 20 minutes of recommended processing. Always consult a reputable canning guide for precise high-altitude adjustments specific to your elevation.
- The Importance of a Clean Strain: As mentioned in the instructions, resist the urge to squeeze the cheesecloth when straining the cooked apples. While it might seem efficient, squeezing introduces pulp and cloudiness into your juice, which will result in a less clear and aesthetically pleasing jelly. Patience is a virtue here; let gravity do the work.
- Skim the Scum: As your jelly boils, you may notice a layer of foam or “scum” forming on the surface. While harmless, this foam can make your finished jelly look cloudy. Use a clean, shallow spoon to carefully skim off this scum during the final stages of boiling or after the jelly has rested for a few minutes off the heat. This simple step contributes to a beautifully clear and sparkling jelly.
Discover More Exquisite Jam and Jelly Recipes
Share Your Experience: Write a Review!
We love hearing from our community! If you make this delightful Honey Rosemary Apple Jelly recipe, or any other dish featured on Leite’s Culinaria, please consider leaving a review, a star rating, and even your best photo in the comments section below. Your feedback and beautiful culinary creations inspire us all!–David
Featured Review
I had a big bag of crabapples and wanted to try something a little different. The rosemary is very subtle and my jelly is a beautiful blush colour from the crabapples. The hardest part was waiting for the liquid to drain (patience is not my strong suit) but worth it in the end. The leftover cooked apples are being turned into apple butter as I just didn’t want it to go to waste.
HeAther
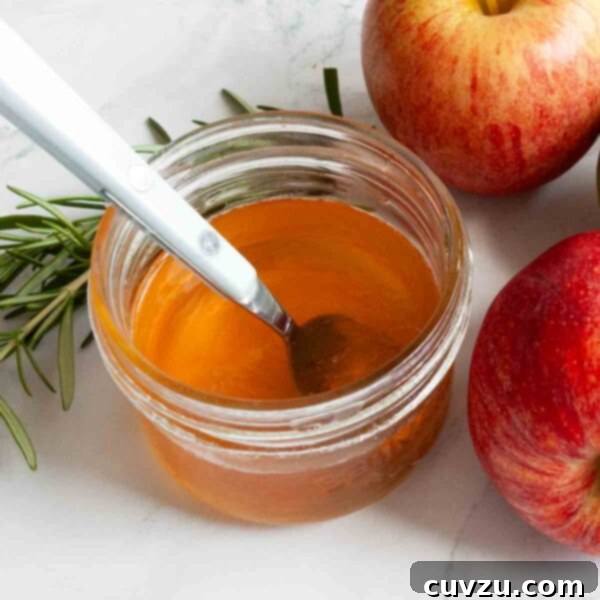
Honey Rosemary Apple Jelly
- PIN
Ingredients
- 2 pounds (about 4) large apples, (Choose firm, slightly underripe eating apples for best pectin content; Cortland, Gala, or Golden Delicious are excellent choices)
- 2 pints cold water
- 2 large sprigs fresh rosemary
- About 1 pound granulated sugar
- About 10 1/2 ounces honey, preferably a light, floral type such as clover or wildflower, to complement the apple and rosemary without overpowering
- 1 large lemon, juiced
Instructions
- Start by thoroughly washing your apples. There’s no need to peel or core them at this stage, as the skins and cores contain valuable pectin. Simply cut each apple into quarters, and if there are any blemishes or the stem remains, remove those. Then, roughly chop the quartered apples into small, uniform chunks. Transfer all the chopped apples—including the skins, core fragments, and seeds—into a large, sturdy saucepan or stockpot.
- Pour the specified amount of cold water into the pot with the apples. Add the two large sprigs of fresh rosemary, gently submerging them in the mixture. Bring the contents of the pot to a vigorous boil over medium-high heat. Once boiling, immediately reduce the heat to a low simmer. Cover the pot loosely and allow the mixture to gently simmer for a full 45 minutes. This extended simmering time is crucial for softening the apples and extracting their natural pectin and the delicate rosemary flavor.
- After simmering, carefully ladle the entire apple and rosemary mixture onto several layers of clean cheesecloth, which should be suspended over a large, clean bowl. This setup allows the pure apple juice to drip freely. It is essential to let this process occur naturally, without any intervention. Allow the liquid to drip through the cheesecloth, completely undisturbed and without squeezing, for a generous 3 to 4 hours. Meanwhile, as the juice drips, place a small ceramic saucer or plate into your freezer; this will be vital for testing the jelly’s set later on.
☞ TESTER TIP: It will be incredibly tempting to try and speed along this straining process by pressing on the apple mixture within the cheesecloth. You must resist this temptation! The absolute key to achieving a beautifully clear and sparkling jelly is to let only the pure, unadforced juice drip from the apple mixture. Any pressure will push cloudy apple solids through, compromising the clarity of your final product.
- Once all the liquid has finished dripping, accurately measure the volume of the strained apple juice. Transfer this clear liquid into a clean, large, heavy-bottomed pan. For every 18 ounces (500 ml) of liquid you’ve collected, add 9 ounces (250 g) of granulated sugar, 5 1/2 ounces (150 g) of your chosen honey (preferably a light, floral type), and the freshly squeezed juice of 1 lemon. The lemon juice is crucial here, not only for flavor but also to help activate the pectin for setting.
- Place the pan over medium-high heat. Stir the mixture continuously until all the sugar has completely dissolved. This step is important to prevent crystallization. Once the sugar is fully dissolved, increase the heat to bring the mixture to a rapid, rolling boil. Ensure it boils vigorously, as this is when the pectin will activate and the jelly will begin to thicken.
- Allow the jelly mixture to boil hard for approximately 10 minutes. At this point, retrieve your chilled saucer from the freezer. Turn off the heat under the jelly mixture. Spoon a small teaspoon of the hot liquid onto the cold saucer and immediately place it back into the fridge for exactly 1 minute to cool rapidly.
- After 1 minute, remove the saucer from the fridge. Gently push the cooled jelly on the saucer with your fingertip. If the surface wrinkles or leaves a defined trail where your finger passed, then your jelly has reached the ideal setting point. This technique is famously known as the “wrinkle test.” If the jelly remains liquid or doesn’t wrinkle, don’t despair! Simply continue to boil the mixture for another few minutes, then repeat the test with a fresh, clean, and cold saucer. It’s critical to turn off the stove each time you test to prevent the jelly from overcooking. The total time for the jelly to set can vary, often taking 15 minutes or even longer, depending on the specific pectin, acid, and sugar balance in your apples and how vigorously it boils. Patience here yields perfection!
- Once your jelly passes the wrinkle test, turn off the heat completely. Use a clean, shallow spoon to carefully skim off any foam or “scum” that may have formed on the surface of the jelly. This step ensures a beautifully clear and visually appealing final product. After skimming, let the jelly rest in the pot for about 10 minutes. This resting period helps any remaining air bubbles to rise to the surface and allows the fruit pieces (if making jam) to distribute more evenly, although for jelly, it primarily helps with settling and clarity.
- While the jelly mixture is boiling and approaching its setting point, this is the perfect time to sterilize your canning jars and lids. Refer to the detailed canning guide provided below for complete instructions on proper jar sterilization and preparation for either hot water bath canning or simple refrigeration.
- After the 10-minute resting period, give the jelly one last skim for any lingering foam. Carefully ladle the hot, shimmering jelly into your hot, sterilized jars, filling them almost to the very top, leaving about ¼ inch of headspace. Wipe the rims of the jars meticulously clean with a damp cloth to ensure a perfect seal. Immediately place the sterilized lids on top, followed by the rings, securing them fingertip tight. If canning, process the jars in a boiling water bath canner according to established guidelines and your canner’s manufacturer’s directions. The jelly will continue to firm up and fully set in the jars as they cool completely on your countertop.
- For optimum flavor and quality, store your properly canned and sealed jars of honey rosemary apple jelly in a cool, dark place, such as a pantry, and consume them within 1 year. Once you open a jar, it must be stored in the refrigerator. After opening, enjoy your delicious homemade jelly within 3 weeks for the freshest taste and texture.
Notes for Optimal Results
- Selecting Your Fruit for Pectin Power: To achieve a perfectly set jelly without added pectin, the ripeness of your apples is key. Always strive to use slightly underripe or barely ripe fruit. As apples mature, their pectin content gradually decreases. Using overripe fruit can lead to a reduced level of natural pectin, which may interfere significantly with the jelly’s ability to set properly, resulting in a runny or soft texture.
- Precision in Setting with a Thermometer: While the “wrinkle test” is a time-honored and reliable method, for ultimate precision in determining when your apple jelly has achieved the ideal setting point, we highly recommend using an instant-read thermometer. Jams and jellies typically reach their setting point at 220°F (104°C) when at sea level. This temperature indicates that sufficient water has evaporated, and the sugar-pectin ratio is just right for gelling.
- High-Altitude Canning Adjustments: If you are planning to can your jelly and live at a high altitude, it’s critical to adjust your processing time. Water boils at a lower temperature as elevation increases, which means foods require longer processing to be safely preserved. Consult a reliable canning guide (like the USDA’s) for specific adjustments based on your altitude, as neglecting this step can compromise the safety and shelf stability of your preserves.
- Don’t Rush the Drip: Remember the tester tip: resisting the urge to squeeze the cheesecloth during the straining process is paramount. Squeezing will force fine pulp into your juice, resulting in a cloudy jelly. Allow ample time (3-4 hours) for gravity to work its magic and yield a beautifully clear, translucent juice.
- Cleanliness is Next to Jelliness: Sterilizing your jars and lids thoroughly is not just about cleanliness; it’s about food safety and ensuring a proper seal for long-term storage. Always use freshly cleaned and sterilized equipment for canning.
Recipe Adapted From
Spoonfuls of Honey, a delightful collection of recipes celebrating the versatility of honey.
Buy On AmazonExplore More with AI
Nutrition Information
Nutrition information is automatically calculated, so should only be used as an approximation. Individual results may vary based on exact ingredients and preparation methods.
Our Essential Guide to Canning Jams, Jellies, and Other Preserves
For those eager to extend the shelf life of their delicious homemade apple jelly, water bath canning is an excellent and safe method. This detailed guide walks you through the fundamental steps to ensure your preserves are safely sealed and ready for long-term enjoyment.
1. Diligently Prepare Your Canning Jars and Lids
Before you even begin cooking your apple jelly, it’s crucial to set up a meticulously clean workspace and prepare all your canning equipment. Start by washing your canning jars and their corresponding two-piece lids (flats and rings) in hot, soapy water. Rinse them thoroughly to remove all soap residue. For proper sterilization, place the clean jars into a large canning pot, fill the pot with water to cover the jars by at least an inch, and bring it to a gentle simmer (around 180°F or 82°C). Keep the jars in this hot water until they are ready to be filled. Alternatively, you can sterilize jars by placing them in a 225°F (107°C) oven for at least 10 minutes until you’re ready to fill them. While the oven method is not officially recommended by the USDA, it is a common practice among many experienced home canners.
For the lids (flats), place them in a small saucepan with water and bring to a simmer (do not boil). Keep them hot until you’re ready to seal the jars; this helps soften the sealing compound for a better seal.
2. Precisely Fill Your Sterilized Jars
Properly filling your canning jars is a critical step that ensures a successful seal and safe preservation. All canned goods require “headspace”—the empty space between the food and the rim of the jar. This space is essential to allow for the expansion of the food during processing and to create a strong vacuum seal as the jars cool. For jams and jellies, the general rule is to leave exactly 1/4 inch (about 0.6 cm) of headspace. Carefully ladle the hot apple jelly into the hot, sterilized jars, using a funnel to minimize drips and ensure a clean fill. After filling, always take a moment to meticulously wipe the rim of each jar clean with a damp, clean cloth or paper towel. Any jelly residue on the rim can prevent the lid from forming a perfect seal.
When placing the sterilized lids (flats) on top of the filled jars, center them carefully. Then, screw on the outer rings. It’s important not to overtighten the rings. Secure them only until they are “fingertip tight”—meaning snug but not forcefully tightened. Overtightening can actually hinder the proper venting of air from the jars during processing, which is a crucial step for creating a reliable vacuum seal. A good seal allows air to escape and then pulls the lid down as the jar cools.
3. Process the Jars in a Water Bath
Prepare your canning pot or a large, deep stockpot by filling it halfway with water and bringing it to a low boil. Maintain this gentle boil until you are ready to place the filled jars inside. If you are using a dedicated canning pot, which comes with a rack, place the prepared jars of food directly onto this rack. This keeps the jars slightly elevated from the bottom and allows water to circulate freely around them.
If you are using a deep stockpot, which is generally best suited for small-batch preserving, line the bottom of the pot with a clean dish towel or a canning rack if you have one. Then, carefully place your filled jars on top of the towel or rack. The towel serves an important purpose: it prevents the jars from rattling against the bottom of the pot during boiling and helps keep them upright, preventing them from tumbling over onto their sides. It’s important to note that while this method is widely used by home canners, it may not be universally recommended or endorsed by the USDA for all types of canning. However, many experienced farmers and European country folk have successfully employed this old-school technique for generations, and we’ve found their “laissez-faire” ways effective for jellies.
Ensure that the jars are not stacked on top of each other, as ample space is required for water circulation to achieve proper sealing. Once all jars are in the pot, carefully add enough additional hot water to cover the jar tops by at least an inch (or more). Cover the pot with its lid and increase the heat to bring the water back to a vigorous, rolling boil. Processing times begin only once the water in the canning pot has returned to a full boil. This can sometimes take as long as 15 minutes, so keep a close eye on your pot and have a timer nearby to accurately track the processing duration.
4. Carefully Remove and Cool the Jars
Once the specified processing time has elapsed, carefully turn off the heat under the canning pot. Allow the jars to rest in the hot water for about 5 minutes before removing them. This short rest period helps to equalize the temperature and reduce the risk of thermal shock to the jars. Using a specialized jar lifter or a sturdy set of kitchen tongs, carefully remove each jar from the canner, lifting it straight up to avoid tilting and breaking the seal. Place the hot jars upright on a folded kitchen towel or a wire rack on your countertop. This prevents direct contact with a cold surface, which could cause the jars to crack, and allows air to circulate for even cooling. Ensure there is some space between each jar. It is crucial at this stage that you do not press down on the tops of the lids, as this can create a false seal and compromise the integrity of your preserve.
5. Confirm Proper Jar Sealing for Safety and Longevity
As your jars cool completely on the countertop (which can take 12 to 24 hours), you will likely hear satisfying popping sounds emanating from the can tops. This distinctive “pop” is the reassuring sign that a secure vacuum seal has been successfully formed. Once the jars are fully cool to the touch, it’s essential to double-check each seal. To do this, remove the outer ring from each jar. Then, lift the jar gently by holding only the lid (the flat disk). If the lid stays securely intact and doesn’t budge, you have successfully canned your food, and it is safe for pantry storage.
If, however, a seal feels loose, or if the lid easily lifts off, then the seal is broken or was never properly formed. In such cases, you have two options: you can reprocess the jar within 24 hours. To do so, remove the faulty lid, check the jar rim for any cracks, chips, or nicks that might have prevented a seal (and replace the jar if damaged). Then, replace the lid with a brand new, sterilized one and reprocess the jar in a boiling water bath for the full recommended time. Alternatively, if you prefer not to reprocess, simply refrigerate the jar immediately and plan to consume its contents within 2 to 3 weeks, treating it as a refrigerated item rather than a shelf-stable preserve.
Hear From Our Kitchen: Recipe Testers’ Honest Reviews
Anna Scott
Last holiday season, I was searching for a flavorful and distinctive accompaniment for a roast turkey tenderloin. This delightful recipe for apple jelly immediately caught my eye, and I was absolutely charmed by its unique sweet-savory flavor combination. It certainly took a bit of time to make, transforming into a fascinating process that felt like part science experiment and part joyful cooking—it was genuinely fun and engaging!
Having previously made jams by simply boiling various fruits with lemon and sugar, I was particularly intrigued by this specific apple jelly recipe’s clever use of apples for their natural pectin. The ingenious part is that you’re not using the apple flesh for the jam itself, but rather solely relying on the pure, clear juices that are slowly extracted by allowing the cooked apples and rosemary to drip through cheesecloth. This method yields an incredibly translucent and elegant jelly. It proved to be a magnificent accompaniment to my Instant Pot turkey, adding a bright, herbaceous, and sweet counterpoint. I can also easily envision it being absolutely yummy spread on a warm wedge of savory buttermilk cornbread or a freshly baked homemade biscuit.
Suzanne Fortier
I am absolutely thrilled to welcome this gorgeous apple jelly into my preserving repertoire! As the author so aptly suggests, this jelly offers a depth that is far more complex than simply sweet; it boasts a strong, comforting overtone of honey beautifully balanced by delicate herbal undertones from the rosemary. I can already imagine it being a wonderful pairing with any rich pork dish, elevating a classic grilled cheese sandwich, or simply smeared on a slice of warm, buttered bread for a luxurious snack.
A crucial tip I discovered during the process: when you boil the syrup, remember to boil it hard and consistently. If the boil isn’t vigorous enough, it will take considerably longer to reach the necessary temperature, leading to more evaporation and a potentially less efficient set. In my case, it took almost 30 minutes to set via the reliable “wrinkle test.” Additionally, it’s a really good idea to diligently skim the scum from the surface while the jelly is still cooking. It becomes much harder to remove once the jelly begins to thicken and set. My final yield was almost 16 ounces of beautifully clear, blush-toned jelly. Truly gorgeous!