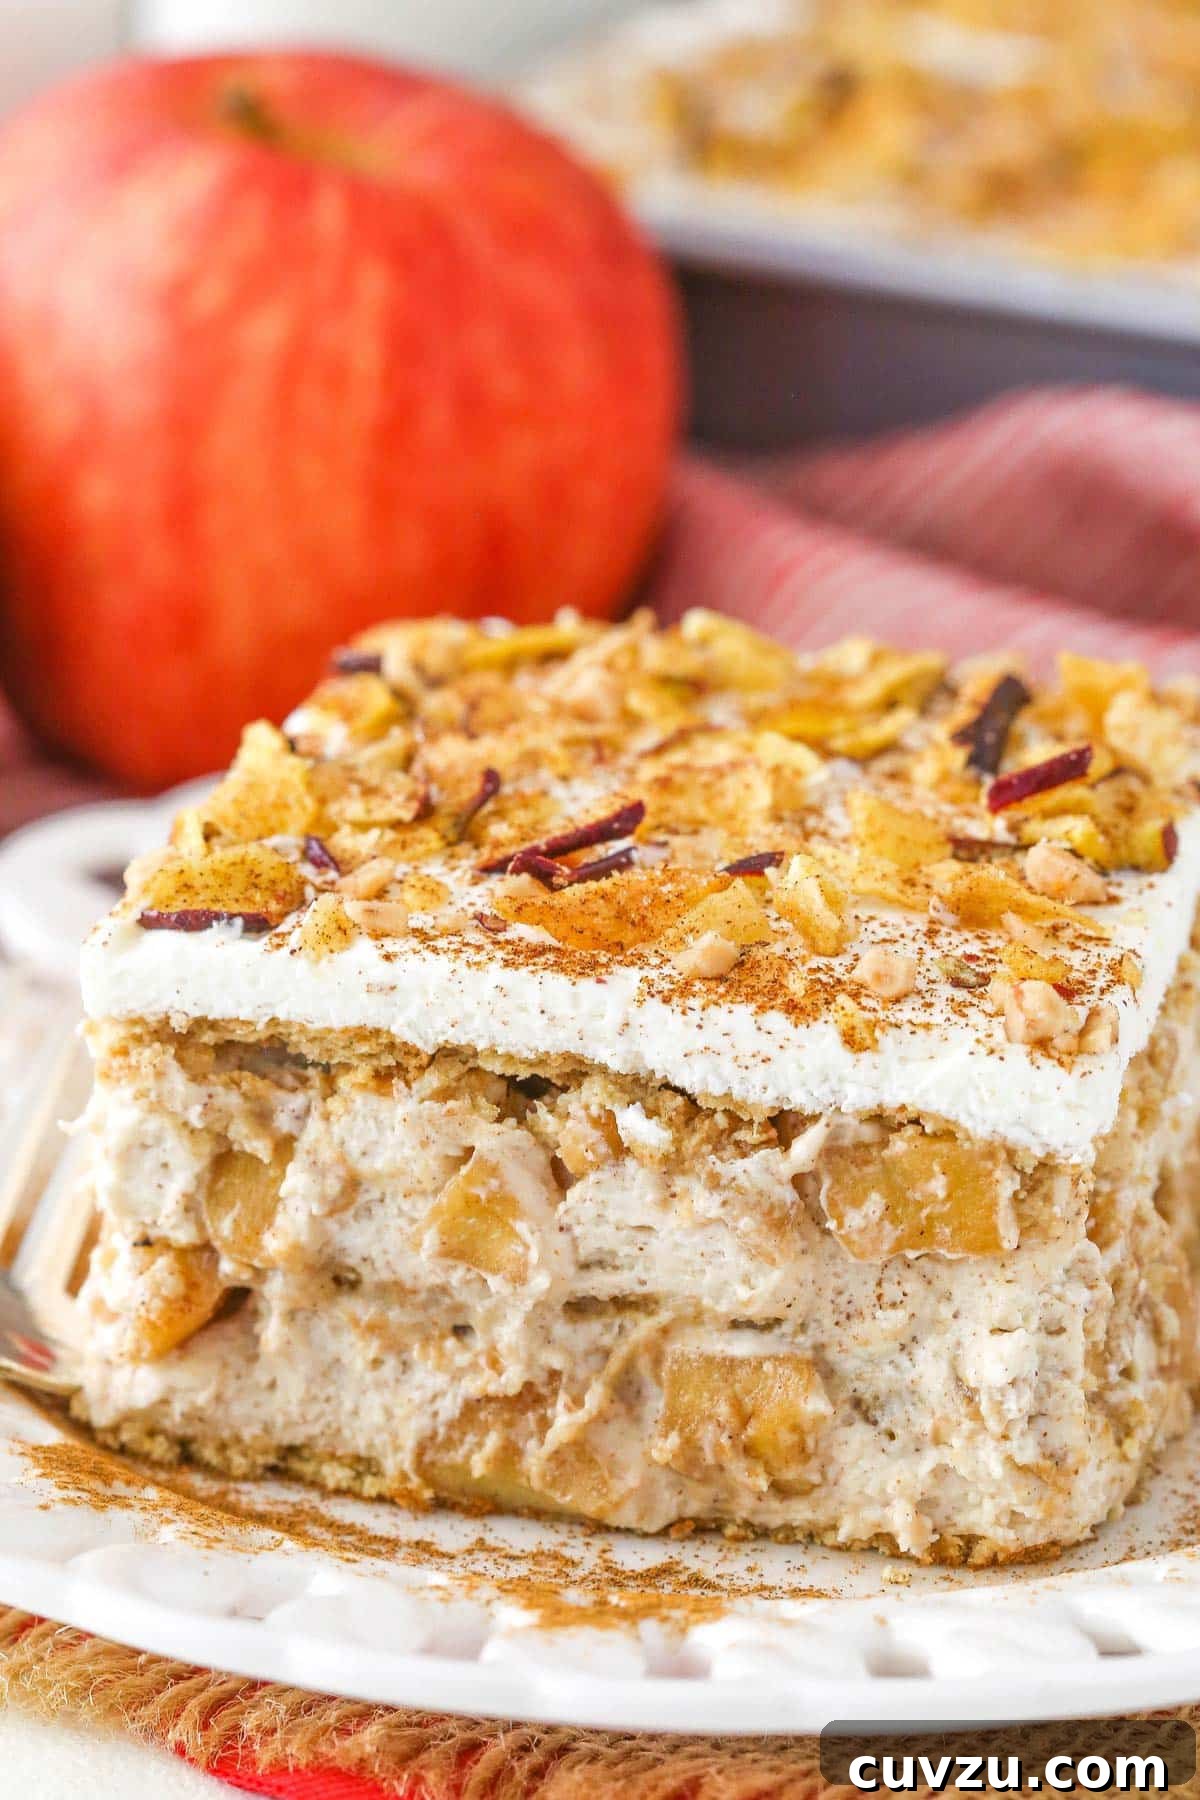
Welcome to the ultimate autumn indulgence: the Cinnamon Apple Icebox Cake! If you’re searching for a dessert that embodies the cozy flavors of fall without the fuss of baking, look no further. This exquisite no-bake treat layers tender, spiced apples with a dreamy, light cream cheese mousse and crisp graham crackers, creating a symphony of textures and tastes. Perfect for holiday gatherings, potlucks, or simply a delightful weekend dessert, this icebox cake is an effortless way to impress and satisfy any sweet tooth. Its simplicity belies its rich, comforting flavor, making it a must-try for apple and cinnamon lovers alike.
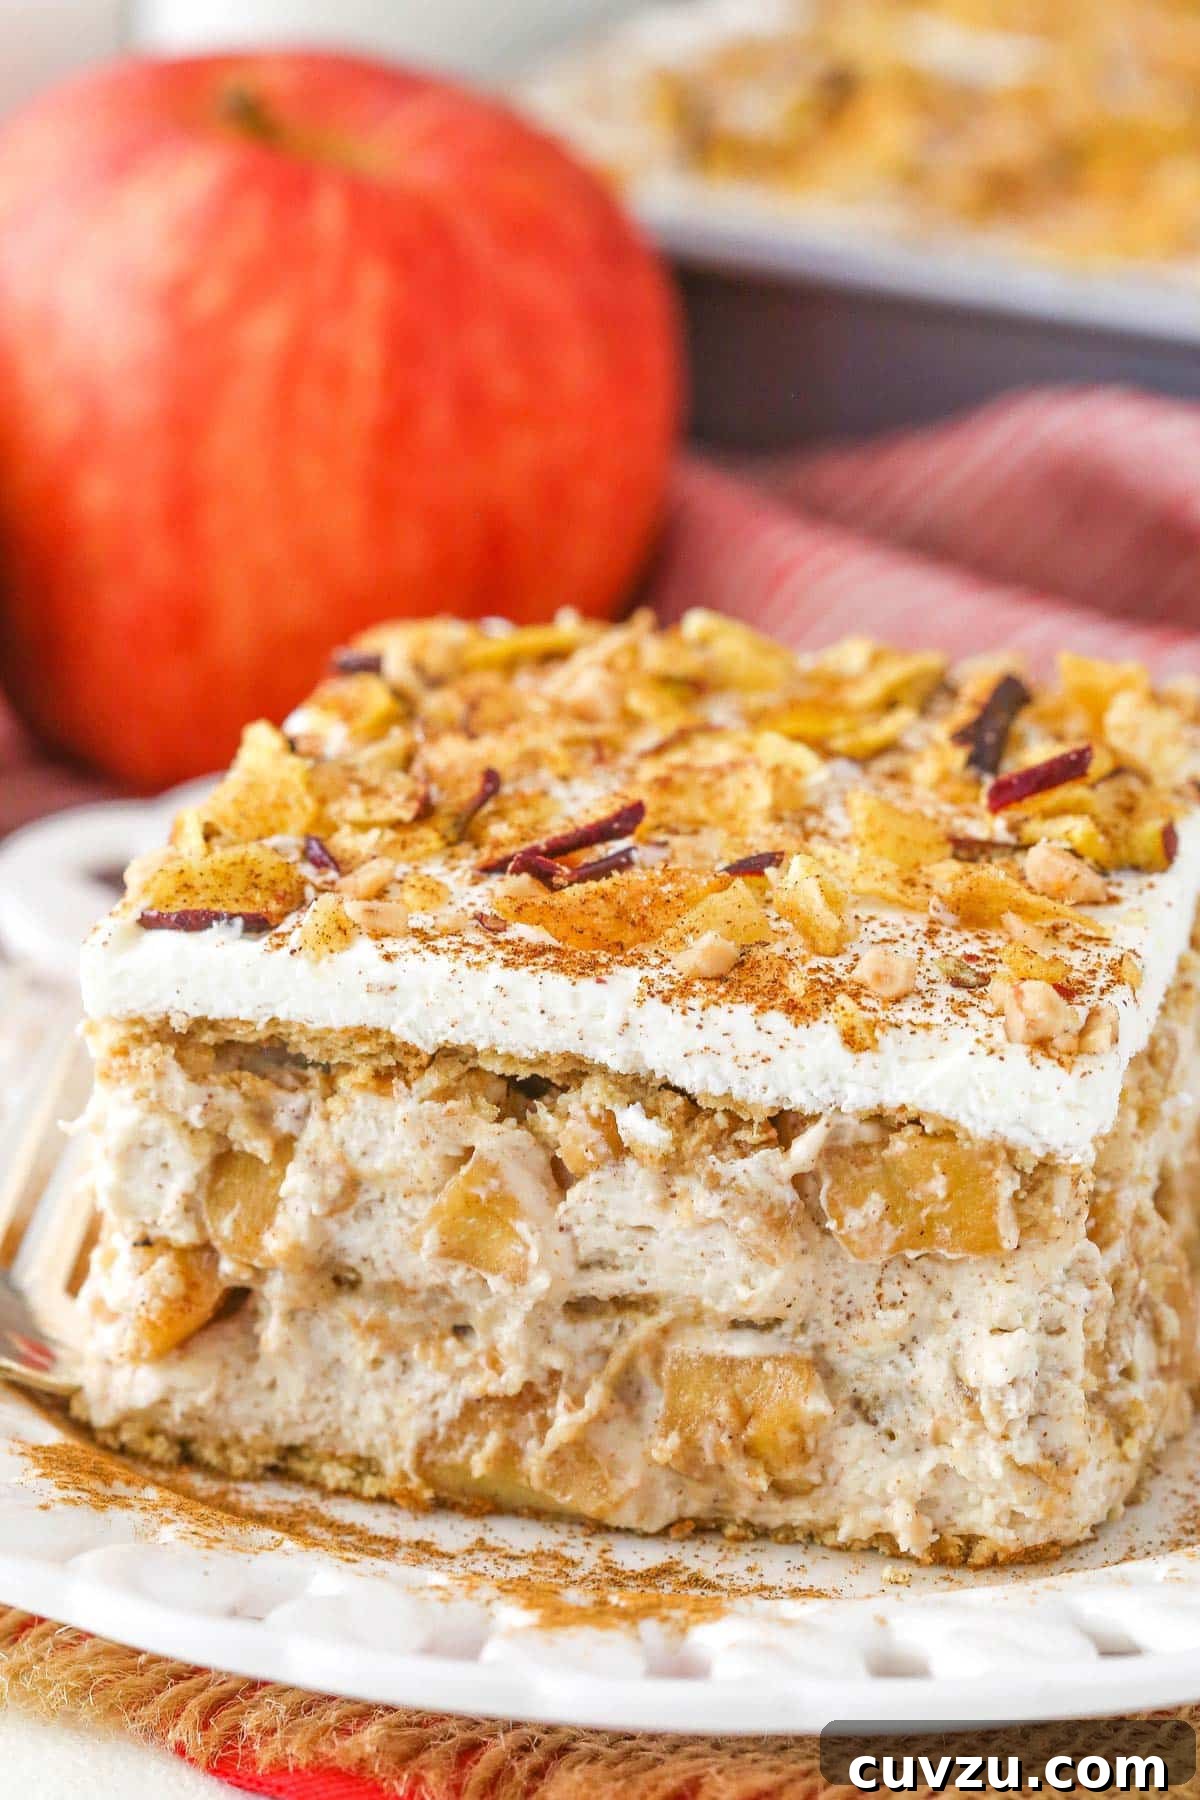
Discover the Magic of No-Bake Desserts with This Cinnamon Apple Icebox Cake
There’s something truly magical about an icebox cake. It’s a dessert that requires no oven, minimal effort, and delivers maximum flavor. This particular Cinnamon Apple Icebox Cake shines as a testament to the versatility and deliciousness of no-bake creations. Imagine the warm, inviting aroma of cinnamon and nutmeg mingling with sweet, softened apples, all nestled between layers of graham crackers that soften to a cake-like texture overnight. This is the kind of dessert that brings smiles, evokes memories of crisp autumn days, and becomes an instant classic in your recipe repertoire.
Whether you’re new to the world of no-bake desserts or a seasoned enthusiast, this recipe is designed for success. Its straightforward steps make it accessible for even novice bakers, while the impressive results make it worthy of any special occasion. The beauty of an icebox cake lies in its transformation during refrigeration; the crisp graham crackers slowly absorb moisture from the creamy mousse and tender apples, softening into a delightful, cohesive cake. This chilling process not only develops the flavors but also creates that wonderfully unique texture that defines a perfect icebox cake. Say goodbye to complicated baking techniques and hello to easy, delicious elegance.
Why This Cinnamon Apple Icebox Cake is Your Next Favorite Dessert
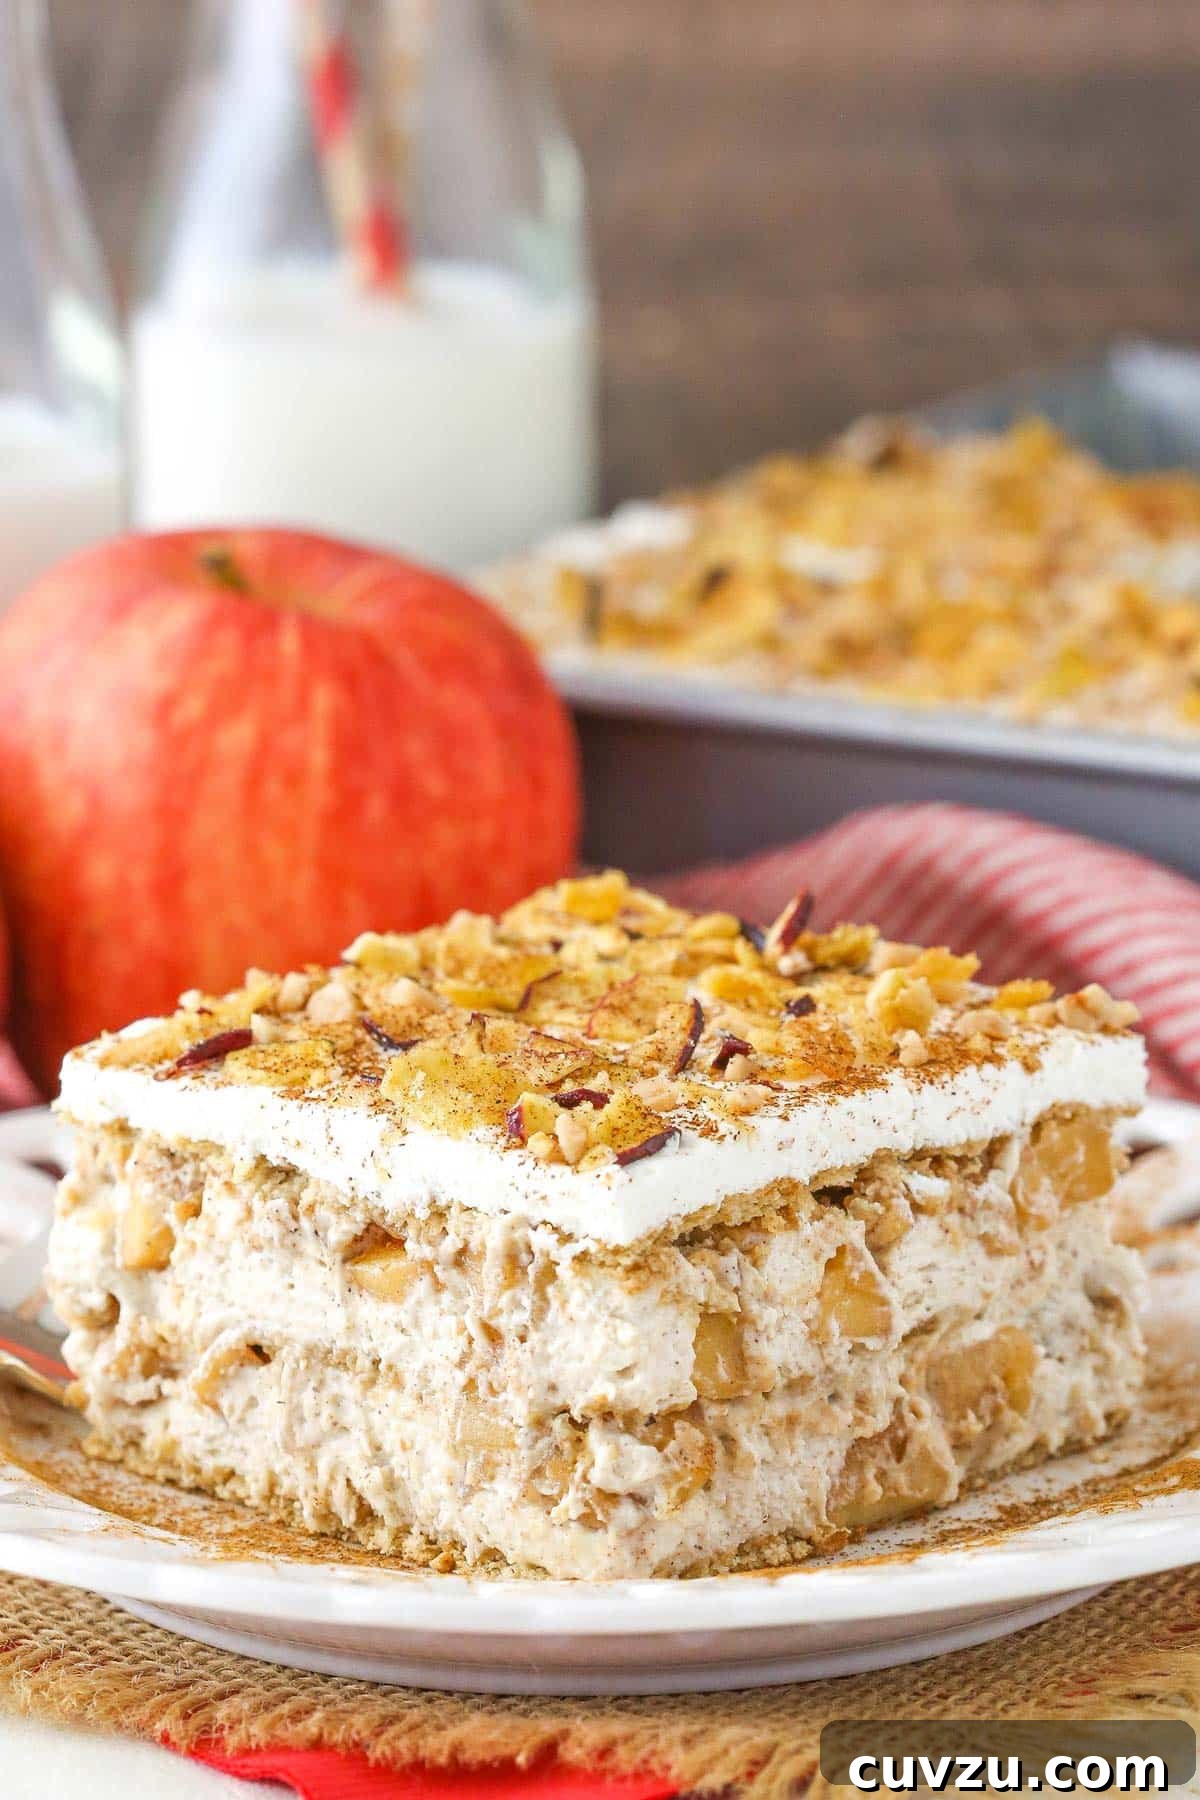
Beyond its undeniable ease, this Cinnamon Apple Icebox Cake offers a perfect balance of flavors and textures. The apples, gently cooked with brown sugar, cinnamon, nutmeg, and a hint of lemon, become wonderfully tender and aromatic, providing a delightful warmth that is characteristic of fall. This sweet and tangy apple layer is then perfectly complemented by a rich yet light cream cheese mousse. The mousse, infused with more brown sugar and cinnamon, offers a creamy counterpoint to the spiced apples, creating a harmonious blend that’s simply irresistible.
The graham crackers are not just a structural component; they are a key player in the cake’s texture. As they meld with the moist layers, they lose their crispness and become soft, almost cake-like, adding a subtle honeyed flavor that pairs beautifully with the apples and cream. This dessert is also incredibly versatile, making it ideal for various occasions. Planning a holiday feast? This cake can be prepared hours, or even a day, in advance, freeing up your oven and your time. Hosting a casual get-together? Its crowd-pleasing appeal ensures there won’t be a slice left. It’s a delightful way to celebrate the bounty of the apple season and usher in the festive spirit.
Crafting Your Perfect No-Bake Apple Cinnamon Cake
Creating this delicious icebox cake is a straightforward process, broken down into a few simple stages: preparing the cinnamon apples, whipping up the creamy mousse, and then assembling the layers. Each step is designed for ease and enjoyment, resulting in a dessert that tastes far more complicated than it is to make.
The Heart of the Cake: Spiced Cinnamon Apples
The journey to this delectable dessert begins with the star ingredient: apples. You’ll want to select apples that hold their shape well when cooked but also soften to a tender consistency. Varieties like Honeycrisp, Granny Smith (if you prefer a tart note), Fuji, or even good old Red Delicious are excellent choices. Start by chopping your chosen apples into bite-sized pieces. In a pan, combine these apples with light brown sugar, ground cinnamon, a touch of ground nutmeg, and a splash of lemon juice. The lemon juice is crucial here; it not only brightens the apple flavor but also helps prevent browning.
Gently cook this mixture over medium heat, stirring occasionally, until the apples reach your desired tenderness. Some prefer a slight bite, while others enjoy a softer, almost jam-like texture. This usually takes about 10-15 minutes. Once cooked, set the apples aside to cool completely to room temperature. This cooling step is important to prevent them from melting the mousse when layered.
The Creamy Dream: Light Mousse Filling
The next component is the luscious cream cheese mousse that forms the creamy backbone of the cake. For the best results, ensure your cream cheese is at room temperature; this will allow it to beat smoothly without lumps. In a large mixing bowl, combine the softened cream cheese with brown sugar and ground cinnamon. Beat these ingredients until the mixture is light, fluffy, and completely smooth. Next, add a couple of tablespoons of milk and continue to beat until everything is well incorporated and wonderfully creamy.
In a separate, very clean and cold mixing bowl, whip heavy whipping cream with vanilla extract and powdered sugar until stiff peaks form. The cold temperature of the cream and bowl is key to achieving perfectly stiff peaks. Once whipped, gently fold a portion of this whipped cream into the cream cheese mixture in two stages. The goal is to incorporate it without deflating the air, maintaining that light and airy texture. This creates a mousse that is rich, tangy, and subtly sweet, with a delicate cinnamon undertone.
Assembling Your Icebox Masterpiece
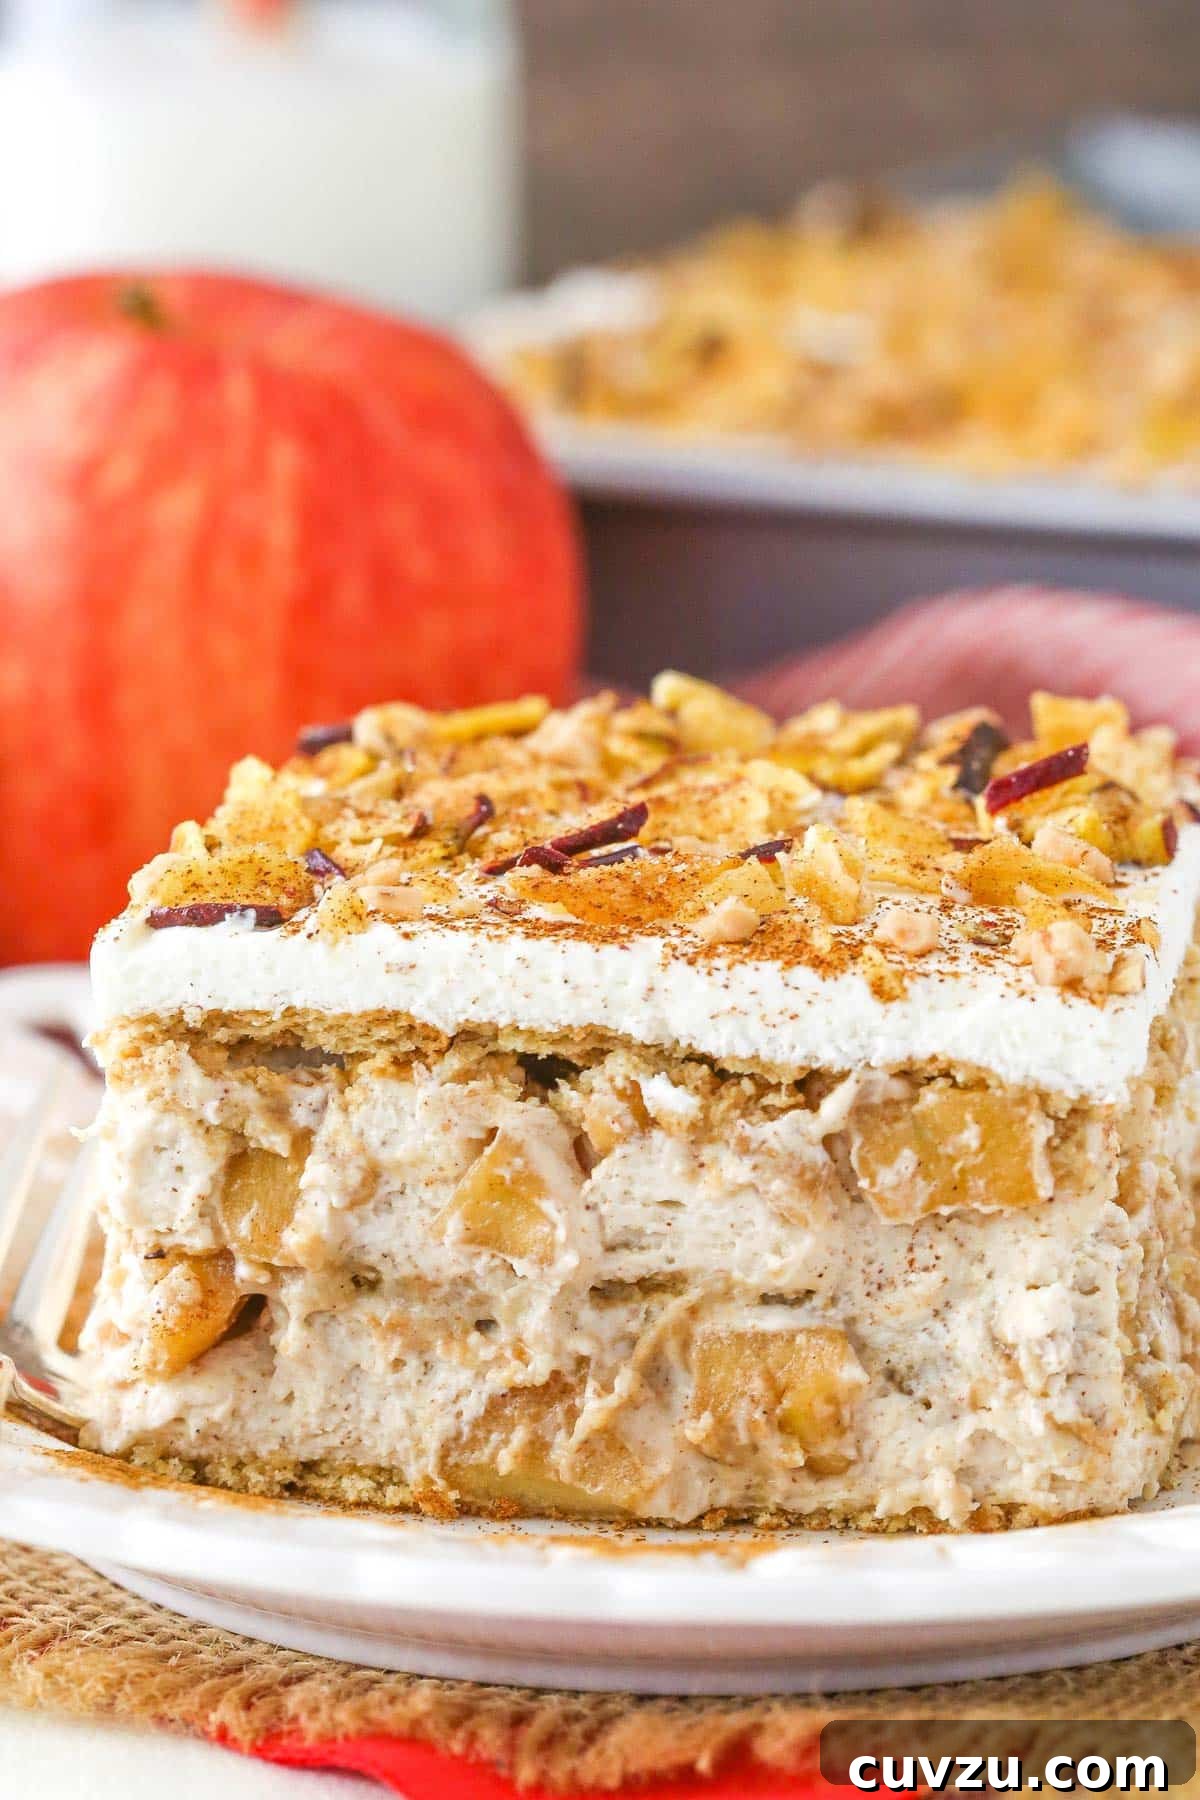
Now comes the fun part: layering! Choose a 9-inch square pan for this recipe. Begin by arranging a single layer of graham crackers at the bottom of the pan, breaking larger pieces as needed to fill any gaps and create a solid base. This uniform layer is important for the cake’s structural integrity.
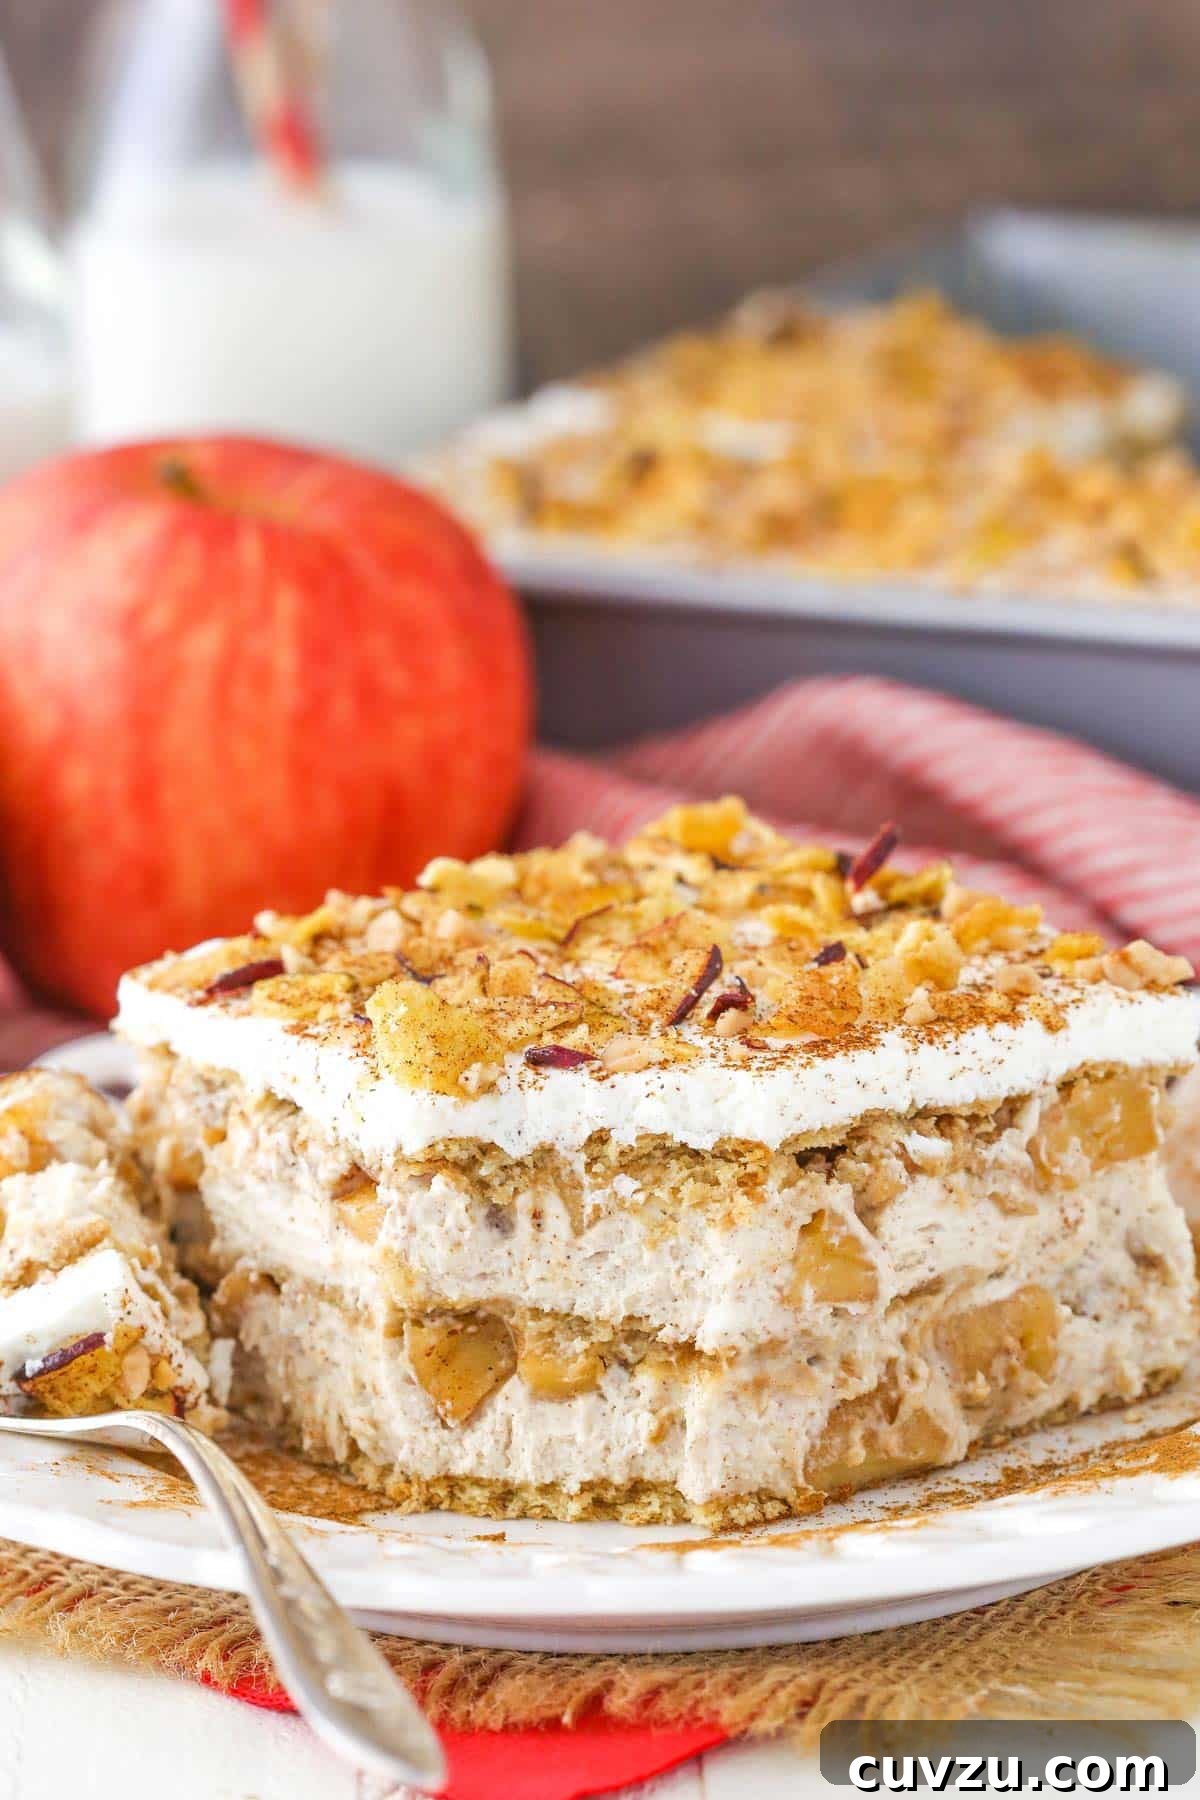
Next, spread about half of your creamy mousse filling evenly over the graham crackers. On top of the mousse, distribute about half of your cooled cinnamon apples, gently pressing them into the filling. Repeat this process: another layer of graham crackers, followed by the remaining mousse, and then the rest of the apples. Finish with one final layer of graham crackers on top. For the final touch, spread the remaining reserved whipped cream (from the mousse preparation) over the very top layer of graham crackers. This creates a beautiful, pristine white finish.
Once all the layers are assembled, the most crucial step is refrigeration. Cover the pan loosely with plastic wrap and refrigerate for at least 4-5 hours, or preferably overnight. This extended chilling period allows the graham crackers to fully soften, the flavors to meld beautifully, and the cake to firm up, making it easy to slice and serve. The waiting might be hard, but it’s essential for achieving that perfect icebox cake texture.
Tips for Success & Variations
- Apple Choice: While Red Delicious are good, for a more complex flavor and texture, consider mixing two types of apples, such as a tart Granny Smith with a sweet Honeycrisp.
- Cracker Alternatives: Not a fan of graham crackers? Try shortbread cookies, digestive biscuits, or even ginger snaps for a different flavor profile.
- Spice It Up: Enhance the fall flavors by adding a pinch of allspice or ground cloves to your cinnamon apples.
- Caramel Drizzle: For an extra touch of decadence, drizzle warm caramel sauce over each slice just before serving.
- Nutty Crunch: Sprinkle chopped pecans or walnuts between layers or on top for added texture and flavor.
- Make-Ahead: This cake is even better the next day! Prepare it a day in advance for optimal flavor and texture development. Store any leftovers covered in the refrigerator for up to 3-4 days.
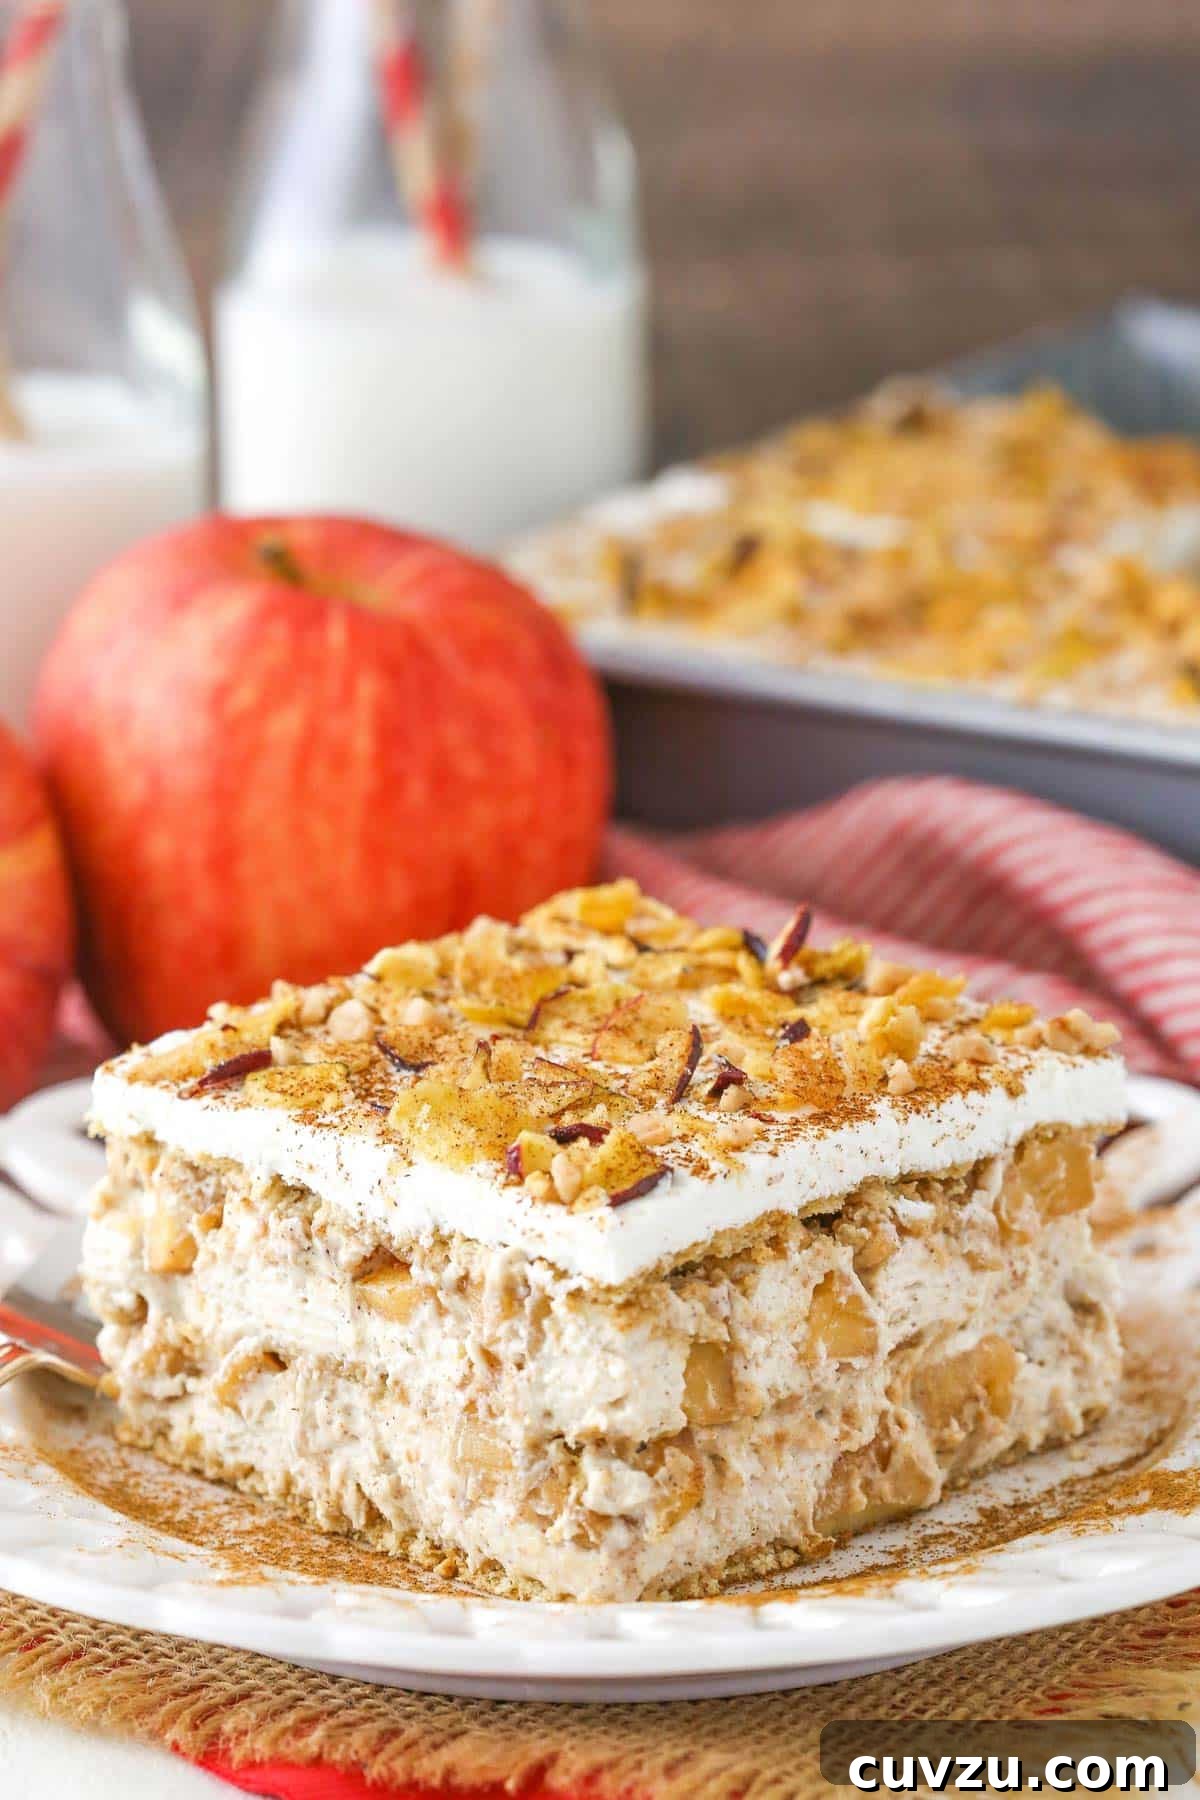
The final cake is truly a slice of apple heaven! The delicate crunch of the cinnamon apples combined with the smooth, brown sugar cinnamon filling is simply irresistible. We hope you enjoy making and devouring this delightful no-bake treat as much as we do!
More Irresistible Apple Cake Recipes to Explore
- Classic Applesauce Cake: A Moist and Flavorful Treat
- Decadent Caramel Apple Layer Cake: Perfect for Special Occasions
- Sweet Apple Upside Down Cake: A Beautiful and Simple Dessert
- Baked Caramel Apple Blondie Cheesecake: The Best of Both Worlds
- Rich Caramel Apple Pecan Layer Cake: A Taste of Southern Comfort
Print Recipe
Cinnamon Apple Icebox Cake
5 Stars 4 Stars 3 Stars 2 Stars 1 Star
No reviews
Author: Lindsay
Prep Time: 15 minutes
Cook Time: 15 minutes
Total Time: 30 minutes
Yield: 9–12 Slices
Category: Dessert
Method: No-Bake, Stovetop
Cuisine: American
Description
This Cinnamon Apple Icebox Cake is a delightful no-bake dessert featuring layers of tender, spiced apples, a luscious cream cheese mousse, and softened graham crackers. It’s an easy, elegant, and irresistibly delicious treat, perfect for fall celebrations or any time you crave a comforting, apple-infused dessert without turning on the oven.
Ingredients
Scale
FOR THE CINNAMON APPLES
- 2–3 large apples, peeled, cored, and chopped (such as Honeycrisp, Fuji, or Red Delicious)
- 1/4 cup (56g) light brown sugar, packed
- 1 1/4 tsp ground cinnamon
- 1/8 tsp ground nutmeg
- A sprinkle of fresh lemon juice (about 1 teaspoon)
FOR THE MOUSSE FILLING
- 12 oz (340g) cream cheese, softened to room temperature
- 3/4 cup (108g) brown sugar
- 2 tsp ground cinnamon
- 2 tbsp milk
- 2 1/2 cups heavy whipping cream, very cold
- 1 tsp vanilla extract
- 1 1/4 cups (144g) powdered sugar
ADDITIONAL COMPONENTS
- 1 box (approx. 14.4 oz) graham crackers
- Apple chips, crushed (optional, for garnish)
- Extra crushed graham crackers (optional, for garnish)
Instructions
1. Prepare the Cinnamon Apples: In a medium saucepan, combine the chopped apples, light brown sugar, 1 1/4 tsp ground cinnamon, ground nutmeg, and a sprinkle of lemon juice. Stir well to ensure the apples are evenly coated with the spices.
2. Cook the apple mixture over medium heat, stirring occasionally, for about 10-15 minutes, or until the apples reach your desired tenderness. Remove from heat and set aside to cool completely to room temperature. This step is crucial to prevent the hot apples from melting the cream cheese mousse.
3. Make the Cream Cheese Mixture: In a large mixing bowl, using an electric mixer, beat the softened cream cheese, 3/4 cup brown sugar, and 2 tsp ground cinnamon together until the mixture is light, fluffy, and completely smooth, with no lumps.
4. Add the milk to the cream cheese mixture and continue to beat until smooth and well combined. Set this cream cheese mixture aside while you prepare the whipped cream.
5. Whip the Cream: In a separate large, very cold mixing bowl, combine the cold heavy whipping cream, vanilla extract, and powdered sugar. Using an electric mixer, whip on high speed until stiff peaks form. Be careful not to over-whip, which can result in a grainy texture.
6. Reserve approximately 1 1/2 cups of the whipped cream in a separate bowl to use as the top layer and garnish later. This ensures a beautifully white and smooth finish for your cake.
7. Combine Mousse Ingredients: Gently fold the remaining whipped cream into the prepared cream cheese mixture in two parts. Use a spatula and fold carefully until just combined, taking care not to deflate the mixture too much. The goal is a light and airy mousse.
8. Layer the Cake: Take a 9×9 inch square pan. Arrange a single, even layer of graham crackers at the bottom of the pan. Break some crackers into smaller pieces as needed to fill any gaps, ensuring a solid base layer.
9. Spread approximately half of the creamy mousse filling evenly over the layer of graham crackers. Use an offset spatula for a smooth finish.
10. Distribute about half of the cooled cinnamon apples evenly on top of the mousse layer. Gently press the apples into the filling to secure them.
11. Repeat the layering process: add another layer of graham crackers, followed by the remaining mousse filling, and then the rest of the cooled cinnamon apples.
12. Place one final layer of graham crackers on top of the apple layer, ensuring full coverage.
13. Evenly spread the 1 1/2 cups of reserved whipped cream over the top layer of graham crackers. This will be the beautiful, creamy top of your icebox cake.
14. Chill Thoroughly: Cover the pan loosely with plastic wrap and refrigerate for a minimum of 4-5 hours, or ideally overnight. This chilling time is essential for the graham crackers to soften and for all the flavors to meld beautifully, creating a cohesive cake texture.
15. Serve: Before serving, you can optionally top the icebox cake with crushed graham crackers or crushed apple chips for added texture and visual appeal. Slice into 9-12 pieces and enjoy your delicious no-bake Cinnamon Apple Icebox Cake!
Nutrition Information
- Serving Size: 1 Slice
- Calories: 339
- Sugar: 28.5 g
- Sodium: 120.4 mg
- Fat: 22.5 g
- Carbohydrates: 31.8 g
- Protein: 4.1 g
- Cholesterol: 71.7 mg
Enjoy your homemade Cinnamon Apple Icebox Cake!