Delight in the simple luxury of homemade chocolate-covered strawberries! This comprehensive guide will walk you through every step of creating these elegant and irresistibly delicious treats, perfect for sharing, gifting, or indulging yourself. Learn how to select the best strawberries, master the art of melting chocolate, and discover creative decorating techniques to make them truly special.

Few desserts capture the essence of elegance and indulgence quite like chocolate-covered strawberries. Their vibrant red hue, luscious sweetness, and rich chocolate coating create a sensory experience that feels incredibly sophisticated, yet they are surprisingly simple to prepare at home. Once you discover how effortless it is to craft these gourmet treats in your own kitchen, you’ll likely find yourself skipping the store-bought versions forever. There’s an unmatched freshness and customizable charm that only homemade can offer, making every bite a delightful celebration.
Why Choose Homemade Chocolate Covered Strawberries?
You might be wondering, with so many options available in stores, why bother making chocolate-covered strawberries from scratch? The answer lies in the superior quality, personalized touch, and undeniable satisfaction that comes from creating them yourself. Here are several compelling reasons why going the homemade route is truly the best option:
- Effortless Elegance, Unforgettable Impression: Despite their luxurious appearance, these chocolate-dipped delights require only two primary ingredients: fresh strawberries and quality chocolate. No complex baking techniques or specialized equipment are needed, just a few straightforward steps to transform simple fruit into an absolutely stunning dessert. They’re perfect for impressing guests at a dinner party, adding a touch of romance to an evening, or simply treating yourself to something special.
- Superior Taste and Quality Over Store-Bought: The difference in taste between homemade and commercially produced chocolate-covered strawberries is often night and day. Homemade versions boast fresher, juicier berries and a rich, genuine chocolate flavor, free from the waxy texture and overly sweet, artificial coatings sometimes found on grocery store varieties. Plus, crafting them at home is significantly more cost-effective, allowing you to enjoy a premium treat without the premium price tag.
- Endless Customization and Creativity: This is where homemade truly shines! Whether you prefer the intense richness of dark chocolate, the creamy sweetness of milk chocolate, or the delicate notes of white chocolate, you have full control. Beyond the chocolate, the decorating possibilities are boundless. Drizzle them with contrasting white chocolate, sprinkle with finely chopped nuts, add festive sprinkles for holidays, or roll them in cookie crumbs for extra texture. Each strawberry can be a canvas for your culinary creativity, allowing you to tailor them perfectly to any occasion or preference.
- A Fun and Rewarding Culinary Project: Making chocolate-covered strawberries is not just about the end product; it’s also a fun and engaging activity. It’s a great project to do with kids, friends, or a partner, offering a rewarding experience that results in delicious edible art. The process itself is therapeutic, and the joy of sharing your handcrafted creations is unparalleled.

Essential Ingredients and Equipment
Creating perfect chocolate-covered strawberries starts with selecting the right components and having the necessary tools at hand. Here’s a detailed look at what you’ll need to embark on this delicious journey. For precise measurements, always refer to the full recipe card below.
- Fresh Strawberries: The star of our show! Opt for ripe, firm, and blemish-free strawberries with bright green stems. Larger strawberries tend to be easier to dip and offer a more substantial bite, but any size works. Choose organic if possible for the best flavor and to avoid pesticides.
- Quality Chocolate: The type of chocolate you choose significantly impacts the flavor and texture of your finished product. You can use bittersweet, semi-sweet, milk, or white chocolate, depending on your preference. The key is to select a high-quality baking chocolate designed for melting.
- White Chocolate & Pink Gel Icing Color (Optional): These are wonderful for adding decorative drizzles or creating visually appealing accents. Gel colors are preferred over liquid food coloring as they won’t seize the chocolate.
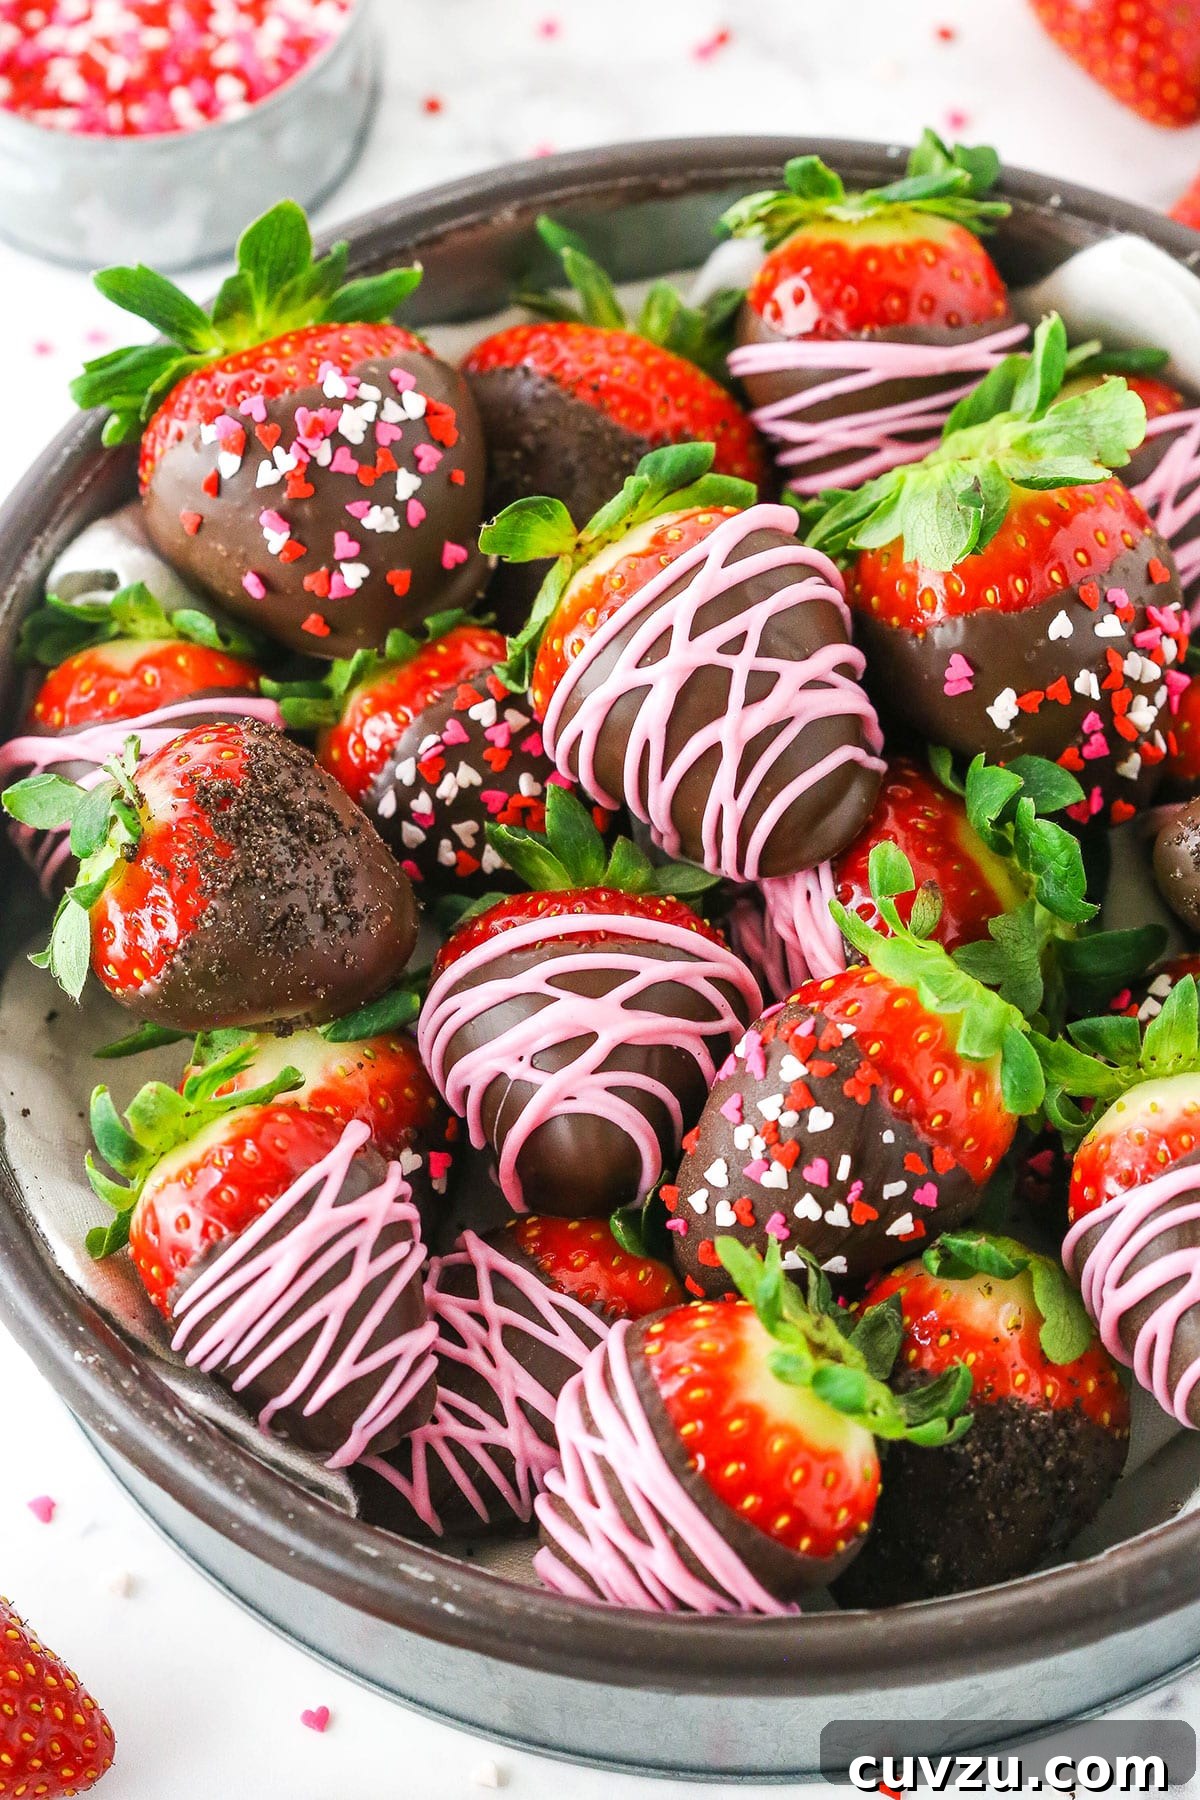
- Toppings (Optional): This is where you can truly let your imagination run wild! My personal favorites include finely crushed Oreo crumbs and a vibrant assortment of sprinkles. Below, I’ll share even more exciting ideas to inspire your decorating.
Choosing the Right Chocolate for Dipping
Since this recipe relies heavily on just two main ingredients – strawberries and chocolate – the quality and type of chocolate you use are paramount. You want a chocolate that melts smoothly, has a beautiful sheen, and sets firm without becoming waxy or difficult to bite through. Not all chocolates are created equal when it comes to dipping.
I highly recommend using **chocolate melting wafers or baking bars** specifically formulated for confectionery. These often contain a higher percentage of cocoa butter or specific emulsifiers that help them melt evenly and set with a glossy finish. Brands like Ghirardelli offer excellent dark chocolate melting wafers, which are incredibly reliable and easy to use. They also come in white and milk chocolate varieties, providing versatility for your creations. Ghirardelli dark chocolate baking chips are another fantastic option that melts beautifully. Another superb choice is Baker’s baking bar chocolate, which is known for its consistent melting properties and rich flavor.
What to AVOID: Steer clear of standard chocolate chips or everyday eating chocolate bars. While delicious for snacking, they often contain stabilizers that prevent them from melting smoothly, resulting in a thick, clumpy, or dull coating. These types of chocolates are designed to hold their shape, not to flow freely for dipping.
Essential Equipment:
Having the right tools will make the process much smoother and more enjoyable:
- Parchment Paper or Silicone Mats: Essential for preventing your dipped strawberries from sticking as they set.
- Baking Sheets: To hold the parchment paper and dipped strawberries.
- Microwave-Safe Bowls or Double Boiler Setup: For melting your chocolate. Heatproof glass bowls are ideal.
- Rubber Spatula or Spoon: For stirring chocolate and gently shaking off excess.
- Piping Bags or Ziplock Bags (Optional): For creating elegant drizzles. Small round tips (like Wilton tip 3) can enhance precision.
- Toothpicks or Skewers (Optional): Can be helpful for handling strawberries, especially smaller ones, if you prefer not to hold them by the stem.
Mastering the Art: How to Make Chocolate Covered Strawberries
Creating these beautiful treats is simpler than you might imagine. Let’s walk through the basic steps, then dive into the crucial details that ensure professional-looking results every time.
- Prepare Your Strawberries with Precision: The first and most critical step is to wash your fresh strawberries thoroughly under cool running water. After washing, drying them completely is paramount. Any residual water can cause the melted chocolate to “seize” (thicken and become grainy) or prevent it from adhering properly to the fruit. I recommend using several layers of paper towels to gently pat each strawberry individually until it is bone dry. Ensure the berries are at room temperature, as cold berries can cause the chocolate to set too quickly and crack.
- Organize Your Toppings: If you plan to add any decorative toppings like sprinkles, nuts, or cookie crumbs, prepare them in advance. Place them in shallow bowls or dishes. This ensures they are immediately accessible once you’ve dipped the berries, as the chocolate will start to set quickly.
- Set Up Your Drying Station: Line a baking sheet with parchment paper or a silicone baking mat. This provides a non-stick surface for your dipped strawberries to cool and firm up without sticking, ensuring their perfect presentation.
- Melt Your Chosen Chocolate: Achieving perfectly melted chocolate is key to a smooth, glossy coating. Refer to the detailed melting instructions below for both microwave and double boiler methods. The goal is a velvety, free-flowing consistency.


- Dip, Coat, and Top: Hold each strawberry firmly by its stem. Gently immerse the strawberry into the melted chocolate, swirling it to ensure an even, generous coating on all sides. Lift the strawberry and allow any excess chocolate to drip back into the bowl. This prevents unsightly pooling at the base. If adding immediate toppings, roll or sprinkle them onto the chocolate while it’s still wet and tacky. Then, carefully place the dipped strawberry onto your prepared parchment paper.
- Allow the Chocolate to Firm Up: Once all your strawberries are dipped and topped, allow the chocolate to set. This typically takes about 20-30 minutes at room temperature. For quicker setting, you can place the baking sheet in the refrigerator for about 10-15 minutes, but avoid extended chilling to prevent condensation.
- Final Decorations (If Applicable): If you plan to add a drizzle of contrasting colored white chocolate, wait until the primary chocolate coating has fully firmed up. This ensures clean lines and prevents colors from bleeding.
Mastering Chocolate Melting: Two Simple Methods
Properly melting chocolate is crucial for a smooth, glossy finish on your strawberries. Overheating can cause chocolate to seize, burn, or develop a dull appearance. Here are two reliable methods to achieve perfectly melted chocolate:
Method 1: Melting Chocolate in the Microwave
This is generally the quickest and easiest method, but it requires careful attention to avoid overheating. Place your finely chopped chocolate or melting wafers into a microwave-safe bowl. Heat the chocolate in short bursts, typically 10-20 second intervals. Start with a slightly longer interval (e.g., 30 seconds for the first round), then significantly shorten subsequent intervals as the chocolate begins to melt. After each interval, remove the bowl and stir the chocolate thoroughly with a dry spatula. The residual heat in the bowl and the already melted chocolate will continue to melt the remaining chunks. Continue this process of heating and stirring until the chocolate is mostly smooth with just a few small lumps remaining. Remove it from the microwave and continue stirring until completely smooth. This gradual approach prevents scorching and ensures a silky texture.
Method 2: Melting Chocolate in a Double Boiler
The double boiler method offers more gentle and controlled heating, reducing the risk of burning. You can use a dedicated double boiler or create your own by setting a heatproof glass bowl over a saucepan. Add about 1-2 inches of water to the saucepan and bring it to a gentle simmer over medium-low heat. Place your heatproof bowl on top of the pot, ensuring the bottom of the bowl does not touch the simmering water. There should be a small gap to allow the steam to heat the chocolate indirectly. Add your chopped chocolate or wafers to the glass bowl and stir constantly with a dry spatula as it melts. The steam will gently and evenly heat the chocolate. Once the chocolate is mostly melted and smooth, with a few small pieces still visible, remove the bowl from the heat. Continue stirring until all the chocolate has melted into a perfectly smooth, glossy consistency, utilizing the residual heat. This method is excellent for maintaining a consistent temperature and is particularly forgiving.
Once your chocolate is flawlessly melted and has a beautiful, flowing consistency, you’re ready to start dipping your fresh, dry strawberries!

Expert Tips for Chocolate Covered Strawberry Success
Achieving picture-perfect chocolate-covered strawberries is easier with a few insider tips. Pay attention to these details, and your homemade treats will look and taste like they came from a gourmet shop:
- Start with Peak-Quality Strawberries: Always select the freshest, ripest, and firmest strawberries available. Avoid any berries with soft spots, bruises, or mold. Strawberries at room temperature coat more smoothly than cold ones, as the temperature difference is less drastic, preventing immediate shocking and cracking of the chocolate.
- Absolute Dryness is Non-Negotiable: This cannot be stressed enough! After washing, meticulously dry each strawberry with paper towels. Even a tiny drop of water can cause the chocolate to seize (turn thick and grainy) or prevent it from adhering properly, leading to a patchy, unattractive coating.
- Handle with Care (and by the Stem): Holding each strawberry by its green stem keeps your fingers clean and allows you to dip and rotate the berry evenly for a full, uniform coating. Gently swirl the strawberry in the chocolate, ensuring every surface is covered.
- Eliminate Excess Chocolate: After dipping, gently shake or tap the strawberry against the side of the bowl to allow any excess chocolate to drip back. This prevents a thick “foot” of chocolate from forming at the base of the berry when it hardens, ensuring a cleaner, more elegant look. (Though, let’s be honest, an extra bit of chocolate is rarely a bad thing!)
- Craving an Extra-Thick Coating? For those who love a generous layer of chocolate, you can double-dip the berries! Simply allow the first coat of chocolate to fully harden before dipping them again into the melted chocolate. This creates a wonderfully decadent crunch.
- The Power of Parchment Paper: Always place your freshly dipped strawberries on a baking sheet lined with parchment paper or a silicone baking mat. This crucial step ensures the chocolate doesn’t stick to the surface as it sets, making for easy removal and pristine presentation.
- Timing is Everything for Toppings: If you’re adding sprinkles, chopped nuts, cookie crumbs, or any other toppings, do so immediately after dipping, while the chocolate is still wet and tacky. This allows the toppings to firmly adhere to the chocolate. For decorative drizzles of a contrasting chocolate, however, wait until the main chocolate coating has fully set and hardened for crisp, clean lines.
- Mind the Temperature of Your Melted Chocolate: Keep your melted chocolate at a consistent, warm temperature for optimal dipping. If it starts to cool and thicken, gently reheat it in very short bursts (5-10 seconds in the microwave) or over the double boiler, stirring thoroughly until it returns to a smooth, dippable consistency.


Simple, Yet Impressive, Decorating Ideas
Once your strawberries are perfectly dipped in chocolate, the real fun begins: decorating! This is your chance to personalize your treats and make them visually stunning. The options are truly limitless, allowing for creativity that suits any occasion or taste. Here are some fantastic ideas to get you started:
- Vibrant Sprinkles: A classic and universally loved option! Choose colorful rainbow sprinkles for a festive look, or opt for themed sprinkles for holidays like Valentine’s Day (red, pink, white) or Christmas (red, green, white).
- Crushed Oreo Crumbs: For a delightful cookies-and-cream twist, roll your chocolate-dipped strawberries in finely crushed Oreo crumbs. The dark crumbs against the chocolate create a beautiful contrast and add a wonderful textural element.
- Finely Chopped Nuts: Almonds, pistachios, walnuts, or pecans add a sophisticated crunch and nutty flavor. Toasting the nuts lightly before chopping can enhance their aroma and taste.
- Crushed Graham Cracker Crumbs: Perfect for a s’mores-inspired treat! The subtle sweetness and crunchy texture of graham crackers pair wonderfully with chocolate.
- Shredded Coconut: For a tropical flair, dip your berries in finely shredded coconut. Lightly toasted coconut adds an extra layer of flavor and aroma.
- Melted Chocolate Drizzle: A simple yet elegant way to decorate. Use a contrasting chocolate (white chocolate over dark, or vice-versa) for visual appeal. You can also color white chocolate with gel food coloring for a pop of color.
- Edible Glitter or Dust: For truly show-stopping berries, a light dusting of edible glitter or pearl dust can add a magical shimmer.
- Mini Chocolate Chips: A quick and easy way to add more chocolatey goodness and texture.
Important Decorating Timing: For most dry toppings (sprinkles, crumbs, nuts, coconut, mini chips), you’ll want to apply them immediately after dipping, while the chocolate coating is still wet and tacky. This ensures they adhere firmly. However, for a decorative chocolate drizzle, it’s best to let the primary chocolate coating dry and firm up completely first. This prevents the drizzle from merging with the base coat and ensures crisp, distinct lines.
How to Create an Elegant Chocolate Drizzle
Adding a drizzle is a fantastic way to elevate the presentation of your chocolate-covered strawberries. You can use any type of melted chocolate for this, but white chocolate often provides the most striking contrast. For a fun twist, I love adding a few drops of pink gel icing color to white chocolate to create a lovely, soft pink drizzle.
To achieve a beautiful drizzle, you have a couple of easy options:
- The Ziplock Bag Method: Spoon your melted chocolate (plain or colored) into a small plastic ziplock bag. Snip off a tiny piece of one of the bottom corners with scissors. Make the cut as small as possible to start, as you can always make it bigger if needed. Then, gently squeeze the bag and move it back and forth over your firm-set strawberries to create thin, artistic lines.
- The Piping Bag Method: For more control and precision, use a piping bag fitted with a small, round tip (like Wilton tip 3). Fill the bag with your melted chocolate. This method allows for finer lines and more intricate patterns, which I personally prefer for the added control and professional finish it offers.
Whichever method you choose, practice on a piece of parchment paper first to get a feel for the flow and pressure. Drizzle creatively – zigzags, straight lines, or even swirls – to make each strawberry a mini work of art.
Optimal Storage for Freshness and Appearance
While chocolate-covered strawberries are undeniably at their peak when enjoyed the day they are made, careful storage can allow you to prepare them a day in advance for special occasions. Understanding the science behind their freshness is key to preserving their quality.
- The “Best When Fresh” Principle: Chocolate-covered strawberries are truly best savored within a few hours of preparation. The primary reason for this is the interaction between the cold, moist strawberry and the relatively dry chocolate coating. Storing them in the refrigerator, while necessary for longer preservation, inevitably creates condensation. This moisture can cause several undesirable effects: the chocolate may develop a dull, grayish bloom (sugar or fat bloom), and the strawberries themselves can become soggy or release excess juice, affecting both texture and taste.
- If You Must Store Them (for up to 24 hours): Should you need to store your delectable treats overnight or for a few hours, the refrigerator is your only option. However, it’s crucial to minimize condensation. Arrange the dipped berries in a single layer on a plate or shallow container, separating layers with wax paper if stacking is necessary. The most important step is to cover the plate *loosely* with plastic wrap or foil. Do not use an airtight container, as this will trap moisture and accelerate condensation, leading to soggy berries and bloomed chocolate. Store them in the coolest part of your refrigerator.
- Serving Recommendation: For the most delightful experience, plan to make these exquisite treats on the same day you intend to serve them. Once the chocolate has fully firmed up at room temperature, they are ready to be enjoyed. Serving them at room temperature will showcase their best flavor, texture, and pristine appearance, ensuring the strawberries are juicy and the chocolate is perfectly crisp and glossy.
More Irresistible Strawberry Desserts
If you’ve fallen in love with the sweet and vibrant taste of strawberries, you’re in for a treat! Explore more delightful ways to incorporate this beloved fruit into your desserts:
- Homemade Strawberry Cake: A tender, moist cake bursting with fresh strawberry flavor and often topped with a luscious strawberry frosting.
- Strawberry Sprinkle Cookies: Fun, colorful cookies with a delightful strawberry essence and playful sprinkles.
- Easy Strawberry Sauce: A versatile sauce perfect for topping pancakes, ice cream, cheesecakes, or even your chocolate-covered strawberries!
- Strawberry Pretzel Salad: A unique and refreshing dessert combining a salty pretzel crust with a creamy filling and fresh strawberries.
- Strawberry Shortcake Recipe: The quintessential summer dessert, featuring sweet biscuits, fresh strawberries, and whipped cream.
Chocolate Covered Strawberries
No reviews yet
- Author: Lindsay
- Prep Time: 20 minutes
- Total Time: 1 hour 20 minutes
- Yield: 15–20 strawberries
- Category: Dessert
- Method: No Bake
- Cuisine: American
Description
Chocolate covered strawberries are one of my favorite simple desserts! Learn how to make chocolate covered strawberries and decorate them for sharing or gifting, creating an impressive treat with minimal effort.
Ingredients
Scale
- 1 lb fresh strawberries
- 10 oz baking chocolate (bittersweet, semi-sweet, milk or white chocolate)*
- 3 oz white chocolate, optional (for drizzle)
- Pink gel icing color, optional (for coloring white chocolate)
- Sprinkles, optional
- Oreo crumbs, optional
- Any additional toppings, optional (e.g., chopped nuts, shredded coconut)
Instructions
- Wash the strawberries thoroughly under cool water and then dry them completely. Use several paper towels to pat each strawberry individually until it is bone dry. Any residual water can cause the chocolate to seize or prevent it from sticking properly. Ensure berries are at room temperature.
- Prepare your dipping station: Line a baking sheet with parchment paper or a silicone mat. If using toppings, place them in shallow bowls for easy access.
- Melt the chocolate: Add your chosen baking chocolate (finely chopped or wafers) to a microwave-safe bowl. Heat in 10-20 second intervals, stirring well after each interval. Use the residual heat to continue melting, avoiding overheating, which can cause the chocolate to seize or streak. Alternatively, use a double boiler for gentle, controlled melting.
- Dip the strawberries: Holding each strawberry by its stem, immerse it fully into the melted chocolate. Gently swirl and then lift, allowing any excess chocolate to drip back into the bowl.
- Add toppings (if desired): Immediately after dipping, if adding dry toppings like sprinkles or cookie crumbs, gently roll the chocolate-covered strawberry in the chosen topping or sprinkle it over. Place the dipped and topped strawberry onto the prepared parchment paper to set.
- Prepare white chocolate drizzle (if desired): If adding a white chocolate drizzle, melt the white chocolate using the same microwave or double boiler method. You can add a small amount of gel icing color for a vibrant touch.
- Drizzle and set: Once the primary chocolate coating on your strawberries has fully firmed up, use a piping bag with a small round tip (like Wilton 3) or a ziplock bag with a tiny corner snipped off to drizzle the melted white chocolate over the berries in a decorative pattern.
- Final setting and serving: Allow all chocolate to firm up completely (about 20-30 minutes at room temperature, or 10-15 minutes in the fridge). Serve the strawberries when they are at their best – ideally the day they are made. While they can be stored for up to 24 hours, condensation may affect their appearance and texture over time.
Notes
For the best results, use high-quality baking chocolate specifically designed for melting. I highly recommend Ghirardelli dark chocolate melting wafers, which are incredibly reliable and also available in white and milk chocolate. Their dark chocolate baking chips also work wonderfully. Another excellent option is Baker’s baking bar chocolate. The main takeaway is to avoid using average chocolate chips or eating chocolate bars, as they often contain ingredients that prevent them from melting smoothly or setting properly for dipping applications.