Classic Lemon Bars: The Ultimate Recipe for a Zesty, Buttery Delight
There are few desserts that evoke a sense of nostalgic comfort and bright, refreshing flavor quite like classic lemon bars. With their distinct layers – a tender, buttery cookie crust, a luxuriously silken and tangy lemon filling, and a delicate dusting of confectioners’ sugar – they offer a symphony of tastes and textures that is both familiar and utterly irresistible. This recipe doesn’t just promise delicious lemon bars; it delivers a refined version of the beloved treat, designed to surpass even the cherished memories of your childhood favorites. Prepare for a dessert experience that is bright, balanced, and beautifully smooth, offering just the right amount of puckery zest to awaken your senses.
Why This Lemon Bar Recipe Is a Must-Try
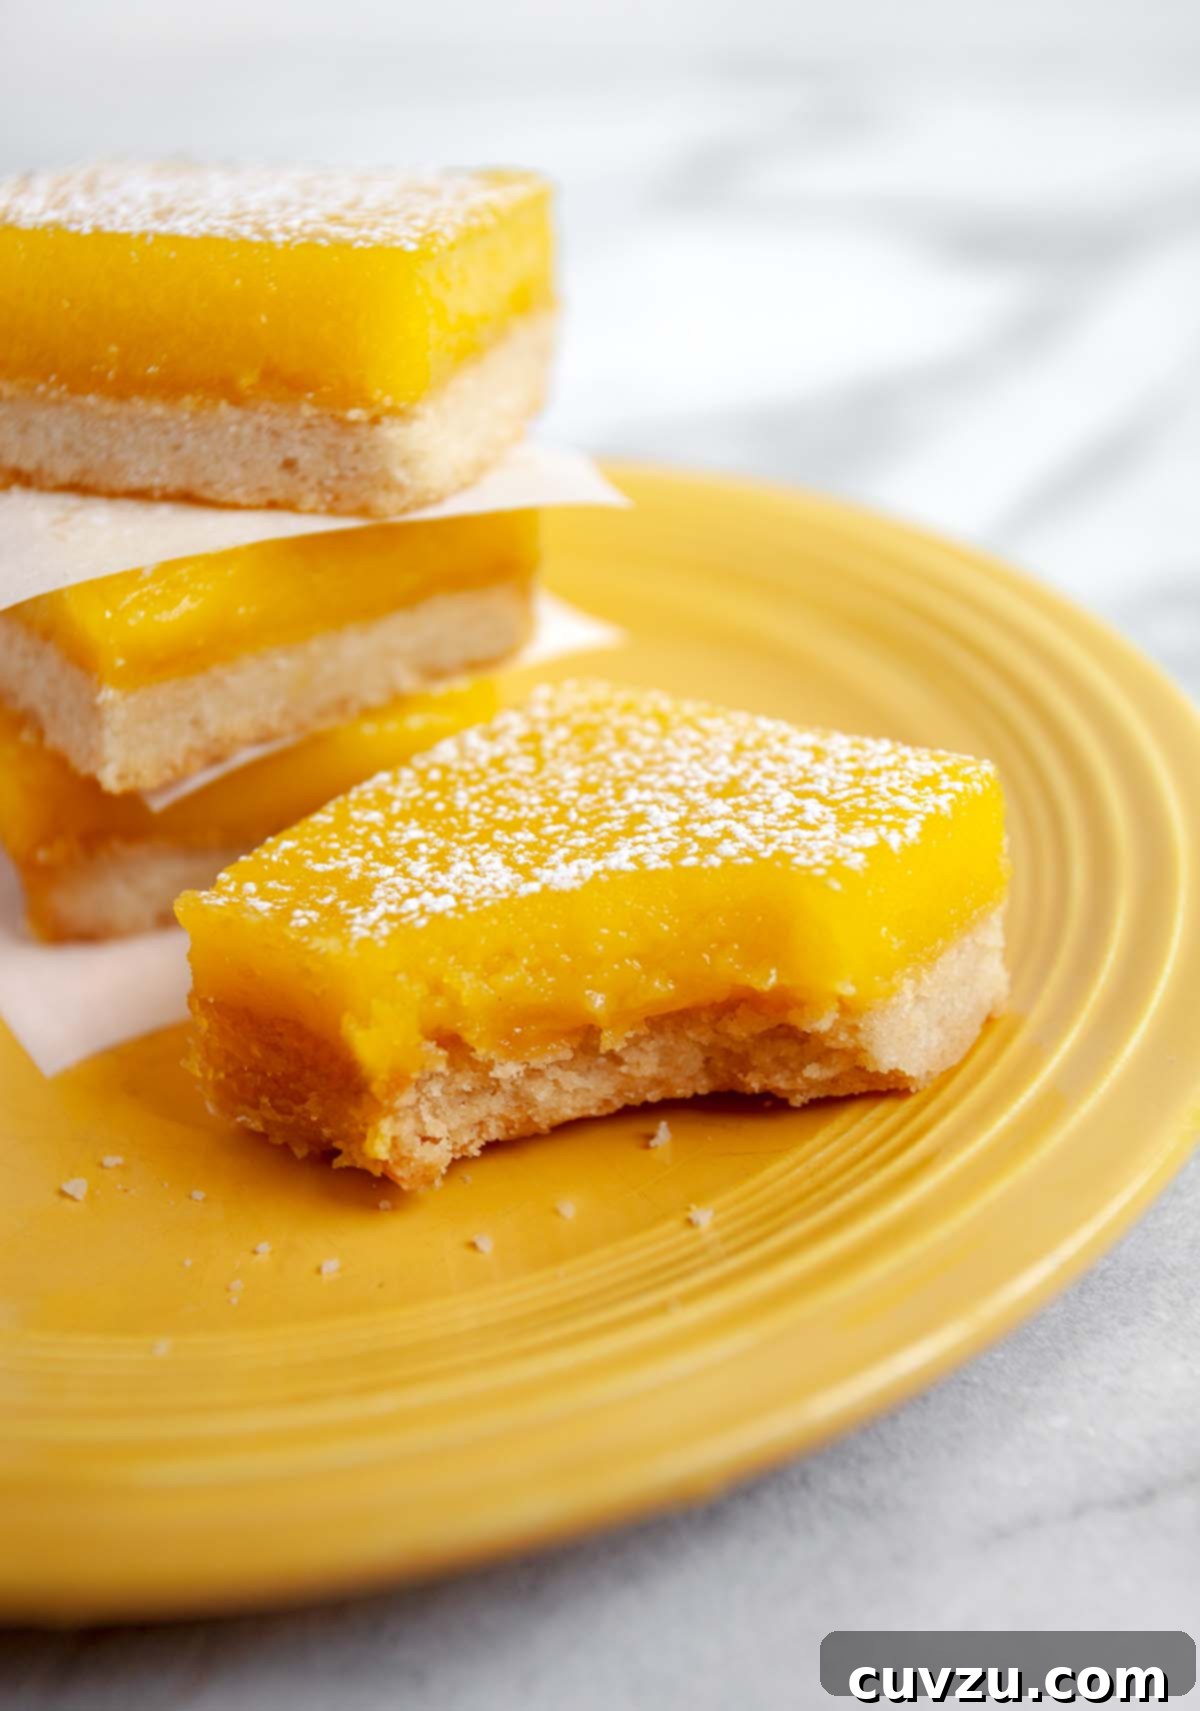
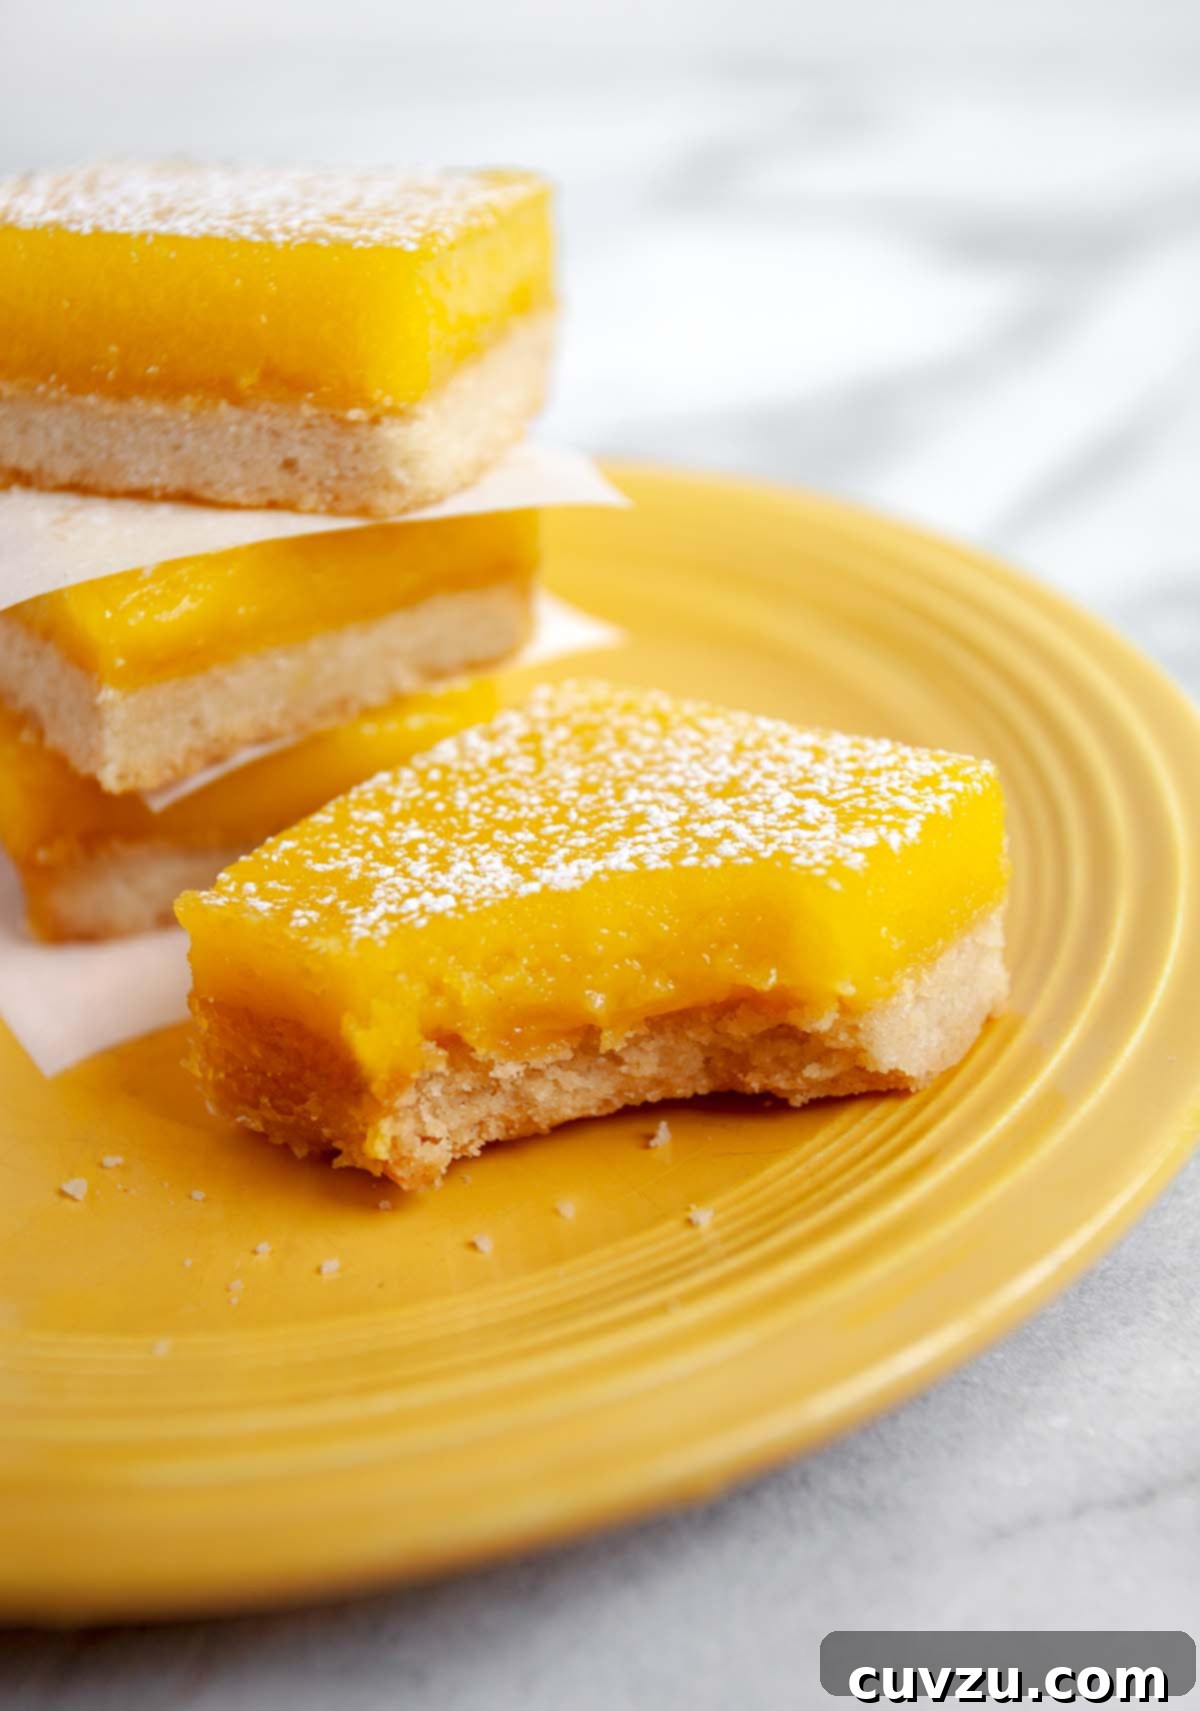
Every bite of these lemon bars is a journey of delightful contrasts. The foundation is a perfectly crafted cookie crust, reminiscent of a delicate shortbread, that crumbles gently in your mouth. Unlike some crusts that can be tough or overly dry, ours is designed for a melt-in-your-mouth tender texture, providing the ideal base without competing with the vibrant filling.
Then comes the star: the lemon filling. This isn’t just any lemon filling; it’s a silken, deeply flavored curd that strikes a masterful balance between tart and sweet. It’s rich, smooth, and just puckery enough to make your taste buds tingle with pleasure, without being overwhelmingly sour. The subtle hint of fresh lemon zest further elevates its aromatic profile, ensuring a truly authentic citrus burst.
Finally, a generous dusting of confectioners’ sugar adds that quintessential finish, providing not only a beautiful visual flourish but also a delicate layer of sweetness that beautifully complements the tartness below. The refined edges and perfectly set filling are a testament to a recipe perfected over time, promising a consistently superior result that is a cut above the rest. (But don’t worry, we won’t tell your mom.)

Lemon Bars
Recipe by David Leite
Print Recipe
Dessert
American
16
bars
218
kcal
25 minutes
1 hour
5 minutes
1 hour
30 minutes
Ingredients
For the Buttery Cookie Crust
- Nonstick vegetable spray, (optional, for easy release)
- 1 1/4 cups unbleached all-purpose flour
- 1/2 cup confectioners’ sugar, plus more for dusting
- 1/2 teaspoon salt
- 8 tablespoons unsalted butter, softened but still cool, cut into 1-inch pieces, plus more for the baking dish
For the Zesty Lemon Filling
- 7 large egg yolks
- 2 whole large eggs
- 1 cup plus 2 tablespoons granulated sugar
- 2/3 cup fresh lemon juice, (from 4 to 5 large lemons, preferably organic), plus 1/4 cup finely grated zest
- Pinch of salt
- 4 tablespoons unsalted butter, cut into 4 pieces
- 3 tablespoons heavy cream
- Confectioners’ sugar, optional, for dusting
Instructions
Step 1: Prepare the Buttery Cookie Crust
- Prepare your baking dish: Lightly spray a 9-inch (23-cm) square baking dish with nonstick cooking spray or generously butter it. For easy removal, fold two 16-inch (40-cm) pieces of parchment paper or aluminum foil lengthwise to measure 9 inches wide. Fit one sheet in the bottom of the prepared dish, pressing it firmly into the corners and up the sides. Ensure there’s an overhang to act as handles later. Fit the second sheet of foil in the dish in the same manner, perpendicular to the first sheet. Lightly spray these overlapping sheets with nonstick cooking spray or butter them generously.
- Combine dry ingredients for the crust: In a small food processor, briefly pulse the flour, confectioners’ sugar, and salt together until well combined, about 5 seconds.
- Add butter and mix: Add the softened but still cool butter pieces to the dry ingredients. Process until the mixture is blended and resembles coarse meal, typically 8 to 10 seconds. Continue pulsing for about three 1-second bursts until the mixture takes on a pale yellow hue and a fine, sandy texture.
- Press and chill the crust: Sprinkle this crumbly mixture evenly into your prepared baking dish. Use your fingers or the bottom of a flat glass to press it down firmly and uniformly across the entire bottom of the dish. This creates a compact, even crust. Refrigerate the pressed crust for at least 30 minutes to allow the butter to firm up, which helps prevent a greasy crust and promotes a tender texture.
- Bake the crust: While the crust chills, preheat your oven to 350°F (175°C). Adjust an oven rack to the middle position. Bake the chilled crust for approximately 20 minutes, or until it turns a beautiful golden brown. Once baked, remove the pan from the oven and place it on a wire rack. Crucially, do not allow the crust to cool completely to room temperature; it should remain warm as you prepare the filling.
Step 2: Craft the Silken Lemon Filling
- Whisk egg mixture: In a medium-sized nonreactive bowl (glass or stainless steel is ideal to prevent metallic reactions with the lemon), whisk together the egg yolks and whole eggs until they are thoroughly combined but not frothy. This should take about 5 to 10 seconds.
- Add sugar and lemon: Stir in the granulated sugar, whisking just until combined (another 5 to 10 seconds). Then, add the fresh lemon juice, finely grated lemon zest, and a pinch of salt. Whisk everything together until fully integrated, about 5 to 10 seconds. The zest is crucial for adding depth of flavor and a bright aroma.
- Cook the lemon curd: Transfer this vibrant mixture to a medium nonreactive saucepan. Place it over medium-low heat. Add the cut butter pieces. Cook, stirring or whisking constantly, for 5 to 10 minutes. The key is to keep stirring to prevent scorching and ensure even cooking. The curd will gradually thicken to a consistency that coats the back of a spoon. It should be thick enough to hold its shape somewhat when stirred.
- Strain and finish the filling: Immediately remove the saucepan from the heat. Pour the hot lemon mixture through a fine-mesh strainer set over a clean nonreactive bowl. Use the back of a spoon or a spatula to press down on any solids (like cooked egg bits or zest) to extract all the delicious curd. This step ensures a perfectly smooth, silken filling. Stir the heavy cream into the strained curd until it is fully incorporated and no streaks remain. This adds richness and a beautiful creamy texture.
Step 3: Assemble and Finish the Lemon Bars
- Combine and bake: Immediately pour the warm lemon filling over the still-warm cookie crust in the baking dish. Return the dish to the preheated oven. Bake for an additional 10 to 15 minutes. The filling is ready when it appears shiny and opaque, and the center portion jiggles only slightly when you gently shake the edge of the baking dish. Be careful not to overbake, as this can make the filling rubbery.
- Cool and cut: Allow the lemon bars to cool completely in the baking dish on a wire rack until they reach room temperature, which typically takes about 45 minutes to 1 hour. This cooling period is crucial for the filling to set properly. Once cool, use the parchment or foil overhang as handles to carefully lift the entire slab of lemon bars out of the dish and transfer it to a cutting board.
- Slice and dust: Using a sharp knife, cut the lemon bars into 2 1/2-inch squares. For clean, professional-looking cuts, wipe the knife clean with a damp cloth between each cut. Just before serving, lightly dust the top of the bars with additional confectioners’ sugar. This adds a beautiful presentation and an extra touch of sweetness.
Expert Tips for Perfectly Irresistible Lemon Bars
- Fresh Lemons are Key: The vibrant flavor of your lemon bars hinges on fresh lemon juice and zest. Avoid bottled lemon juice; the difference in taste is significant. Organic lemons are often preferred for their zest, as they are free from wax coatings and pesticides.
- Don’t Overmix the Crust: When making the shortbread crust, process the butter and dry ingredients just until combined and crumbly. Overmixing can develop the gluten in the flour, leading to a tough rather than tender crust.
- Chill the Crust: The refrigeration step for the crust is not optional! It allows the butter to firm up, which helps the crust bake into a delicate, crumbly texture and prevents it from shrinking excessively.
- Keep the Crust Warm: As advised in the instructions, pouring the warm lemon filling over a still-warm crust helps them bond beautifully and promotes even cooking of the filling from the bottom up, as noted by one of our expert testers.
- Constant Stirring for the Filling: When cooking the lemon curd, constant stirring over medium-low heat is vital. This prevents the eggs from scrambling and ensures a smooth, homogeneous, and perfectly thickened filling without any lumps.
- Strain for Silkiness: Don’t skip straining the lemon filling! Even if you think it looks smooth, this step catches any minuscule cooked egg bits or larger pieces of zest, guaranteeing that signature silky texture.
- Avoid Overbaking the Filling: The lemon filling should still have a slight jiggle in the center when removed from the oven. It will continue to set as it cools. Overbaking can result in a firm, rubbery texture instead of a delicate, creamy one.
- Patience is a Virtue for Cooling: Allow the bars to cool completely to room temperature before cutting. Attempting to cut them while warm will result in a messy, unset filling. Chilling overnight can further improve the set and overall texture, creating a firmer filling that contrasts beautifully with the crust.
- Clean Cuts: For those picture-perfect squares, use a long, sharp knife and wipe it clean with a damp cloth between each slice. This prevents the filling from sticking and creating jagged edges.
Storage and Serving Suggestions
Storing Your Lemon Bars
Lemon bars are best stored in an airtight container in the refrigerator. They will maintain their fresh taste and texture for up to 3-4 days. While they are delicious at room temperature, chilling them often enhances the firmness of the filling, making for cleaner cuts and a more refreshing bite, especially on a warm day.
Freezing Lemon Bars
For longer storage, lemon bars freeze exceptionally well. Once completely cooled and cut, arrange them in a single layer on a baking sheet and freeze until solid. Then, transfer the frozen bars to an airtight freezer-safe container or bag, separating layers with parchment paper. They can be frozen for up to 1 month. Thaw them in the refrigerator overnight or at room temperature for a few hours before serving. Some even enjoy them directly from the freezer for a delightful, chilly treat!
Serving Suggestions
These classic lemon bars shine on their own, but they also make a wonderful addition to a dessert platter. Serve them after a light lunch, alongside afternoon tea, or as a bright finish to any meal. A simple garnish of fresh raspberries, blueberries, or a tiny sprig of mint can add a touch of elegance and visual appeal. They are perfect for picnics, potlucks, or any occasion where a crowd-pleasing, refreshing dessert is desired.
Frequently Asked Questions About Lemon Bars
- Why are my lemon bars gooey or runny?
- This is typically due to underbaking the filling. The filling needs to reach a certain temperature to set properly. Ensure it jiggles only slightly in the center when removed from the oven. Also, ensure the bars cool completely to allow the filling to set fully.
- Can I use Meyer lemons for this recipe?
- Absolutely! Meyer lemons offer a slightly sweeter, less acidic, and more floral flavor profile compared to regular Eureka or Lisbon lemons. If using Meyer lemons, you might want to slightly reduce the sugar in the filling or add a bit more zest to maintain the desired tartness, as they are naturally milder.
- My crust is too hard/soggy. What went wrong?
- A hard crust can result from overworking the dough, which develops gluten, or overbaking. A soggy crust might occur if the filling is too hot when poured onto a cool crust, or if the bars are stored improperly in a humid environment. Following the chilling and baking times for the crust closely is key.
- How do I prevent cracks in the lemon filling?
- Cracks often appear if the bars are overbaked or if they cool too rapidly. Ensure you don’t overbake the filling (it should still jiggle slightly). Allowing the bars to cool gradually on a wire rack at room temperature, rather than rushing them into the fridge, can also help prevent cracking.
- Can I make these gluten-free?
- While this specific recipe uses all-purpose flour, you can experiment with gluten-free all-purpose flour blends. Look for blends designed for baking and ensure they contain xanthan gum for structure. Results may vary, so careful monitoring of texture and baking times will be necessary.

Adapted From
This exceptional recipe is proudly adapted from the culinary classic, “Baking Illustrated,” a trusted guide for home bakers seeking perfection in their pastries.
Buy On Amazon
Explore More Culinary Insights
Ingredient Substitutions (Creative Swaps & Flavor Profiles)
Scale Recipe (Adjusting for Different Servings)
Summarize Recipe Insights
Nutrition Facts
Calories: 218 kcal
Carbohydrates: 25 g
Protein: 3 g
Fat: 12 g
Saturated Fat: 7 g
Monounsaturated Fat: 4 g
Trans Fat: 1 g
Cholesterol: 128 mg
Sodium: 87 mg
Fiber: 1 g
Sugar: 16 g
Nutrition information is automatically calculated and should be used as an approximation.
Tried this delicious recipe?
Share your creation! Mention @leitesculinaria or tag #leitesculinaria on Instagram! We love seeing your baking success!
What Our Recipe Testers Say About These Lemon Bars
MaryBeth Jirgal
“Perfect lemon bars! The filling is tart and bright; the shortbread crust melts in your mouth. They received a thumbs up from my lemon bar-loving tween!
The bars are delicious. I used a probe thermometer. After 10 minutes, the curd still had not reached 170°F and was very thick so I took it off the heat and strained it.
I loved how the foil made it so easy to lift out of the pan. I cut 16 bars, each just over 2 inches, which is slightly smaller than written in the recipe.”
Olivia Bleitz
“Excellent. The filling is simultaneously tart, sweet, and just a slight hint of bitter, and the crust was crumbly and sweet with a touch of salt. Fabulous.
I didn’t expect the crust to work the way it did—it didn’t seem like there would be enough moisture to hold it all together but it worked like a dream! A really great (easy!) method for a lovely short crumbly crust.
I used whole milk instead of heavy cream (I could have sworn I had heavy cream on hand!). I baked the bars for 16 minutes. At that point, the edges were set and there was a slight jiggle in the center when I tapped the side of the pan. I didn’t dust with powdered sugar.
At room temperature, I found the texture contrast between the crust and filling to be too dramatic. I really loved it once it had been refrigerated overnight and the filling was just slightly more set but the crust had maintained its crisp texture. For the record, my husband and family didn’t agree. They thought it was excellent chilled and at room temperature.”
Robyn O.
“The lemon flavor was wonderful and the sweet cookie-like crust was a perfect texture and complement to the more sour, softer lemon curd. And the two perpendicular foil layers in the pan worked very well to allow for easy extraction from the pan.
I think it is better to leave the squares at room temperature for longer than 45 minutes before cutting. After cooling the bars for 45 minutes, I lifted the large square from the baking dish and began to cut it. It was slightly warmer than room temperature, so the lemon curd wasn’t quite set. These ones didn’t quite look like the photograph. We tried some of them and then waited to cut the rest for another 3 hours. These cut nicely as were more firmly set, and looked closer to the photograph. I also put a few in the fridge, but the best ones were the ones left to sit longer at room temperature.”
Chiyo Ueyama
“As one can never have enough lemon bars (I think it’s safe to say they are universally adored), I tested this recipe twice. The tartness of the lemon and sugar are very well balanced and the buttery crust was tender and not overly rich. Lovely lovely treats.
I tried two different methods:
Method #1: Pouring the filling over a cooled crust; Method #2: Pouring the filling over a warm crust.
I strongly recommend Method #2. I think the warm crust—mine was quite hot, having been out of the oven for under 2 minutes—provided a large heated surface that cooked the filling very evenly from the bottom. When baked, the surface of the filling had a uniformed appearance with a delicate white foamy layer on top, which served as a barrier to keep the confectioner’s sugar from being absorbed into the bars. And the texture of the lemon filling was equally gooey in the middle and near the edges. (With Method #1, the “white foamy layer” formed only around the edges like a picture frame. The filling was definitely wetter in the middle, and the confectioner’s sugar disappeared into it.)
So get started on the filling as soon as you put the crust in the oven and have it at the ready. One caution with the recommended Method #2: since the filling cooks faster (no worries, no curdling of the eggs), start checking the bars at 18 minutes, or reduce the oven temperature to 325°F.
For the lemon juice, I would juice 3 lemons and measure. (Two yielded just enough the first time, but not quite the second time…)
Lemon bars freeze well—they don’t freeze hard—I love eating them right out of the freezer.”
Daisy Lewis
“Lemon bars are one of my favorite desserts, but I usually crave more lemon curd. This recipe totally took care of that! It has such a great lemon curd-to-crust ratio, and the crust is so buttery and delicious. The addition of powdered sugar really makes it like an amazing cookie rather than your usual crust.
While really delicious, I think I craved a little more pucker factor.”