
Mastering Royal Icing: A Beginner’s Guide to Beautifully Decorated Cookies
Welcome to the enchanting world of royal icing! If you’ve ever admired perfectly decorated cookies and thought it was beyond your skill, think again. Decorating with royal icing is an accessible, rewarding craft that allows you to transform simple sugar cookies into edible works of art. This comprehensive guide will equip you with all the techniques and tricks you need to confidently pipe royal icing onto your cookies, making it perfect for beginners and seasoned bakers alike.
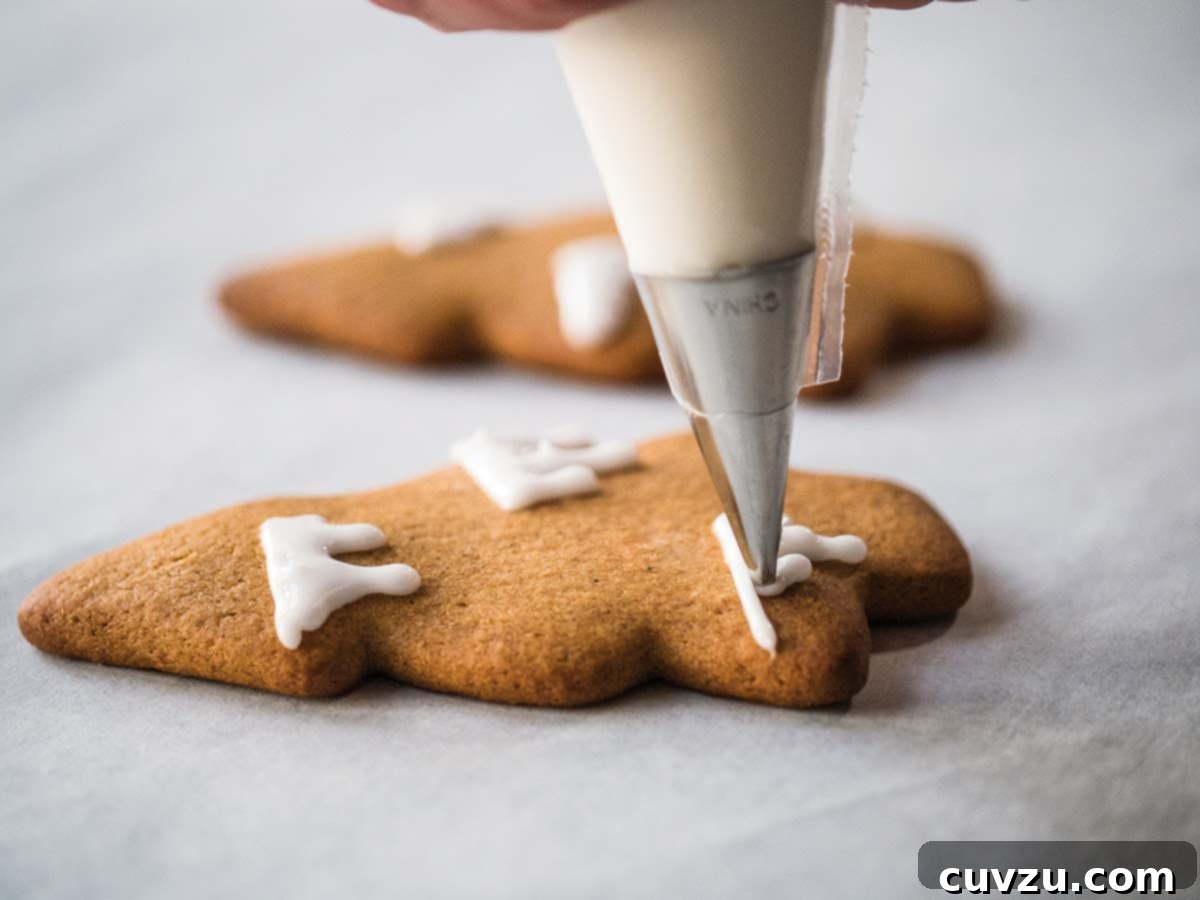
Whether you’re preparing for a festive occasion like Hanukkah or Christmas, or simply enjoying an impromptu Saturday afternoon baking spree, royal icing is your secret weapon. Its unique properties make it ideal for creating stunning, durable decorations that will impress everyone.
The Magic of Royal Icing: Why It’s Every Decorator’s Favorite
Royal icing stands out as a magic tool in the realm of dessert decorating, particularly for cookies. What makes it so special? When applied to cookies, it dries to a hard, firm finish. This crucial characteristic means your intricate designs will stay perfectly intact, allowing you to transport your beautiful creations without fear of smearing or damage. Imagine stacking cookies without a single smudge! This durability is unmatched by many other icing types.
Beyond its robust nature, royal icing offers incredible versatility. You can achieve surprisingly intricate details, from delicate lace patterns to bold, vibrant designs. Even a simple outline can elevate the look of a plain cookie, adding a touch of elegance and professionalism. The smooth, matte finish provides a pristine canvas for all your creative ideas.
The beauty of royal icing lies not just in its end result, but also in its potential for mastery. While it may seem daunting at first, a few fundamental tricks are all it takes to achieve impressive outcomes. These techniques are surprisingly easy to learn and master, even for those new to cookie decorating.
Crafting the Perfect Royal Icing: From Powder to Perfection
The journey to beautifully decorated cookies begins with the royal icing itself. Achieving the right consistency is paramount, and it starts with proper mixing. While it’s possible to mix royal icing by hand, using a stand mixer will undoubtedly yield a much smoother, more consistent icing, saving you time and effort.
☞ MAKE THE RECIPE: ROYAL ICING
Once your basic royal icing is prepared, the real artistry begins with adjusting its consistency. Royal icing is unique in that its thickness can be precisely controlled, allowing for various decorating techniques. There are three primary consistencies you’ll use: piping, medium, and flooding.
Piping Consistency (Outline Consistency)
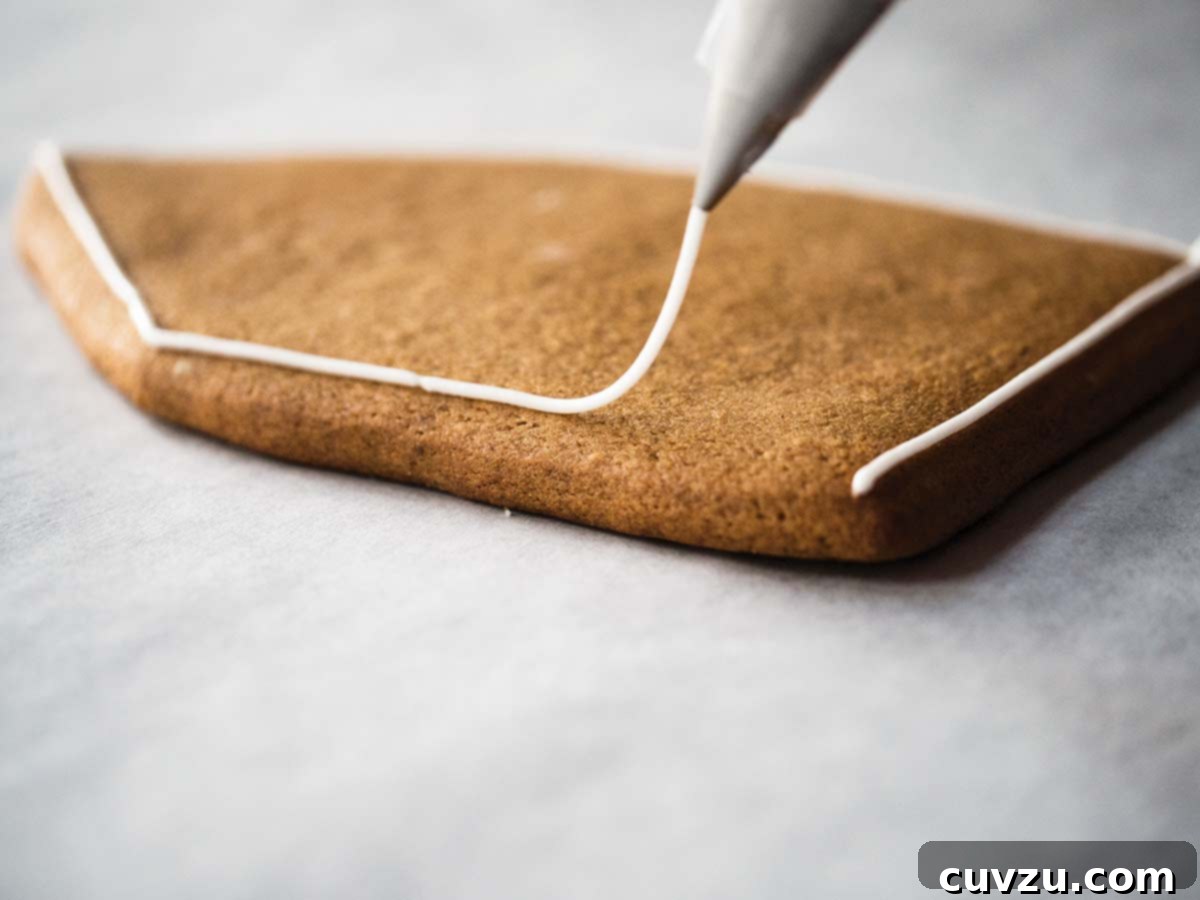
This is the thickest consistency you’ll typically use. Its purpose is to create strong, defined outlines and intricate details. To achieve this, start with the least amount of water suggested in your recipe. Add water a single drop at a time, mixing thoroughly after each addition, until you reach the desired consistency. The icing should flow slowly and smoothly from the piping tip without requiring excessive pressure. Crucially, once piped, it should hold its shape perfectly without any spreading or softening. Think of it as toothpaste – it retains its form beautifully.
Medium Consistency (Detail/Filling Consistency)
Slightly thinner than piping consistency, medium consistency is perfect for adding specific details that need to “settle” slightly but not completely flatten. When piped, it should relax a bit and be relatively easy to nudge into place, allowing it to “melt” into the icing next to it. However, it should not drip or flow uncontrollably. This consistency is ideal for creating designs that have a little dimension but aren’t as rigid as a pure outline, such as small dots, swirls, or for partial filling of smaller areas.
Flooding Consistency (Run-Out Consistency)
This is the thinnest consistency, designed to fill in large areas within an outline, creating a smooth, flat surface. The icing should flow easily but not be watery or completely liquid. A good benchmark is a consistency thicker than maple syrup but thinner than honey. When piped onto a surface, it should immediately begin to flatten and spread to fill the area, self-leveling to a perfect sheen. You can test this by drawing a line on the surface of the icing in its bowl; if the line disappears within 10-15 seconds, you’ve hit the perfect flooding consistency.
Essential Tools for Your Royal Icing Journey
Before you begin piping, ensure you have the right equipment. These tools will make your decorating process much smoother and more enjoyable:
- Piping Bags or Squeeze Bottles: Both work well, with piping bags offering more flexibility for various tips and squeeze bottles being excellent for flooding large areas.
- Piping Tips: Small round tips (like PME 1.5, Wilton #1, #2, or #3) are essential for outlining and fine details.
- Couplers: These allow you to change piping tips on the same bag without changing the icing.
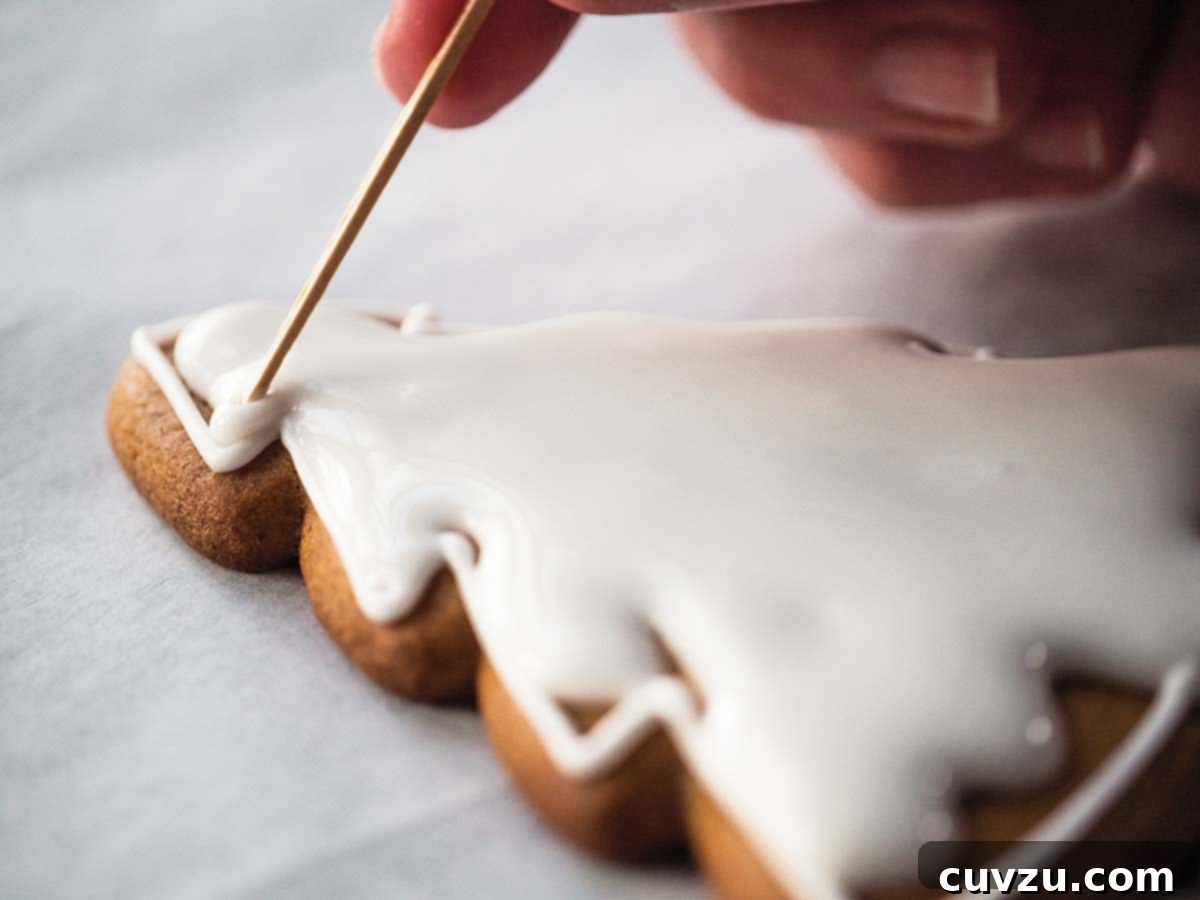
- Scribe Tool or Toothpick: Indispensable for nudging icing into corners, popping air bubbles, and creating intricate wet-on-wet designs.
- Gel Food Coloring: Unlike liquid food coloring, gel colors won’t significantly alter the consistency of your royal icing, providing vibrant hues.
- Rubber Spatulas: For mixing and transferring icing.
- Airtight Containers: To store your royal icing and keep it fresh.
Step-by-Step: Decorating Cookies with Royal Icing
Now that you understand consistencies and have your tools ready, let’s walk through the decorating process.
Step 1: Prepare and Color Your Icing
Start by making your royal icing according to your chosen recipe. Once the base icing is ready, divide it into separate bowls for each color you plan to use. Tint each portion with gel food coloring, mixing thoroughly until you achieve your desired shade. Then, carefully adjust each colored icing to the appropriate consistency – piping, medium, or flooding – by adding tiny amounts of water as needed.
Step 2: Load Your Piping Bags
Fit your piping bags with the desired tips (or use couplers). Fold down the top of the bag to create a cuff, then use a spatula to fill the bag about halfway with your prepared icing. Twist the top of the bag tightly to prevent icing from oozing out and to maintain pressure.
Step 3: Outline Your Cookies (Piping Consistency)
Hold the piping bag at a 45-degree angle, slightly above the surface of the cookie. Apply steady, even pressure, letting the icing fall onto the cookie rather than pressing the tip directly against it. Outline the perimeter of your cookie, creating a “dam” that will hold the flooding icing. For intricate designs, outline the internal sections as well. Allow these outlines to dry and crust over for 10-15 minutes, which helps prevent colors from bleeding.
Step 4: Flood Your Cookies (Flooding Consistency)
Once your outlines are slightly dry, use your flooding consistency icing to fill in the outlined areas. Start by piping a border just inside your outline, then fill the remaining space, working from the outside in. Use your scribe tool or toothpick to gently push the icing to the edges and into corners, ensuring an even layer. This tool is also great for popping any small air bubbles that rise to the surface. Allow the flooded base layer to dry completely, ideally for 6-12 hours, or even overnight, especially in humid conditions. This critical drying time prevents indentations and allows you to add subsequent layers without smudging.
Step 5: Adding Details (Piping or Medium Consistency)
Once your base layer is completely dry, you can begin adding intricate details. Use piping or medium consistency icing for designs like dots, swirls, lines, or script. If you want to create a “wet-on-wet” design (where designs spread slightly into the wet flood layer, like marbling or polka dots that become flush with the surface), apply these details immediately after flooding, before the base layer sets. For raised details, wait until the flood layer is fully dry.
Troubleshooting Common Royal Icing Issues
Even with practice, you might encounter a few common challenges. Here’s how to address them:
- Cratering: This happens when your flood icing sinks in the middle. It’s often due to too-thin icing, too much icing in the center, or insufficient drying time between layers. Try thicker flooding icing and ensure a consistent layer.
- Bleeding Colors: When colors run into each other, it can be frustrating. This usually happens when wet icing layers touch, especially darker colors next to lighter ones, or if your icing is too thin. Allow each color to dry sufficiently before applying an adjacent color.
- Bumpy Surface: Caused by air bubbles not being popped during the flooding stage. Use your scribe tool diligently to eliminate bubbles.
- Cracking: If your dried icing cracks, it could be due to extreme changes in temperature or humidity, or icing that’s too thick and dries unevenly.
Storing Your Royal Icing and Decorated Masterpieces
Proper storage ensures the longevity of both your unused icing and your decorated cookies.
- Storing Royal Icing: Unused royal icing can be stored in an airtight container at room temperature for up to two weeks. Place a piece of plastic wrap directly on the surface of the icing to prevent a crust from forming. Re-whip it gently before use, adding a tiny bit of water if needed to regain consistency.
- Storing Decorated Cookies: Once completely dry (which can take up to 24 hours depending on humidity), royal iced cookies can be stored in an airtight container at room temperature for several weeks. Layer them with parchment paper to prevent scratching. Avoid refrigerating, as condensation can damage the icing.
Unleash Your Creativity: Royal Icing Inspiration for Every Occasion
The beauty of royal icing is its adaptability to any celebration or theme. Here are just a few ideas to spark your imagination:
- Holidays: Christmas (snowflakes, ornaments), Hanukkah (dreidels, menorahs), Valentine’s Day (hearts, Cupid’s arrows), Easter (bunnies, eggs).
- Birthdays: Personalize with names, ages, or themed characters.
- Weddings & Showers: Elegant monograms, floral patterns, or miniature bridal attire.
- Everyday Treats: Simple polka dots, stripes, or geometric designs can elevate a casual cookie.
Embark on Your Decorating Adventure
Decorating cookies with royal icing is a delightful journey that combines precision with artistic expression. While the initial steps might require a bit of patience, the satisfaction of creating beautiful, professional-looking cookies is incredibly rewarding. From the basic piping and flooding techniques to understanding different consistencies, you now have the foundational knowledge to begin your royal icing adventure.
Don’t be afraid to experiment, practice regularly, and most importantly, have fun with it! Each cookie is an opportunity to learn and refine your skills. So gather your ingredients, prepare your tools, and get ready to pipe your way to stunning, delicious masterpieces. Your friends and family will surely be amazed by your beautifully decorated creations.
Originally published November 30, 2019