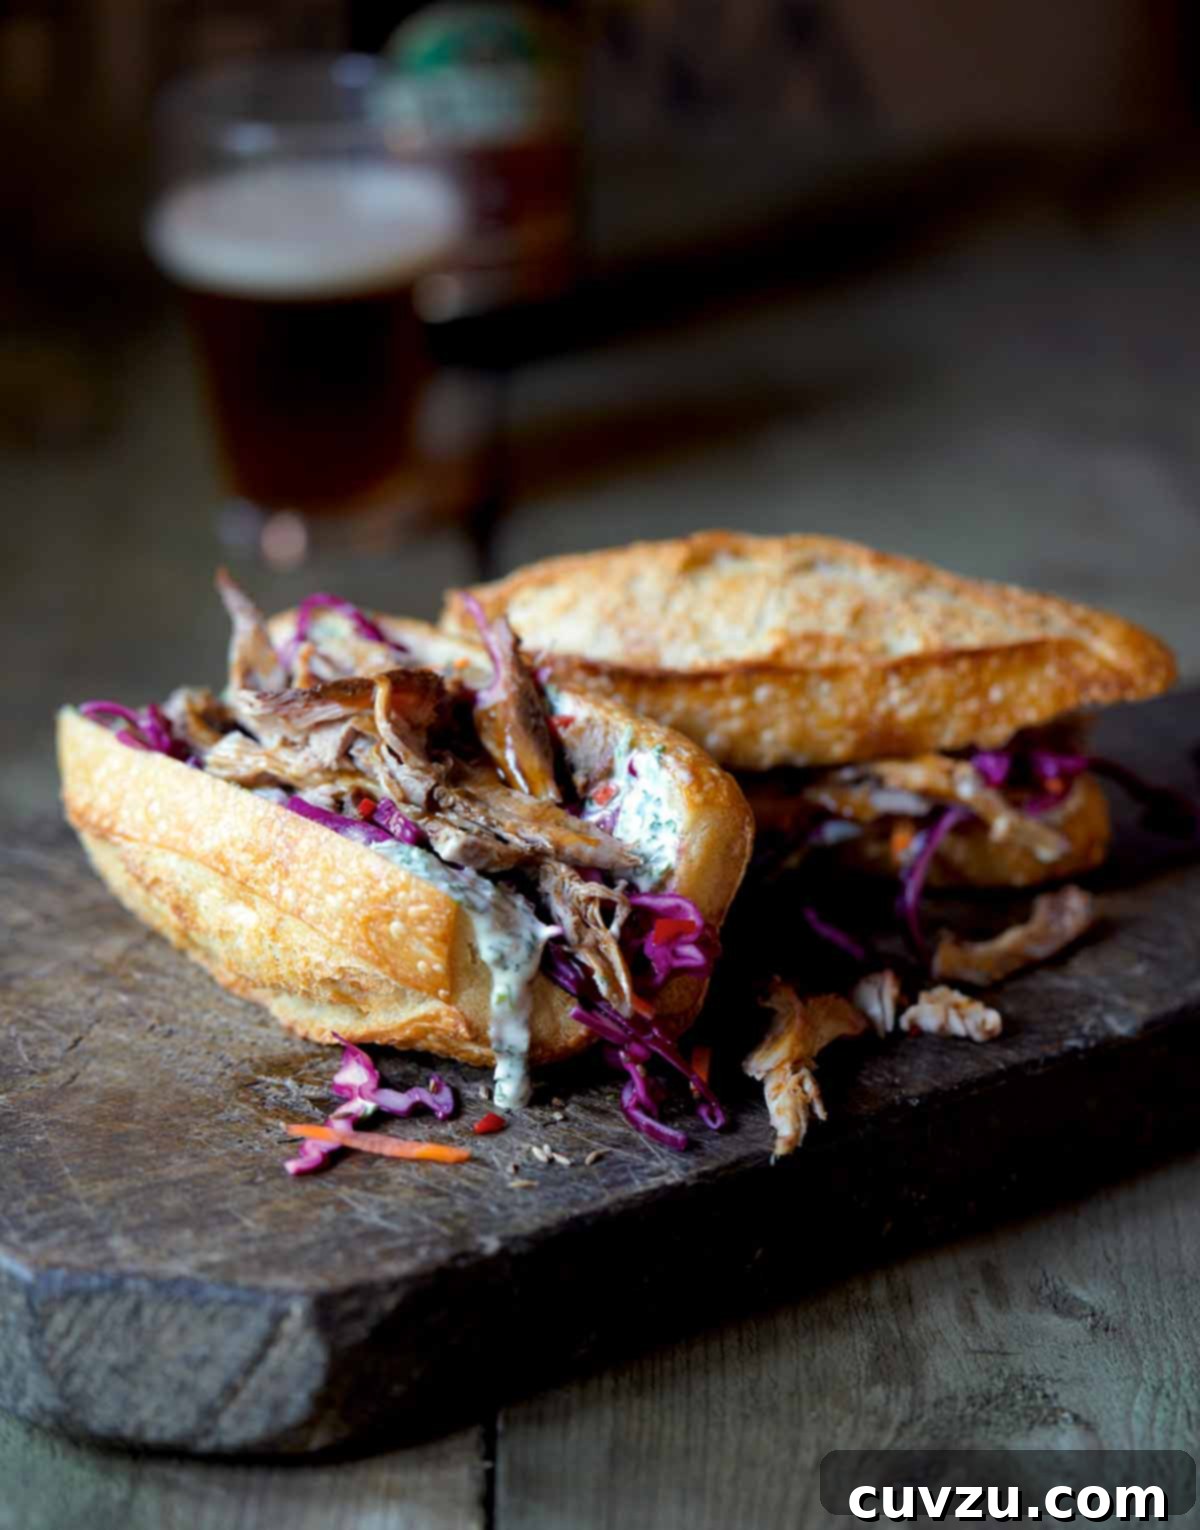
The Ultimate Pulled Pork Sandwiches: A Culinary Journey to Flavor Perfection
Embark on a delicious adventure with this comprehensive guide to crafting the ultimate pulled pork sandwiches. Featuring succulent, slow-cooked pork, a vibrant, tangy coleslaw, and a unique cilantro mayonnaise, this recipe promises an unforgettable experience. Discover the secrets to achieving melt-in-your-mouth tenderness and perfectly balanced flavors that make this American barbecue staple a true masterpiece.
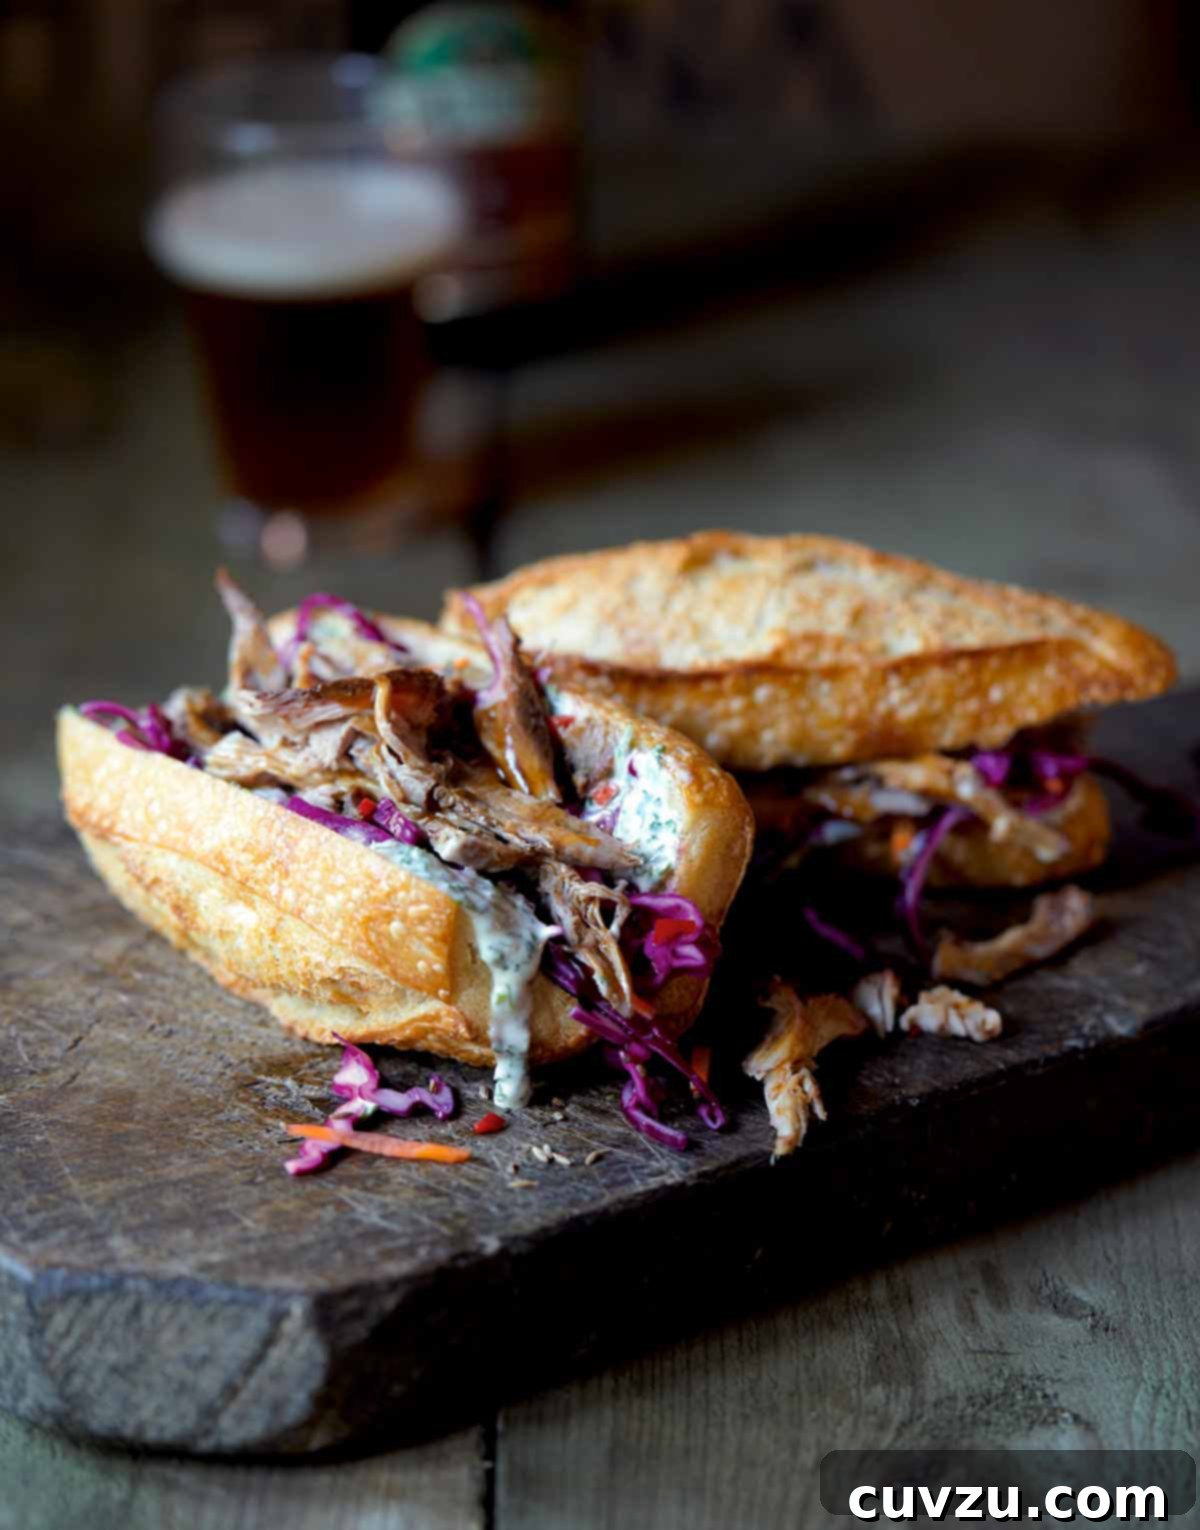
From Slow Cooker to Smoker: Your Path to Perfect Pulled Pork
Pulled pork sandwiches are more than just a meal; they are a cherished culinary institution, deeply embedded in the fabric of American comfort food and barbecue culture. The magic lies in the harmonious interplay of textures and tastes: the incredible tenderness of pork that has been slowly cooked to perfection, the refreshing crunch and tang of a crisp coleslaw, and the subtle warmth of a soft, yielding bun. This combination is not merely food; it’s an experience, a celebration of flavor that satisfies the deepest cravings.
While the final assembly of these exquisite sandwiches is remarkably simple, the journey to creating truly exceptional pulled pork demands a measure of patience and a commitment to the art of slow cooking. The authentic recipe presented here, adaptable for your grill or smoker, is an investment of time that pays dividends in unparalleled flavor depth and an almost ethereal tenderness. Every hour dedicated to its preparation contributes to a culinary reward that will undoubtedly leave a lasting impression on your palate.
We understand, however, that life can be busy, and sometimes a shortcut is needed. The fantastic news is that you absolutely don’t have to forgo the pleasure of these magnificent sandwiches! If you’re seeking a quicker route to enjoy pulled pork without the extensive cook time, there are excellent alternatives. Consider exploring an easy pulled pork recipe that can be masterfully prepared in your oven or a slow cooker. These methods yield delicious results with significantly less hands-on attention. And for those moments when time is truly scarce, don’t hesitate to visit your favorite local barbecue establishment for some high-quality takeout pulled pork. Our ultimate goal is for you to savor the incredible flavors of this sandwich, regardless of your chosen preparation method.
The Secret Weapon: Mastering the Marinade Injector for Unmatched Flavor
To those unfamiliar, a marinade injector might resemble a tool more at home in a medical setting than a kitchen. However, in the hands of a savvy cook, it transforms into an indispensable instrument for infusing thick cuts of meat, particularly large pork shoulders, with profound flavor and essential moisture. At its core, it’s a large syringe designed to bypass the surface and deliver aromatic liquids directly into the meat’s interior.
Why a Marinade Injector is a Game-Changer:
- Deep Penetration: Traditional marinades often struggle to permeate beyond the outer layers of dense meats. An injector ensures that every bite, from crust to core, is bursting with the intended flavors.
- Unrivaled Moisture: During long cooking processes, especially in smoky or dry environments, meat can lose moisture. Injecting marinade helps to keep the pork incredibly juicy and tender throughout, preventing dryness.
- Expedited Flavor: Instead of relying on passive absorption over many hours, an injector provides an immediate and comprehensive infusion of flavor, enhancing the overall taste profile significantly.
A Step-by-Step Guide to Using Your Marinade Injector:
- Perfect Your Marinade Consistency: The first rule of injection is a smooth marinade. If your recipe includes finely grated ingredients like ginger and garlic, as ours does, it’s crucial to ensure there are no chunks that could clog the injector needle. A quick blend in a mini food processor can achieve the necessary smooth, pourable consistency. Some advanced injectors even come with various needle tips designed for liquids of different thicknesses.
- Filling the Injector: Submerge the needle completely into your prepared marinade. Slowly and steadily pull back the plunger, drawing the liquid into the syringe. Be meticulous in avoiding air bubbles, as these can disrupt even distribution.
- Strategic Injection into the Pork: Carefully insert the needle deep into various points of the pork shoulder. As you gently depress the plunger, release the marinade into the meat. You’ll observe the meat subtly swelling as it absorbs the liquid. Aim for a pattern that covers the entire cut.
- Even Distribution is Key: Repeat the injection process at regular, evenly spaced intervals across the entire pork shoulder. Continue until all of your marinade has been successfully introduced into the meat. A slight seepage of liquid from the injection sites is perfectly normal and nothing to worry about.
- Post-Use Cleaning: For longevity and hygiene, it is imperative to disassemble and thoroughly clean your marinade injector immediately after each use. Follow the manufacturer’s instructions diligently to prevent any clogs or bacterial buildup, ensuring it’s ready for your next culinary creation.
Integrating a marinade injector into your pulled pork preparation is a straightforward technique that yields extraordinary results, elevating your dish from simply delicious to truly unforgettable.
Share Your Culinary Journey: We Want to Hear From You!
We deeply value the experiences of our cooking community. If you embark on the delightful journey of making this pulled pork sandwich recipe, or any other cherished dish from Leite’s Culinaria, we warmly invite you to share your results! Please consider leaving a review, a star rating, and your most captivating photo in the comments section below. Your feedback and beautiful creations inspire us all. –David
Featured Review: A Testament to Taste and Tenacity
“I smoked a butt this holiday weekend, and the coleslaw and mayo went really well with the flavor profile of my butt. The recipes are easy and straightforward, that being said, my blender would not emulsify the yolk, one yolk was just to small an amount for the blades to catch, so I did the absolute wrong thing and added a wee bit of oil, which of course now wouldn’t emulsify. I hand whisked this with another egg yolk that I had emulsifed with the lemon and fixed my broken mayo. Be aware that your blender may not be capable of starting with that small amount of liquid to do the trick. Yummilicious!!!!”
BBQgoddess
Authentic Pulled Pork Sandwiches Recipe
Pulled Pork Sandwiches: The Heart of Southern Comfort
Average Rating: 5 out of 5 stars from 2 votes
As American as apple pie, and perhaps even more sought after in modern culinary trends, these pulled pork sandwiches epitomize the perfect harmony of textures and flavors. Experience the delightful collision of incredibly tender, richly seasoned pulled pork with cool, crisp, and tangy coleslaw for an utterly terrific effect.
Recipe by David Leite
- Course
- Mains, BBQ
- Cuisine
- Southern, American
- Servings
- 8 to 12 sandwiches
- Calories
- 497 kcal per serving
- Prep Time
- 30 minutes
- Cook Time
- 12 hours
- Resting Time
- 1 hour
- Total Time
- 13 hours 30 minutes
Essential Equipment
- Marinade injector
- Grill, Smoker, or Oven (depending on preferred method)
- Large resealable plastic bag
- Small roasting pan
- Reliable meat thermometer
- Two forks for shredding pork
- Small dry skillet (for toasting cumin seeds)
- Large mixing bowl
- Blender or immersion blender
Ingredients List
Note: All measurements are in US customary units. Adjustments for metric can be made.
For the Flavorful Marinade
- 3 garlic cloves, finely grated
- One (1- to 2-inch) piece fresh ginger, peeled and finely grated
- 1 cup apple cider
- 1/4 cup cider vinegar
- 1 teaspoon Tabasco sauce
- 2 tablespoons Worcestershire sauce
- 3 tablespoons soy sauce
- 1 teaspoon freshly grated nutmeg
- 1 teaspoon ground cinnamon
For the Aromatic Rub
- 2 tablespoons cayenne pepper
- 2 tablespoons sweet paprika
- 2 tablespoons dark brown sugar
- 2 tablespoons fine sea salt
For the Tender Pulled Pork
- One (5 1/2-lb) bone-in pork shoulder (also known as pork butt)
For the Tangy Coleslaw
- 1 to 2 tablespoons cumin seeds (optional, but recommended for depth)
- 2 teaspoons granulated sugar
- 2 teaspoons salt
- 2 tablespoons red or white wine vinegar
- 1/2 head green or red cabbage, finely shredded
- 1 carrot, peeled and julienned
- 2 small red bell peppers, seeded and finely chopped (optional, for color and subtle sweetness)
For the Creamy Cilantro Mayonnaise
- 1 large egg yolk, at room temperature
- 1 3/4 teaspoons fresh lemon juice
- 1/2 teaspoon salt
- 1/4 teaspoon freshly ground black pepper
- 1 cup mild olive oil or vegetable oil
- 2 to 4 tablespoons chopped fresh cilantro, or more to taste
For Serving
- 8 to 12 rolls, partially split lengthwise (e.g., brioche buns, potato rolls, or kaiser rolls)
Step-by-Step Instructions
Phase 1: Crafting the Marinade
-
Begin by finely grating the garlic cloves and the peeled fresh ginger directly into a bowl. This technique extracts maximum flavor and creates a pulp that can easily pass through the marinade injector. Incorporate the apple cider, cider vinegar, Tabasco sauce, Worcestershire sauce, soy sauce, freshly grated nutmeg, and ground cinnamon. Stir all these ingredients until they are thoroughly combined. For optimal injection, ensure the marinade is completely smooth; if necessary, pulse it briefly in a mini food processor to eliminate any lingering chunks.
Carefully transfer the blended marinade into your marinade injector. Systematically inject the liquid into the pork shoulder at multiple points, aiming for even distribution throughout the meat. This critical step ensures that the pork absorbs a complex profile of flavors and retains moisture during the extensive cooking process.
Phase 2: Preparing the Dry Rub
-
In a small bowl, combine the cayenne pepper, sweet paprika, dark brown sugar, and fine sea salt. Mix these dry ingredients meticulously until they form a uniform, aromatic rub. This blend will create a delicious, savory crust—often referred to as “bark”—on the exterior of your pulled pork.
Phase 3: The Slow Cook: Transforming Pork Shoulder
-
Generously apply the prepared spice rub to all surfaces of the pork shoulder, ensuring comprehensive coverage. Do not be concerned if some of the injected marinade seeps out; the rub will still adhere effectively. Place the seasoned pork into a large, resealable plastic bag, ensuring it is tightly sealed. Position the bag within a small roasting pan to capture any potential drippings. Refrigerate the pork overnight (for a minimum of 8-12 hours) to allow the rub’s flavors to fully penetrate the meat and the ingredients to meld.
-
Method A: Grill or Smoker (The Traditional Route)
Preheat your grill or smoker to a precise and consistent temperature of 200°F (100°C). Configure your setup for indirect cooking: for a gas grill, turn off one or more burners; for a charcoal grill or dedicated smoker, pile the charcoal to one side or utilize the attached smoke box. Position an aluminum pan containing approximately one inch of water on the unlit side of the grill; this contributes moisture to the cooking environment and collects valuable drippings. Place the pork shoulder on the grill rack directly above this water pan. Close the lid and allow the pork to cook slowly, basting it periodically with the collected drippings. Continue this process until the internal temperature of the meat reaches around 175°F (70°C). This phase typically spans 6 to 12 hours, varying with the pork’s size and the stability of your cooking temperature.
Once the pork reaches 175°F (70°C), carefully wrap it tightly in two layers of heavy-duty aluminum foil. Return the foil-wrapped pork to the grill and continue cooking until its internal temperature ascends to at least 190°F (88°C), with an ideal target of 200°F (93°C) for maximum shreddability. If required, you may increase the grill temperature to 285°F (140°C) during this final push to accelerate the cooking process slightly. Remove the pork from the grill and let it rest, still wrapped in foil, for a full hour. This resting period is critical for the redistribution of juices, guaranteeing an exceptionally tender and moist final product.
-
Method B: Big Green Egg (The Kamado Experience)
Preheat your Big Green Egg to a steady 200°F (100°C). Carefully construct your fire, arranging large pieces of natural lump charcoal up to the rim of the firebox, ensuring that all vents remain unobstructed. Allow the fire to stabilize and burn for at least 7 hours prior to placing the pork. Configure the EGG for indirect cooking: insert the convEGGtor (plate setter) with its legs facing upwards. Pour a modest amount of water into a roasting and drip pan, then position this pan on the convEGGtor. The water provides humidity, and the pan collects juices and drippings for basting. Place the cooking grid onto the convEGGtor. Insert a meat thermometer into the thickest part of the pork, avoiding the bone, and position the pork on the cooking grid. Close the EGG lid.
After approximately 6 hours, the pork’s internal temperature should hover around 175°F (70°C). At this juncture, meticulously wrap the pork in two layers of heavy-duty aluminum foil, return it to the grid, and close the EGG lid. Continue cooking until the internal temperature reaches a minimum of 190°F (88°C), with 200°F (93°C) being optimal. If necessary, elevate the EGG temperature to 285°F (140°C) for the concluding phase. Remove the pork from the EGG and allow it to rest, still wrapped, for 1 hour before carefully unwrapping it.
-
Method C: Oven Baked Brilliance (The Indoor Option)
Preheat your oven to 250°F (121°C). Place a sturdy wire rack inside a roasting pan. Position your pork shoulder, with the fatty side facing upwards, on the wire rack within the roasting pan. Roast the pork, uncovered, until a rich, crisp, and dry exterior—universally known as “bark” in barbecue circles—has fully developed. This phase can take between 4 to 8 hours, depending on your oven’s accuracy and the specific size of your pork butt. As a guideline, this typically occurs when the pork’s internal temperature reaches around 170°F (77°C); however, the visual confirmation of a robust bark takes precedence over the precise temperature. Neglecting to develop a proper bark will result in a soggy exterior rather than a desirable crispness.
Once the bark is perfectly formed, carefully wrap the pork shoulder in two layers of heavy-duty aluminum foil. Return the wrapped pork to the wire rack in the roasting pan. Continue roasting until the internal temperature of the pork reaches at least 190°F (88°C), with 200°F (93°C) being the preferred target for ease of shredding. Remove the pork from the oven and allow it to rest, still wrapped, for 1 hour before meticulously unwrapping the foil. This resting period is crucial for ensuring the meat remains incredibly juicy.
-
Once the pork has rested, employ two forks to effortlessly pull the tender meat from the bone, shredding it into succulent strands. Discard the bone and any discernible excess fat.
Phase 4: Crafting the Tangy Coleslaw
-
If you opt to use cumin seeds, begin by toasting them. Place a small, dry skillet over medium heat, add the cumin seeds, and toast, shaking the skillet frequently, until they become intensely fragrant. This typically takes about 1 1/2 minutes. Immediately transfer the toasted seeds onto a small plate to cool, preventing them from over-toasting or burning.
-
In a large mixing bowl, combine the granulated sugar, salt, and red or white wine vinegar. Stir vigorously until both the sugar and salt have completely dissolved, creating a well-balanced dressing. Add the finely shredded green or red cabbage, julienned carrot, and the optional finely chopped red bell peppers to the bowl. Toss all the vegetables thoroughly to ensure every piece is evenly coated with the tangy dressing. Finally, incorporate the cooled toasted cumin seeds (if using) and toss one more time to distribute them uniformly throughout the slaw. For optimal flavor development, allow the coleslaw to chill for a minimum of 30 minutes, or ideally, prepare it overnight.
Phase 5: Mastering the Cilantro Mayonnaise
-
In a blender, combine the room-temperature egg yolk, fresh lemon juice, and a pinch each of salt and pepper. Process these ingredients on low speed until they are thoroughly blended and slightly frothy.
Chef’s Note: If your blender features a wide base or if you’re working with smaller quantities, it can be challenging to achieve an initial emulsion. To overcome this, consider doubling the recipe for a larger volume, or alternatively, utilize an immersion blender, which is particularly effective at creating emulsions with minimal liquid. This ensures a smooth and stable start to your mayonnaise.
With the blender continuously running on low speed, begin to incorporate the oil by adding it in an extremely slow, fine stream. This gradual addition is paramount for a successful emulsion; adding oil too quickly will likely cause the mayonnaise to break. Continue processing until the mixture visibly thickens and achieves a smooth consistency. Once a stable emulsion has formed and the mayonnaise begins to take shape, you may incrementally increase the speed at which you add the remaining oil.
-
Transfer the freshly prepared mayonnaise to a small bowl and gently fold in the chopped fresh cilantro. Adjust the quantity of cilantro to suit your personal preference, starting with 2 tablespoons and adding more if you desire a more pronounced herbaceous flavor. This recipe yields a generous batch of mayonnaise, which is a culinary bonus. Its rich, zesty, and aromatic notes make it incredibly versatile—perfect not just for these sandwiches, but also as an accompaniment to grilled fish or chicken, slathered on corn on the cob, or as a vibrant dip for fresh vegetables. Any leftover cilantro mayonnaise can be stored in a tightly covered container in the refrigerator for up to one week.
Phase 6: Assembling Your Epic Pulled Pork Sandwiches
-
To construct your ultimate pulled pork sandwich, begin by lightly spreading a generous amount of the homemade cilantro mayonnaise onto the cut sides of each roll. This layer provides essential creamy tang and moisture, enhancing the overall experience. Next, pile a substantial spoonful or two of the crisp, tangy coleslaw onto the bottom half of each roll. Finally, crown the coleslaw with an abundant mound of the incredibly tender, flavor-packed pulled pork. Carefully place the top half of the bun to complete your masterpiece. Serve immediately and prepare for a truly satisfying and memorable bite!

Adapted From
The Big Green Egg Book
Buy On Amazon
Approximate Nutrition Information
- Serving:
- 1 sandwich
- Calories:
- 497 kcal
- Carbohydrates:
- 50 g
- Protein:
- 8 g
- Fat:
- 31 g
- Saturated Fat:
- 4 g
- Monounsaturated Fat:
- 20 g
- Cholesterol:
- 23 mg
- Sodium:
- 3075 mg
- Fiber:
- 4 g
- Sugar:
- 15 g
Nutrition information is automatically calculated and should be used as an approximation. Actual nutritional values may vary based on ingredient sourcing and precise preparation methods.
Tried this recipe? Share your success!
We’d love to see your mouth-watering pulled pork sandwiches! Mention @leitesculinaria or tag #leitesculinaria on Instagram to share your culinary creations with our community.
Insights from Our Dedicated Recipe Testers
Our commitment to culinary excellence is underpinned by the valuable feedback from our team of dedicated recipe testers. For this Pulled Pork Sandwiches recipe, their experiences provide unique perspectives and practical advice, ensuring that you too can achieve barbecue perfection. Their insights illuminate the nuances of different cooking methodologies and offer helpful tips for navigating the path to success.
Angie Zoobkoff
Angie emphasizes that while this recipe requires a bit of advanced planning, the actual hands-on effort is surprisingly minimal, and the resulting pulled pork sandwiches are profoundly worth the wait! She raves about the pork’s incredible tenderness, noting how it perfectly combines with the vibrant cilantro mayonnaise and the sharp, vinegary slaw to create an ideal sandwich experience. Angie successfully adapted the recipe for a smaller 3 1/4-pound pork roast, using half the marinade and rub but adhering to the cooking instructions as written. On her smoker, the pork achieved its target internal temperature of 190°F in approximately 30 minutes after being wrapped in foil, following an initial unwrapped cooking phase. The pork, after resting for an hour, shredded effortlessly, proving to be both tender and juicy, complete with a beautifully crusty edge that was well-flavored from the rub. Both the mayo and slaw were highly praised. As a self-proclaimed cilantro enthusiast, Angie noted that while 2 tablespoons gave a pleasant flavor, she would personally add more for an even bolder cilantro presence, suggesting others might consider doing the same based on their preference.
Dan Kraan
Dan Kraan highlights this pulled pork sandwich recipe’s exceptional ability to produce deliciously tender pork, imbued with smoky nuances and layers of flavor. He underscores that this is a long, relaxed culinary endeavor, a true labor of love that requires setting aside ample time, perhaps even a day off to enjoy the process. While oven roasting offers an easier alternative, Dan notes it simply cannot replicate the distinctive smoky goodness that is integral to outstanding pulled pork. Initially, Dan anticipated an Asian flair due to the soy sauce and ginger in the marinade, but found that the blend of ingredients created a unified, complex flavor profile that surpassed the sum of its individual parts.
The coleslaw earned praise for its wonderful crunch, providing a delightful complement to the pork. However, Dan advised caution with the cumin seeds, recommending using half the suggested amount as he found the full quantity tended to overpower other flavors in the sandwich. He also noted that the slaw’s flavor significantly improves after being refrigerated overnight, allowing the ingredients to meld. The cilantro mayonnaise, which he described as rich and sultry, served as an excellent counterpoint to the crispness of the coleslaw and the smoky, subtly spiced pork. Dan suggests this versatile mayonnaise would also be superb as a dip for vegetables or chicken, or even slathered on poached salmon. He recommends preparing the mayonnaise a day in advance, mirroring the optimal preparation times for both the pulled pork and the coleslaw.
Dan detailed his smoking process using a bullet smoker at approximately 225°F. His pork reached an internal temperature of 170°F after 12 hours, at which point the crucial “bark” had developed beautifully. He then wrapped the roast in foil and returned it to the smoker, increasing the temperature to 280°F. After an additional 1 1/2 hours, the internal temperature reached 190°F, prompting him to remove it for a 1-hour rest. Dan’s key takeaway: “It’s difficult to set an exact time for pork because there are so many variables. It is done when it’s done,” emphasizing the importance of internal temperature over strict timing. Post-assembly, Dan expressed a desire for a supplemental sauce, thick or thin, to add more moisture to the pork, suggesting that a zesty sauce would further perk up the sandwich. This feedback highlights a common preference for a wetter, saucier style of pulled pork that some barbecue traditions favor.
Top Tips for Mastering Your Pulled Pork Sandwich
Achieving pulled pork sandwich perfection is a rewarding culinary endeavor. Here are essential tips, drawn from expert advice and tester experiences, to ensure your success:
- Embrace Patience: True, authentic pulled pork is a testament to the “low and slow” cooking philosophy. Resist any temptation to rush the cooking process, particularly during the initial hours. Time is your most valuable ingredient here.
- Trust Your Thermometer: A high-quality meat thermometer is your best friend. Internal temperature is a far more reliable indicator of doneness and desired tenderness than any suggested cook time. Aim for a range of 190-200°F (88-93°C) for pork that easily shreds.
- The Non-Negotiable Rest: Do not skip the 1-hour resting period after the pork finishes cooking. This crucial time allows the meat fibers to relax, redistributing the precious juices throughout the roast, which results in an exceptionally tender and moist final product.
- Develop the “Bark”: If you’re using a smoker or oven, ensure the flavorful, crisp exterior crust (the “bark”) has fully developed before wrapping the pork. This distinctive texture and concentrated flavor are hallmarks of outstanding pulled pork.
- Smooth Marinade for Injectors: When using a marinade injector, it’s vital that your marinade is thoroughly blended and free of any fibrous bits or chunks that could clog the needle. A fine consistency ensures smooth, even distribution.
- Coleslaw for Balance: The bright, tangy, and crunchy coleslaw is not merely a side; it’s a critical component. Its acidity and texture brilliantly cut through the rich, fatty nature of the pork, refreshing the palate with every bite.
- Mayonnaise Emulsion Expertise: When preparing homemade mayonnaise, introduce the oil in a very slow, steady stream, especially at the beginning, to ensure a stable emulsion forms. An immersion blender can be a secret weapon for smaller batches, making the process almost foolproof.
- Personalize Your Flavors: Don’t hesitate to adjust the spice levels in the rub or the amount of fresh cilantro in the mayonnaise to perfectly suit your personal taste preferences.
- Serve Warm and Wonderful: Pulled pork is always best served warm. If preparing ahead, you can keep the shredded pork warm in a slow cooker, perhaps with a splash of apple cider or your favorite barbecue sauce to maintain moisture.
- Choose the Right Bun: A sturdy yet soft roll is essential. Options like brioche buns, potato rolls, or crusty kaiser rolls provide the perfect foundation to hold the generous fillings without disintegrating.
Why Pulled Pork Sandwiches Remain an Enduring BBQ Icon
The enduring appeal of pulled pork sandwiches lies in their comforting simplicity, combined with an explosively rich and nuanced flavor profile. These sandwiches are deeply rooted in the culinary traditions of the American South, particularly from regions renowned for their barbecue artistry. They tell a compelling story of how a humble, often inexpensive cut of meat—the pork shoulder, or “butt”—can be transformed into something truly extraordinary through time, patience, and precise technique. The slow-cooking process breaks down connective tissues, rendering the meat incredibly tender and infusing it with layers of savory, smoky flavor, making it an accessible yet gourmet option for pitmasters and home cooks alike.
The magic truly ignites when the rich, often smoky pork encounters its perfect culinary counterpoint: a bright, acidic, and crunchy coleslaw. This balance is not merely delicious; it is fundamental to the sandwich’s success. The crisp, tangy slaw provides a vital textural contrast and effectively cuts through the inherent richness of the pork, refreshing the palate and ensuring that each bite is as exciting and satisfying as the first. The thoughtful addition of a unique condiment, such as our vibrant cilantro mayonnaise, further elevates the experience, introducing a creamy, herbaceous layer that harmoniously binds all the elements together.
Beyond their exceptional taste, pulled pork sandwiches possess an inherently communal spirit. They are ideally suited for gatherings, backyard barbecues, tailgates, or game days, offering a generously satisfying meal that can effortlessly feed a crowd once the initial slow cooking is complete. They embody casual indulgence and the profound joy of sharing delicious food with loved ones. Whether you aspire to be a seasoned grill master or are simply a home cook exploring new and exciting flavors, mastering the art of the pulled pork sandwich is a deeply rewarding culinary achievement that is guaranteed to bring smiles and satisfaction all around.