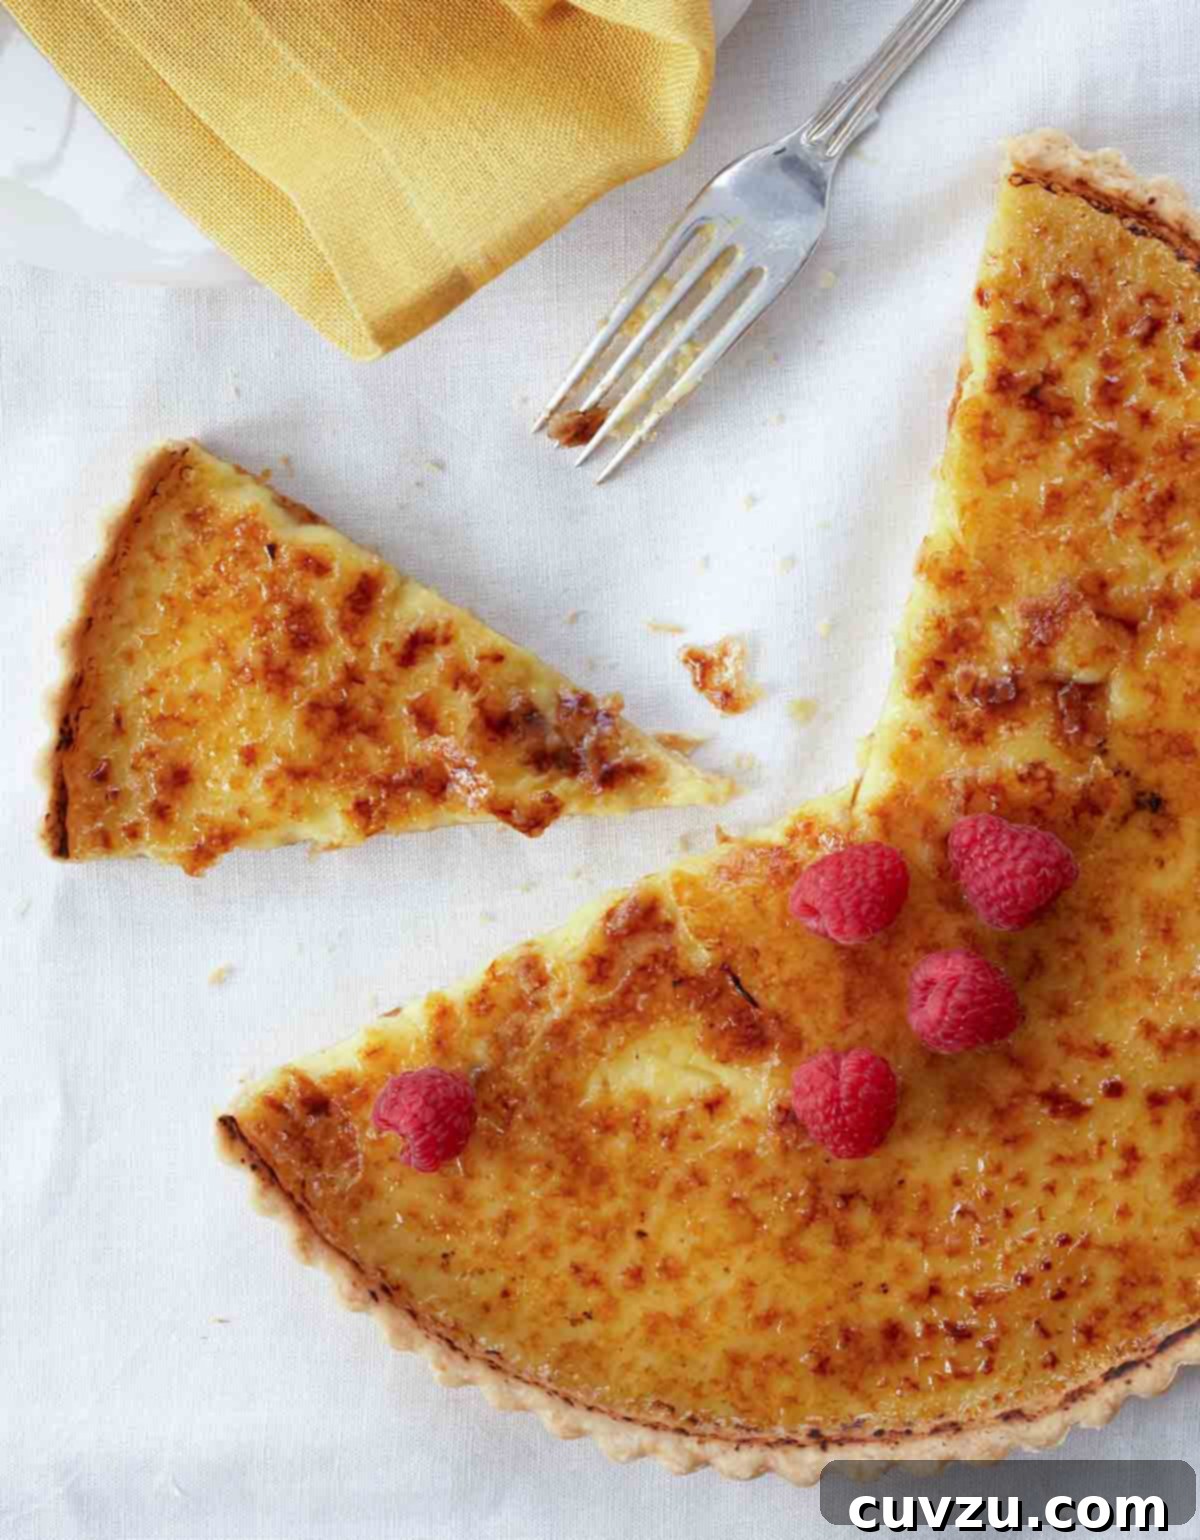
Experience the irresistible allure of a Coconut Crème Brûlée Tart – a dessert that truly captivates with its harmonious blend of tropical flavors and classic French elegance. Imagine a creamy, velvety coconut filling nestled within a perfectly buttery, flaky pastry crust, all crowned with a glistening, crisp layer of caramelized sugar that shatters with a satisfying crack at the touch of a spoon. This isn’t just a dessert; it’s a sensory delight, an exquisite showstopper that’s surprisingly straightforward to create, promising to impress at any gathering or elevate a simple weeknight meal. Why settle for ordinary when you can indulge in extraordinary?
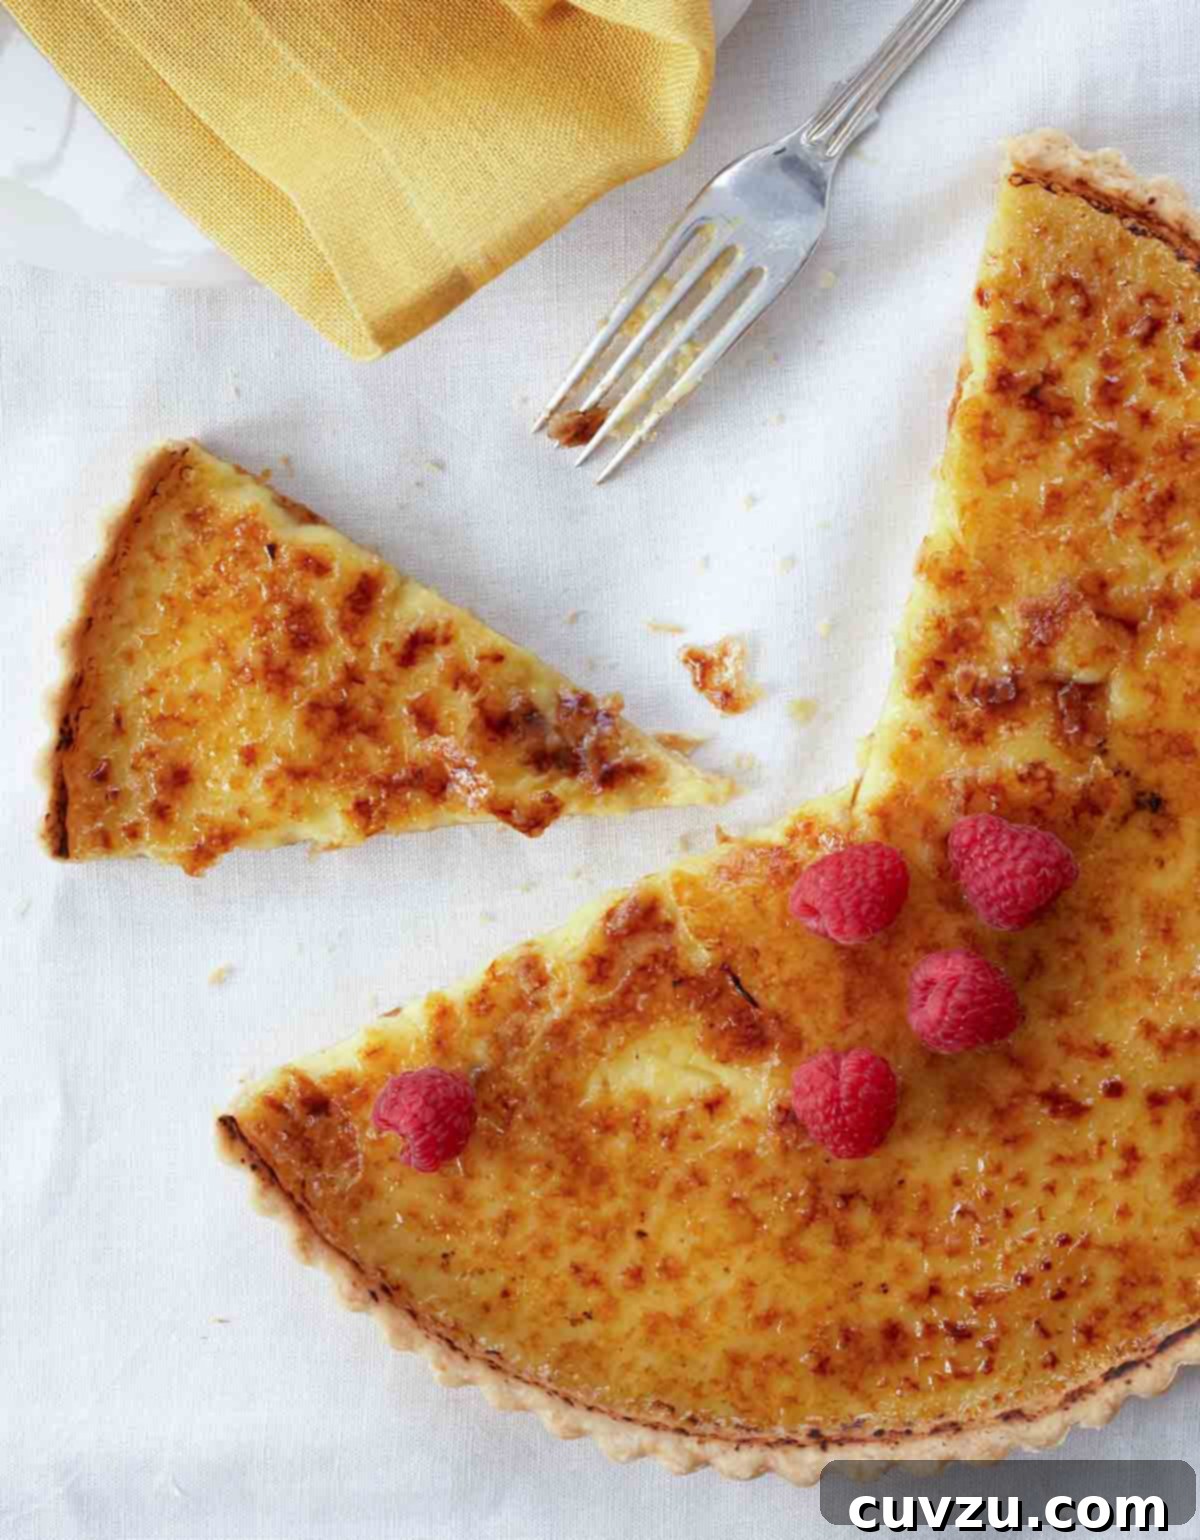
This stunning dessert presents an elegant facade but requires far less effort than its sophisticated appearance suggests. It begins with crafting a rich, exquisitely buttery pastry dough that forms the ideal foundation. This base cradles a silken, subtly flavored coconut custard, a tropical whisper against a creamy canvas. The grand finale is a sugary topping, meticulously caramelized to a golden perfection, promising a delightful crunch that shatters with the slightest touch, revealing the smooth indulgence beneath.

Why This Recipe Works: The Science of Perfect Indulgence
This coconut crème brûlée tart is a triumph of textural contrasts and balanced flavors. It masterfully combines a crisp, exquisitely buttery tart crust that melts in your mouth, a divinely smooth and creamy coconut custard filling that’s both rich and light, and a signature crackly caramelized sugar topping that delivers that iconic brûlée crunch. Each element is carefully calibrated for perfection:
- Toasting the coconut beforehand is a critical step that intensifies and deepens its nutty, tropical flavor, preventing it from tasting flat or artificial.
- The thoughtful combination of heavy cream and half-and-half in the custard ensures a luxurious, rich mouthfeel without becoming overly dense or cloying, allowing the delicate coconut notes to shine through.
- The use of multiple large egg yolks provides the necessary structure and emulsification, resulting in a custard with an unparalleled velvety texture.
- A final layer of torched turbinado sugar is the secret to achieving that quintessential brûlée crunch and a beautiful amber hue, transforming a simple tart into an elegant masterpiece.
Whether you’re hosting a sophisticated dinner party or simply seeking a sublime weekend treat, this dessert is a guaranteed showstopper that promises a truly memorable culinary experience.
Essential Ingredients: Decoding Their Roles
Crafting the perfect Coconut Crème Brûlée Tart begins with understanding the purpose behind each ingredient. Here’s a closer look at what makes this recipe sing:
- Heavy Cream & Half-and-Half—This dynamic dairy duo is the foundation of our silky-smooth custard. Heavy cream delivers unparalleled richness and body, while half-and-half lightens the texture just enough to prevent the custard from being too heavy. This balance is key to allowing the vibrant coconut flavor to emerge without being overshadowed or tasting like a generic sunscreen (as David wisely notes!). Using both ensures a perfect consistency that holds its shape beautifully while remaining melt-in-your-mouth tender.
- Egg Yolks—These are the true magic behind the custard’s luscious, velvety texture and rich golden hue. Egg yolks act as a thickening agent and emulsifier, creating that characteristic smooth, creamy consistency without the need for flour or cornstarch. The more yolks, the richer and silkier your custard will be. If you find yourself with leftover egg whites, don’t let them go to waste! Transform them into delightful meringues, a light and airy pavlova, or if you’re feeling particularly ambitious, delicate French macarons.
- Vanilla Bean or Extract—Vanilla is a foundational flavor that enhances and rounds out the coconut’s sweetness. If you have a precious vanilla bean on hand, its fragrant seeds will impart an unmatched depth and complexity to the custard, a truly aromatic experience. If not, a high-quality pure vanilla extract will perform beautifully, adding a warm, comforting note. Avoid imitation vanilla for the best flavor.
- Turbinado Sugar—This is the star for achieving that signature brûlée crunch. Turbinado sugar, also known as raw cane sugar, features larger, coarser crystals that caramelize beautifully under a torch, forming a hard, glass-like shell. Its subtle molasses notes also add a touch of complexity to the burnt sugar topping. If turbinado isn’t available, don’t fret! Regular granulated sugar can be used, but you might need to torch it a bit more carefully and evenly to achieve a similar crispness. Superfine sugar is another excellent alternative, as its smaller crystals melt more uniformly.
- Sweetened Flaked Coconut—Crucial for that distinct tropical flavor, this type of coconut is dried and has sugar added, enhancing its tenderness and natural sweetness. Toasting it (as detailed in the recipe) is a game-changer, intensifying its nutty notes and adding a depth that elevates the entire dessert.
Your Coconut Crème Brûlée Tart Questions Answered
Here are answers to some frequently asked questions about making and serving this decadent coconut crème brûlée tart:
Absolutely! While this recipe features a classic rich, buttery shortbread tart crust, which provides an ideal counterpoint to the creamy filling, you have several delicious alternatives. A graham cracker crust offers a delightful, slightly spiced crunch that pairs wonderfully with coconut. For a gluten-free option, an almond flour crust can provide a delicate, nutty base. You could also explore a shortbread crust made with a different nut flour, or even a chocolate cookie crust for an intriguing flavor combination. Just ensure your chosen crust is pre-baked (blind-baked) to prevent sogginess.
For the ultimate caramelized topping, turbinado sugar is highly recommended. Its distinctively large, coarse crystals melt evenly under heat, creating a beautifully crisp, glass-like, and richly flavored layer. As baking authority Martha Stewart notes, turbinado sugar is a minimally processed raw cane sugar with a light golden hue and a subtle molasses flavor, making it ideal for this purpose. If you don’t have turbinado sugar, superfine (caster) sugar is an excellent second choice because its fine granules melt more uniformly than regular granulated sugar, resulting in a smoother finish. Standard granulated sugar can be used, but be aware that it may caramelize less evenly and could potentially result in a slightly grainy texture if not torched carefully. For the smoothest possible finish with turbinado, you can briefly grind it in a blender or food processor until it’s finer but not powdered.
A runny custard typically indicates that it was underbaked. The custard for this tart should be baked until the edges appear firm and set, but the center still retains a slight, gentle wobble when you lightly shake the pan. It’s crucial not to overbake, as this can lead to a curdled texture, but underbaking will prevent it from setting properly. Remember that custards continue to set and firm up significantly as they cool to room temperature and then chill in the refrigerator. If your custard is still too loose after adequate cooling and chilling, it’s likely it needed a few more minutes in the oven.
Absolutely! This tart is a fantastic make-ahead dessert, perfect for entertaining. You can bake the tart completely, allow it to cool, and then refrigerate it, uncovered initially to prevent condensation, then covered loosely with plastic wrap, for up to 24 hours. Crucially, do NOT caramelize the sugar topping until just before serving. When you’re ready to serve, gently blot any condensation from the surface of the custard with a paper towel, then sprinkle with the sugar and caramelize using a kitchen torch. This ensures that satisfying crackly top is achieved fresh every time.
While the recipe calls for sweetened flaked coconut to achieve a specific flavor and texture profile, you can certainly experiment with unsweetened flaked coconut. If you opt for unsweetened, you may want to slightly increase the sugar in the custard filling to compensate for the lack of sweetness from the coconut itself. Be sure to taste the mixture before baking and adjust to your preference. Toasting it will still be beneficial for enhancing its nutty aroma.
A kitchen torch is truly the ideal tool for creating the perfect crème brûlée topping, as it allows for precise control and minimal heating of the custard. However, if you don’t own one, you can use your oven’s broiler as an alternative. Place your oven rack in the highest position, preheat the broiler, and carefully watch the tart. Place the tart under the broiler for only 1-2 minutes, keeping a constant eye on it, rotating the pan if necessary, until the sugar is caramelized. This method carries a higher risk of overheating the custard or burning the crust, so extreme vigilance is necessary. Remove immediately once desired color is achieved.
Pro Tips & Troubleshooting for Tart Perfection
Achieving a bakery-worthy Coconut Crème Brûlée Tart is easier with these expert insights:
- Toast the Coconut for Maximum Flavor: This seemingly small step makes a huge difference. Toasting sweetened flaked coconut in the oven deepens its natural sugars, enhancing its nutty depth and imparting a rich, warm aroma that permeates the custard. It transforms a subtle coconut note into an unmistakable tropical essence. Always stir it a few times for even browning.
- Strain the Custard for Silkiness: After infusing the cream mixture with toasted coconut, pouring the custard through a fine-mesh sieve is absolutely crucial. Pressing gently on the solids with the back of a spoon helps extract every last drop of flavorful liquid while removing any fibrous coconut pieces or coagulated egg bits. This guarantees a remarkably smooth, uniform, and velvety-soft filling, free of any unwanted textures.
- Blind Bake the Tart Shell: Pre-baking the tart shell, also known as blind baking, is essential to prevent a soggy bottom crust. Custard fillings are inherently moist, and without this step, the pastry would absorb moisture and become soft. Blind baking ensures your crust remains crisp, flaky, and golden brown, providing that perfect structural integrity and delightful crunch against the creamy custard.
- Torch, Don’t Broil the Tart (If Possible): While a broiler can work in a pinch, a kitchen torch creates the best caramelized top. The direct, concentrated flame of a torch allows you to precisely control the browning, melting the sugar evenly into a thin, crackly layer without overheating or cooking the delicate custard underneath. Broiling risks uneven caramelization, burning, and potentially warming the custard too much, compromising its set.
- Mind the Temperature: When making the custard, ensure your cream mixture is hot but not scorching when adding to the egg yolks. Tempering the yolks by slowly whisking in a small amount of the hot cream first prevents them from scrambling.
- Patience is a Virtue: Allow the tart to cool completely on a wire rack before chilling. This slow cooling process allows the custard to finish setting and firming up properly, ensuring a perfect slice. Rushing it can lead to a less stable or slightly jiggly custard.
Serving Suggestions: Elevate Your Dessert Experience
This Coconut Crème Brûlée Tart is exquisite on its own, but a few thoughtful garnishes and pairings can elevate it even further, making it truly unforgettable.
🍓 Fresh Fruit Contrast: Serve this tropical tart with a generous handful of fresh raspberries or blackberries. Their bright, tart acidity provides a beautiful counterpoint to the rich, creamy custard and the sweet caramelized topping, creating a refreshing balance of flavors. Other tropical fruits like thinly sliced mango or passion fruit pulp can also add a delightful exotic touch.
☁️ Whipped Cream Indulgence: A dollop of lightly sweetened whipped cream, perhaps infused with a hint of vanilla or a touch of rum, adds another layer of luxurious creaminess and indulgence. For an extra flourish, sprinkle a few toasted coconut flakes on top of the whipped cream.
☕ Coffee or Tea Pairing: For a comforting finish, pair a slice of this tart with a freshly brewed cup of coffee or a delicate herbal tea. The warmth and subtle bitterness can beautifully complement the tart’s sweetness.
🍷 Wine Pairing Perfection: For an elegant adult pairing, consider a glass of Moscato d’Asti or a luscious Sauternes. Both sweet wines boast notes that harmonize wonderfully with the caramelized sugar and rich custard, creating a sophisticated dessert experience.
Storage: Keeping Your Tart Fresh
Proper storage ensures your Coconut Crème Brûlée Tart remains delicious and picture-perfect for as long as possible. Always remember to store the tart without the brûlée topping applied.
For short-term storage: Keep the baked (but un-brûléed) coconut crème brûlée tart in the refrigerator for up to 3 days. Once completely cool, cover it loosely with plastic wrap to prevent condensation from softening the crust or custard surface.
For longer storage: The fully baked tart, again, without the caramelized topping, can be frozen for up to 1 month. To freeze, wrap the cooled tart tightly in several layers of plastic wrap, then an additional layer of aluminum foil, ensuring it’s airtight. When you’re ready to serve, thaw the tart overnight in the refrigerator. Before serving, gently blot any condensation from the custard’s surface with a paper towel, then sprinkle with sugar and brûlée just before slicing.
☞ TESTER TIP: Reheating the brûlée topping is strongly not recommended. The caramelized sugar top will quickly soften and lose its signature crunch in the refrigerator due to moisture absorption. For that perfect, satisfying crackle, always torch the sugar fresh, just moments before serving each time.
Explore More Silky Crème Brûlée Recipes
If you’ve fallen in love with the smooth texture and caramelized crunch of this coconut tart, delve into other variations of this beloved classic. Crème brûlée is incredibly versatile, adapting beautifully to a myriad of flavors.
Share Your Brûlée Moment!
If you embark on the delightful journey of making this coconut crème brûlée tart, I would absolutely love to hear about your experience! Please take a moment to leave a review, give it a star rating, and share your most beautiful photo in the comments section below. Your invaluable feedback not only assists other home bakers but also genuinely brightens my day! – David
I loved the subtle coconut flavor and the unsweetened coconut I used made this a perfect dessert for those who prefer something “not too sweet.”
TiffLH
Coconut Crème Brûlée Tart
David Leite
- PIN
Equipment
-
9- or 10-inch (23- or 25-cm) fluted tart pan with a removable bottom
-
Kitchen torch
Ingredients
For the crust
- 1 1/3 cups all-purpose flour, plus more for the work surface
- 1 tablespoon sugar
- 1/4 teaspoon salt
- 1 stick (4 oz) cold unsalted butter, cut into small pieces
- 3 to 5 tablespoons ice water
For the coconut creme brulee filling
- 1 1/4 cups sweetened flaked coconut, (see cooks notes below)
- 1 1/2 cups heavy cream
- 3/4 cup half-and-half
- 6 large egg yolks
- 2 tablespoons turbinado sugar, (see cooks notes below)
- pinch of salt
- 1/4 cup turbinado sugar, finely ground if desired (see cooks notes below)
- raspberries for garnish, (optional)
Instructions
Make the crust
-
In a medium bowl, whisk together the 1 1/3 cups all-purpose flour, 1 tablespoon sugar, and 1/4 teaspoon salt. Cut in the 1 stick (4 oz) cold unsalted butter (cut into small pieces) with a pastry blender or two knives used scissors-fashion until the mixture resembles coarse meal with some pea-sized butter bits remaining.
-
Sprinkle 1 tablespoon of the ice water over the flour mixture, stirring gently with a fork to moisten evenly. Continue adding ice water, 1 tablespoon at a time, until the dough just begins to come together when a small bit is pressed between your fingers. Be careful not to overwork the dough, as this can lead to a tough crust.
-
Gently press the dough together into a cohesive ball in the bowl. Shape the dough into a disk, wrap it tightly in plastic wrap or wax paper, and refrigerate for at least 30 minutes, or up to 2 days, to allow the gluten to relax.
-
On a lightly floured surface, roll the chilled dough into a 12- to 13-inch round. Carefully transfer the rolled dough to a 9- or 10-inch round fluted tart pan with a removable bottom. Gently press the pastry against the bottom and up the sides of the pan. Trim the excess pastry to about 1/2 inch above the pan’s edge. Fold the overhanging crust inwards and gently press it against the sides of the pan so it extends just 1/4 inch above the rim. Prick the bottom and sides of the tart shell generously with a fork to prevent bubbling, and refrigerate for another 30 minutes.
-
Preheat your oven to 350°F (175°C). Position an oven rack in the middle of the oven.
-
Line the chilled tart shell with a piece of heavy-duty aluminum foil, pressing it snugly into the bottom and against the sides. Fill the foil-lined shell with uncooked rice or dried beans to weigh down the crust. Bake for 20 minutes. Carefully remove the foil and rice/beans, then continue to bake for about 10 minutes longer, or until the crust is pale golden brown and feels dry. Let the baked tart shell cool completely on a wire rack before filling.
Make the filling
-
Preheat the oven to 350°F (175°C) again for toasting the coconut.
-
Spread the 1 1/4 cups sweetened flaked coconut evenly on a large baking sheet. Toast in the preheated oven, stirring the coconut twice for even browning, until it achieves a beautiful golden-brown color, typically 6 to 8 minutes. Remove from the oven immediately. Lower the oven temperature to 300°F (150°C) for the custard, or turn it off and preheat it again when ready for baking.
-
In a large saucepan over medium heat, combine the 1 1/2 cups heavy cream, the toasted coconut (from step 8), and 3/4 cup half-and-half. Bring the mixture to a rolling boil, stirring occasionally. As soon as it reaches a boil, immediately remove from the heat, cover the saucepan, and let it steep for 35 minutes to fully infuse the coconut flavor into the cream.
-
When the steeping time is complete and you’re ready to bake the tart, in a large bowl, vigorously whisk together the 6 large egg yolks, 2 tablespoons turbinado sugar, and a pinch of salt until well combined and slightly pale. While continuously whisking, slowly stream the warm cream mixture into the egg yolk mixture to temper the yolks, preventing them from scrambling. Pour the entire mixture through a fine-mesh strainer set over a large glass measuring cup or another bowl, pressing firmly on the coconut solids with the back of a spoon to extract as much liquid and flavor as possible. Discard the solids.
-
Place the cooled tart pan (containing the blind-baked crust) on a sturdy baking sheet. Gently pull the oven rack out slightly, place the baking sheet on the rack, and carefully pour the prepared custard into the tart pan. Bake for 25 to 30 minutes in the 300°F (150°C) oven, or until the custard is just barely set at the edges with a slight jiggle remaining in the center. It’s crucial to watch the custard closely during the final minutes, as it can set and overcook very quickly. Remember, the custard will continue to firm up as it cools. Remove the tart from the baking sheet and let it cool completely on a wire rack before chilling it for at least 2 hours in the refrigerator.
-
Just before serving, carefully remove the side of the tart pan. Gently blot the surface of the chilled custard with the edge of a paper towel to remove any condensation. Sift the 1/4 cup turbinado sugar evenly over the custard surface. Using a kitchen blowtorch, move the flame evenly back and forth just above the top of the tart, avoiding direct contact with the pastry crust, until the sugar is melted and evenly browned to a beautiful caramel. Let the tart stand for about 5 minutes to allow the sugar to harden into a crisp shell before serving. Slice into elegant wedges and garnish with fresh raspberries, if desired.
Notes
- Sweetened Flaked Coconut: This ingredient is dried coconut to which water and sugar have been added. This process enhances both its tenderness and its inherent flavor, making it delightfully sweet and moist. Many find its taste and texture remarkably similar to that of fresh coconut. Always store any type of dried coconut in an airtight container in a cool, dark place to maintain its freshness. Untoasted dried coconut typically keeps well for about 4 months at cool room temperature, 5 to 6 months when refrigerated, and up to 8 to 12 months if stored in the freezer.
- Toasting Coconut: I firmly believe that the flavor of toasted coconut far surpasses that of raw coconut. Toasting introduces a wonderful depth of flavor and a comforting warmth that is truly irresistible. To ensure even browning as it toasts in the oven, stir the coconut from the edges of the baking sheet into the center, and move any still-white coconut to the outside, using a wide metal spatula. By stirring it near the halfway mark and then again closer to the end, you’ll achieve beautifully and uniformly golden-brown coconut. I personally prefer a deep golden brown over a paler shade for maximum flavor, but always watch it carefully as coconut can go from toasted to burnt very quickly.
- Turbinado Sugar: This is a pure, raw cane sugar characterized by its large, distinctive brown crystals and a delicate, subtle molasses flavor. Its crystalline structure makes it excellent for melting, rendering it perfect for sprinkling atop crème brûlée to create that signature crisp crust. If you desire an exceptionally smooth, glass-like top after torching, you can first finely grind the turbinado sugar in a blender or food processor until it’s finer, but not powdered.
Adapted From
Luscious Coconut Desserts
Buy On Amazon
Explore More with AI
Nutrition
Nutrition information is automatically calculated, so should only be used as an approximation.
Recipe Testers’ Reviews: Real Feedback from Our Kitchen
Curious about how this Coconut Crème Brûlée Tart performs in a real home kitchen? Our dedicated recipe testers put it to the test, and here’s what they had to say:
Sonia Soelter
Sonia enthusiastically rated this tart a perfect ten out of ten, noting its outstanding qualities. Despite involving several steps, she found the process manageable and appreciated the delightful coconut aroma that filled her kitchen during baking. The instructions were lauded for their clarity and precision, contributing to a beautifully finished tart. Sonia described the crust as “golden, tender, and flaky, with a very nice buttery flavor,” setting a high standard for the base. The filling was spot-on, achieving the exact creamy yet firm texture of a classic crème brûlée, with an unmistakable coconut flavor that wasn’t overly sweet. A minor hiccup occurred when she had to use a broiler instead of a torch for the topping, resulting in a grittier sugar layer. However, this didn’t deter from the tart’s rapid disappearance, prompting her to declare she would “certainly make this again (after I purchase a torch).” Her experience highlights the importance of a kitchen torch for the ideal brûlée finish but confirms the underlying recipe’s stellar quality.
Maria Peplowski
Maria’s experience was equally glowing, with all eight of her dinner guests loving the dish. She found the directions exceptionally easy to follow, making the process smooth, especially by dividing the work into two days—preparing the dough on one day and the filling on the next. Even without a 10-inch tart pan, using her 9-inch pan resulted in a thicker, more substantial filling, which she considered “a good thing.” Her tart took about 40 minutes to cook, reinforcing the recipe’s advice to watch it closely toward the end, as it transitioned “from liquid to solid in an instant.” The filling was perfectly “smooth and creamy” and set up beautifully, with a “just right” coconut taste. She noted the sugar crust was quite thin, allowing for neat, easy slices. While she didn’t grind the sugar this time, she plans to try it next, as melting the turbinado sugar with her torch took a little extra time. Maria’s review emphasizes the recipe’s adaptability and impressive outcome, even with slight adjustments.